Table of Contents
let's talk about chocolate. Not just any chocolate, but the kind that oozes out of a warm, decadent cake. Yes, I'm talking about molten chocolate lava cake! I know what you might be thinking: "That sounds complicated." But guess what? It's not! I've spent countless hours perfecting this simple molten chocolate cake recipe, and I'm here to tell you that anyone can make it, even if you're not a master baker. This recipe is all about ease and maximum chocolate satisfaction. In this article, I'll walk you through each step, from gathering your few, basic ingredients to serving up a dessert that looks like you've been slaving away in the kitchen for hours. We'll cover everything from mixing the batter to baking it just right for that perfect gooey center. Plus, I’ll share my best tips and tricks for ensuring your simple molten chocolate cake is a total success every single time. So, grab your apron, and let's get baking!
Gathering Your Simple Ingredients for Molten Chocolate Cake

Gathering Your Simple Ingredients for Molten Chocolate Cake
The Chocolate: The Star of the Show
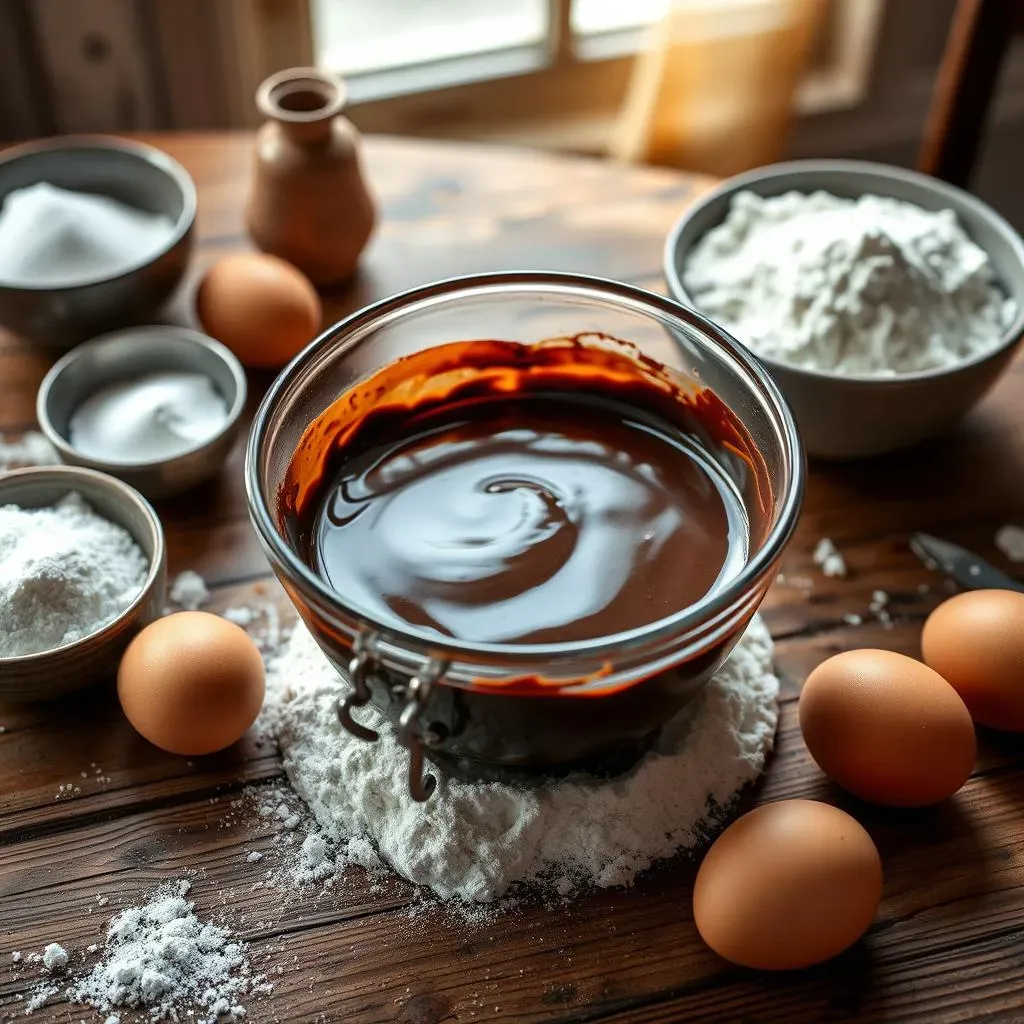
let's be real, the chocolate is the main event here. You can't have a molten chocolate cake without, well, chocolate! I like to use good-quality semi-sweet chocolate; it gives that perfect balance of richness without being too bitter. But hey, if you're a dark chocolate lover, go for it! Just make sure it's a bar, not chocolate chips, they don't melt as smoothly. You need about 4 ounces, which is usually about half of a standard-sized bar. And remember, the better the chocolate, the better the cake. It's like choosing a good wine for a great dinner, it makes a difference!
The Supporting Cast: Butter, Eggs, and Sugar
Next up, the supporting cast. We're talking butter, eggs, and sugar. These are simple ingredients, but they play a crucial role in creating that perfect texture. You'll need a stick of unsalted butter, it's about half a cup. It adds richness and helps with the moistness of the cake. Eggs are essential for binding everything together and giving the cake some structure. You need two whole eggs and two egg yolks. The extra yolks are what give the cake that fudgy, decadent feel. And for the sugar, we're using just a touch, about 1/4 cup of granulated sugar. It's just enough to sweeten things up without overpowering the chocolate flavor.
Here is a list of the ingredients you'll need:
- 4 ounces semi-sweet chocolate
- 1 stick (1/2 cup) unsalted butter
- 2 whole eggs
- 2 egg yolks
- 1/4 cup granulated sugar
- 1/4 cup all-purpose flour
- Pinch of salt
The Final Touches: Flour and Salt
Last but not least, we have flour and a pinch of salt. These might seem like minor players, but they're actually pretty important. You'll need just 1/4 cup of all-purpose flour, it helps give the cake some structure and prevents it from being too liquidy. And then there's the salt, it’s just a pinch, but it enhances all the other flavors. It's like adding a little secret ingredient that you can't quite put your finger on, but you know it makes a difference. So, that's it! Those are all the ingredients you need to make the most amazing molten chocolate cake. It is so simple and easy, right? Now, let's get to the fun part: baking!
StepbyStep Guide to Making Simple Molten Chocolate Cake
StepbyStep Guide to Making Simple Molten Chocolate Cake
Melting the Chocolate and Butter
Alright, let's get started with the fun part. First, you need to melt the chocolate and butter together. You can do this in a couple of ways. My favorite is using a double boiler. It's gentle and prevents the chocolate from scorching, but if you don't have one, a microwave works just fine. If you're using a double boiler, put some water in the bottom pot and bring it to a simmer. Then, place a heatproof bowl on top, making sure the bottom of the bowl doesn't touch the water. Toss in your chopped chocolate and cubed butter, and let them melt slowly, stirring occasionally until it's all smooth and glossy. If you're microwaving, do it in 30-second intervals, stirring after each one, until it's melted. It's important to be patient here; you don't want to overheat the chocolate.
Once that’s done, set the bowl aside and let it cool slightly while you move on to the next step. It should be warm, not hot, when you add the eggs, so don't rush this part.
Mixing the Batter
Now, for the batter! In a separate bowl, crack those two whole eggs and two egg yolks, then add the sugar. Whisk them together until they're pale and a little bit thicker. This usually takes about a minute or two. Now, it's time to add the melted chocolate mixture to the egg mixture. Pour it in slowly while whisking constantly until everything is well combined. Be gentle, you don't want to overmix, otherwise the cake will be tough. Next, add the flour and salt and mix again until just combined. Don't worry if it looks a little thick; that's exactly how it should be. The key here is to mix until everything is just incorporated, no more. Overmixing is the enemy of a good molten cake, trust me on this!
Remember, the goal here is to have a smooth, luscious batter, ready to transform into a gooey delight.
Step | Action | Notes |
|---|---|---|
1 | Melt chocolate and butter | Use double boiler or microwave, stir until smooth. |
2 | Whisk eggs and sugar | Until pale and slightly thickened. |
3 | Combine wet ingredients | Slowly pour melted chocolate into the egg mixture, while whisking. |
4 | Add dry ingredients | Mix flour and salt, mix until just combined. Do not overmix. |
Preparing and Baking the Cakes
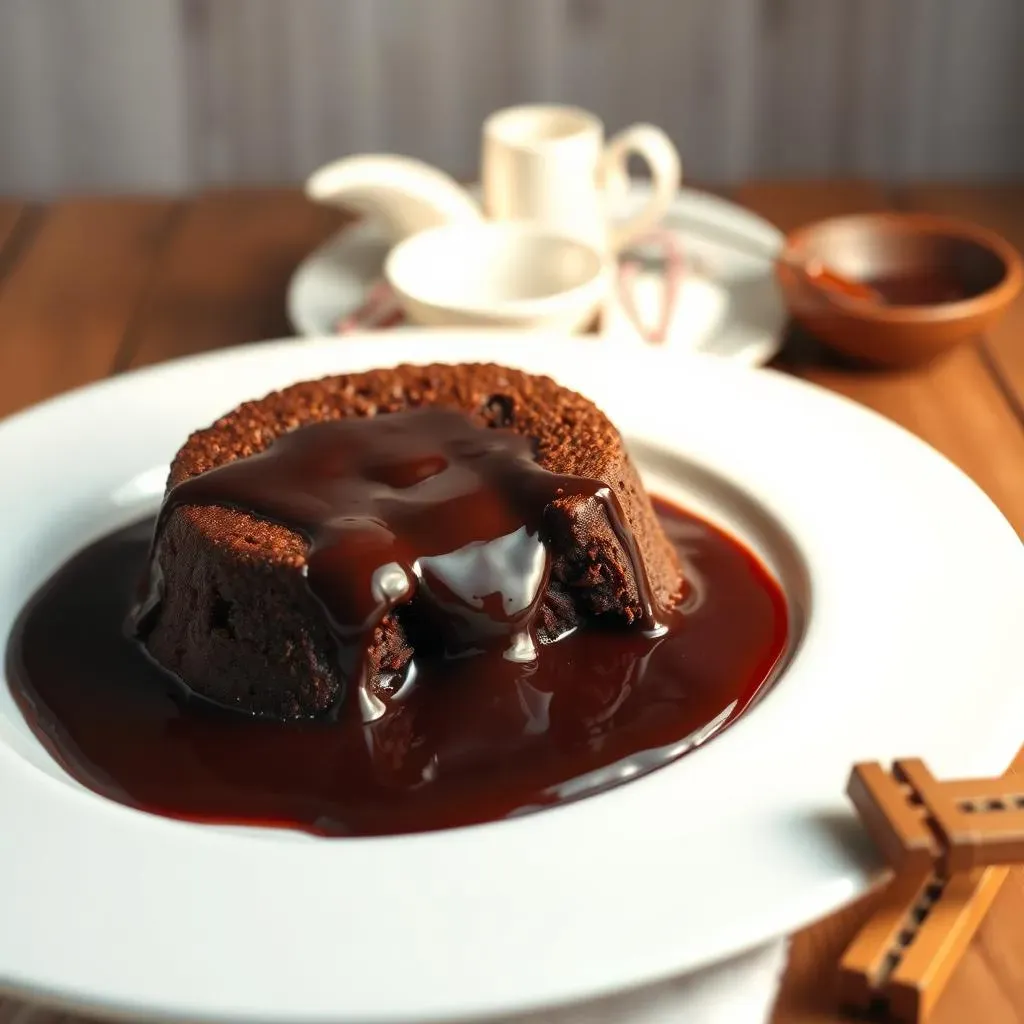
Finally, we're ready to bake! Preheat your oven to 425°F (220°C). While that's heating up, grease your ramekins. I like to use butter and a little cocoa powder, it prevents any white marks on the sides of the cake. Then, divide the batter evenly between the ramekins. You should get about two good-sized cakes from this recipe. Now, pop them in the oven and bake for about 12-15 minutes. The edges should be set, but the center should still be soft and gooey. Keep a close eye on them, every oven is different. When they're done, take them out and let them sit for a minute or two before you flip them out onto a plate. And that's it! You've just made the most amazing molten chocolate cake. You should be proud of yourself!
Don't worry if it takes you a couple of tries to get it perfect; baking is a journey, not a race. You'll get the hang of it in no time!
Tips for Perfecting Your Simple Molten Chocolate Cake
Tips for Perfecting Your Simple Molten Chocolate Cake
Don't Overmix the Batter
let's talk about the most common mistake people make: overmixing. It's like the cardinal sin of molten cake baking. When you overmix the batter, you develop the gluten in the flour, which can lead to a tough, dense cake instead of that light, airy texture we're aiming for. So, after you add the flour and salt, mix just until everything is combined. Don't keep stirring and stirring, you will regret it! It's better to have a few streaks of flour than to overmix. Remember, gentle is the key here, treat your batter like it's precious cargo, because it is!
Think of it like this, you're trying to whisper to the ingredients, not shout at them. Less is more in this case.
The Importance of Baking Time
Baking time is crucial, seriously crucial. This isn't like baking a regular cake where you can just stick a toothpick in and call it a day. The whole point of a molten cake is that gooey center, and getting that perfect texture is all about timing. You want the edges to be set and the center to still be soft. Usually, 12-15 minutes at 425°F (220°C) does the trick, but every oven is different, so keep a close eye on them. The cakes should be puffed up around the edges and the center should look slightly soft. If you’re unsure, it’s better to slightly underbake them than overbake them. A slightly underbaked cake is still delicious, but an overbaked cake is just a sad, sad, chocolate disappointment.
It’s a delicate dance between baked and gooey, but you'll get it with a little practice.
Tip | Why it Matters |
|---|---|
Don't overmix | Prevents tough cake. |
Watch baking time closely | Crucial for the gooey center. |
Ramekin Prep and Serving
Finally, let's talk about ramekins. They’re your best friend when it comes to making molten cakes. Make sure you grease them well, and don't be shy about it! I like using butter and a dusting of cocoa powder, it adds a little extra flavor and prevents any white marks on the sides of the cake. Also, let the cakes cool for a minute or two after they come out of the oven. This makes it easier to flip them out onto a plate. A little patience goes a long way. When you're ready to serve, you can dust them with some powdered sugar or cocoa powder, or add a scoop of vanilla ice cream. This cake goes well with a lot of things. The most important thing is to serve them warm, that gooey center is best when it's nice and hot. Trust me on this, you will not regret it!
And remember, even if your first cake isn't perfect, it'll still be delicious. Baking is a journey, and we're all learning along the way.
Serving and Variations for Your Simple Molten Chocolate Cake
Serving and Variations for Your Simple Molten Chocolate Cake
Classic Serving Suggestions
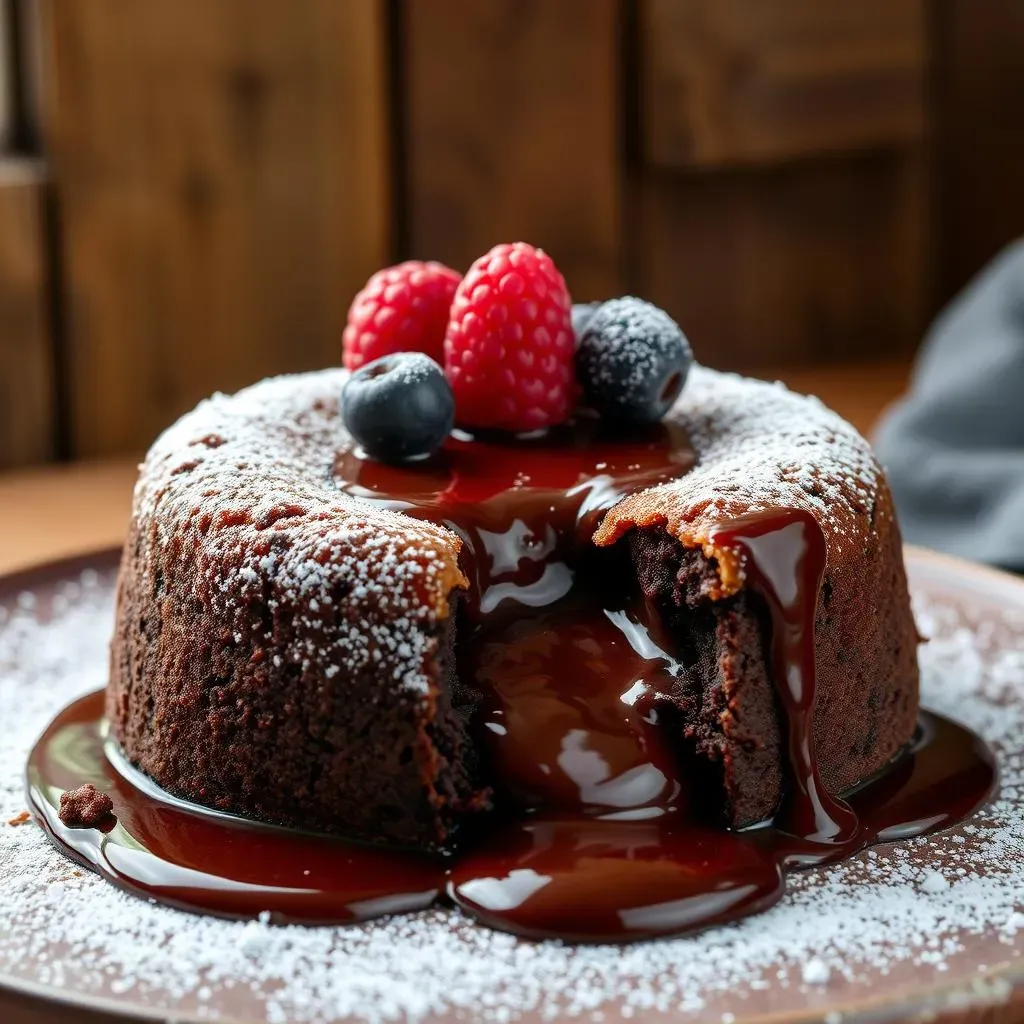
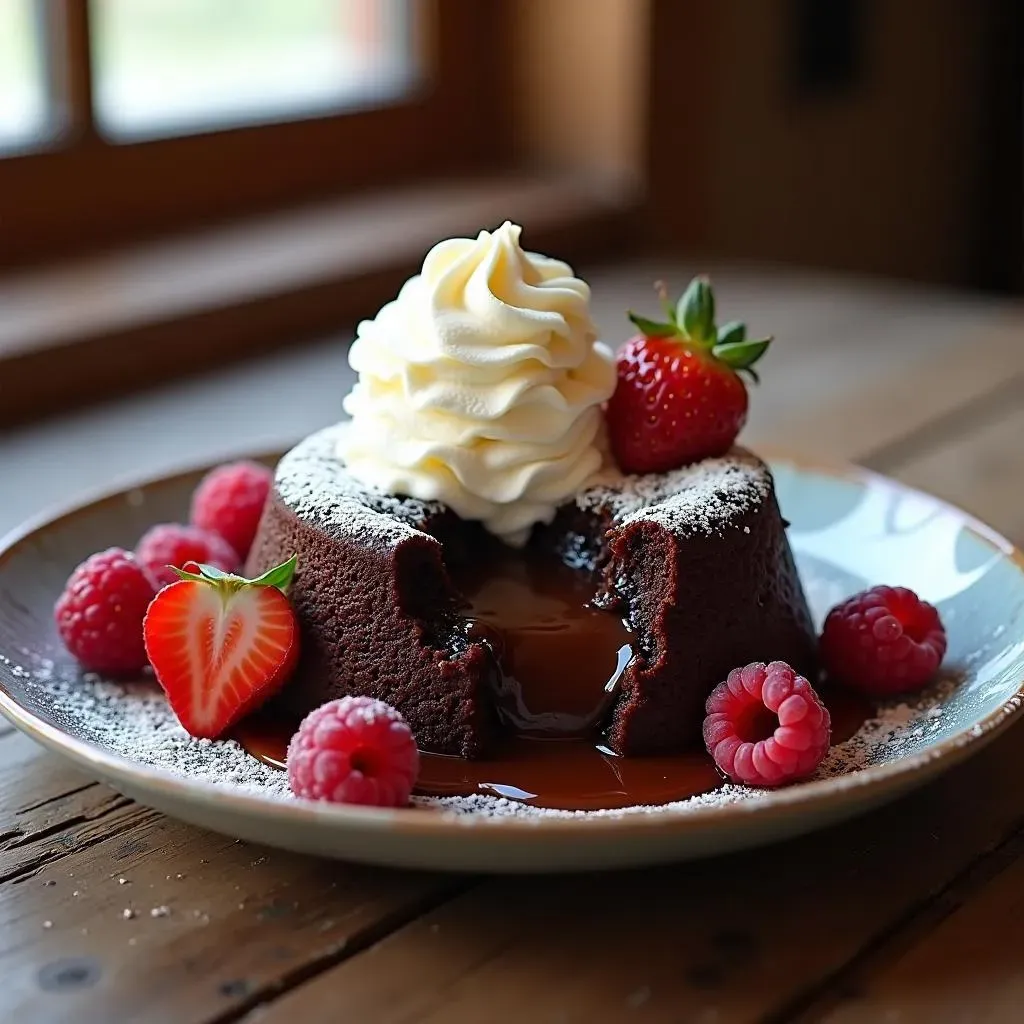
so you've baked your simple molten chocolate cakes, and they look absolutely amazing. Now what? Well, first things first, you've got to serve them warm. This isn't a dessert you want to let sit around. The molten center is at its peak when it's fresh out of the oven. For a classic presentation, a simple dusting of powdered sugar or cocoa powder works wonders. It adds a touch of elegance without overpowering the rich chocolate flavor. You can also add a scoop of vanilla ice cream. The cold creaminess of the ice cream paired with the warm, gooey cake is just heavenly. It's a contrast of temperatures and textures that makes each bite a delight. A dollop of whipped cream is another winner, it's light and airy and complements the richness of the cake perfectly. It's like a warm hug in a bowl, if that makes any sense.
Fun and Creative Variations
Alright, let's get a little adventurous! Once you've mastered the basic simple molten chocolate cake recipe, the possibilities are endless. For a bit of extra flavor, try adding a teaspoon of espresso powder to the batter. It enhances the chocolate flavor and gives it a little kick. Or, if you're feeling a bit nutty, stir in some chopped nuts, like almonds or hazelnuts, it adds a nice crunch. And for a boozy twist, add a tablespoon of your favorite liqueur to the batter. I like using a bit of raspberry liqueur or coffee liqueur, but feel free to experiment. If you want to get fancy, try adding a small piece of caramel or a square of white chocolate to the center of each cake before baking. It creates an extra surprise when you cut into it. These are just a few ideas, but the best part about baking is that you can customize it to your own taste. Don't be afraid to try new things and get creative!
It's your kitchen, your cake, your rules. Have fun with it!
Variation | Description |
|---|---|
Espresso Boost | Add 1 tsp of espresso powder for a richer flavor. |
Nutty Crunch | Mix in chopped almonds or hazelnuts for texture. |
Boozy Twist | Add 1 tbsp of your favorite liqueur. |
Surprise Center | Add caramel or white chocolate to the center before baking. |
Serving with Flair
When it comes to serving, it's all about presentation. Don't just plop the cake on a plate! Take a few extra minutes to make it look extra special. A drizzle of chocolate sauce or a sprinkle of sea salt can elevate the whole experience. You can also add some fresh berries like raspberries or strawberries, their tartness balances the richness of the chocolate. A sprig of mint not only adds a touch of color but also a hint of freshness. And if you want to go all out, serve it with a side of chocolate ganache for dipping. It’s an extra layer of chocolatey goodness that everyone will love. Remember, presentation is key, it's the first impression your guests will have of your creation. So, make it count! With these tips and tricks, you'll be serving up simple molten chocolate cakes that are not only delicious but also look like they came straight from a fancy bakery.
It's all about the details!
The Sweet Finale: Enjoying Your Simple Molten Chocolate Cake
And there you have it! A simple molten chocolate cake recipe that's both easy to make and guaranteed to impress. From the rich, gooey center to the warm, comforting aroma, this dessert is a true delight. Remember, baking should be fun, so don’t be afraid to experiment with different chocolates or toppings. Whether you're celebrating a special occasion or just craving a treat, this recipe is a foolproof way to satisfy any chocolate craving. Now go ahead and enjoy the fruits of your labor, and maybe, just maybe, make another one tomorrow. You deserve it!