Table of Contents
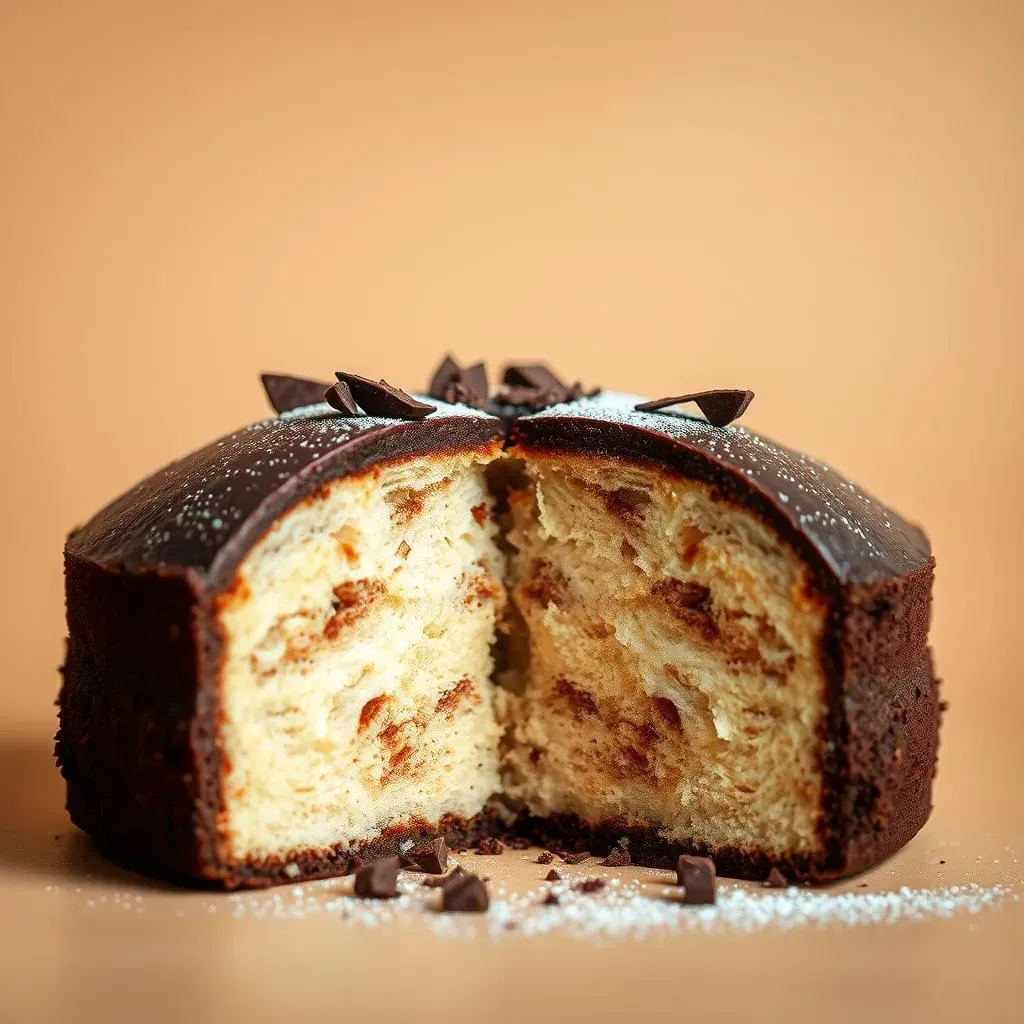
Ever dream of a chocolate cake that's both light as a feather and deeply satisfying? You know, the kind that makes you feel like you're biting into a cloud of cocoa goodness? Forget those dense, heavy cakes; we're talking about a simple light chocolate cake recipe that's so good, it might just rival your favorite bakery. This isn't your average cake; it’s a sponge cake, which means it's all about that airy, delicate texture that just melts in your mouth. We're going to walk through all the steps to make this amazing treat, from mixing the batter to adding the perfect fillings and decorations. Get ready to learn how to make this simple light chocolate cake recipe that will impress everyone. We'll cover how to mix the batter just right, so it's light and fluffy, what kind of fillings you can use to make it extra special, and some easy ideas for making it look as good as it tastes. So, if you're ready to bake something truly special, let's get started!
Making Your Simple Light Chocolate Cake
Making Your Simple Light Chocolate Cake
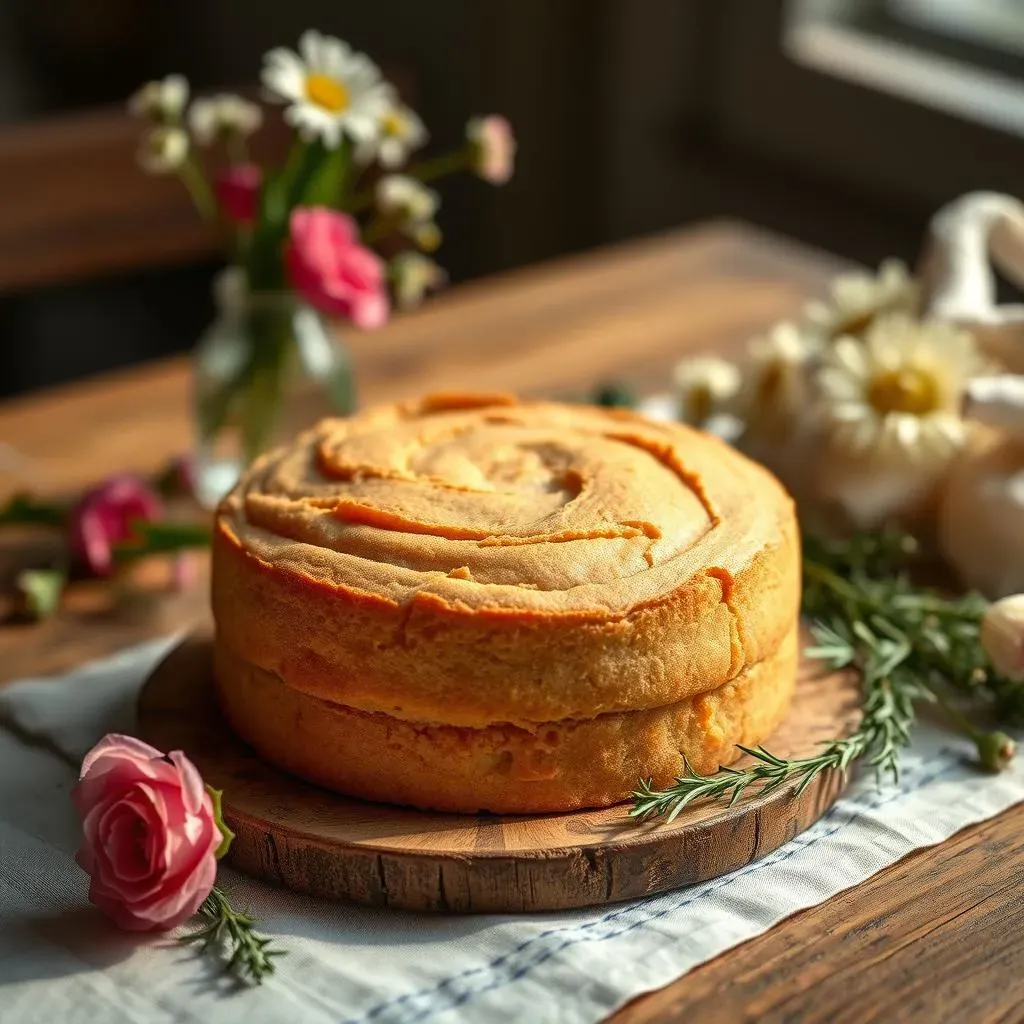
Getting Started with the Batter
let's talk batter. This isn't your average cake mix situation, we are making a light and airy sponge cake. It’s all about the technique here. First, you'll need to grab your usual suspects: flour, sugar, cocoa powder, but here's the secret weapon – cornstarch. Yes, cornstarch! It's what makes the cake so tender and light. Mix all your dry ingredients together in a bowl, making sure there are no lumps. Then in a separate bowl, whisk those egg whites into stiff peaks. This is where you have to be patient. It’s like making a meringue, you want to create a cloud of egg white.
Now, for the wet ingredients. You will want to have your egg yolks ready and mix them with a little bit of vanilla extract. Then you'll gently fold the dry ingredients into the egg yolk mixture, and then the egg whites. And when I say gently, I mean GENTLY. We're not trying to deflate those lovely air bubbles. Think of it as folding in a cloud, not stirring a pot of soup. Use a spatula, and fold until just combined, no more. Overmixing is the enemy of a light sponge cake. If you overmix, your cake will be tough, and nobody wants that.
The Baking Process
Alright, the batter is ready, and it’s looking beautiful. It’s time to get it into the oven. Make sure you have preheated your oven, and your cake pan is prepped. I like to line the bottom with parchment paper, and grease the sides, just to be sure. Pour that gorgeous batter into the pan, and pop it into the oven. Now, here's a little tip: don't open the oven door while it's baking! I know, it’s tempting, but resist. Opening the door can cause the cake to deflate. Let it bake until a toothpick inserted into the center comes out clean. This usually takes about 30-35 minutes, but every oven is different.
Once it's done, take the cake out and let it cool in the pan for a few minutes. The most important part: flip it upside down in the pan, and let it cool completely. This prevents the cake from sinking. It sounds weird, but trust me, it works. Letting it cool upside down, and in the pan is a must. It maintains the structure of the cake. While the cake cools, you can start thinking about the fillings and decorations. But, patience is key. A well-cooled cake is a happy cake!
Step | Action | Why? |
|---|---|---|
Mix Dry Ingredients | Combine flour, sugar, cocoa powder, cornstarch | Ensures even distribution and light texture |
Whisk Egg Whites | Beat egg whites until stiff peaks form | Creates airiness and lift in the cake |
Combine Wet Ingredients | Mix egg yolks and vanilla extract | Adds moisture and flavor |
Fold Ingredients | Gently combine dry, wet and egg whites | Maintains air bubbles for a light texture |
Bake | Pour batter into pan and bake until done | Cooks the cake to perfection |
Cool | Cool cake upside down in pan | Prevents cake from sinking |
Cake Filling Options for Your Light Chocolate Cake
Cake Filling Options for Your Light Chocolate Cake
Classic Creamy Fillings
so the cake is cooling, and now it’s time for the fun part: the filling! When you think of a light chocolate cake, you might immediately go for something creamy. And you'd be right! A classic whipped cream is always a winner. It’s light, fluffy, and pairs perfectly with the airy sponge. You could also go for a chocolate whipped cream for an extra chocolate kick. Just add some cocoa powder to your regular whipped cream recipe. It's a simple way to elevate the filling. Another great option is a mascarpone cream. It’s richer than regular whipped cream but still light enough to complement the sponge.
Don't be afraid to add some flavorings to your cream. A little vanilla extract is always a good idea, but you can also try adding other extracts like almond or peppermint. And if you're feeling fancy, a touch of liqueur, like a coffee or chocolate liqueur, can make your filling even more special. Remember, the goal is to add moisture and flavor without making the cake soggy or too heavy. A light and airy cake calls for a light and airy filling, so keep that in mind when choosing your ingredients.
Fruity and Jammy Delights
If you’re in the mood for something a little different, fruit fillings are the way to go. A simple raspberry jam is a classic choice. The tartness of the raspberries cuts through the richness of the chocolate, creating a perfect balance of flavors. You can either use store-bought jam or make your own. And if raspberries aren’t your thing, other berries work just as well. Think strawberries, blueberries, or even a mix of different berries. You can also use a fruit compote, which is basically cooked fruit with a little bit of sugar. It’s a bit more textured than jam, but it’s equally delicious.
Here’s a pro tip: if you are using a jam or compote, consider warming it up slightly before spreading it on the cake. This makes it easier to spread and it also helps the cake absorb the moisture. Just make sure it’s not too hot, or it will melt your whipped cream if you are using it. Another idea is to add some fresh fruit to your filling. Sliced strawberries, raspberries, or even some chopped mango can add a burst of freshness and flavor. The combination of creamy and fruity is always a winner, especially with a light chocolate sponge cake.
Filling Type | Description | Flavor Profile |
|---|---|---|
Whipped Cream | Light, fluffy cream | Classic, mild |
Chocolate Whipped Cream | Whipped cream with cocoa | Rich, chocolatey |
Mascarpone Cream | Rich, creamy cheese-based filling | Smooth, slightly tangy |
Raspberry Jam | Sweet and tart jam | Fruity, tart |
Fruit Compote | Cooked fruit with sugar | Textured, sweet |
Unique and Unexpected Choices
let's get a little adventurous! If you're feeling bold, there are tons of other filling options you can experiment with. How about a light lemon curd? The tangy lemon pairs beautifully with the chocolate. Or, if you’re a fan of nutty flavors, a hazelnut spread or a homemade praline paste could be a delicious choice. These options add a touch of sophistication and an unexpected twist to the classic cake. You could also try a coffee-flavored cream or a caramel sauce. The possibilities are endless!
And don’t forget the textural contrast. Adding some chopped nuts, chocolate shavings, or even some toasted coconut flakes can take your filling to the next level. The key is to have fun and experiment with different flavors and textures until you find the combination that you love the most. Remember, this cake is a blank canvas, and you can do whatever you want with it. It’s all about creating something that you'll enjoy, so don’t be afraid to get creative and think outside the box. The best part is that you can customize it to your liking and create a cake that’s truly your own.
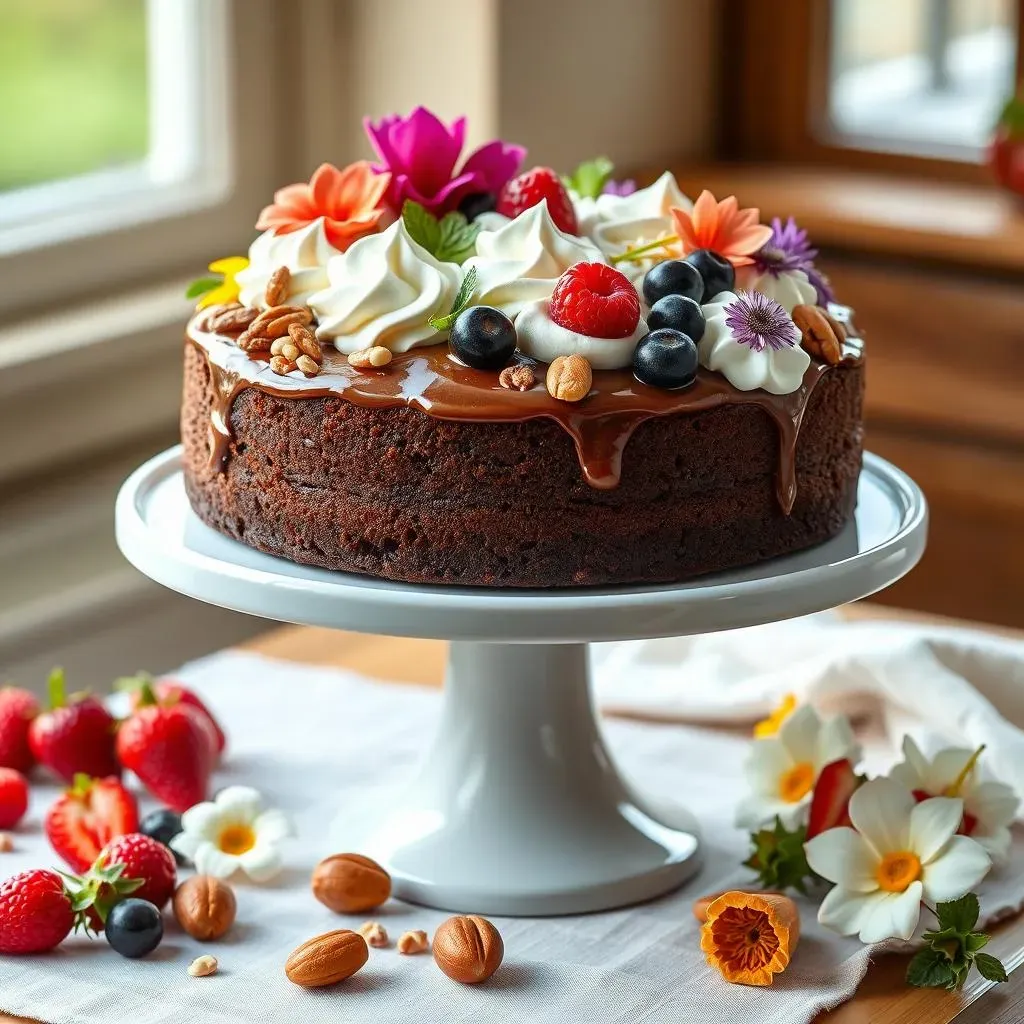
Assembling and Decorating Your Simple Light Chocolate Cake

Assembling and Decorating Your Simple Light Chocolate Cake
Alright, the cake is cool, the filling is ready, now it's time to bring it all together! First, you'll want to gently remove the cake from the pan. Because we cooled it upside down, it should come out easily. Place it on your serving plate or cake stand. If you want, you can use a serrated knife to trim the top to make it even. Then, using a long knife or a spatula, spread your chosen filling evenly over the bottom layer of the cake. If you're adding more than one filling, start with the least dense one first. For example, if you're using jam and whipped cream, spread the jam first and then the cream. Be generous with the filling, but don't overdo it. You don't want it oozing out when you put the other layer on. If you are making a two-layer cake, carefully place the top layer on top of the filling. If you have a three layer cake, repeat the filling process again, and then put the final layer on top. You can also make mini cakes by using a cookie cutter and cutting out small circles from the cake layers and then filling them.
Now comes the fun part: decorating! This is where you can get creative and let your personality shine through. A simple dusting of powdered sugar is always elegant and easy. For a more classic look, you can frost the entire cake with whipped cream or chocolate frosting. If you're using whipped cream, make sure the cake is completely cool, or the cream will melt. You can use a spatula to create a smooth surface or use a piping bag to make swirls or rosettes. Fresh fruit is another great option. Strawberries, raspberries, blueberries, or any other berries you like add a pop of color and freshness. You can arrange them in a simple pattern or create a more elaborate design. Chocolate shavings, sprinkles, nuts, or even edible flowers are all great ways to add extra flair. The key is to have fun and make it your own. There are no rules when it comes to decorating, so just go with what you like.
Step | Action | Tip |
|---|---|---|
Remove Cake | Gently take cake from pan | Cooling upside down helps |
Trim Cake | Use a serrated knife to level cake | Optional, for even layers |
Add Filling | Spread filling evenly | Start with least dense filling |
Stack Layers | Carefully place layers | For multi-layer cakes |
Decorate | Add frosting, fruit, etc. | Let your creativity shine |
If you're feeling a bit more adventurous, you can try making a chocolate ganache to pour over the cake. Ganache is a mixture of chocolate and cream, and it creates a beautiful, glossy finish. You can also use a stencil to create a pattern with powdered sugar or cocoa powder. Another idea is to make chocolate curls using a vegetable peeler. Simply peel the edge of a chocolate bar to create beautiful curls. And if you’re really looking to impress, you can try making a sugar glaze. It’s basically a mixture of powdered sugar and a liquid, like milk or lemon juice, and it creates a shiny, smooth coating. You can add food coloring to the glaze to make it even more vibrant. Remember, the goal is to create a cake that not only tastes amazing but also looks beautiful. It’s all about the presentation, so take your time and enjoy the process of decorating.
And there you have it, a simple light chocolate cake recipe that is easy to make, and looks amazing. It's perfect for a birthday, a special occasion, or just a regular day when you need a little something sweet. The best part is that you can customize it to your liking and make it your own. So, don't be afraid to experiment with different fillings and decorations. Have fun with it, and most importantly, enjoy every bite! Now go and make some magic in the kitchen, because you've got all the tools you need to create a truly unforgettable cake. I'm sure it will be a showstopper, and it will make everyone who tries it happy! Happy baking!
Wrapping Up Your Simple Light Chocolate Cake
So, there you have it – a simple light chocolate cake recipe that's sure to impress. You've learned how to create a sponge cake with a texture that's both light and satisfying. From mixing the batter to choosing your fillings and decorations, you now have the know-how to whip up a delicious treat. Remember, the key is in not overmixing the batter and letting the cake cool properly to keep it light and airy. This cake isn't just about the taste; it's about the joy of baking and sharing something you made with your own hands. So go ahead, bake this cake, share it with friends, and enjoy the sweet success of your baking adventure. Happy baking!