Table of Contents
Let's face it: baking a cake can feel like a major undertaking. But what if I told you creating a show-stopping dessert was easier than you think? This article is all about simple chocolate cake decorating – transforming a plain cake into a masterpiece without needing years of pastry school or a Michelin star. Forget complicated techniques and expensive tools; we're focusing on straightforward methods that deliver impressive results. We'll explore easy frosting techniques, from smooth and elegant to creatively textured, perfect for any skill level. Get ready to unleash your inner artist with fun and inspiring simple chocolate cake decorating ideas, whether you're a complete beginner or looking to refresh your skills. We’ll cover everything from basic frosting techniques to adding unique touches that elevate your cake from ordinary to extraordinary. By the end, you'll be confident enough to tackle any chocolate cake decorating project and impress your friends and family with your newfound cake decorating prowess. So, grab your apron, gather your ingredients, and let's embark on this delicious journey of simple chocolate cake decorating!
Simple Chocolate Cake Decorating: Mastering the Basics
Simple Chocolate Cake Decorating: Mastering the Basics
So, you're diving into the world of simple chocolate cake decorating? Fantastic! It's a delicious adventure, trust me. The key to mastering the basics is preparation and a little patience. Think of it like building a house – you wouldn't start with the roof, would you? You start with a solid foundation. In cake decorating, that foundation is a perfectly baked and cooled cake. Make sure your cake is completely level; you can use a serrated knife to trim off any uneven bumps. Then, crumb coat it – this is a thin layer of frosting that traps all those pesky crumbs and creates a smooth surface for your final layer. This is crucial for a professional finish, not just a "I-threw-some-frosting-on-it" look. A crumb coat is your secret weapon for a flawlessly decorated cake, no matter how simple your design.
Step | Action | Tip |
|---|---|---|
1 | Bake and cool your cake completely. | Use a cake leveler for extra-smooth layers. |
2 | Crumb coat the cake. | Chill the crumb-coated cake for 30 minutes before applying the final layer of frosting. |
3 | Apply your final layer of frosting. | Use a bench scraper for a perfectly smooth finish. |
Once you’ve got that crumb coat down pat, the world of simple chocolate cake decorating opens up. Don't feel pressured to create elaborate designs right away. Start with the basics: a simple swirl, a neat border, or even just a smooth, even layer of frosting. Practice makes perfect! It’s about finding what works for you and having fun with it. Don't be afraid to experiment with different piping tips and techniques. And remember, even a small detail can make a big difference – a sprinkle of cocoa powder, some chocolate shavings, or a few fresh berries can elevate your cake from good to gorgeous. Simple doesn’t mean boring!
- Practice piping different swirls and patterns.
- Experiment with different types of frosting.
- Use simple decorations like sprinkles, chocolate shavings, or fresh fruit.
Easy Chocolate Frosting Techniques for Beginners
Easy Chocolate Frosting Techniques for Beginners
Easy Chocolate Buttercream: The Classic Choice
Let's start with the most versatile frosting: chocolate buttercream. It's rich, creamy, and easy to work with. The key is to beat the butter until it's light and fluffy – this incorporates air, making it lighter and easier to spread. Gradually add your powdered sugar, alternating with your cocoa powder and milk (or cream for an extra luxurious touch). Don't rush this process; take your time to ensure everything is well combined and smooth. A stand mixer is your best friend here, saving you a serious arm workout. Once you’ve achieved that perfect, fluffy consistency, you're ready to frost your cake! Remember, a little goes a long way. You can always add more, but you can't take it away!
Ingredient | Amount | Tip |
|---|---|---|
Unsalted Butter, softened | 1 cup | Room temperature butter is crucial for smooth frosting. |
Powdered Sugar | 3-4 cups | Add gradually to avoid a sugar cloud explosion. |
Unsweetened Cocoa Powder | 1/2 cup | Dutch-processed cocoa powder gives a richer color and flavor. |
Milk or Cream | 2-4 tablespoons | Add more for a thinner consistency. |
Simple Chocolate Ganache: Effortless Elegance
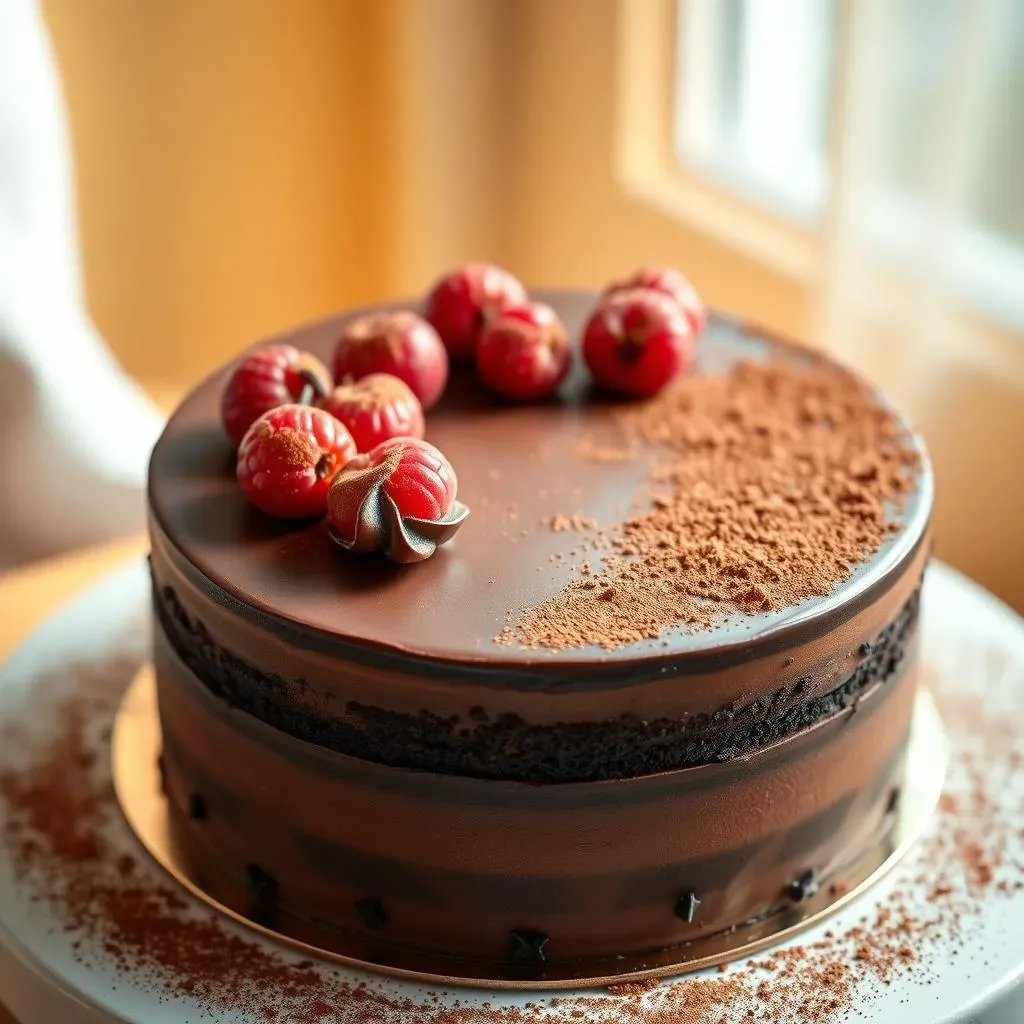
Next up is chocolate ganache – incredibly easy and effortlessly elegant. This is the ultimate shortcut to a sophisticated look. Simply heat your heavy cream until it simmers, then pour it over finely chopped chocolate. Let it sit for a few minutes to melt the chocolate, then whisk until it’s smooth and glossy. That’s it! You can use this ganache as a drip cake topping, a filling, or even just a simple glaze. The beauty of ganache is its versatility. It sets beautifully, creating a gorgeous, shiny finish. For a richer flavor, use dark chocolate; for a lighter, sweeter option, use milk chocolate. Experiment and discover your favorite!
- Use high-quality chocolate for the best flavor and texture.
- Let the ganache cool slightly before using it to prevent it from being too runny.
- You can add flavorings like vanilla extract or liqueur to your ganache.
Beyond the Basics: Creative Chocolate Frosting Ideas
Once you've mastered the basics, let's get creative! Think about adding texture to your frosting. You can use a fork to create a rustic look, or a piping bag with different tips for intricate designs. Don't be afraid to experiment! Consider adding other ingredients to your frosting for extra flavor and visual appeal. A swirl of peanut butter in your chocolate buttercream? Yes, please! Crushed Oreo cookies for a textural twist? Absolutely! The possibilities are endless. Remember, it's your cake, your rules. Have fun, experiment, and most importantly, enjoy the process!
Creative Simple Chocolate Cake Decorating Ideas
Creative Simple Chocolate Cake Decorating Ideas
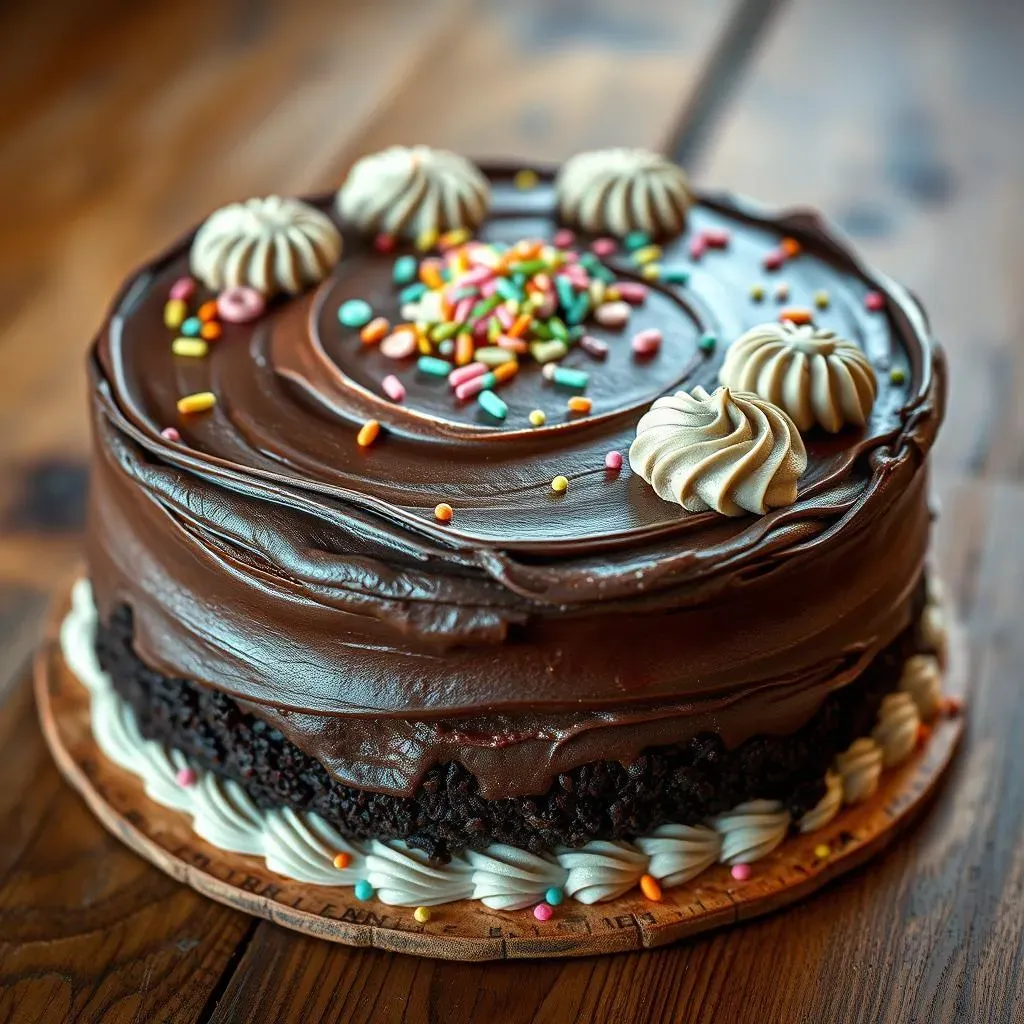
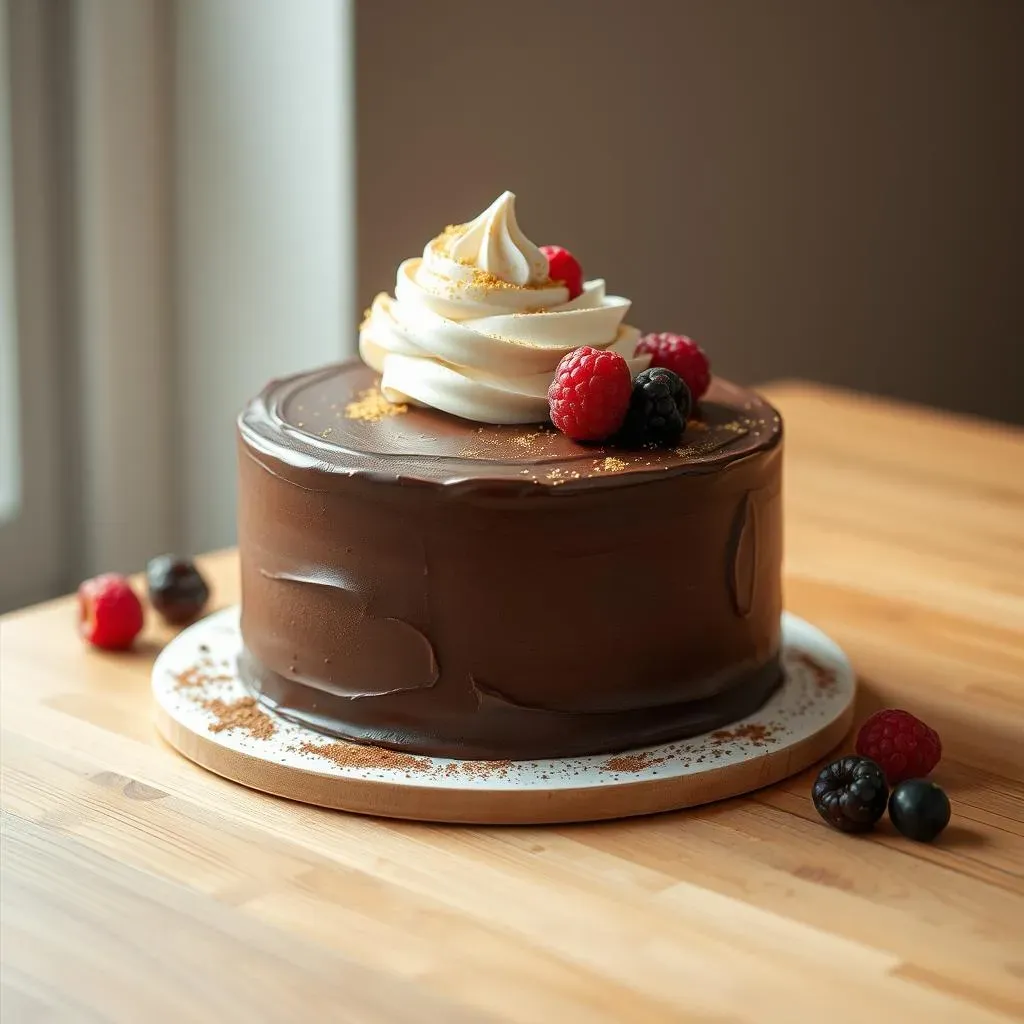
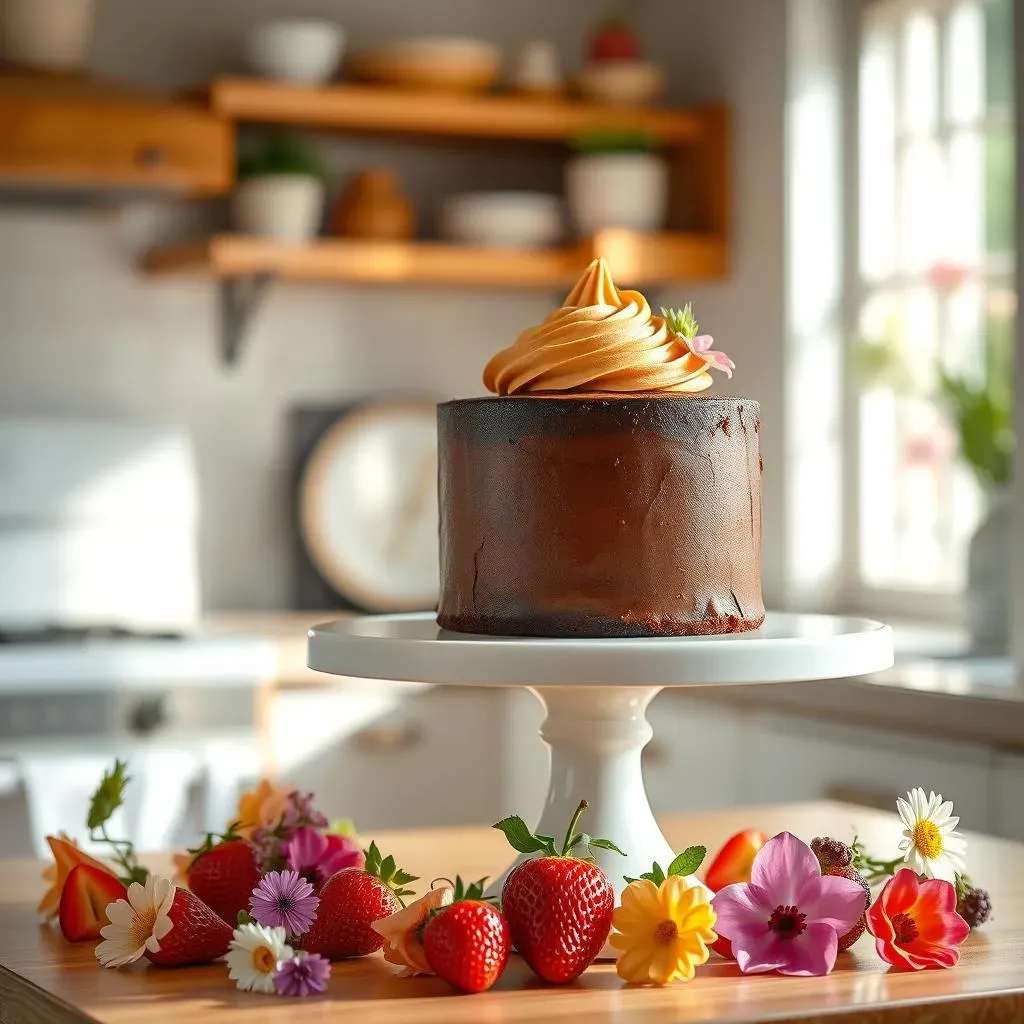
Now that we've nailed the fundamentals, let's unleash our creativity! Simple doesn't mean boring; it means smart and stylish. Think about using contrasting colors – a dark chocolate ganache with a sprinkle of bright red berries or a creamy white frosting with dark chocolate shavings. Or, try creating simple patterns: stripes, polka dots, or even a checkerboard effect. These are surprisingly easy to achieve with a piping bag and a little patience. You can also use stencils to add intricate designs; these are readily available online or in craft stores. Remember, the beauty of simple chocolate cake decorating lies in the details. A few strategically placed chocolate curls, a delicate dusting of cocoa powder, or some edible flowers can transform a plain cake into a showstopper. Don't be afraid to experiment with textures, too. A combination of smooth frosting and crunchy toppings like nuts or pretzels adds visual interest and a delightful textural contrast.
Decoration Idea | Materials Needed | Tip |
|---|---|---|
Chocolate Shavings | Chocolate bar, vegetable peeler | Chill the chocolate for easier shaving. |
Fresh Berries | Assorted berries (strawberries, raspberries, blueberries) | Arrange berries in a pleasing pattern. |
Chocolate Drizzle | Melted chocolate, piping bag | Let the chocolate cool slightly before drizzling. |
Another fun and easy way to add a creative touch is by using different piping techniques. A simple swirl can be elevated by using a contrasting color of frosting or by adding a sprinkle of cocoa powder or cinnamon. You can also create textured effects by using a fork or a spatula to create swirls or peaks in the frosting. Remember, there are no hard and fast rules when it comes to cake decorating. The most important thing is to have fun and let your creativity shine through. Don't be afraid to experiment and try new things; you might be surprised at what you come up with! And always remember, even a simple cake can be absolutely stunning when decorated with a little love and attention to detail.
- Use a piping bag with different tips to create various designs.
- Experiment with different textures, such as smooth, swirled, or textured frosting.
- Add edible flowers or other decorative elements to enhance the visual appeal.
Simple Chocolate Cake Decorating: Tips and Tricks for Success
Simple Chocolate Cake Decorating: Tips and Tricks for Success
So, you're ready to take your simple chocolate cake decorating to the next level? Awesome! Let's talk about those little tricks that elevate your creations from "pretty good" to "wow, you made that?!" First, the importance of temperature cannot be overstated. Room temperature butter is your best friend for smooth, creamy frosting that's easy to spread. Similarly, letting your ganache cool slightly before using it prevents a runny mess. And always, always, chill your cake before frosting – this firms up the layers and prevents the frosting from melting. This is crucial for a perfect, professional-looking finish.
- Use room temperature butter for smooth frosting.
- Chill your cake before frosting to prevent melting.
- Let ganache cool slightly before using it.
Next, let's talk tools. Investing in a few essential tools can make a world of difference. A good quality offset spatula is perfect for smoothing out frosting and creating clean edges. A piping bag with various tips opens up a whole world of decorative possibilities, from simple swirls to intricate designs. And don't underestimate the power of a turntable – it makes frosting and decorating so much easier and more efficient. Finally, don't be afraid to experiment! Simple chocolate cake decorating is all about finding what works best for you and having fun with it. Try different frosting techniques, add unique toppings, and don't be afraid to step outside your comfort zone. The most important thing is to enjoy the process and create a cake that you're proud of.
Tool | Use | Alternative |
|---|---|---|
Offset Spatula | Smoothing frosting, creating clean edges | Butter knife |
Piping Bag & Tips | Creating decorative designs | Ziploc bag with corner snipped off |
Turntable | Easy frosting and decorating | Lazy Susan |