Table of Contents
Ever found yourself scrolling through dessert photos, pausing on that perfect shot of a chocolate lava cake with its gooey center just waiting to spill out? Maybe you thought, "Yeah, right, like I could ever pull that off." Turns out, that molten dream isn't locked away in fancy restaurant kitchens. It's surprisingly achievable right in your own home. Forget complicated techniques and endless lists of obscure ingredients. We're cutting straight to the good stuff with a reliable **recipe for chocolate lava cake** that actually works.
Why This Recipe for Chocolate Lava Cake Works
Why This Recipe for Chocolate Lava Cake Works
Alright, let's talk about why this specific **recipe for chocolate lava cake** isn't some kitchen myth. Many lava cake recipes out there feel like they require a culinary degree and a prayer circle. This one cuts through the noise. It’s engineered for reliability, focusing on the core elements that make or break that molten center: the ratio of chocolate to butter, the amount of egg, and most critically, the baking time. It’s not about fancy techniques; it’s about getting the fundamentals right, consistently. Think of it as the sturdy workhorse of lava cake recipes – less drama, more delicious payoff. It's the one I turn to when I need that guaranteed chocolate pour, not a dry cake or, worse, a chocolate soup disaster.
Ingredients and Tools for Your Molten Creation
Ingredients and Tools for Your Molten Creation
Gathering Your Chocolatey Arsenal
let's get down to brass tacks – what do you actually need for this **recipe for chocolate lava cake**? The beauty here is you don't need a pantry stocked like a professional patisserie. The core ingredients are surprisingly simple. You'll need good quality dark chocolate. This isn't the time for chocolate chips that resist melting properly; grab a bar of baking chocolate, something with at least 60% cocoa for that rich, deep flavor. Unsalted butter is non-negotiable – it provides the necessary fat for that luscious texture and helps create the molten center. Eggs are crucial for structure and richness, and yes, room temperature is better; they incorporate more evenly. Granulated sugar adds sweetness, obviously, and a touch of all-purpose flour gives just enough structure so the cake holds its shape while the center remains liquid. That's really it for the basics. See? Nothing scary yet.
Essential Kitchen Sidekicks
Now, for the gear. You don't need a stand mixer or any single-use gadgets gathering dust in your cupboard. A couple of small bowls are necessary for melting the chocolate and whisking ingredients. You'll definitely need a double boiler set-up, or just a heatproof bowl set over a pot of simmering water – way easier than burning chocolate directly in a saucepan (ask me how I know). A whisk is handy for combining the wet ingredients. And the stars of the show? Ramekins. These are those small, individual ceramic dishes. Four or six-ounce sizes work perfectly for a single serving. Make sure you butter and flour them well; nothing is more frustrating than a lava cake that refuses to slide out of the mold, turning your elegant dessert into a crumbly mess. A baking sheet is useful to place the ramekins on, catching any potential overflow and making them easier to handle in and out of the hot oven.
- Good Quality Dark Baking Chocolate (60% cocoa or higher)
- Unsalted Butter
- Large Eggs (Room Temperature)
- Granulated Sugar
- All-Purpose Flour
- Small Heatproof Bowls
- Small Pot (for double boiler)
- Whisk
- Ramekins (4 or 6 ounce)
- Baking Sheet
StepbyStep Instructions for Your Recipe for Chocolate Lava Cake
StepbyStep Instructions for Your Recipe for Chocolate Lava Cake
Now that you’ve got your ingredients lined up and your ramekins prepped – seriously, don’t skip the butter and flour step, you’ll regret it – it’s time to bring this whole thing together. The first move in mastering this **recipe for chocolate lava cake** is melting the chocolate and butter. Do this gently over a double boiler. Don't crank the heat; low and slow is the mantra here. You want smooth, glossy chocolate, not a seized, grainy mess. Once it's perfectly melted, pull it off the heat and let it cool slightly while you handle the eggs and sugar. Whisk the eggs and sugar together until they're light and slightly thickened – this incorporates air and helps with texture. Then, whisk in the cooled chocolate mixture. Finally, carefully fold in the flour. Don't overmix; just combine until you don't see any dry streaks. That's your batter, ready to go.
Tips and Tricks for the Perfect Recipe for Chocolate Lava Cake
Tips and Tricks for the Perfect Recipe for Chocolate Lava Cake
Alright, you've got the batter mixed, the ramekins ready. Now, here’s where the rubber meets the road for this **recipe for chocolate lava cake**. The single most important factor is the baking time. This isn't a cake you bake until a toothpick comes out clean; that's the death knell for your molten center. You want the edges to be set and firm, but the very center should still feel soft and wobbly when you gently shake the ramekin. This usually takes around 6-8 minutes in a preheated 450°F oven, but ovens vary wildly. Seriously, know your oven. Start checking around 6 minutes. If they look puffed up and solid all the way across, you've gone too far. They should puff up slightly, and the middle should look just slightly sunken and still liquid underneath the surface. Don't be afraid to pull one out and test it if you're unsure the first time. Better to sacrifice one for the good of the batch than end up with four solid chocolate pucks.
Serving and Storing Your Decadent Cakes
Serving and Storing Your Decadent Cakes
The Grand Reveal: Serving Immediately
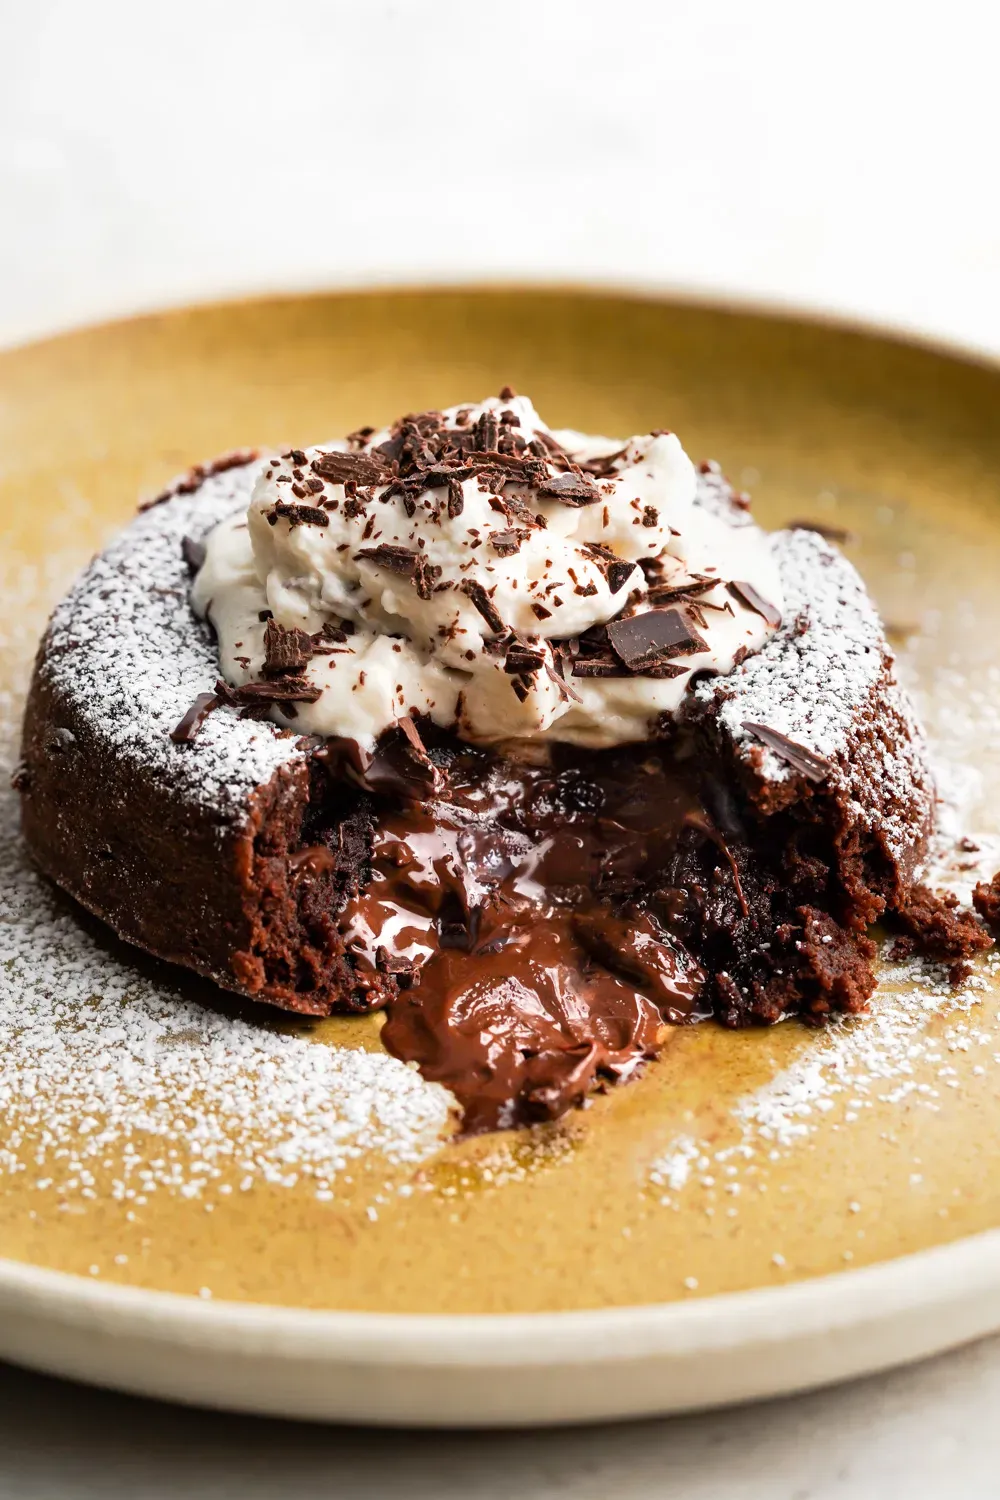
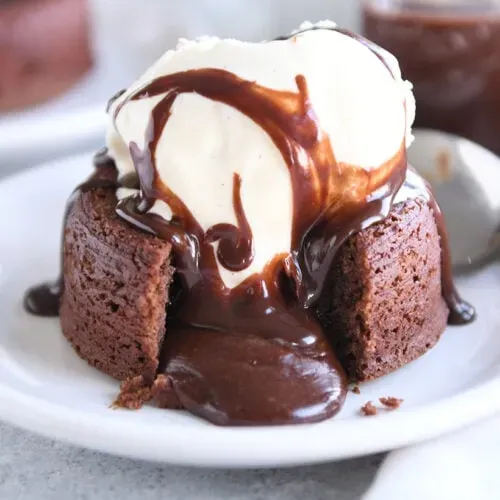
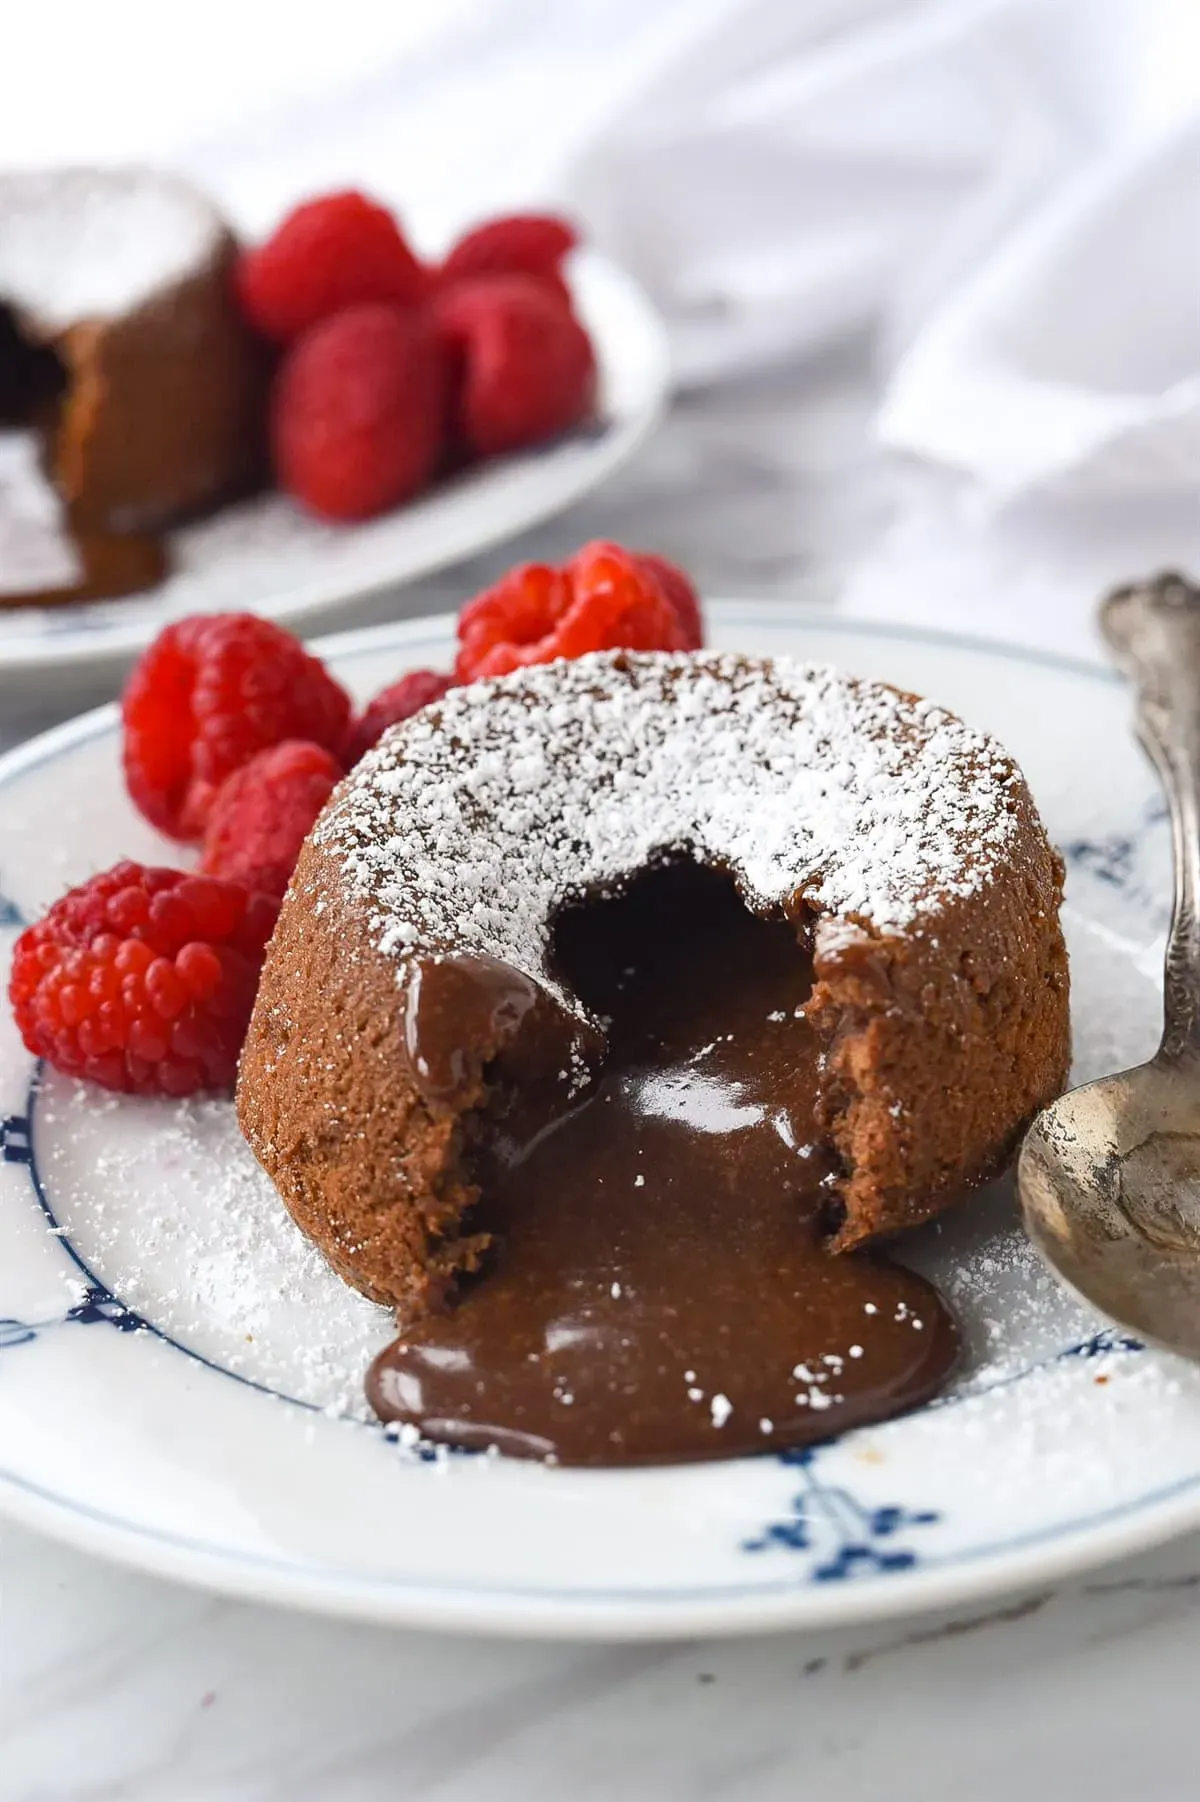
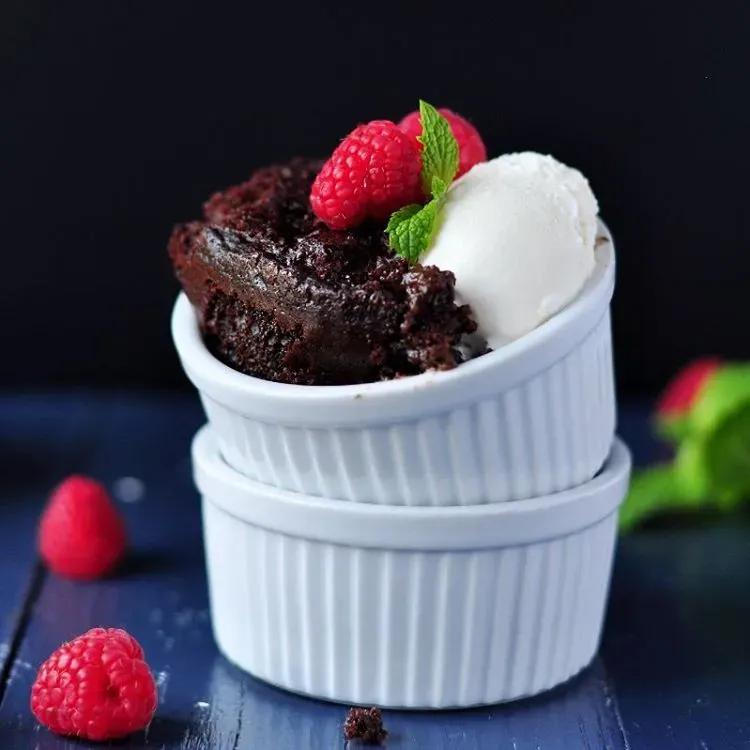
the timer's buzzed, and your kitchen smells like a high-end chocolate factory. This is the moment of truth for your **recipe for chocolate lava cake**. Resist the urge to dive in immediately. Let the ramekins sit for just one minute after pulling them from the oven. This brief pause helps the edges firm up slightly, making the inversion process much smoother. Place a serving plate upside down over the ramekin, hold both firmly, and flip them over. Gently lift the ramekin. With any luck (and proper buttering/flouring!), the cake will slide out, revealing that perfect, slightly sunken top. Now, for the fun part: toppings. A simple dusting of powdered sugar is classic. A scoop of vanilla bean ice cream melting into the warm chocolate is practically mandatory. Fresh berries, a dollop of whipped cream, or a drizzle of raspberry sauce also play very well with that rich chocolate.
Making Ahead: Your Future Self Will Thank You
One of the best tricks for this **recipe for chocolate lava cake** is knowing you don't have to make it right before company arrives, or right when that intense chocolate craving hits. You can actually prepare the batter up to a day in advance. Just follow the steps for mixing, pour the batter into your prepared ramekins, and instead of baking, cover them carefully with plastic wrap. Pop them in the fridge. When you're ready to bake, pull them out about 20-30 minutes before baking to take the chill off slightly (though you can bake them cold, they might need an extra minute or two in the oven). Then, bake them exactly as directed in the original instructions. This is a lifesaver if you're hosting or just want instant gratification later.
Thinking about prepping ahead? Here’s a quick reminder:
- Mix batter as usual.
- Pour into buttered and floured ramekins.
- Cover tightly with plastic wrap.
- Refrigerate for up to 24 hours.
- Bake from chilled, potentially adding 1-2 minutes to bake time.
Dealing with Leftovers (If They Exist)
Let's be real: leftovers from a good **recipe for chocolate lava cake** are a rare and precious thing. But if you happen to have one survive the initial onslaught, you can absolutely save it. Cover the cooled cake still in its ramekin, or carefully transfer it to an airtight container, and store it in the refrigerator for up to 2-3 days. Reheating is best done gently. You can microwave it for 30-60 seconds, just until the center is warm and molten again, but be careful not to overcook it. Alternatively, you can pop it back into a preheated oven (around 350°F) for 5-10 minutes. The oven method often yields a slightly better texture, but the microwave is quicker. Either way, you get to experience that molten magic again, even if it's not quite the same as fresh from the oven.
Your Molten Masterpiece Awaits
So there you have it. No culinary degree required, just a handful of ingredients and a few minutes of your time stands between you and a truly impressive dessert. Stop telling yourself these things are too hard or only for pros. This **recipe for chocolate lava cake** is your permission slip to indulge and maybe even show off just a little. Go ahead, preheat that oven, and prepare for that moment when you break through the delicate crust and the chocolate river flows. It’s pretty satisfying, trust us.