Table of Contents
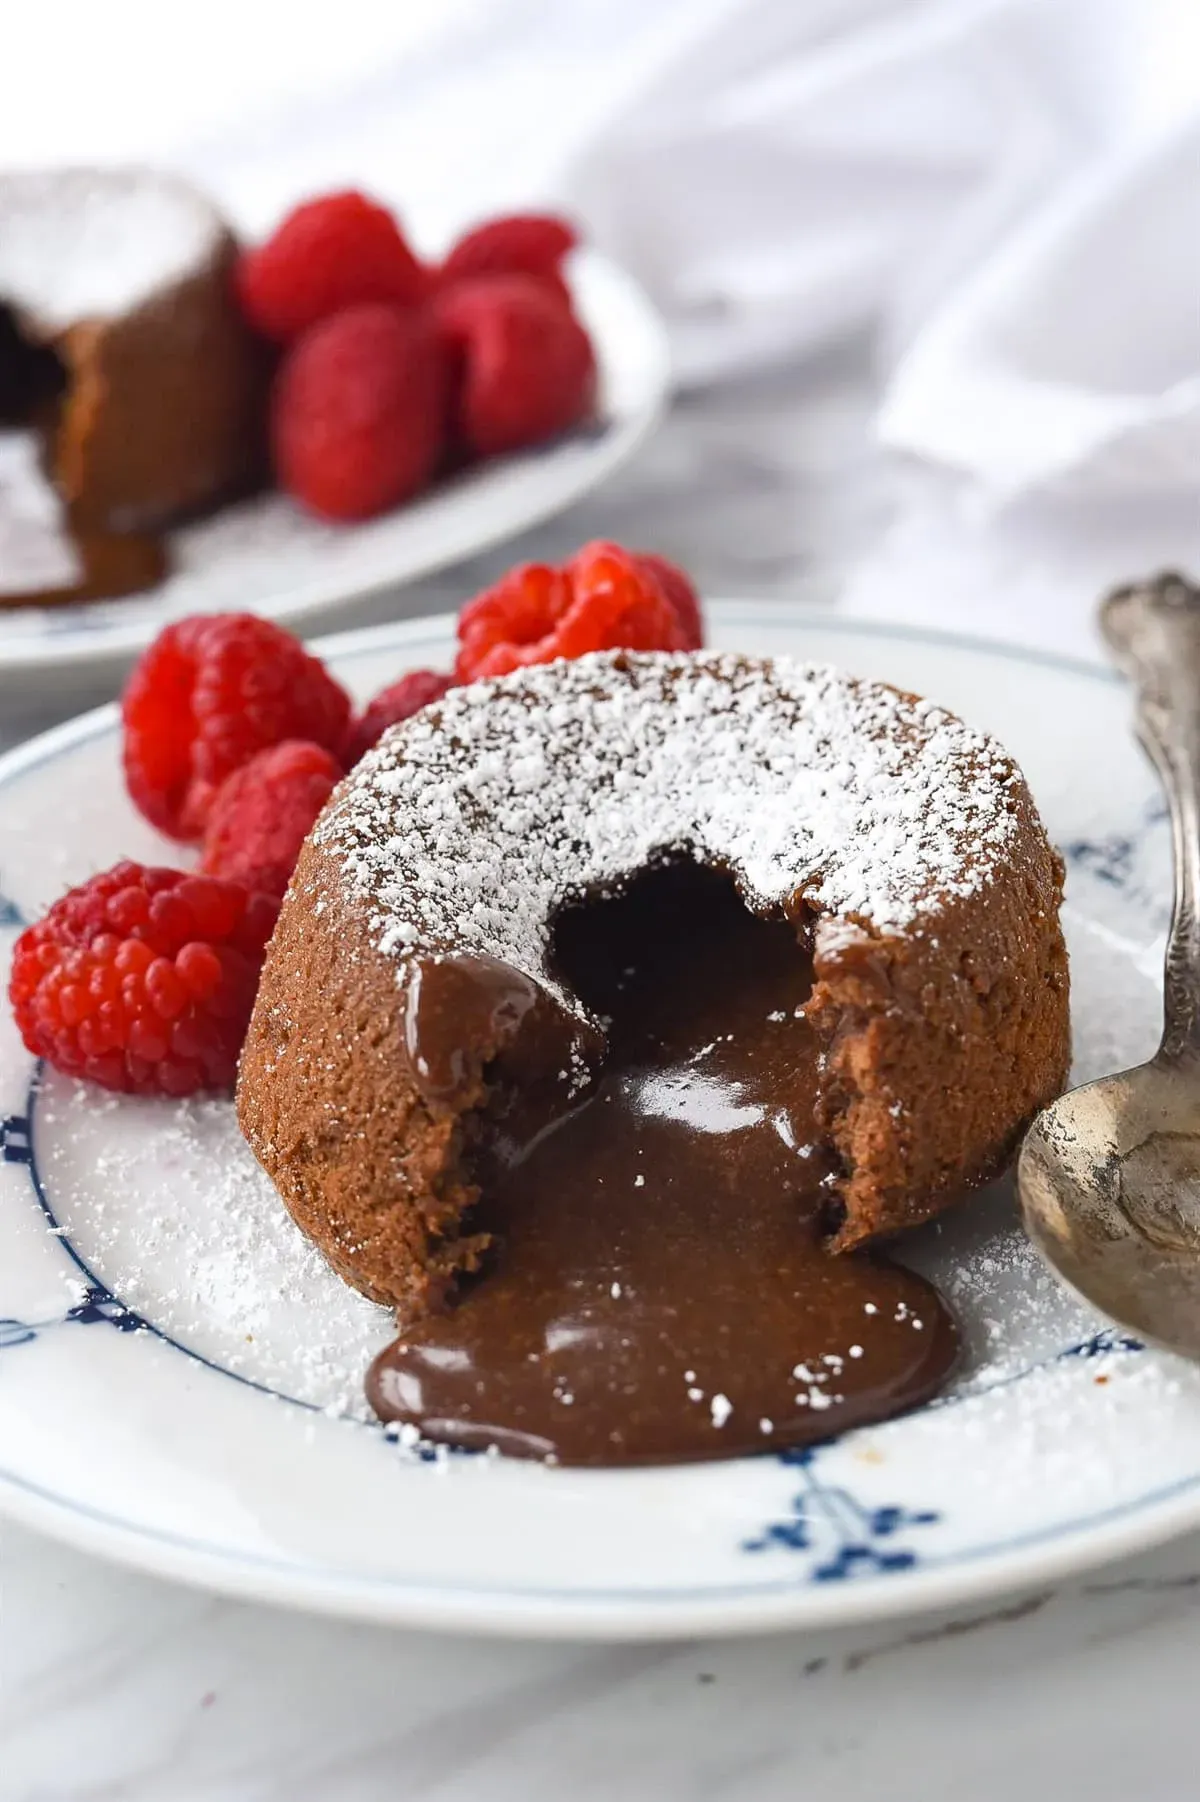
Imagine cutting into a warm chocolate cake, and instead of just cake, a river of rich, molten chocolate flows out. That's the magic of a chocolate lava cake, a dessert that looks fancy but, honestly, isn't nearly as intimidating to make as you might think. People often picture complicated steps or special equipment, but getting that perfect gooey center is surprisingly achievable in your own kitchen.
Decoding the Gooey Magic: What is a Chocolate Lava Cake?
Decoding the Gooey Magic: What is a Chocolate Lava Cake?
More Than Just Underbaked Brownies
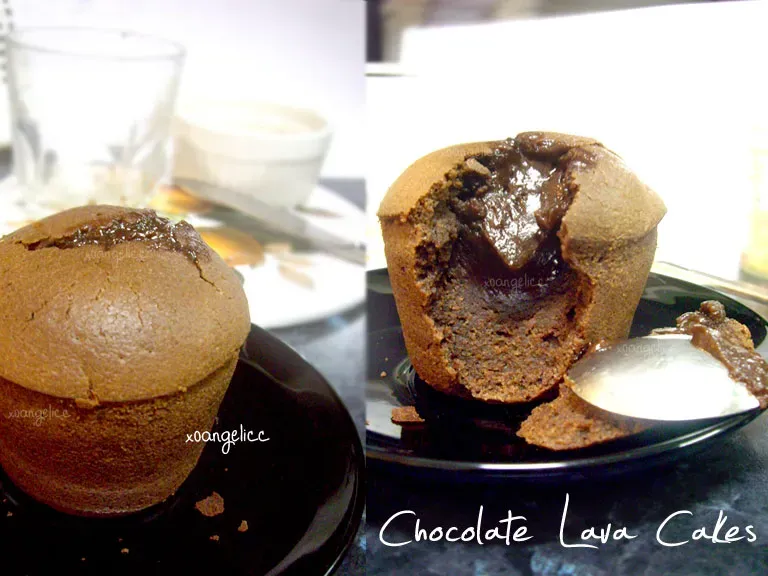
let's clear the air right away. A chocolate lava cake isn't just a regular chocolate cake that someone forgot to bake all the way through. While the center is indeed gloriously gooey and molten, that's by design. Think of it as a dessert engineered for that specific, dramatic moment when you pierce the delicate cake crust and the warm, liquid chocolate spills out. It's a carefully calibrated balance between a baked exterior that holds its shape and an interior that remains luxuriously fluid.
The magic comes down to temperature and timing. You're essentially creating a rich batter, often with a higher ratio of chocolate and butter than a standard cake. This batter goes into a ramekin, a small individual baking dish. The oven heat sets the outer edges of the batter relatively quickly, forming a stable 'wall' and bottom, while the center remains hot but doesn't solidify entirely. The result is that iconic contrast: firm cake on the outside, pure molten gold within. It's dessert theater on a plate.
- Iconic molten chocolate center
- Firm, cake-like exterior
- Baked in individual ramekins
- Achieved through precise timing and temperature
- Designed for dramatic presentation
The "Molten" vs. "Lava" Debate (Who Cares, It's Delicious)
You'll hear these desserts called both "molten chocolate cakes" and "chocolate lava cakes." Is there a difference? Not really, not in practice anyway. The terms are pretty much interchangeable in the dessert world. Some purists might argue about the exact consistency of the center, but for most of us, if it oozes hot chocolate when you cut it, it's a win. The name "lava cake" just paints a more vivid picture, doesn't it? It evokes that flowing, unstoppable chocolate river.
Your Shopping List: Ingredients for the Perfect Recipe Chocolate Lava Cake
Your Shopping List: Ingredients for the Perfect Recipe Chocolate Lava Cake
The Chocolate and Butter Foundation
Alright, let's talk ingredients for this glorious recipe chocolate lava cake. You'd think something this decadent requires a laundry list of fancy stuff, right? Not really. It starts with the absolute essentials: good quality chocolate and butter. Don't skimp here. Using decent chocolate makes a world of difference in that molten center. We're talking bittersweet or semi-sweet chocolate, the kind you'd actually want to eat straight from the bar. Chop it up so it melts evenly with the butter. This dynamic duo creates the rich base that gives the lava its signature flavor and texture. It's the foundation, the heart of the operation.
Rounding Out the Crew: Eggs, Sugar, and Flour
Beyond the chocolate and butter, you'll need a few other standard pantry items. Eggs are crucial; they provide structure to the cakey exterior and contribute to the richness of the lava. You'll likely use both whole eggs and egg yolks for that extra bit of lusciousness. Sugar, of course, sweetens the deal and helps create that smooth, molten texture. Just a touch of flour binds it all together – remember, we don't want a full-blown cake batter here, just enough to form that delicate shell around the liquid core. A pinch of salt is also a secret weapon, enhancing all those deep chocolate flavors.
- Good quality bittersweet or semi-sweet chocolate
- Unsalted butter
- Large eggs
- Egg yolks
- Granulated sugar
- All-purpose flour
- Pinch of salt
Bake the Dream: StepbyStep Recipe Chocolate Lava Cake Guide
Bake the Dream: StepbyStep Recipe Chocolate Lava Cake Guide
Getting Started: Prep Your Ramekins and Melt Your Chocolate
Alright, let's get down to business and actually make this glorious dessert. The first couple of steps for your recipe chocolate lava cake are all about setting the stage. You need to prepare your ramekins. Don't just grease them lightly; you want to be generous with butter, really coating the inside well. Then, dust them with a little cocoa powder or flour. This double-layer of protection is crucial for getting the cakes to release cleanly after baking. Nothing is more frustrating than a lava cake that sticks stubbornly to its dish! While you're doing that, get your chocolate and butter melting. A double boiler is classic, but honestly, the microwave works just fine in short bursts, stirring frequently. You want it smooth and glossy, no lumps allowed.
Whipping Up the Batter: Eggs, Sugar, and Everything Nice
Once your chocolate and butter are a perfectly melted, shimmering pool, set it aside for just a minute to cool slightly. Now, grab your eggs and sugar. You're going to whisk these together until they're light and frothy. This isn't just about mixing; you're incorporating air and dissolving the sugar, which contributes to the final texture. Some recipes call for whole eggs and extra yolks – those extra yolks add incredible richness to the molten center. Gently fold the cooled chocolate mixture into the egg mixture. Don't overmix; you just want it combined. Finally, sift in your small amount of flour and that pinch of salt. Fold gently again until you see no dry streaks. The batter will be thick and rich, exactly what you want for a successful recipe chocolate lava cake.
Into the Oven: The Crucial Baking Time
Now for the moment of truth: baking. Preheat your oven properly – getting the temperature right is key. Divide your thick, luxurious batter evenly among the prepared ramekins. Don't fill them right to the brim; leave a little room for expansion. Pop the ramekins onto a baking sheet (makes them easier to handle) and slide them into the hot oven. This is where precision matters. Baking time is usually short, maybe 11-13 minutes depending on your oven and the size of your ramekins. You're looking for the edges to be set and slightly pulled away from the sides, while the center still looks soft and perhaps a tiny bit jiggly. An overbaked lava cake is just a sad little chocolate cake, and nobody wants that.
Beyond the Bake: Serving and Tweaking Your Lava Cakes
Beyond the Bake: Serving and Tweaking Your Lava Cakes
The Grand Finale: Serving Hot and Fast
You've done it. Your kitchen smells incredible, and four little ramekins hold the promise of chocolatey bliss. The crucial next step for your perfectly baked lava cakes is getting them out of the ramekin and onto a plate without disaster striking. Let them cool for just one minute. This short pause allows the edges to firm up slightly, making the inversion much less risky. Place your serving plate upside down over the ramekin, hold both firmly, and flip. Give the ramekin a gentle tap if needed. Lift the ramekin off slowly. If you greased and floured properly, it should slide right out, revealing that beautiful, slightly domed cake. Serve them immediately. The "lava" is only truly molten when piping hot from the oven. Waiting too long means you might end up with a delicious but solid-centered cake, which defeats the whole purpose.
Elevating the Experience: Toppings and Pairings
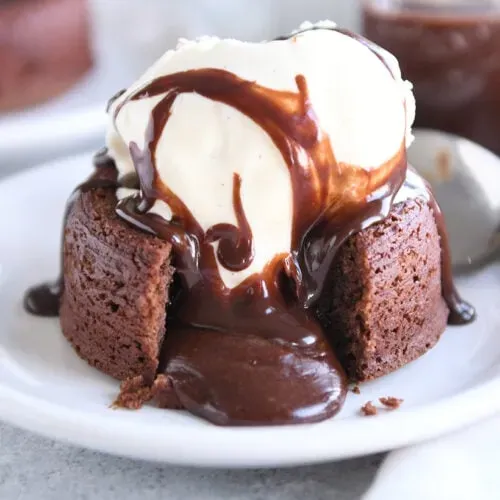
A naked chocolate lava cake is fantastic on its own, but adding a little something extra takes it from great to unforgettable. A simple dusting of powdered sugar is classic and adds a touch of elegance. For a bit of contrast, a scoop of vanilla bean ice cream melting into the hot chocolate lava is pretty much peak dessert. Fresh berries, like raspberries or strawberries, offer a tart counterpoint to the richness. A dollop of freshly whipped cream never hurts either. Some folks drizzle a raspberry sauce or a salted caramel over the top. Think about textures and flavors that complement deep chocolate. A sprinkle of sea salt flakes right before serving can really make the chocolate pop.
- Powdered sugar dusting
- Vanilla bean ice cream
- Fresh berries (raspberries, strawberries)
- Whipped cream
- Raspberry sauce
- Salted caramel drizzle
- Flaky sea salt
Planning Ahead: Making Lava Cakes in Advance
One of the best things about this particular recipe chocolate lava cake is that you can do most of the work ahead of time. You can prepare the batter and pour it into your greased and floured ramekins. Instead of baking, cover them tightly with plastic wrap and pop them in the refrigerator. They can hang out in the fridge for up to 24 hours. When you're ready for dessert, just take them directly from the fridge to a preheated oven. You might need to add a minute or two to the baking time since they are starting cold, but test for those set edges and slightly jiggly centers. This makes them perfect for dinner parties – dessert is ready to bake when you are, minimizing last-minute stress.
Your Lava Cake Awaits
So there you have it. You've navigated the relatively simple path to creating a dessert that consistently gets a reaction. No need for a pastry degree or a professional kitchen setup. Just some basic ingredients, a few minutes of your time, and an oven. The result? A warm chocolate cake with that signature molten core. It's a reliable move for wrapping up a meal or just satisfying a serious chocolate craving. Give it a shot; it's probably easier than finding parking downtown.