Table of Contents
Alright, let's talk about something seriously delicious: mini chocolate cheesecakes. These aren't your average desserts; they're tiny powerhouses of flavor, perfect for when you need a little something sweet, or a lot! Forget complicated recipes; we're diving into a simple method that even a beginner can master. We'll start with that irresistible Oreo crust, then layer on a creamy, chocolate-packed filling that's seriously hard to resist. But it doesn’t stop there! We're topping these little guys with a smooth chocolate ganache and a swirl of whipped cream, because, why not? In this article, I'll walk you through exactly how to make these delightful treats, sharing my best tips for success so yours turn out perfect every single time. Get ready to discover how easy it is to make these crowd-pleasing mini chocolate cheesecakes, from simple prep to delicious serving ideas. We'll cover everything from the ingredients you'll need to how to store them, ensuring you can enjoy your tasty creation whenever you want.
Why You'll Love These Mini Chocolate Cheesecakes
Why You'll Love These Mini Chocolate Cheesecakes
Perfectly Portioned Pleasure
Let's be honest, sometimes a full-sized cheesecake feels like a commitment. That's where these mini versions shine! They're the perfect size for a guilt-free treat, a sweet bite after dinner, or even a little something to brighten up your afternoon. No need to worry about leftovers going to waste or feeling like you've overindulged. Each mini cheesecake is a self-contained dose of chocolatey goodness, just the right amount to satisfy your cravings. Plus, they're adorable; who can resist a tiny, delicious dessert?
Chocolate Lover's Dream
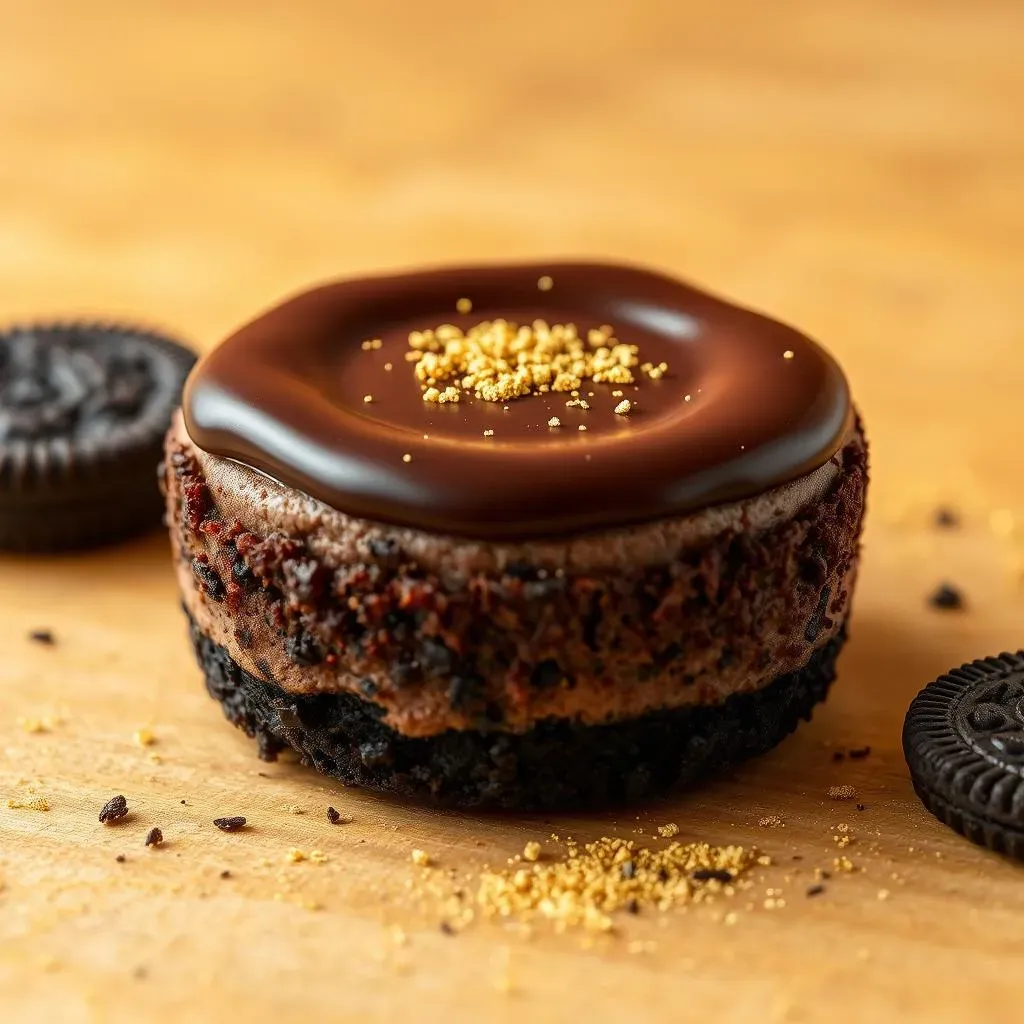
If you're a chocolate fan, these mini cheesecakes are about to become your new best friend. We’re not talking about a hint of chocolate; we're talking about a full-on chocolate experience. From the Oreo cookie crust to the rich, creamy chocolate filling, and then topped with that decadent chocolate ganache, every bite is a chocolate explosion. It's like a triple chocolate threat, but in the best way possible. It's a serious chocolate experience, but it's also balanced with that tangy cheesecake base that makes it so moreish.
Chocolate Element | Description |
|---|---|
Oreo Crust | Provides a dark, slightly bitter base that complements the sweet filling. |
Chocolate Filling | Rich, creamy, and intensely chocolatey, the star of the show. |
Chocolate Ganache | Adds a smooth, glossy finish and an extra layer of chocolate richness. |
Effortless Elegance
Don't let their fancy appearance fool you; these mini chocolate cheesecakes are surprisingly easy to make. We’re skipping the fussy water baths and complicated steps. This recipe is all about simplicity and delicious results. You can whip up a batch in under two hours, and most of that time is just waiting for them to bake and cool. They look impressive enough for a party, but they’re so straightforward that you can make them on a regular Tuesday night. It's the perfect combination of elegance and ease, proving that great desserts don't have to be a hassle.
How to Make the Best Mini Chocolate Cheesecakes
How to Make the Best Mini Chocolate Cheesecakes
Okay, let's get down to the nitty-gritty: how to actually make these amazing mini chocolate cheesecakes. It’s not rocket science, I promise! The key is in the details, so pay close attention. We're aiming for a smooth, creamy filling that’s perfectly baked and a crust that’s both sturdy and delicious. This section is like a step-by-step guide, and I'm here to walk you through each part. We’re starting with that awesome Oreo crust, because who doesn’t love Oreos? Then, we’ll get to the chocolate cheesecake filling, which is the heart and soul of this dessert. Finally, we'll talk about that luscious ganache, which brings it all together.
First things first, let's tackle the Oreo crust. Grab your food processor and toss in about 25 Oreo cookies – the whole thing, cream and all. Pulse them until you get fine crumbs. Melt about 4 tablespoons of unsalted butter, then pour it over the crumbs and pulse again until everything's nicely combined. Now, press this mixture firmly into the bottom of your muffin tin liners. I like to use a small measuring cup to get a nice, even crust. This step is crucial, because a good crust is the foundation of our mini cheesecakes. Once that's done, we’re all set to work on the main act: the chocolate cheesecake filling.
Step | Description |
|---|---|
Crush Oreos | Pulse 25 Oreos in a food processor until fine crumbs form. |
Melt Butter | Melt 4 tablespoons of unsalted butter. |
Combine | Mix melted butter with Oreo crumbs until well combined. |
Press | Press the mixture firmly into the bottom of muffin tin liners. |
Now for the star of the show, the creamy chocolate filling. In a large bowl, beat 24 ounces of softened cream cheese until it's smooth. This is important, because any lumps will affect the texture of our cheesecakes. Then, beat in ¾ cup of granulated sugar until it's all combined. Next, beat in 2 large eggs, one at a time, making sure each one is fully incorporated. Add 1 teaspoon of vanilla extract for that extra flavor. Now, for the chocolate magic: melt 1 cup of semi-sweet chocolate chips with 2 tablespoons of butter in the microwave or over a double boiler. Make sure it’s smooth and then add it to the cream cheese mixture.
Mix everything until just combined – don’t overmix, because that can cause cracks in the cheesecakes. Once your batter is ready, pour it over the Oreo crusts, filling each muffin liner almost to the top. Now, these little guys are ready for the oven! Bake them at 350°F (175°C) for about 20-25 minutes, or until the edges are set but the centers are still slightly jiggly. This is the sweet spot for perfect cheesecake texture. After baking, turn off the oven, crack the door open, and let them cool in the oven for about 30 minutes. This prevents them from cracking. Then, take them out and let them cool completely on a wire rack before adding the ganache.
Tips for Perfect Mini Chocolate Cheesecakes Every Time
Tips for Perfect Mini Chocolate Cheesecakes Every Time
Room Temperature is Key
Alright, let's talk about temperature, because it's a big deal in baking. For these mini cheesecakes, it's absolutely crucial that your cream cheese and eggs are at room temperature. Why? Because it helps everything blend together smoothly. Cold cream cheese will clump up, and you'll end up with a lumpy batter. Nobody wants a lumpy cheesecake! Room temperature ingredients mean a smooth, creamy batter, which translates to a silky, perfect cheesecake. So, take those ingredients out of the fridge ahead of time and let them warm up a bit. It's a small step that makes a huge difference.
Think of it like this: cold ingredients are like stubborn puzzle pieces that don't want to fit. But warm them up, and they slide right into place, creating a beautiful, smooth picture. The same goes for your cheesecake batter. If you are in a hurry, you can put the eggs in a bowl of warm water for 5-10 minutes, and the cream cheese, in its package, can be put near a warm place.
Low and Slow Mixing
Now, let's talk about mixing. It might be tempting to crank up your mixer to high speed and get things done quickly, but resist that urge! When it comes to cheesecake, slow and steady wins the race. Overmixing introduces too much air into the batter, which can cause those dreaded cracks on the surface. We want a smooth, dense cheesecake, not a bubbly one. So, keep your mixer on low speed and mix just until everything is combined. It's okay if you still see a few streaks of the chocolate; they'll blend in during baking. Remember, less is more when it comes to mixing cheesecake batter.
Think of it like gently folding a delicate fabric. You wouldn't want to aggressively bunch it up, right? Same with cheesecake batter. Gentle mixing ensures a smooth, even texture. If you don't have a mixer, no stress, you can use a spatula and mix it gently by hand, it will take a little more time, but it is still doable.
Tip | Why It Matters |
|---|---|
Room Temperature Ingredients | Ensures a smooth, lump-free batter. |
Low Speed Mixing | Prevents overmixing and cracks. |
Serving and Storing Your Delicious Mini Chocolate Cheesecakes
Serving and Storing Your Delicious Mini Chocolate Cheesecakes
Okay, so you've baked these amazing mini chocolate cheesecakes, and they’re looking absolutely perfect. Now what? Well, let’s talk about serving them up and keeping them fresh. The best part about these little treats is how versatile they are. You can serve them as is, or you can dress them up with some extra flair. And when it comes to storing them, it’s pretty straightforward, making it easy to enjoy them days after baking. I’ll show you the best ways to present these delicious desserts and how to keep them tasting just as good as the day you made them.
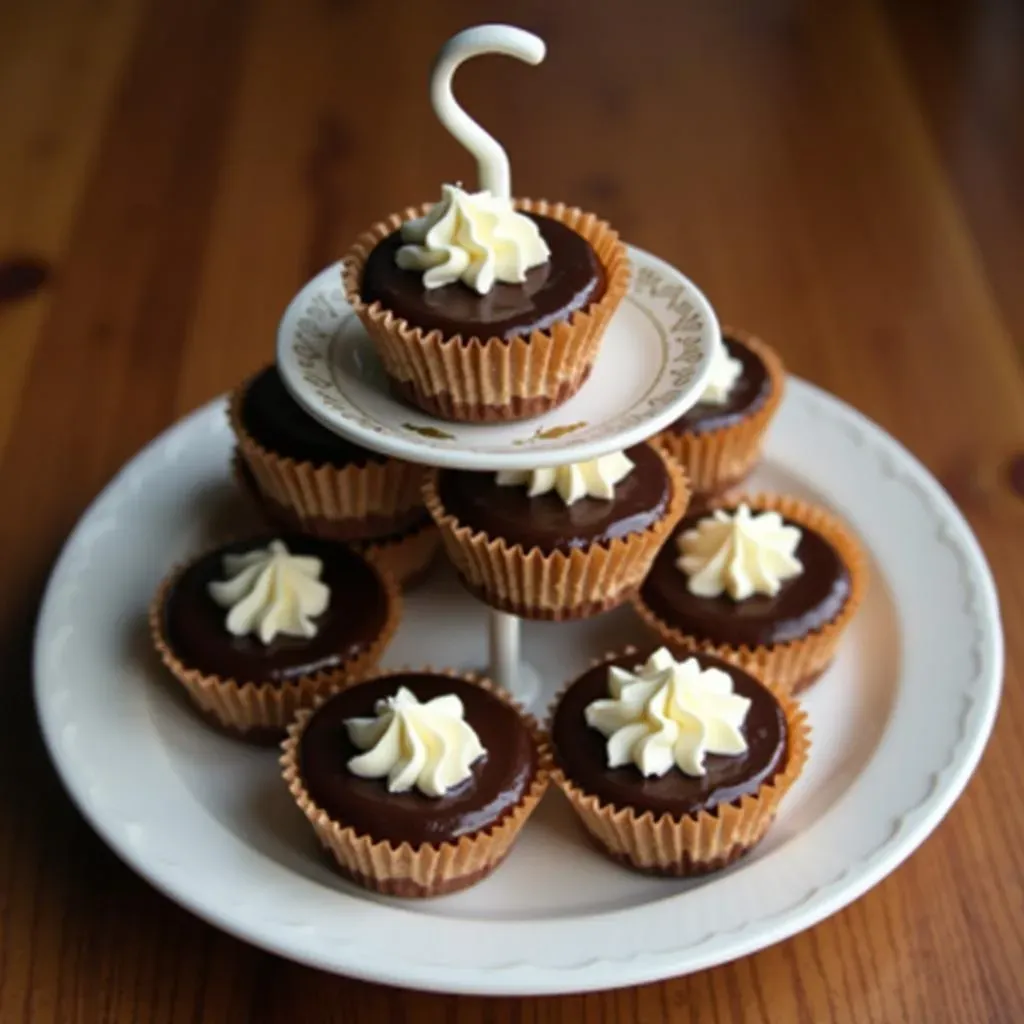
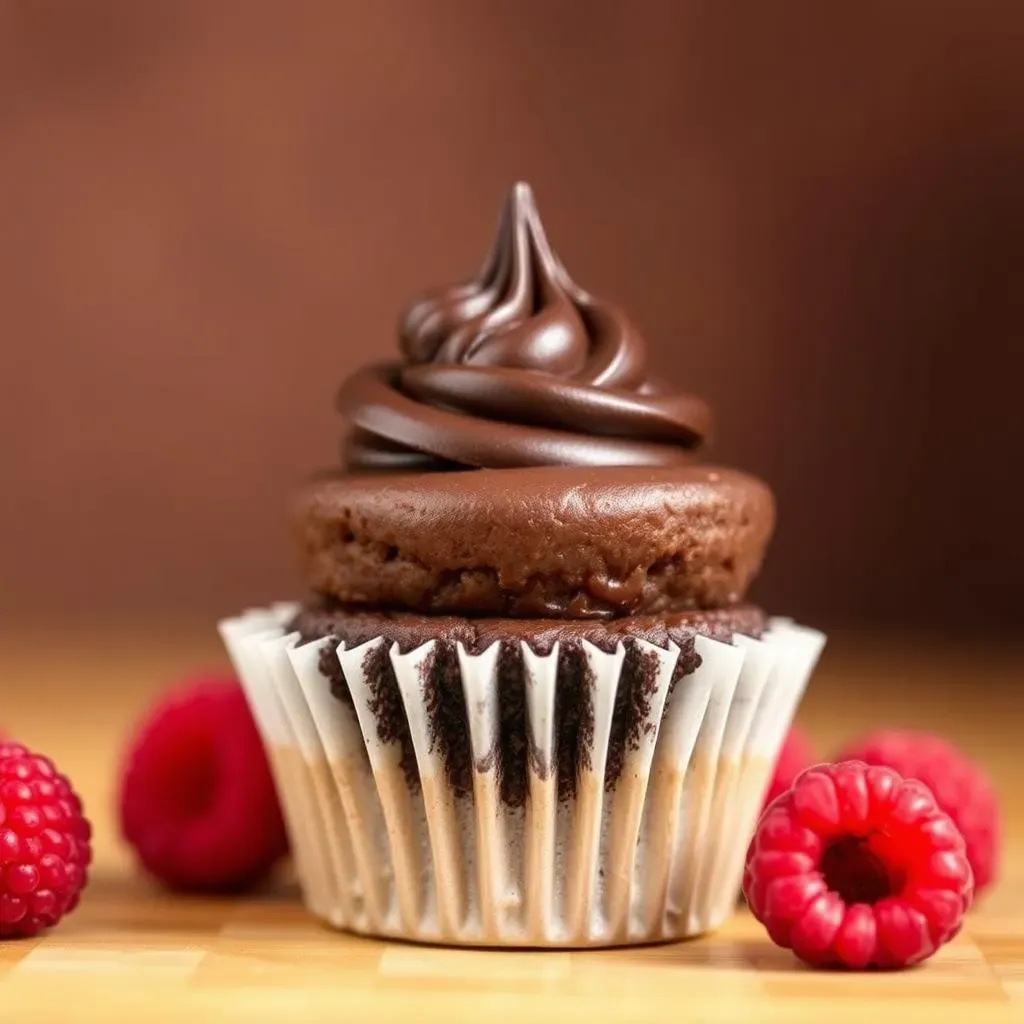
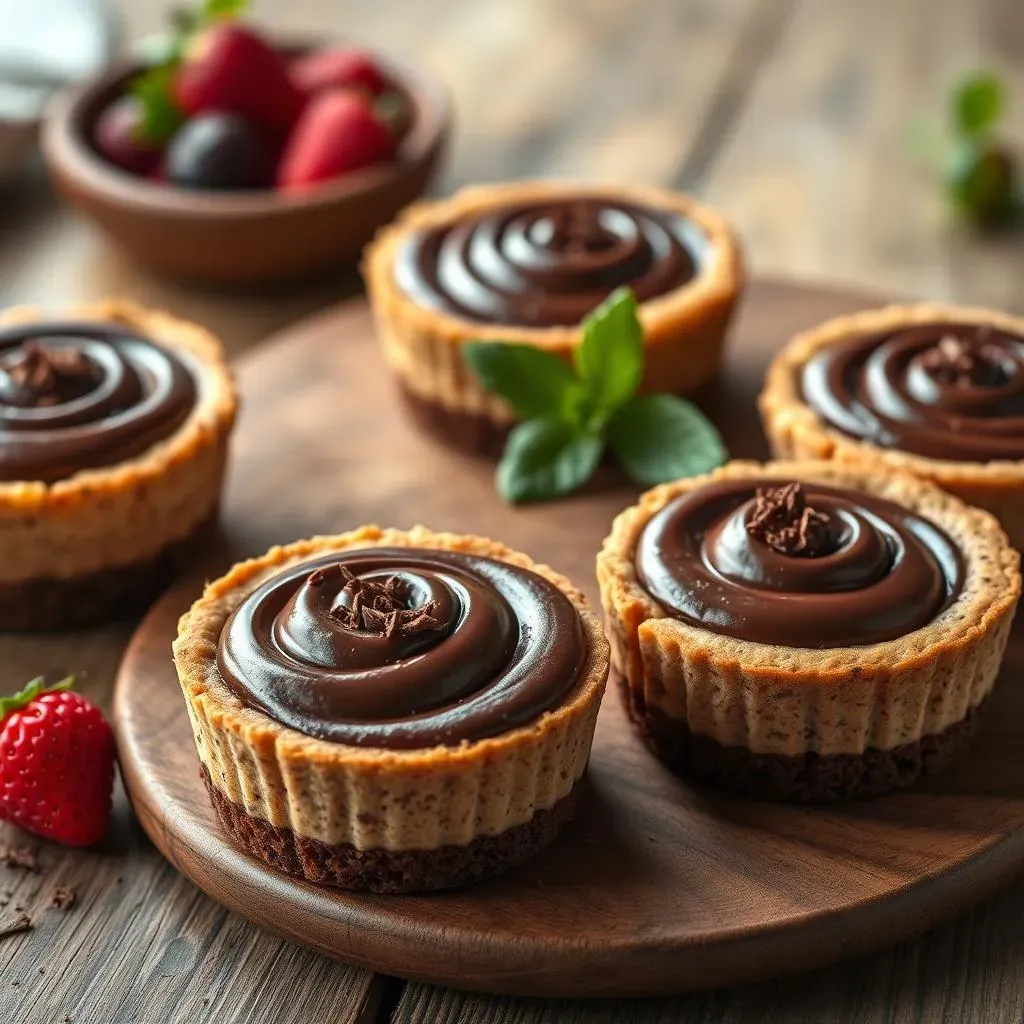
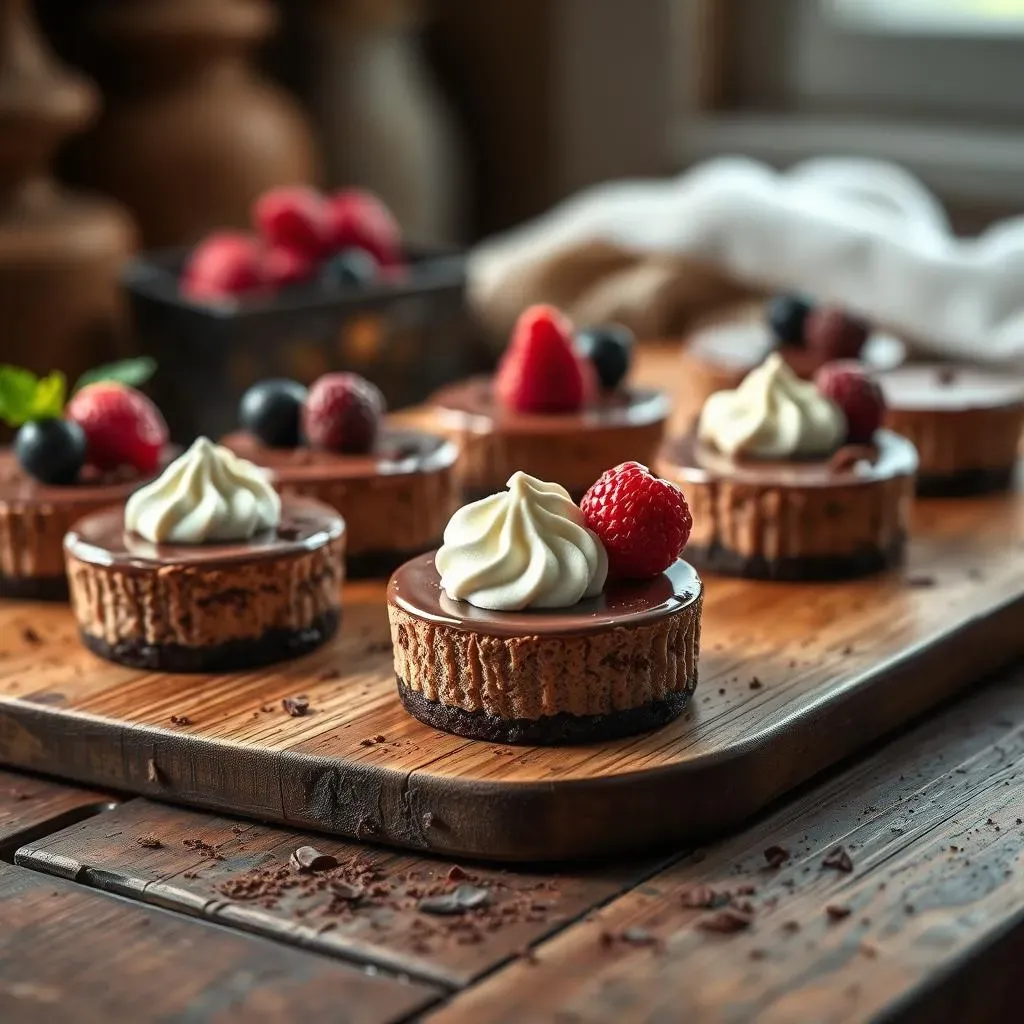
First off, let’s talk about serving. These mini cheesecakes are fantastic on their own, but a little extra never hurt anyone! A dollop of fresh whipped cream on top is a classic choice, and it's super easy to do. You can also get creative with other toppings. Fresh berries, like raspberries or strawberries, add a pop of color and a nice bit of tartness that balances out the richness of the chocolate. Chocolate shavings are another great option for those who want even more chocolate intensity. And for a more fun presentation, you can drizzle a bit of extra melted chocolate or caramel over the top.
Serving Suggestion | Why It Works |
|---|---|
Whipped Cream | Classic, light, and adds a creamy texture. |
Fresh Berries | Adds color, tartness, and a fresh element. |
Chocolate Shavings | Intensifies the chocolate flavor and adds visual appeal. |
Caramel Drizzle | Adds a sweet, gooey element. |
Now, let's get to storing these little beauties. If you plan on eating them within a few days, the refrigerator is your best bet. The key is to store them in an airtight container. This will prevent them from drying out or absorbing any unwanted fridge odors. They’ll stay good in the fridge for about 3 to 4 days. But if you want to keep them longer, you can freeze them. Place the fully cooled cheesecakes on a baking sheet lined with parchment paper and put them in the freezer for a couple of hours until they are solid. Then, you can transfer them to a freezer-safe container or bag, and they’ll keep well for up to 3 months.
When you're ready to eat them, just take them out of the freezer and let them thaw in the fridge for a few hours. This gradual thawing process will help prevent any changes in texture. Don't try to thaw them at room temperature, as this can cause condensation and make the crust soggy. Whether you're serving them fresh or after freezing, these mini chocolate cheesecakes are sure to impress, and with these simple storage tips, you can enjoy them whenever your sweet tooth calls.