Table of Contents
Forget those dry, crumbly attempts you’ve suffered through. You're here because you crave that moment: the spoon breaks the cake's surface, and a warm, molten river of milk chocolate spills out.
Why You Need This Milk Chocolate Lava Cake Recipe
Why You Need This Milk Chocolate Lava Cake Recipe
Tired of Dry Chocolate "Pucks"?
Let's be honest.
You've probably ordered a lava cake at a restaurant, anticipating that dramatic moment of molten chocolate flow.
And sometimes, you get it.
Other times? A solid, slightly warm cake that just sits there, mocking your hopes.
Attempting to recreate this at home often leads to similar disappointment.
Recipes abound online, promising the moon but delivering a dry lunar surface instead.
Maybe it's overbaked.
Maybe the chocolate wasn't quite right.
Whatever the reason, a failed lava cake is just a sad, dense chocolate muffin.
This isn't what you signed up for.
You need a milk chocolate lava cake recipe that consistently works, one that removes the guesswork and delivers the goods.
Stop wasting time and ingredients on recipes that fail to perform.
The Ultimate Easy Impresser
Imagine this: you're hosting friends or family.
Dinner was great, but now comes dessert.
Instead of pulling out store-bought ice cream (again), you present individual ramekins.
Warm.
Fragrant.
Each person plunges their spoon in, and *bam* – a perfect stream of warm, gooey milk chocolate cascades onto the plate.
Jaws drop.
Compliments flow.
They think you're some kind of pastry wizard.
The secret? This reliable milk chocolate lava cake recipe.
It’s surprisingly simple to execute once you know the critical steps and timing.
It requires minimal ingredients you probably already have.
And the payoff for minimal effort is maximum impact.
It's your new go-to dessert for looking effortlessly impressive.
What makes a lava cake truly impressive?
- A perfectly set exterior
- A warm, liquid center
- Rich, decadent chocolate flavor
- Individual portioning
- That dramatic molten moment
Because You Deserve Gooey Happiness
Let's cut to the chase.
Sometimes, you just need a damn good dessert.
Not a diet dessert.
Not something 'healthy-ish'.
Something unapologetically rich, comforting, and utterly delicious.
A successful milk chocolate lava cake recipe delivers exactly that.
It's a personal victory when that center is perfectly molten.
It’s the kind of dessert that silences a room while everyone savors their first bite.
Plus, making them yourself means you can control the quality of the chocolate.
No weird additives, just pure, unadulterated milk chocolate bliss.
So, why do you need this specific milk chocolate lava cake recipe?
Because you deserve dessert success.
You deserve to know you can nail that molten center every single time.
You deserve gooey happiness.
Mastering the Milk Chocolate Lava Cake Recipe: StepbyStep
Mastering the Milk Chocolate Lava Cake Recipe: StepbyStep
Melting Towards Molten Perfection
Alright, let's get down to business with this milk chocolate lava cake recipe.
The first move is melting your chocolate and butter.
Don't just hack at a bar of chocolate; use good quality stuff.
Milk chocolate can be finicky when melting, prone to seizing if you look at it wrong.
Use a double boiler or a microwave on low power, stirring every 30 seconds.
Patience here prevents grainy disaster.
Combine your chopped milk chocolate and cubed butter in a heatproof bowl.
As they melt together, they should become a smooth, glossy, dark liquid.
This foundation is crucial for that luxurious lava flow later.
Pull it off the heat just as the last few chunks disappear; residual heat will do the rest.
Mixing for the Magic Center
Once your chocolate-butter mixture is smooth and slightly cooled (you don't want to scramble the eggs!), it's time to bring in the rest of the crew.
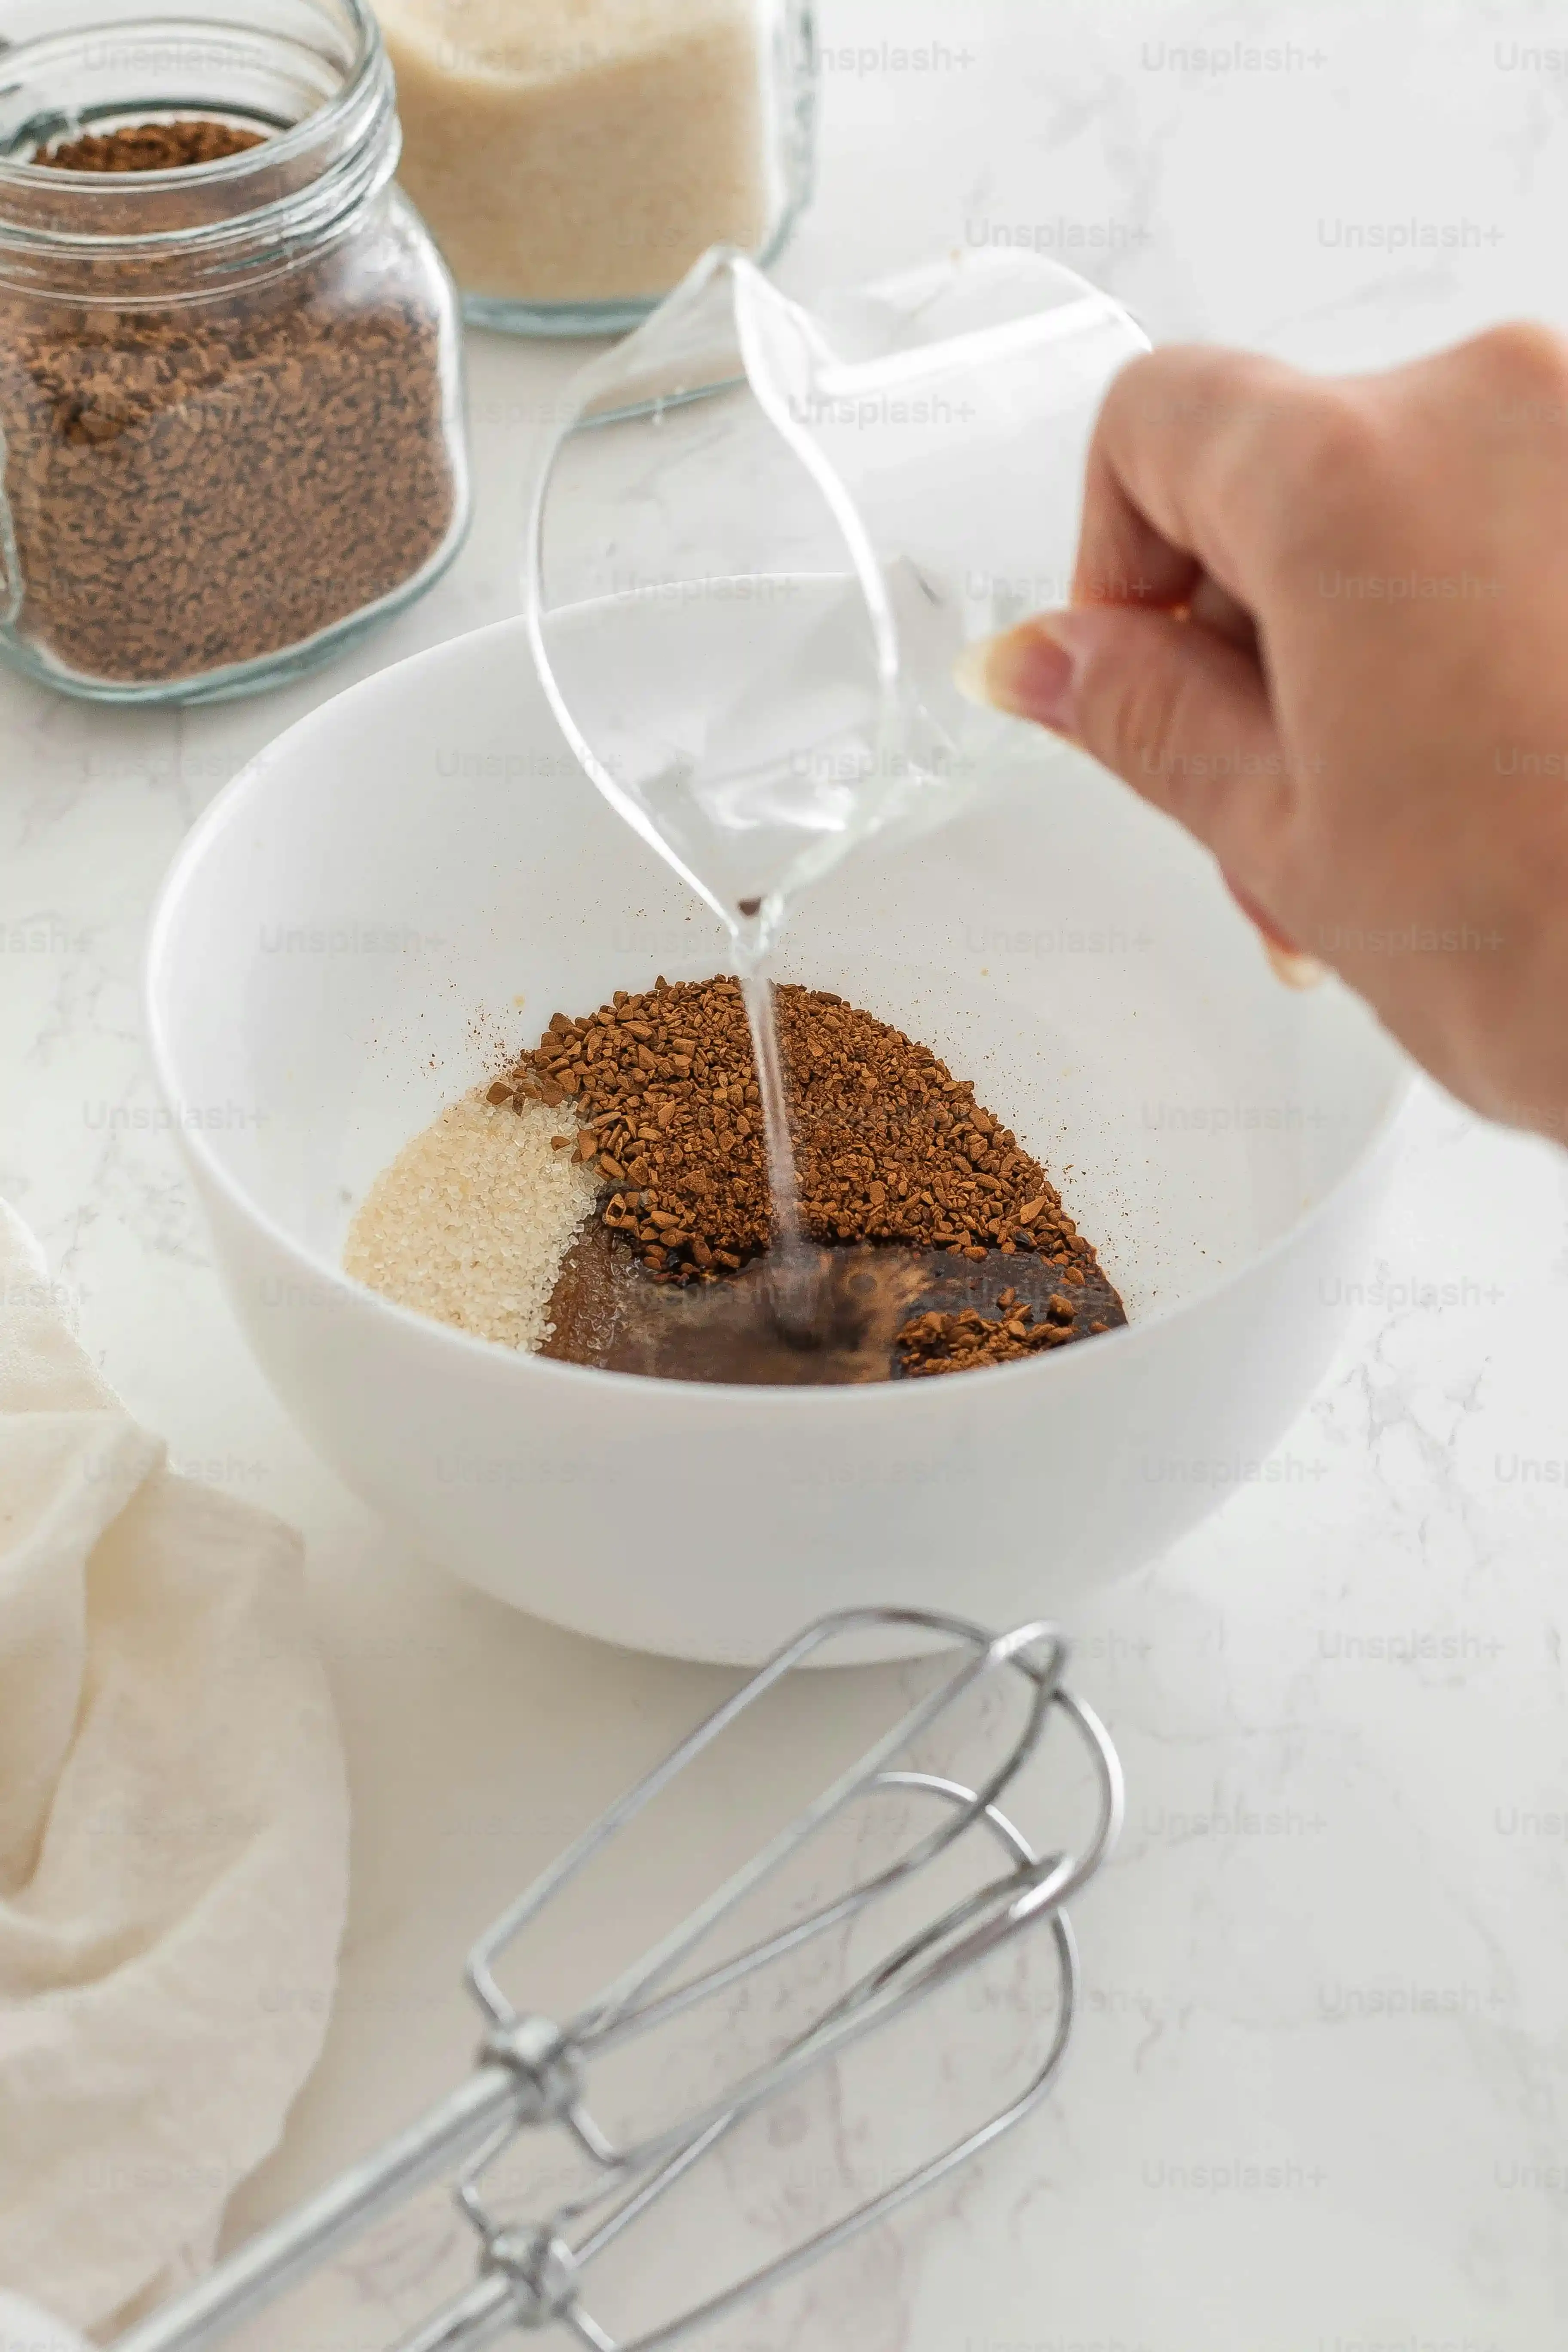
Whisk in the sugar.
Don't go crazy; just incorporate it.
Next come the eggs and egg yolks.
The extra yolks are key; they add richness and help create that gooey center structure.
Whisk them in gently until just combined.
Overmixing develops gluten in the tiny bit of flour we're about to add, and gluten means cakey, not molten.
Finally, fold in the flour and a pinch of salt.
Stop mixing as soon as you see no dry streaks.
This batter should be relatively thick but pourable.
Resist the urge to keep stirring; you're building a delicate balance here for the perfect milk chocolate lava cake recipe.
Quick Checklist for Mixing:
- Use quality milk chocolate.
- Melt chocolate and butter gently.
- Cool mixture slightly before adding eggs.
- Don't overmix when adding eggs and flour.
- Stop mixing as soon as ingredients are combined.
Troubleshooting Your Lava Cakes: Tips for Success
Troubleshooting Your Lava Cakes: Tips for Success
Troubleshooting Your Lava Cakes: Tips for Success
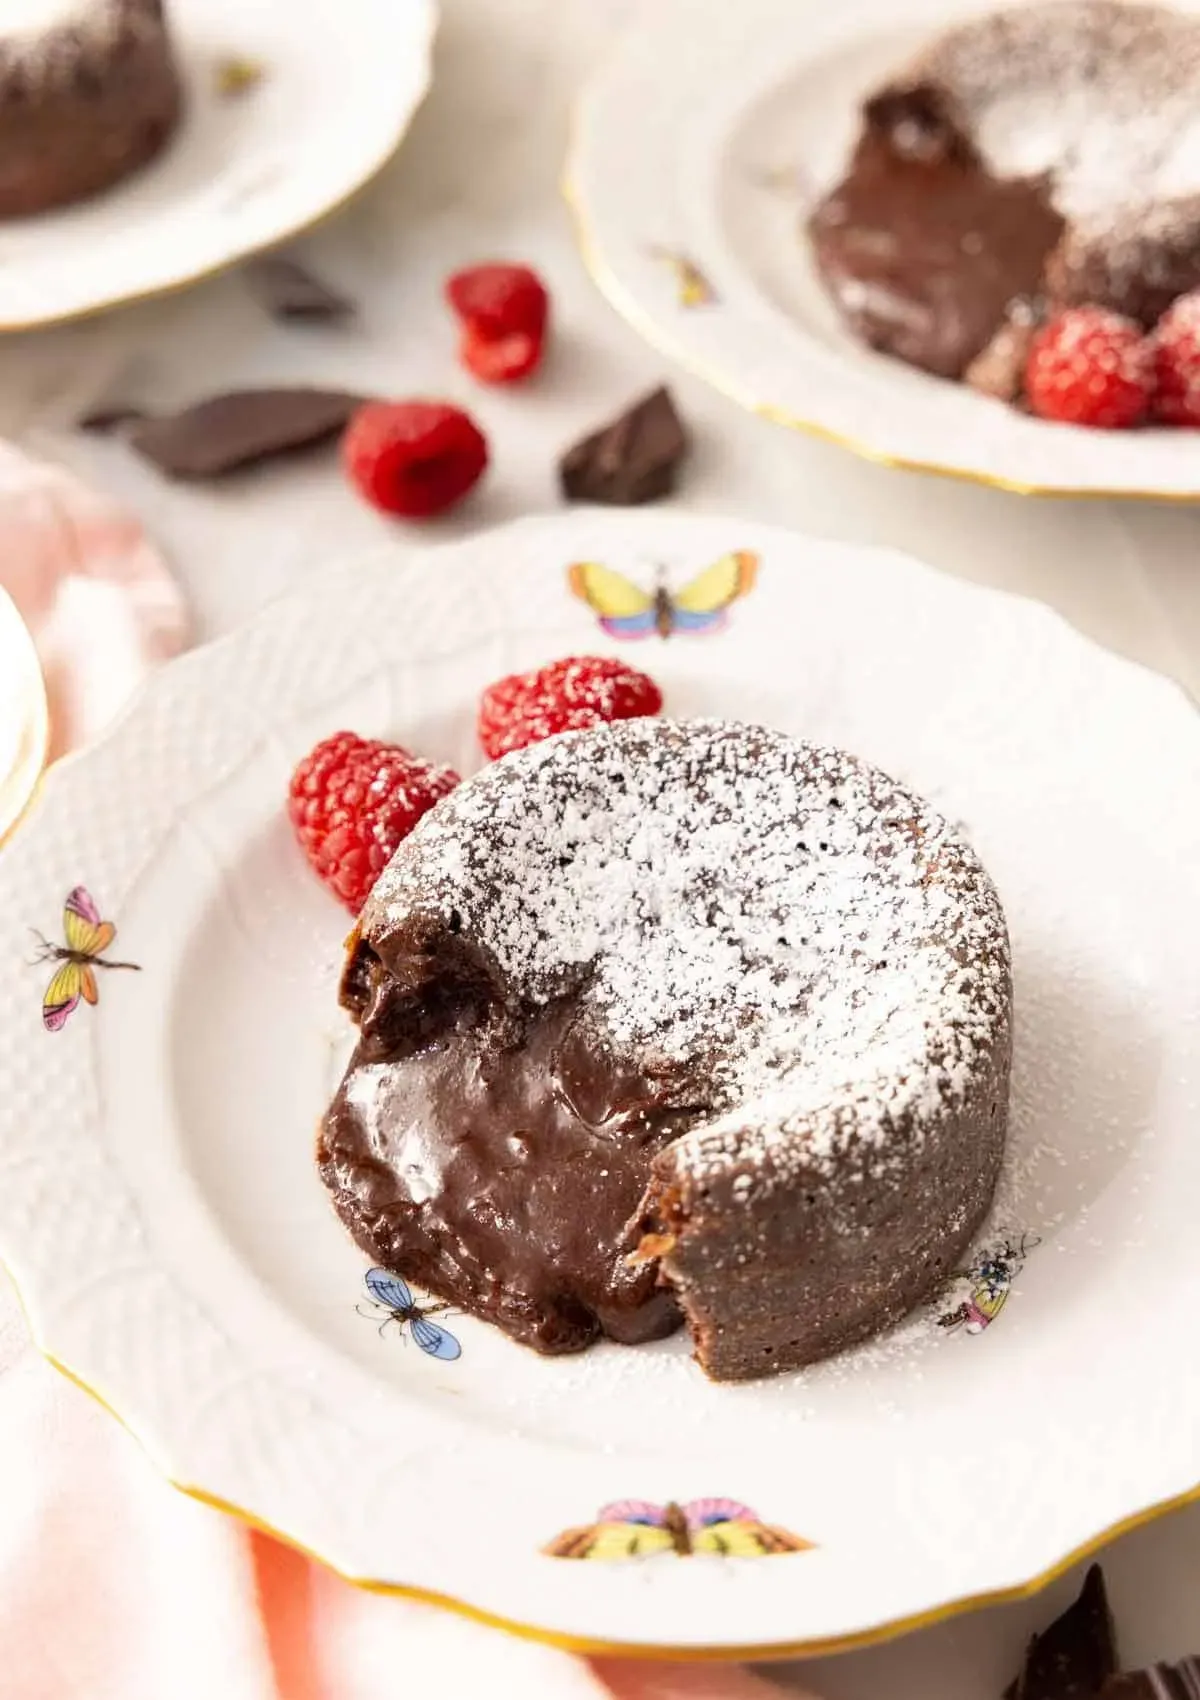
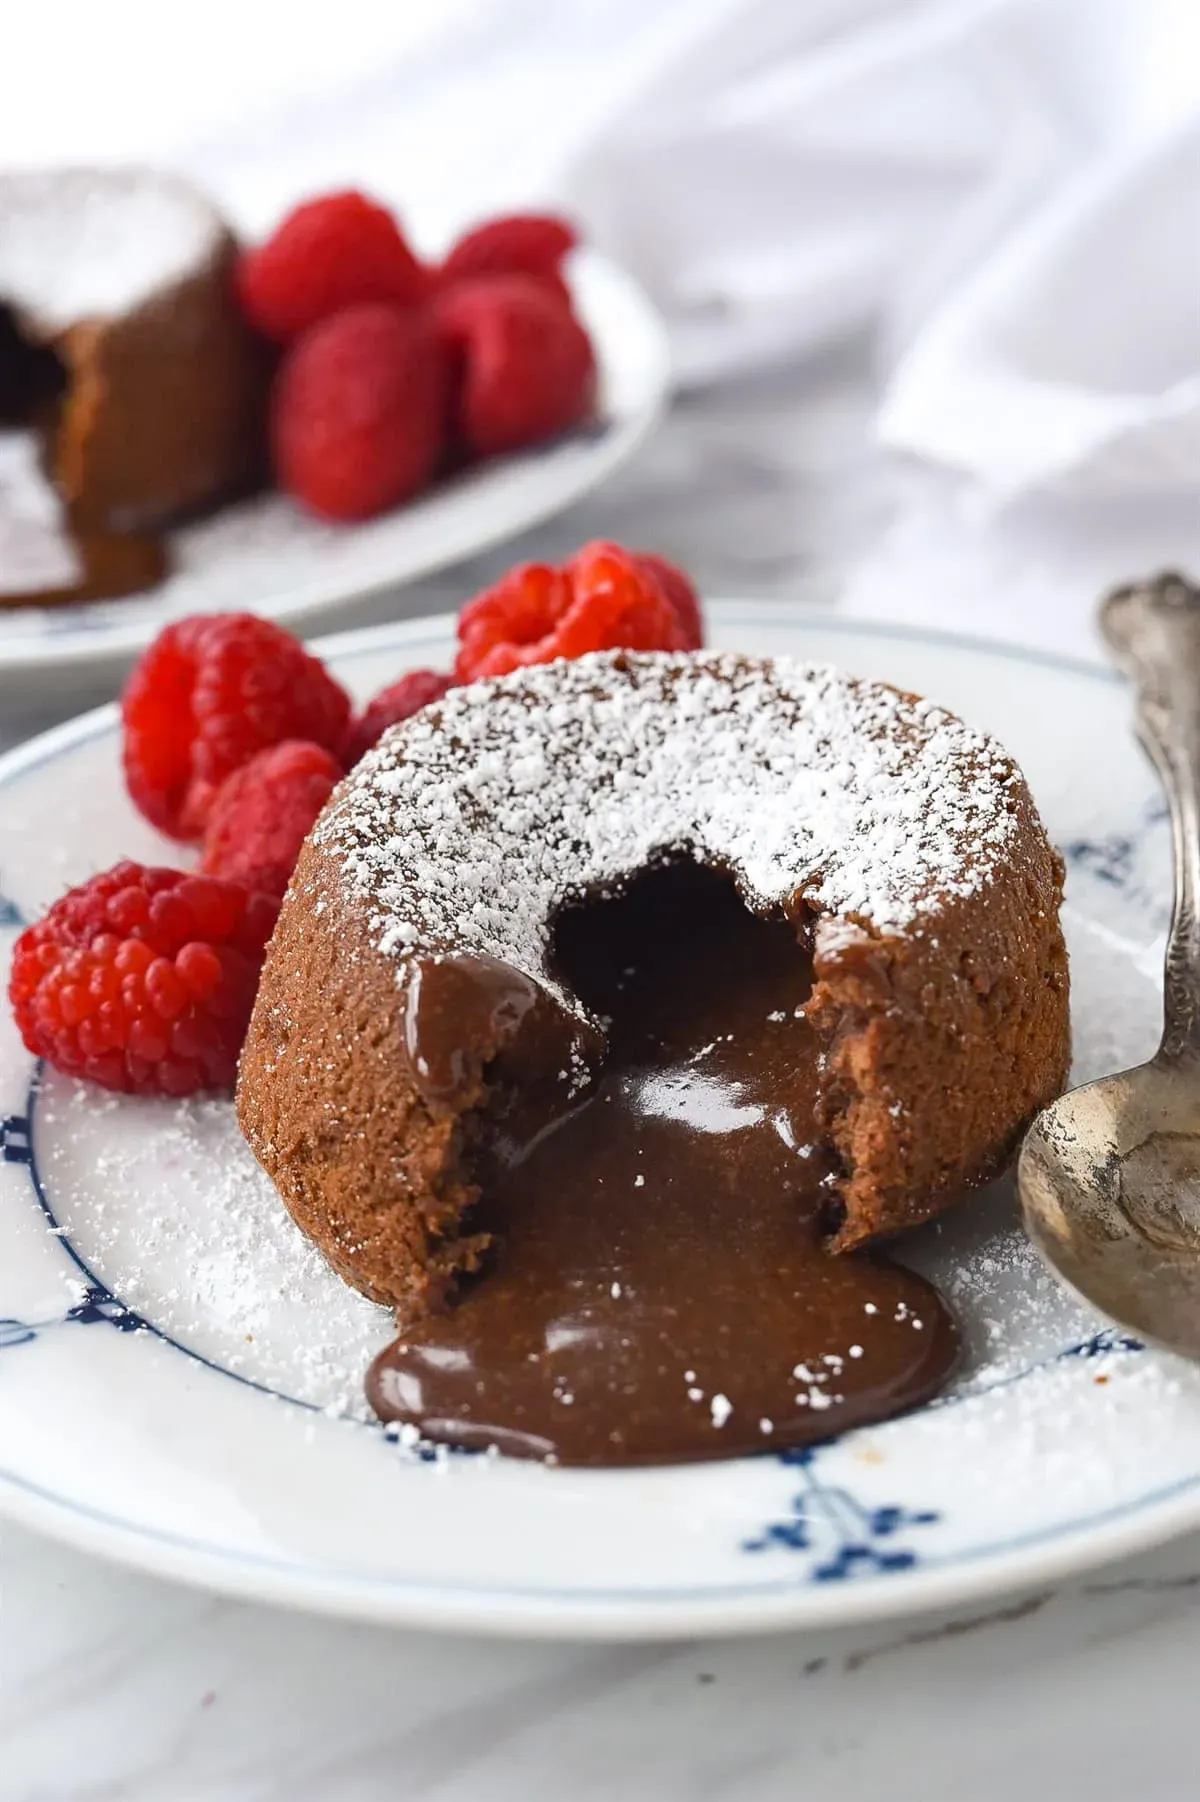
Let's talk about when your perfect milk chocolate lava cake recipe attempt goes south. The most crushing disappointment? Cutting into it and finding... nothing. Just solid cake. This culinary tragedy usually stems from one primary suspect: you overbaked it. Even a minute too long in the oven can turn that beautiful molten core into just another piece of cooked cake. The key is to pull them out when the edges are set and look firm, but the center still looks undeniably soft and jiggly. It should look borderline undercooked in the middle; that's the sweet spot for maximum lava flow.
Alternatively, if your cakes completely collapsed into sad puddles, you likely pulled them too soon. They didn't have enough time for the edges to build structure. Ovens are notoriously temperamental, so the exact bake time in any recipe is really just a suggestion. Your best bet is to watch for that specific visual cue – set edges, wobbly center. Write down the time it takes in *your* oven once you nail it. Also, ensure your ramekins are properly buttered and floured (or cocoa-ed) to prevent sticking, which can also mess with that dramatic release.
Common Lava Cake Crimes & How to Fix Them:
- No Lava: Overbaked. Reduce baking time by 1-2 minutes next attempt. Look for wobbly centers.
- Cakes Collapsed: Underbaked. Increase baking time by 1-2 minutes. Edges weren't set enough.
- Sticking to Ramekin: Improperly greased/floured. Be generous with butter and flour (or cocoa for chocolate cakes). Chill the prepped ramekins before filling.
- Uneven Baking: Hot spots in oven. Rotate ramekins halfway through baking. Consider an oven thermometer.
Beyond the Bake: Serving Your Milk Chocolate Lava Cake
Beyond the Bake: Serving Your Milk Chocolate Lava Cake
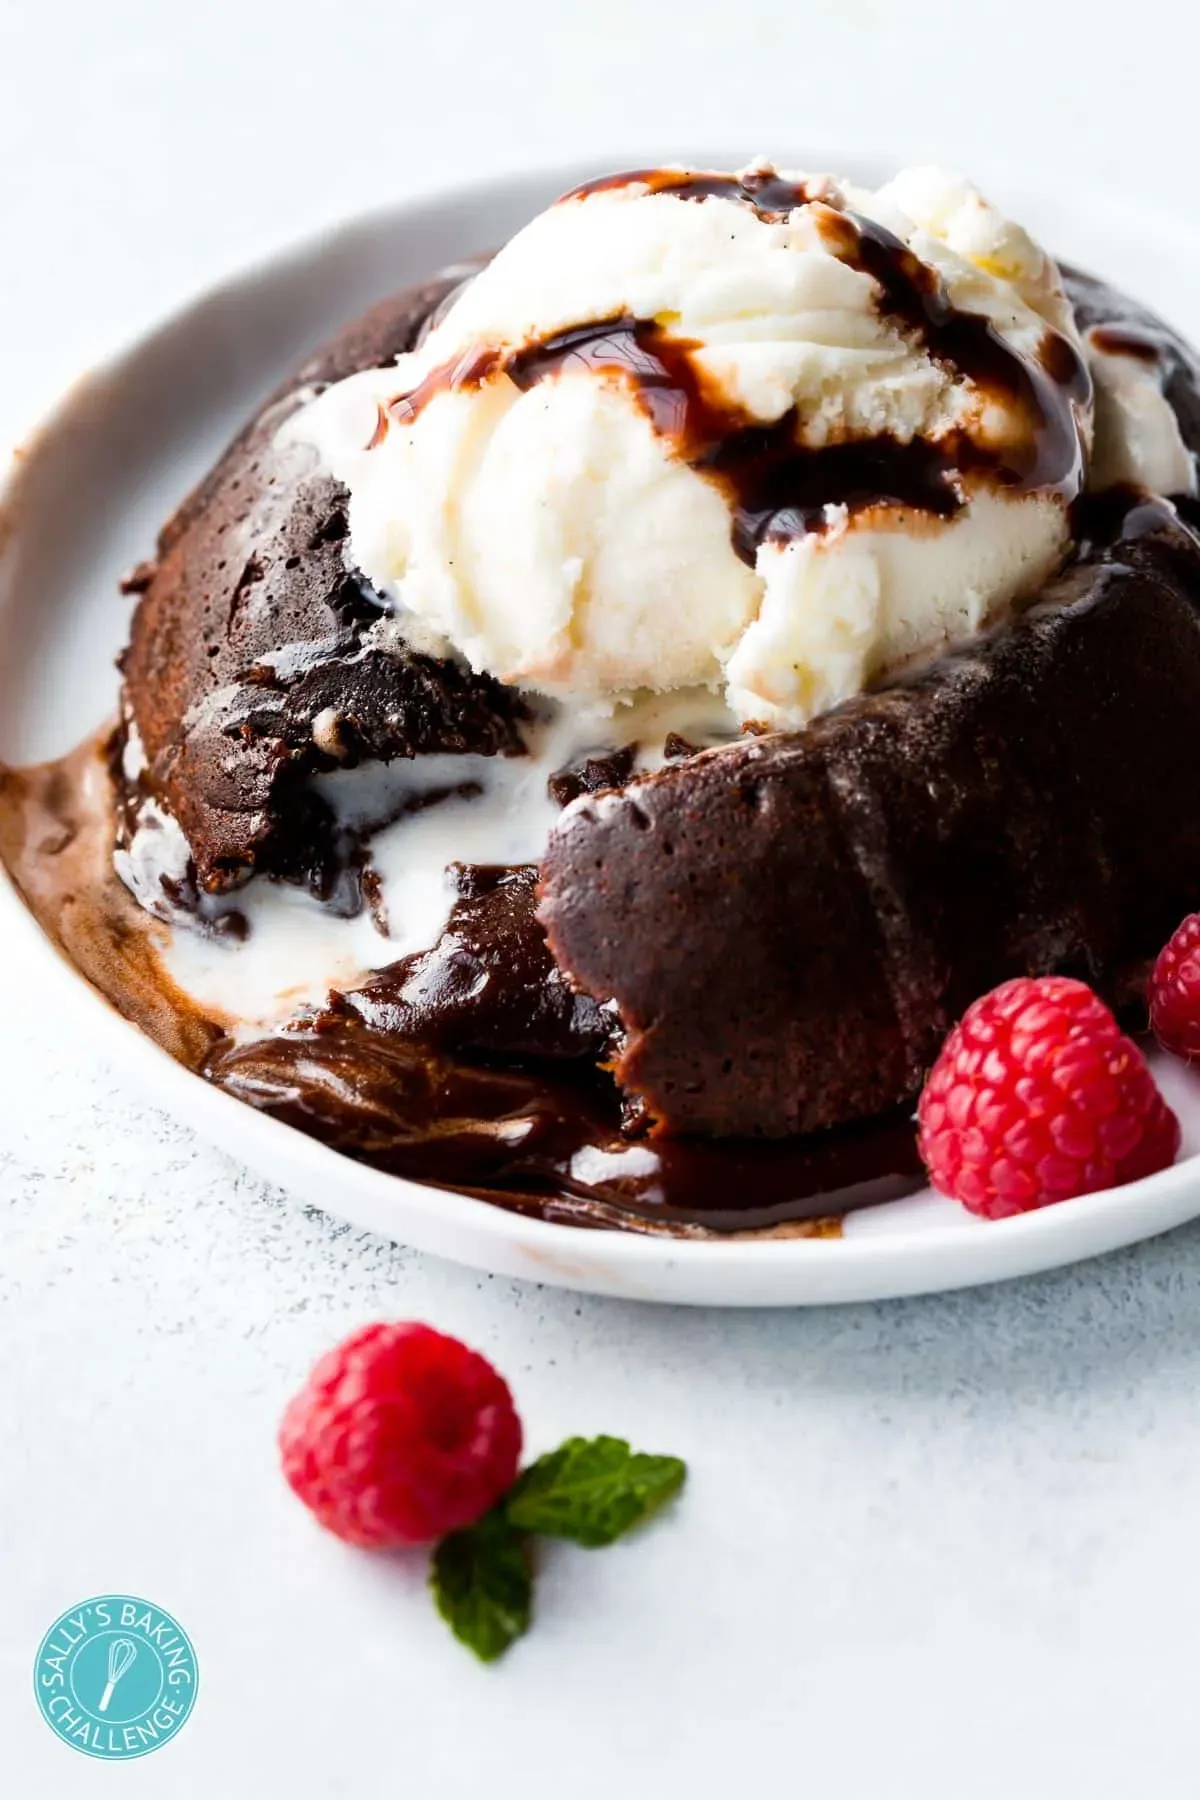
The Grand Reveal: Unmolding Your Masterpiece
You've nailed the bake. The edges are set, the center is wobbly, and the aroma of warm milk chocolate fills your kitchen. Now comes the moment of truth: getting that beautiful cake out of the ramekin and onto the plate without disaster. This step is almost as critical as the baking itself for showcasing your perfect milk chocolate lava cake recipe.
Let the cakes rest in their ramekins for just 1-2 minutes after pulling them from the oven. This brief pause allows the edges to firm up slightly, making them less likely to crumble during the transfer. Place a serving plate upside down over the ramekin. With oven mitts protecting your hands, confidently flip the ramekin and plate together. Give the ramekin a little shake or tap the bottom gently. The cake should slide out cleanly onto the plate, ready for its close-up. If it resists, run a thin, flexible spatula carefully around the edge first, but usually, proper greasing prevents this.
Classic Pairings for Peak Indulgence
A perfect milk chocolate lava cake is fantastic on its own, but adding a companion takes it from great to unforgettable. Think about contrasting textures and temperatures. A scoop of good quality vanilla bean ice cream is the undisputed champion of lava cake pairings. The cold, creamy ice cream slowly melts into the warm, molten chocolate, creating a delightful temperature play.
But don't stop there. A dollop of fresh whipped cream is a lighter, airy alternative that still provides a creamy contrast. Fresh berries, like raspberries or strawberries, add a touch of tartness that cuts through the richness of the milk chocolate beautifully. A simple dusting of powdered sugar or a drizzle of raspberry sauce can also elevate the presentation and flavor without overpowering the main event.
Serving Suggestions for Your Milk Chocolate Lava Cake:
- Vanilla bean ice cream (classic!)
- Freshly whipped cream
- Tart berries (raspberries, strawberries)
- Dusting of powdered sugar
- Raspberry or cherry sauce
- A sprinkle of sea salt flakes (for contrast)
Adding Your Signature Flourish
While the core milk chocolate lava cake recipe is key, personalizing your presentation makes it truly yours. Maybe you have tiny mint leaves from your garden to garnish. Perhaps you have some edible flowers you want to scatter. Or maybe you're feeling extra decadent and want to shave some extra chocolate over the top just before serving.
Consider the plate itself. A simple white plate lets the rich brown of the cake and the flowing lava take center stage. For a more dramatic look, use a dark plate. Think about the angle you unmold it; sometimes slightly off-center looks more artistic. The goal here is to make the dessert look as good as it tastes, enticing that first spoonful and ensuring your guests remember this impressive finale long after the last bite.
Your Perfect Lava Cake Awaits
So there you have it. No more guessing games or hoping for the best when you tackle a milk chocolate lava cake recipe. You've got the steps, the tips for when things go sideways, and the knowledge to plate it like you know what you're doing. Go forth and create that moment of pure, molten bliss. Just try not to eat them all standing over the counter – though, honestly, we wouldn't blame you.