Table of Contents
Ever dream of creating a show-stopping dessert? I'm talking about a magnificent layer chocolate cake from scratch, the kind that makes everyone's eyes widen. Forget those boxed mixes; we're going on a baking adventure! This isn't just about following a recipe; it's about understanding how each ingredient plays its part in creating a moist, chocolatey masterpiece. We'll start by uncovering the secrets to choosing the right components, from cocoa powder to buttermilk, and why they matter. Then, I'll walk you through the baking process, step-by-step, making sure that even a beginner can achieve perfect cake layers. Finally, we'll get to the fun part: creating a luscious chocolate buttercream and assembling your impressive layer chocolate cake. Get ready to impress your friends and family with your brand-new baking skills. This journey into making a layer chocolate cake from scratch will be a piece of cake, I promise!
The Magic of a Layer Chocolate Cake From Scratch
The Magic of a Layer Chocolate Cake From Scratch
Okay, so you wanna know what's so special about a layer chocolate cake from scratch? It's not just a cake; it's a project, a labor of love, and a total showstopper. It's the kind of dessert that makes people say "Wow!" the second it hits the table. Forget those flat, boring sheet cakes. We're talking about multiple layers of rich, moist chocolate goodness, stacked high with creamy frosting. It’s a baking adventure that's as satisfying to create as it is to eat. There's something magical about taking simple ingredients and turning them into a towering masterpiece. It's like building a delicious, edible skyscraper, one layer at a time. Plus, the aroma that fills your kitchen while it's baking? Pure bliss. Trust me, once you experience the joy of making a layer chocolate cake from scratch, you’ll never look at a store-bought cake the same way again.
Key Ingredients for a Perfect Layer Chocolate Cake
Key Ingredients for a Perfect Layer Chocolate Cake
The Chocolate Base: Cocoa and More
Let's talk chocolate! You can't have a great chocolate cake without, well, great chocolate. I'm not talking about any old cocoa powder either. We need the good stuff: natural cocoa powder. This stuff gives you a deep, rich chocolate flavor without being too sweet. It's the foundation of that intense chocolate taste we all crave. And for an extra kick, some recipes add melted dark chocolate. This isn’t just for show; it adds moisture and a serious depth of flavor that will have everyone begging for seconds. Think of it as adding a secret weapon to your cake's arsenal. It's like the difference between a regular guitar and a guitar with an amplifier.
But it’s not all about the cocoa, you know. There's a whole supporting cast that’s just as important. The type of fat you use is key. Butter or oil will do the trick, but different fats give different results. Butter adds flavor; oil makes it extra moist. It's a battle of taste versus texture. And don't forget about the sugar. Granulated sugar is the go-to, but some people like to add a bit of brown sugar for a touch of molasses flavor. It's all about balancing the sweet with the bitter, like a perfectly orchestrated dance of flavors. When you think about it, each ingredient has its own role to play in the success of your cake.
The Wet Ingredients: Moisture is Key
Now, let's dive into the wet ingredients; these are essential for a moist cake. Forget dry, crumbly cake – we’re aiming for a velvety texture that melts in your mouth. Buttermilk is my secret weapon; it adds a slight tang and helps to tenderize the gluten in the flour, creating that perfect crumb. If you don't have buttermilk, you can use a mix of milk and lemon juice or vinegar, but honestly, buttermilk is where it's at. It's like the secret handshake of baking. And then there are the eggs, they aren't just for binding, they add richness and structure. Use them at room temperature, this helps them mix better into the batter and create a smoother texture. It’s a small detail that makes a big difference.
Finally, let’s talk about a surprising addition: hot coffee. Yes, coffee! It doesn't make your cake taste like coffee; instead, it enhances the chocolate flavor, making it richer and more intense. It's like adding a dash of salt to bring out the flavors in a dish. It's a bit of baking magic, and it's what separates a good chocolate cake from a great one. The hot liquid also helps to bloom the cocoa powder, intensifying the chocolate flavor. Don't skip this step; it’s a game changer. In the world of baking, the wet ingredients are like the supporting actors that make the stars shine.
Ingredient | Why It's Important |
|---|---|
Natural Cocoa Powder | Provides rich, deep chocolate flavor |
Buttermilk | Adds tanginess and tenderizes the cake |
Hot Coffee | Enhances the chocolate flavor |
Room Temperature Eggs | Mix better and create a smoother texture |
Layer Chocolate Cake From Scratch: StepbyStep
Layer Chocolate Cake From Scratch: StepbyStep
Getting Started: Mixing the Batter
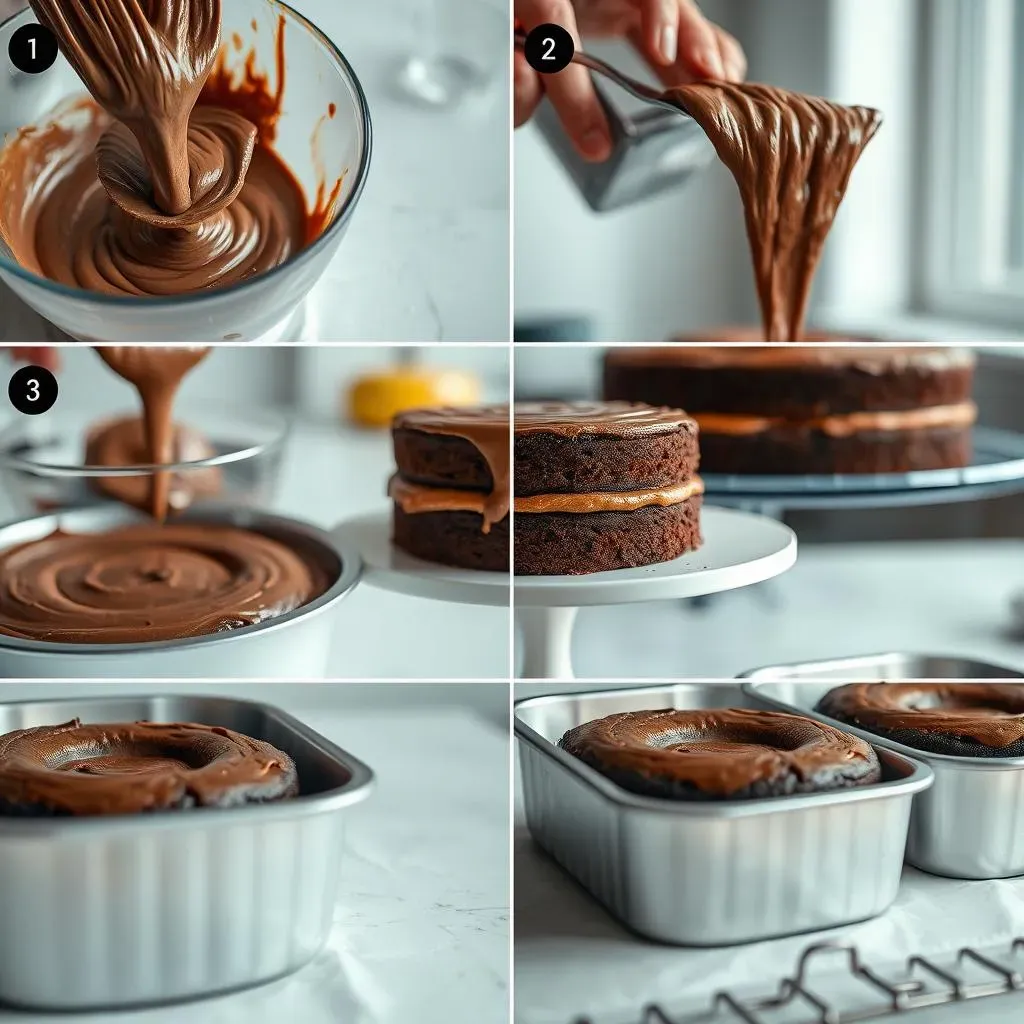
Alright, let's get our hands dirty! First things first, you'll need to gather all your ingredients and measure them out carefully. This isn't a time for eyeballing; baking is a science, remember? Start by combining your dry ingredients in a bowl: flour, cocoa powder, baking soda, baking powder, and salt. Whisk them together to make sure everything is evenly distributed. This step is crucial because you don't want pockets of baking soda in your cake. It's like making sure all the band members are in tune before the concert starts. In a separate bowl, mix your wet ingredients: softened butter or oil, sugar, eggs, buttermilk, and vanilla extract. Give it a good mix until everything is well combined. Then, slowly pour the wet ingredients into the dry ingredients, mixing on low speed. Don't overmix; just combine until the batter is smooth. Overmixing can develop the gluten and make the cake tough. Think of it like a delicate dance; you want to be precise but gentle.
Finally, and this is important, add your hot coffee to the batter and mix until just combined. The batter will be thin, but don't worry; that's how it's supposed to be. It’s like a magic potion that transforms into a fluffy cake. Now, divide the batter evenly into your prepared cake pans. I like to use parchment paper at the bottom of the pans for easy removal. It’s like giving your cake a little non-stick safety net. Make sure to spread the batter evenly in the pans. If you have a kitchen scale, you can weigh the batter into each pan to ensure they're all the same size. This helps them bake evenly. Now you're ready to slide those pans into a preheated oven and let the real magic happen.
Baking and Cooling: Patience is Key
Now, while your cakes are baking, resist the urge to open the oven door. Every time you do, you let out heat, which can cause your cake layers to sink in the middle. It's like peeking at a surprise before it's ready. Let them bake for the recommended time, or until a toothpick inserted into the center comes out clean. The baking time can vary depending on your oven, so keep an eye on them. When they're done, take them out and let them cool in the pans for about 10 minutes before inverting them onto a wire rack to cool completely. This prevents them from sticking to the pan and also lets the steam escape. It’s like giving your cakes a chance to breathe and relax before the next step.
Make sure the cake layers are completely cool before you attempt to frost them. Frosting a warm cake is a recipe for disaster, it will melt the frosting and make a sticky mess. It’s like trying to ice skate on a puddle. So, be patient, let them cool completely. While the cakes are cooling, you can start preparing the frosting. It’s a good time to clean up the kitchen and maybe put on some music. Baking is a marathon, not a sprint, so take your time and enjoy the process. Remember, patience is a virtue, especially when it comes to baking. And trust me, the final result will be well worth the wait.
Step | Description |
|---|---|
Mix Dry Ingredients | Whisk flour, cocoa, baking soda, baking powder, and salt |
Mix Wet Ingredients | Combine butter/oil, sugar, eggs, buttermilk, and vanilla |
Combine Wet and Dry | Slowly mix wet into dry until just combined |
Add Hot Coffee | Mix in hot coffee until just combined |
Bake | Pour batter into pans and bake until done |
Cool | Let cool completely before frosting |
Frosting and Assembling Your Layer Chocolate Cake
Frosting and Assembling Your Layer Chocolate Cake
Making the Chocolate Buttercream: Creamy Perfection
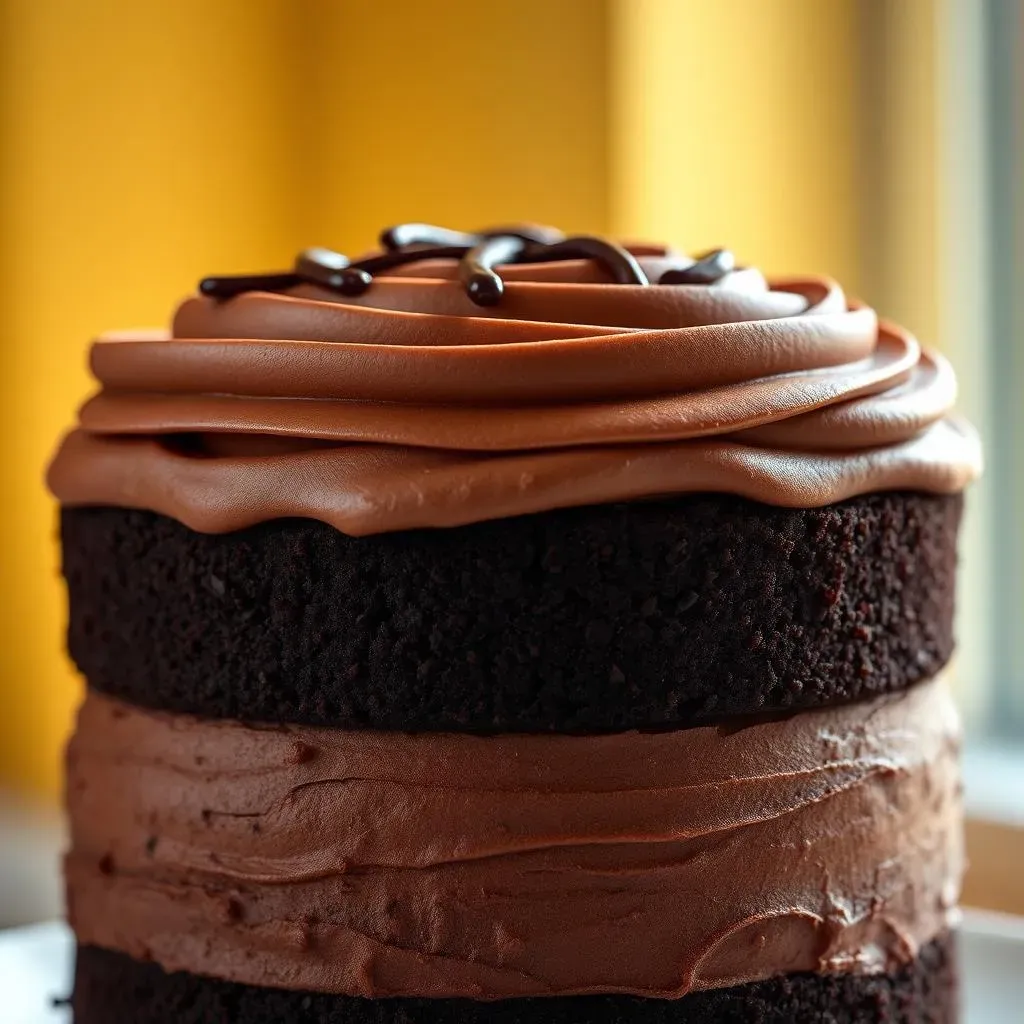
Okay, now for the best part: the frosting! We're not talking about some wimpy, store-bought stuff. We're making a rich, decadent chocolate buttercream that's going to take your cake to the next level. Start with softened unsalted butter; it needs to be at room temperature so it’s nice and fluffy. Then add in confectioners' sugar, a little at a time, mixing on low speed. You don't want a sugar cloud explosion in your kitchen. Next, add unsweetened cocoa powder for that extra chocolate punch. Mix it well, then add some heavy cream, a tablespoon at a time, until your frosting is smooth and creamy. Don't add too much cream at once; you want the consistency to be perfect, not too runny, not too thick. It’s like Goldilocks and the three bears, you want it just right. And a touch of vanilla extract? That’s the secret ingredient that makes it truly irresistible.
Taste your frosting, and don’t be shy about adding more cocoa powder for a deeper chocolate flavor or more confectioners' sugar if it's too runny. The best part about making your own frosting is that you can customize it to your liking. It’s like being a mad scientist in the kitchen, experimenting until you find the perfect formula. If you're feeling fancy, you can add a pinch of salt to enhance the flavors. Once you've got your frosting just the way you like it, it's time to get ready to assemble your masterpiece. The frosting is the glue that holds the cake together, both literally and figuratively. It's the finishing touch that brings everything together and transforms your cake into a true work of art.
Ingredient | Purpose |
|---|---|
Softened Unsalted Butter | Provides richness and structure |
Confectioners' Sugar | Adds sweetness and thickens frosting |
Unsweetened Cocoa Powder | Enhances chocolate flavor |
Heavy Cream | Creates smooth and creamy consistency |
Vanilla Extract | Adds flavor |
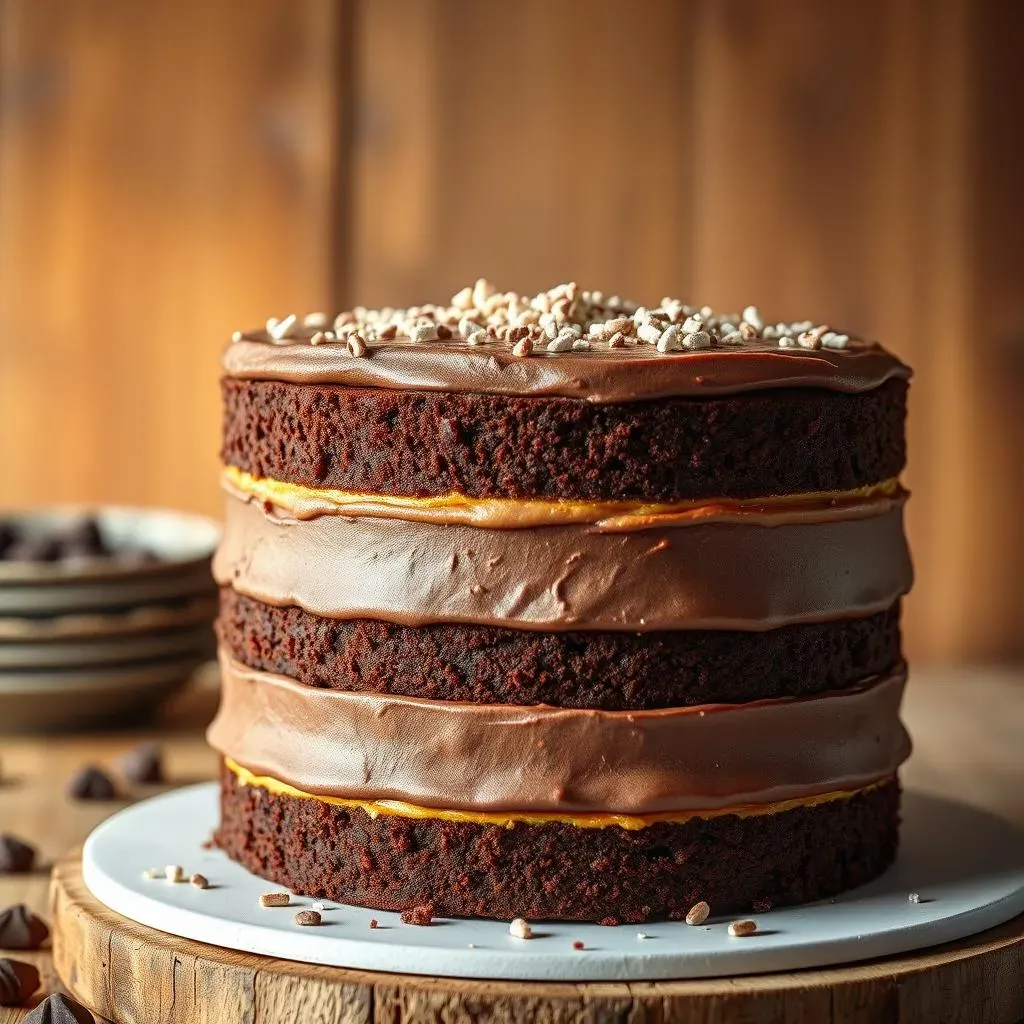
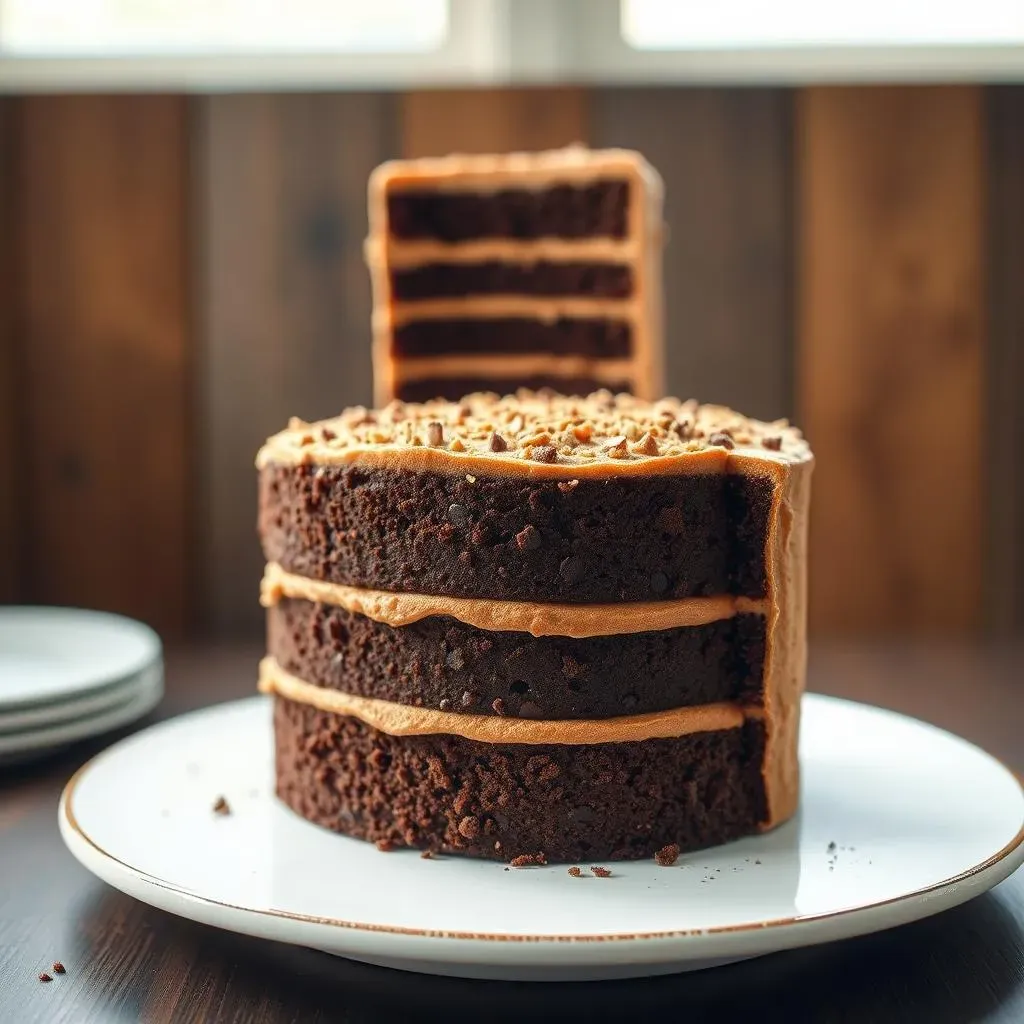
Assembling the Cake: Layer by Layer
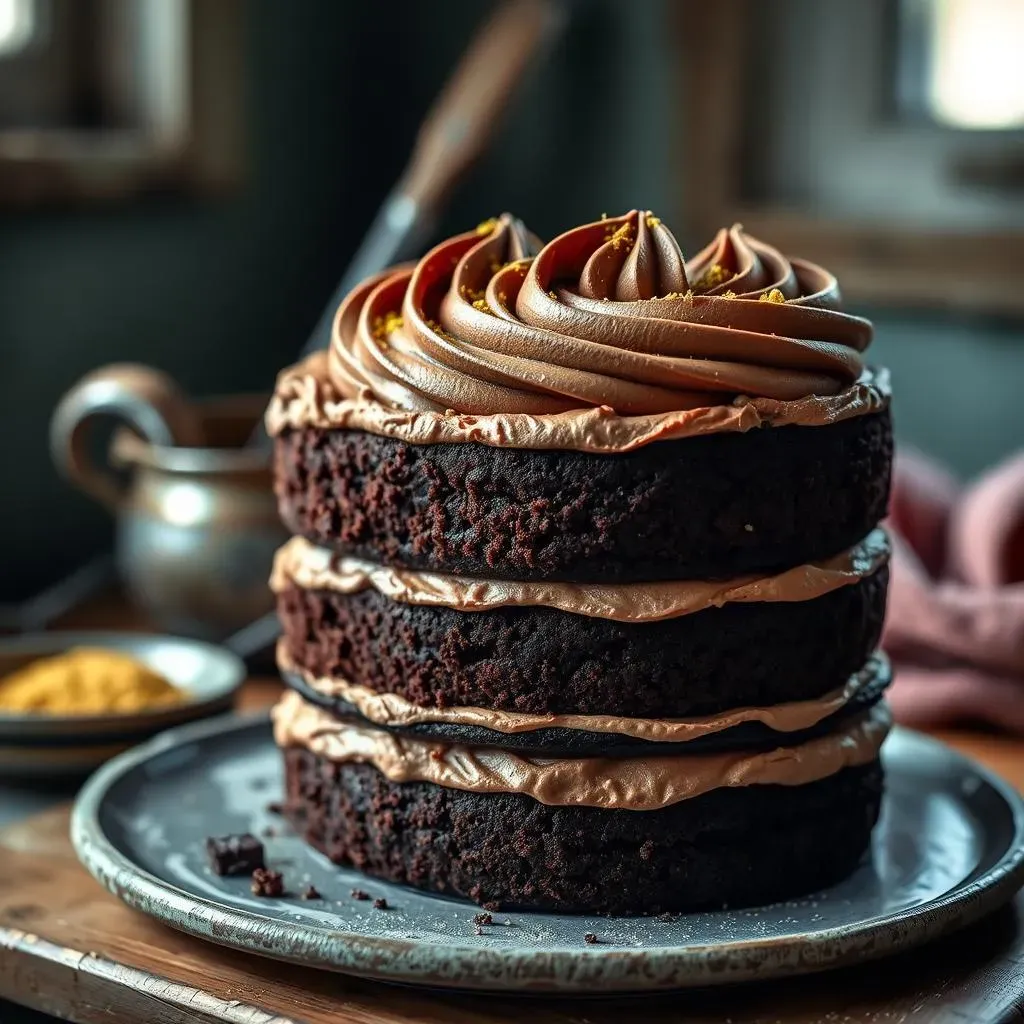
Now comes the moment we've all been waiting for: assembling the cake. Make sure your cake layers are completely cool before you start. Place one layer on your cake stand or serving plate and spread a generous amount of buttercream frosting evenly over the top. Don’t be stingy with the frosting; it's what makes the cake so delicious. Carefully place the second layer on top and repeat the frosting process. If you have a third layer, add it on top and frost it as well. Use a long spatula or offset knife to spread the frosting smoothly. It's like painting with frosting, but on a cake. Don't worry if it's not perfect; you can always smooth it out later.
Once all the layers are stacked, it’s time to do a crumb coat. This is a thin layer of frosting that seals in all the crumbs. It's like putting a primer on a wall before you paint. It doesn't have to look pretty; the main goal is to catch the crumbs so they don't end up in your final frosting layer. Put the cake in the fridge for about 15-20 minutes to let the crumb coat set. Then, take it out and apply a final layer of frosting. This time, you can make it look perfect. Use your spatula to smooth out the frosting and create a nice, even finish. You can get creative with swirls or patterns, or keep it simple and smooth. It’s your cake, so decorate it any way you like. To finish it off, you can add some chocolate chips, sprinkles, or a chocolate ganache drip. This is where your creativity can really shine. The final result should be a magnificent layer chocolate cake that's as beautiful as it is delicious.