Table of Contents
Ever stared at a restaurant dessert menu, eyeing that molten chocolate lava cake, and thought, "Yeah, no way I'm making that at home?" It looks fancy, complicated, like something only a pro baker could pull off. Guess what? It's not. You don't need a culinary degree or hours of free time to nail this classic. We're talking about a lava chocolate cake recipe easy enough for a weeknight craving, ready faster than takeout can arrive.
Gather Your Ingredients for an Easy Lava Chocolate Cake
Gather Your Ingredients for an Easy Lava Chocolate Cake
Alright, so you're ready to dive into this lava chocolate cake recipe easy style? Good. First things first, let's talk about what you actually need. You don't need a pantry stocked like a French patisserie. We're keeping it simple. To gather your ingredients for an easy lava chocolate cake, think foundational baking stuff: unsalted butter, good dark chocolate (this is key, seriously, don't skimp here unless you want disappointment), sugar, eggs, a little flour, maybe some salt and vanilla extract. That's pretty much it. Make sure your eggs are at room temperature; it helps everything mix better and gives you a smoother batter. And that chocolate? Pick something you'd actually eat plain, at least 60% cacao. It makes a difference when it's the star of the show.
StepbyStep: Making Your Lava Chocolate Cake Recipe Easy
StepbyStep: Making Your Lava Chocolate Cake Recipe Easy
Melting Chocolate and Getting Started
let's actually make this thing. The first move in this lava chocolate cake recipe easy journey is melting your butter and chocolate. Grab a heatproof bowl and set it over a pot of simmering water – a double boiler situation, but way less fussy than it sounds. Just make sure the bottom of the bowl doesn't touch the water. Cube up your unsalted butter and break your good dark chocolate into pieces. Toss them both in the bowl. Stir occasionally as they melt into a glossy, dark pool. This isn't the time to wander off; keep an eye on it. Once it's smooth, pull the bowl off the heat. Stir in your sugar and a splash of vanilla extract right into that warm chocolate mixture. Give it a good mix until the sugar starts to dissolve a bit.
Bringing the Batter Together
Now for the rest of the crew. Crack your room temperature eggs into the chocolate mixture one at a time, whisking after each addition until it's fully combined. Don't just dump them all in; that gets weird. The mixture will thicken slightly and get this lovely, rich color. Finally, gently whisk in your flour (and maybe a pinch of salt if your butter was unsalted, which it should be). Stop mixing as soon as you see no dry streaks of flour. Overmixing is the enemy of tender cake. You should have a smooth, relatively thick batter. That's it. Seriously. That's the base for your easy lava chocolate cake recipe.
- Use a double boiler or microwave carefully to melt chocolate and butter.
- Stir in sugar and vanilla while the mixture is still warm.
- Add eggs one at a time, whisking well after each.
- Gently fold in flour just until combined.
- Do not overmix the batter.
Tips and Tricks for Perfect Molten Centers
Tips and Tricks for Perfect Molten Centers
The Crucial Baking Time for Ooze
Alright, you've got the batter for your lava chocolate cake recipe easy. Now comes the moment of truth: baking. This isn't like baking muffins where you can just set a timer and walk away. The difference between a perfect molten center and a sad, fully-baked cake is often mere minutes. Your oven temperature needs to be accurate. Use an oven thermometer if you have one; those built-in dials lie more often than a teenager about homework. A hot oven, usually around 400-425°F (200-220°C), is your friend here. It sets the outside of the cake quickly while leaving the inside gloriously liquid.
Keep a close eye on them through the oven door. The edges should look set and slightly pulled away from the sides of the ramekin, but the very center should still look soft and perhaps a tiny bit wobbly if you gently nudge the pan (don't actually nudge it until they're out, obviously). It's a balancing act. Start checking around the minimum time suggested in the recipe, then check every minute or two. Pull them out when the edges are firm but the center yields slightly. This is the single most critical step for that signature lava flow.
Chocolate Quality and Batter Secrets
Let's revisit the chocolate for a second. You followed the initial steps of the lava chocolate cake recipe easy, melting butter and chocolate. The quality of that chocolate dictates the richness and the flow. Cheap chocolate often contains stabilizers that prevent it from melting into that luxurious liquid state. Opt for a good quality dark chocolate bar (not chips, which also have stabilizers) with at least 60% cacao. Chop it finely so it melts evenly with the butter.
Your batter consistency also plays a role. It should be smooth and pourable, but not watery. If you accidentally added too much flour, don't try to fix it by adding more liquid; that rarely works out well. Just accept the mistake and make a note for next time. Ensure you didn't overmix after adding the flour; that develops gluten, leading to a tougher cake exterior, which isn't ideal for showcasing a delicate molten center.
- Use an accurate oven thermometer to verify temperature.
- Bake at a high temperature (400-425°F) for a short time.
- Look for set edges and a slightly soft center.
- Use high-quality dark chocolate (bar, 60%+ cacao) for the best flow.
- Avoid overmixing the batter once flour is added.
Pan Prep and the Flip Trick
Prepping your ramekins or muffin pan is non-negotiable if you want your beautiful easy chocolate lava cakes to actually *come out*. Don't just grease them lightly. Be generous with the butter, getting into every nook and cranny, especially if using fluted ramekins. Then, dust the insides thoroughly with flour or, even better, cocoa powder (cocoa powder blends seamlessly with the cake color). Tap out any excess. This creates a barrier that prevents the cake from sticking, ensuring a clean release.
Once the cakes come out of the oven, resist the urge to immediately flip them onto a plate. Let them rest in their ramekins for about 1-2 minutes. This brief pause allows the edges to firm up just a touch more, making them less likely to break when you invert them. Place your serving plate upside down over the ramekin, hold them together firmly, and confidently flip. A gentle tap on the bottom of the ramekin usually helps. Lift the ramekin slowly, and with any luck, you'll witness that beautiful cascade of molten chocolate.
Serving and Storing Your Easy Chocolate Lava Cakes
Serving and Storing Your Easy Chocolate Lava Cakes
The Immediate Payoff: Serving Warm and Gooey
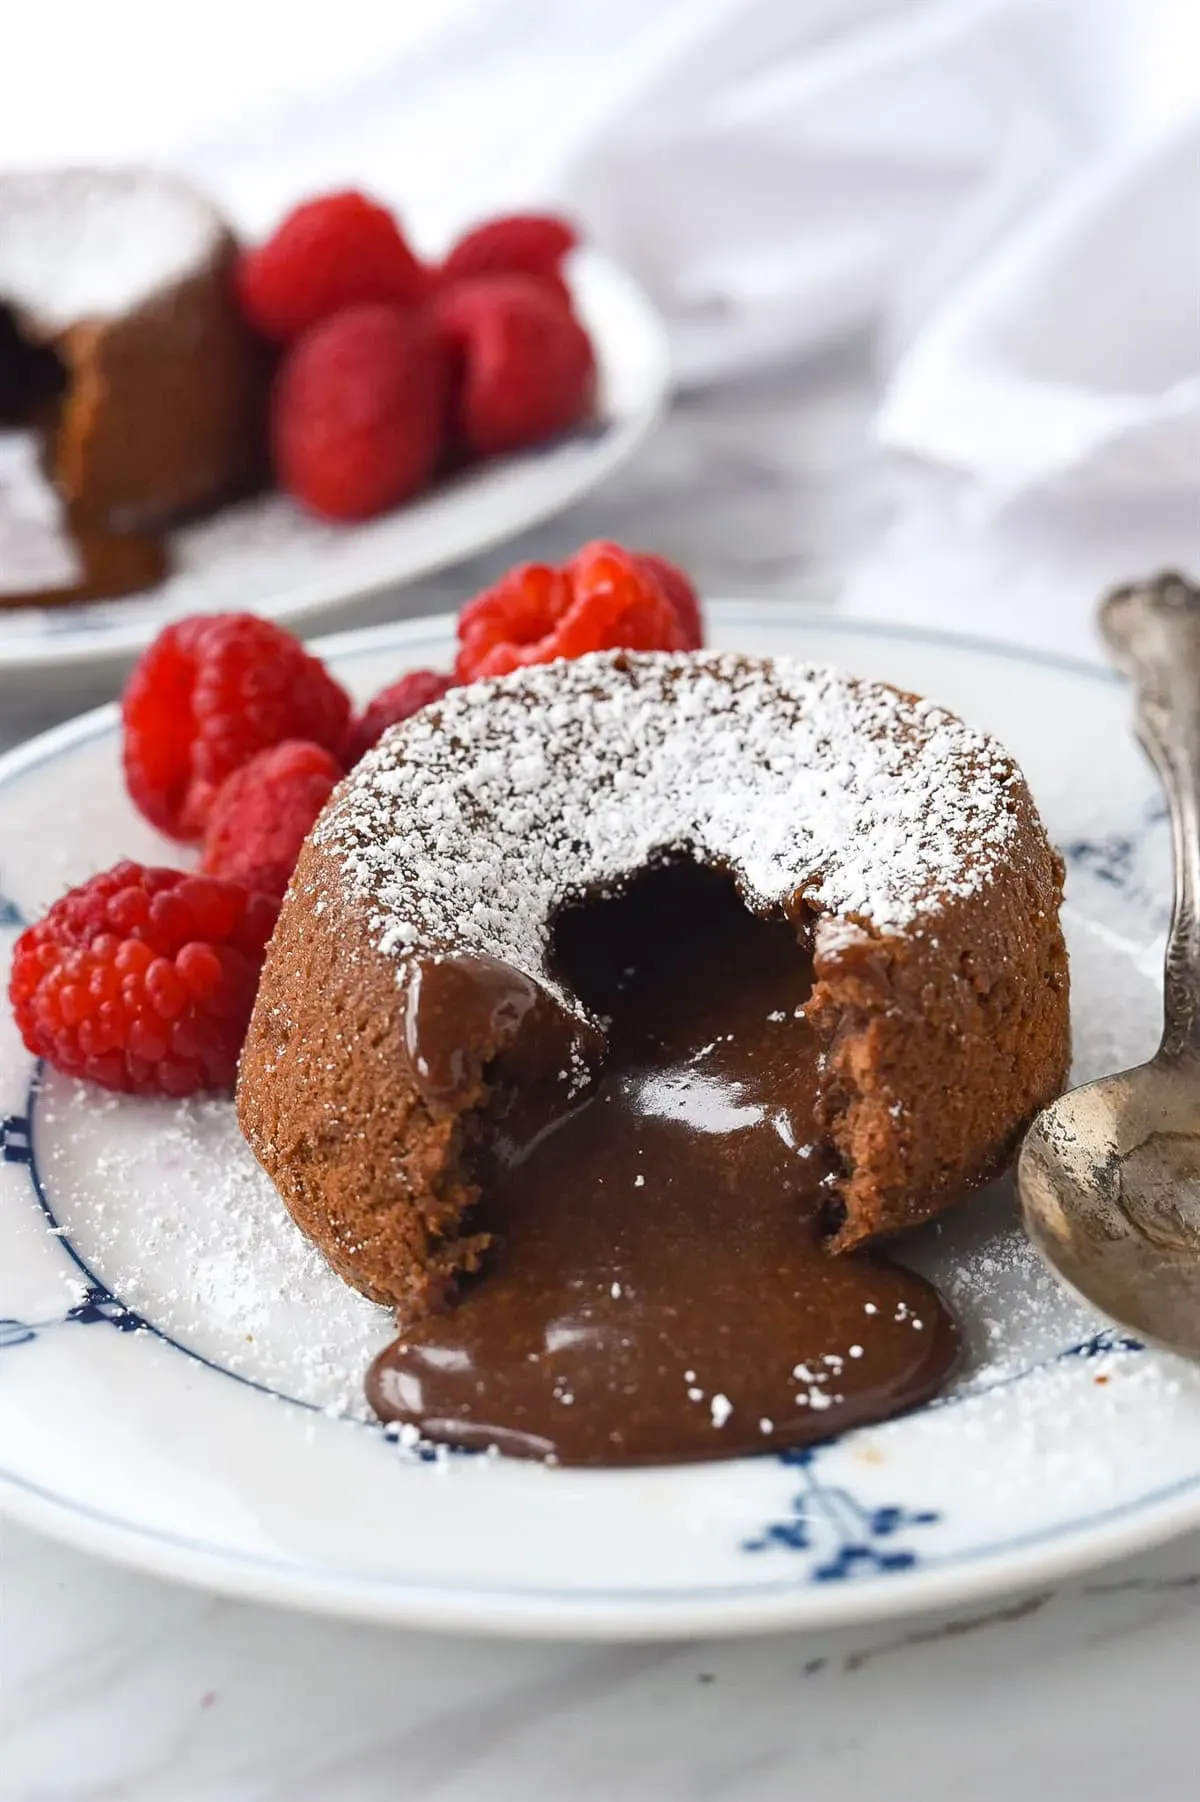
you've successfully navigated the tricky baking time and flipped your perfect little cakes. Now what? You eat them. Immediately. This isn't a dessert you make ahead and let sit around for hours if you want that signature lava flow. The magic happens when they're still warm from the oven. The residual heat keeps that center molten. Slide one onto a plate, maybe sprinkle with a little powdered sugar if you're feeling fancy, or just admire its humble beauty.
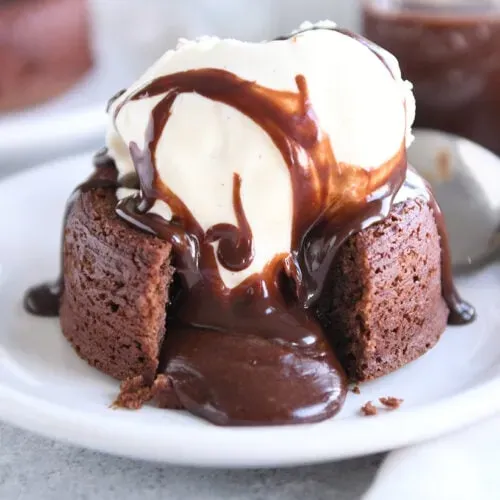
Don't overthink the garnish. A simple scoop of good vanilla ice cream melting into the warm chocolate is classic for a reason. Whipped cream works too. Fresh berries add a nice tart contrast to the richness. But honestly, these are so good on their own, you might not even need anything else. Just grab a spoon and dive in before the chocolate decides to solidify.
Dealing with the Unlikely Event of Leftovers
Let's be real, with an easy lava chocolate cake recipe this good, "leftovers" might be a theoretical concept. But hey, maybe you made a batch of six for yourself (no judgment here) and can't finish them all in one sitting. If you do have any cakes left, let them cool completely in their ramekins. Once cooled, cover them tightly with plastic wrap or transfer them to an airtight container. Stick them in the fridge. They'll keep for maybe 2-3 days, but that molten center will likely firm up significantly.
Eating a cold lava cake is... fine. It's basically a dense, rich chocolate cake. Still tasty, but you lose the main event. If you want the lava back, you'll need to reheat them. Pop one back into its ramekin (or a microwave-safe dish) and microwave on medium power for 30-60 seconds, maybe longer depending on your microwave. You're aiming to warm the center enough to melt again without overcooking the outside. It takes a little trial and error, and it's never quite the same as fresh, but it's better than eating a sad, solid cake.
- Serve cakes immediately after baking for the best molten center.
- Optional toppings: vanilla ice cream, whipped cream, powdered sugar, fresh berries.
- Cool completely before storing any leftovers.
- Refrigerate cooled cakes in an airtight container for up to 3 days.
- Reheat refrigerated cakes gently in the microwave to remelt the center.
Making Ahead and Reheating Baked Cakes
Want to get a head start? You can prepare the batter for your lava chocolate cake recipe easy up to 2 days in advance. Just mix it up, pour it into your prepared ramekins, cover them tightly with plastic wrap, and stash them in the fridge. When you're ready to bake, pull them out of the fridge about 20-30 minutes before baking to take the chill off slightly (this helps with even baking), and then bake as directed, potentially adding a minute or two to the baking time since they're starting colder.
What about freezing? You can actually freeze baked lava cakes, though again, the texture might change slightly. Let them cool completely, then wrap each cake individually in plastic wrap, followed by a layer of foil. They can hang out in the freezer for up to 3 months. To reheat from frozen, unwrap, place in a ramekin, and microwave on medium power, checking every 30 seconds or so, until the center is melted and the cake is warm through. It's a decent option if you absolutely must store them long-term, but fresh is always the winner here.
Your Easy Lava Cake Awaits
So there you have it. No culinary acrobatics required, just a few basic ingredients and a little attention to timing. This lava chocolate cake recipe easy delivers on its promise: a rich, decadent dessert with that essential molten core that makes people swoon. Stop scrolling through fancy dessert photos and actually make one yourself. It's simpler than you think, tastes incredible, and frankly, you deserve a warm, gooey chocolate cake right now. Go on, give it a shot.