Table of Contents
Ever found yourself scrolling through dessert photos, eyes fixated on that perfect molten chocolate center oozing from a warm cake? That restaurant-level indulgence feels out of reach, right? Like something only a pastry chef in a tall white hat could pull off. Turns out, it's far less complicated than you might think. Crafting that decadent, gooey magic at home is absolutely doable, and dare I say, surprisingly simple.
Why Make Lava Cake (Especially with Chocolate Chips)?
Why Make Lava Cake (Especially with Chocolate Chips)?
Why Make Lava Cake (Especially with Chocolate Chips)?
Let's be real. There's a certain undeniable drama to a lava cake. You cut into it, and that warm, liquid chocolate spills out like a delicious secret. It feels fancy, like something you'd only order in a dimly lit restaurant after dropping a small fortune on dinner. But making a lava cake recipe with chocolate chips at home? That's where the real win is. You get that same luxurious experience without the price tag or the need to put on actual pants. Plus, using chocolate chips, especially good quality ones, simplifies the process significantly compared to chopping baking chocolate, and they melt down into that perfect, gooey center beautifully. It's the kind of dessert that makes you look like a culinary genius with minimal effort, and frankly, who doesn't want that?
Gathering Ingredients for Your Lava Cake Recipe with Chocolate Chips
Gathering Ingredients for Your Lava Cake Recipe with Chocolate Chips
The Chocolate and Butter Foundation
Alright, so you're ready to dive into this lava cake adventure. The absolute cornerstone of any good lava cake recipe with chocolate chips starts with, you guessed it, the chocolate and the butter. Don't skimp here if you can help it. While standard semi-sweet chocolate chips work perfectly fine and melt beautifully for that gooey center, using a slightly higher quality chip or even a mix of semi-sweet and dark chocolate chips can elevate the flavor profile significantly. Think Ghirardelli or Guittard, like the pros often recommend. You'll melt these down with butter, which forms the rich base. Unsalted butter is usually the go-to, allowing you to control the salt level yourself, but honestly, if all you have is salted, just use it and maybe hold back a tiny pinch of any added salt later.
Eggs, Sugar, and a Touch of Flour
Beyond the dynamic chocolate-butter duo, you'll need a few other standard baking staples. Eggs are crucial; they provide structure and richness while also contributing to that molten core when underbaked slightly. You'll typically use both whole eggs and sometimes an extra yolk for added richness. Powdered sugar is preferred over granulated because it incorporates more smoothly into the batter, preventing any grainy texture. And then there's just a small amount of flour. This isn't like making a regular cake where flour is the main structural component. Here, flour is just enough to give the cake *just* enough body to hold its shape around the liquid center. Too much flour, and you'll end up with a regular cupcake, which is fine, but not the goal of a lava cake recipe with chocolate chips.
- Good quality semi-sweet or dark chocolate chips (around 1/2 to 3/4 cup)
- Unsalted butter (about 1/2 cup)
- Large eggs (usually 2 whole eggs and 1 extra yolk)
- Powdered sugar (around 1/2 cup)
- All-purpose flour (just a couple of tablespoons)
- A pinch of salt (optional, especially if using salted butter)
- Vanilla extract (optional, but adds nice depth)
Rounding Out Your Supplies
While the ingredients listed above are the absolute must-haves for your lava cake recipe with chocolate chips, having a few other things on hand makes the process smoother. Ramekins are essential – those little ceramic dishes are the perfect size and shape for individual lava cakes. Make sure you have four 6-ounce ramekins. Greasing and flouring (or cocoa-dusting) these correctly is key to getting your finished cakes out cleanly. A double boiler or a heatproof bowl set over a pot of simmering water is the safest way to melt the chocolate and butter without burning it. Whisks, spatulas, and measuring cups/spoons are standard, but worth mentioning. Having vanilla extract on hand can boost the chocolate flavor, and a little salt, even with unsalted butter, can really make the chocolate pop. Simple stuff, really, but having it all lined up prevents those mid-recipe scrambles.
StepbyStep: Crafting Your Lava Cake Batter
StepbyStep: Crafting Your Lava Cake Batter
Melting and Mixing Magic
so you've got your ingredients laid out and your ramekins prepped. Now comes the fun part: bringing it all together. The first move for your lava cake recipe with chocolate chips is to melt that glorious chocolate and butter. Do this gently! A double boiler is your best friend here – it prevents the chocolate from seizing or burning. If you don't have one, a heatproof bowl perched over a small pot of simmering water works just as well. Stir constantly until everything is smooth and glossy. Once that's done, take it off the heat and let it cool slightly for a few minutes. You don't want to scramble your eggs in the next step by adding them to super-hot chocolate. While it's cooling, whisk your eggs and extra yolk with the powdered sugar until pale and slightly thickened. Then, slowly whisk the cooled chocolate mixture into the egg mixture until just combined. Finally, gently fold in the small amount of flour and any vanilla extract or salt. Don't overmix; you just want it incorporated. The batter will be thick and rich, exactly what you want for that molten center.
Baking Your Lava Cake with Chocolate Chips to Gooey Perfection
Baking Your Lava Cake with Chocolate Chips to Gooey Perfection
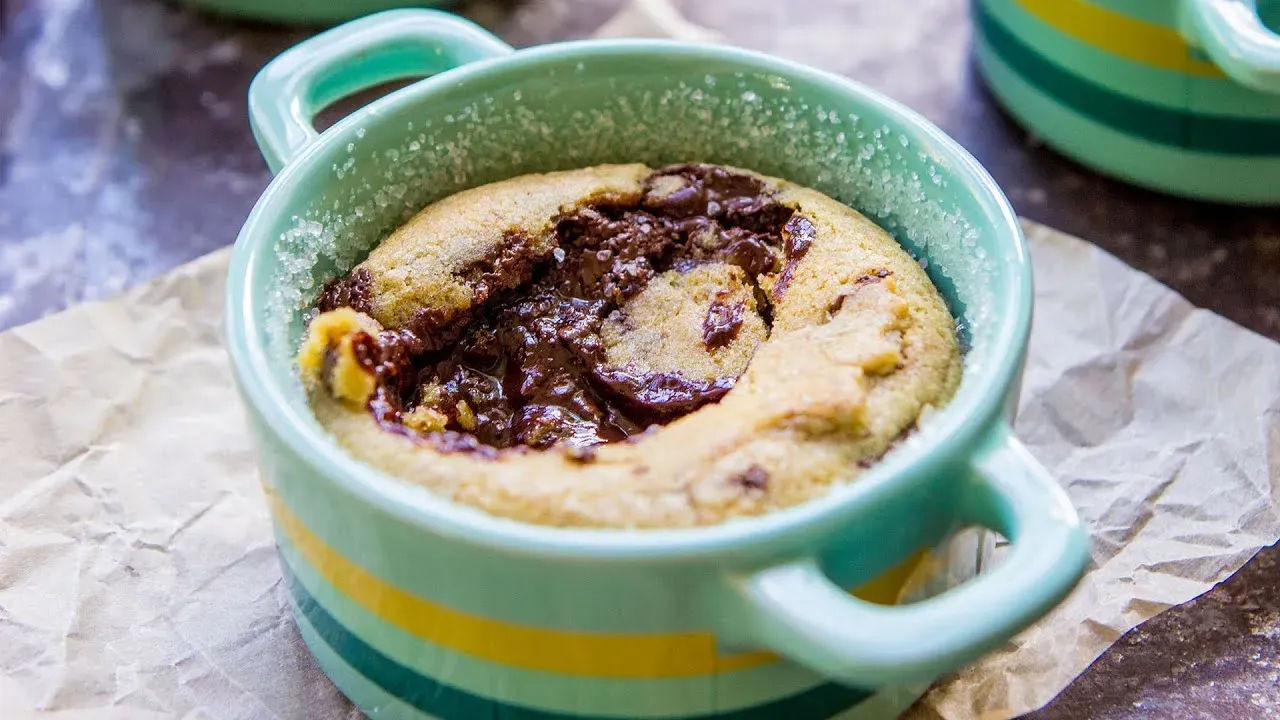
batter's ready, ramekins are filled and looking promising. Now comes the moment of truth: Baking Your Lava Cake with Chocolate Chips to Gooey Perfection. This isn't like baking a regular cake where you want it cooked all the way through. The magic here lies in the underbaking, specifically leaving that center molten. Crank your oven up – most recipes call for a hot oven, around 425°F (220°C). This high heat helps the outside set quickly while the inside stays liquid. Slide those filled ramekins onto a baking sheet (just in case of spills, because sometimes life happens) and into the hot oven they go. The timing is critical and often the most nerve-wracking part. It's usually somewhere between 12 and 15 minutes, but ovens vary wildly. You're looking for the edges to be set and pulling slightly away from the ramekin, while the very center still looks soft and perhaps a tiny bit jiggly. Pull them too early, and they might collapse; leave them in too long, and you've got a perfectly fine chocolate cake, but zero lava. Trust your gut and maybe peek after 11 or 12 minutes.
Serving, Storing, and Making Ahead Your Lava Cakes
Serving, Storing, and Making Ahead Your Lava Cakes
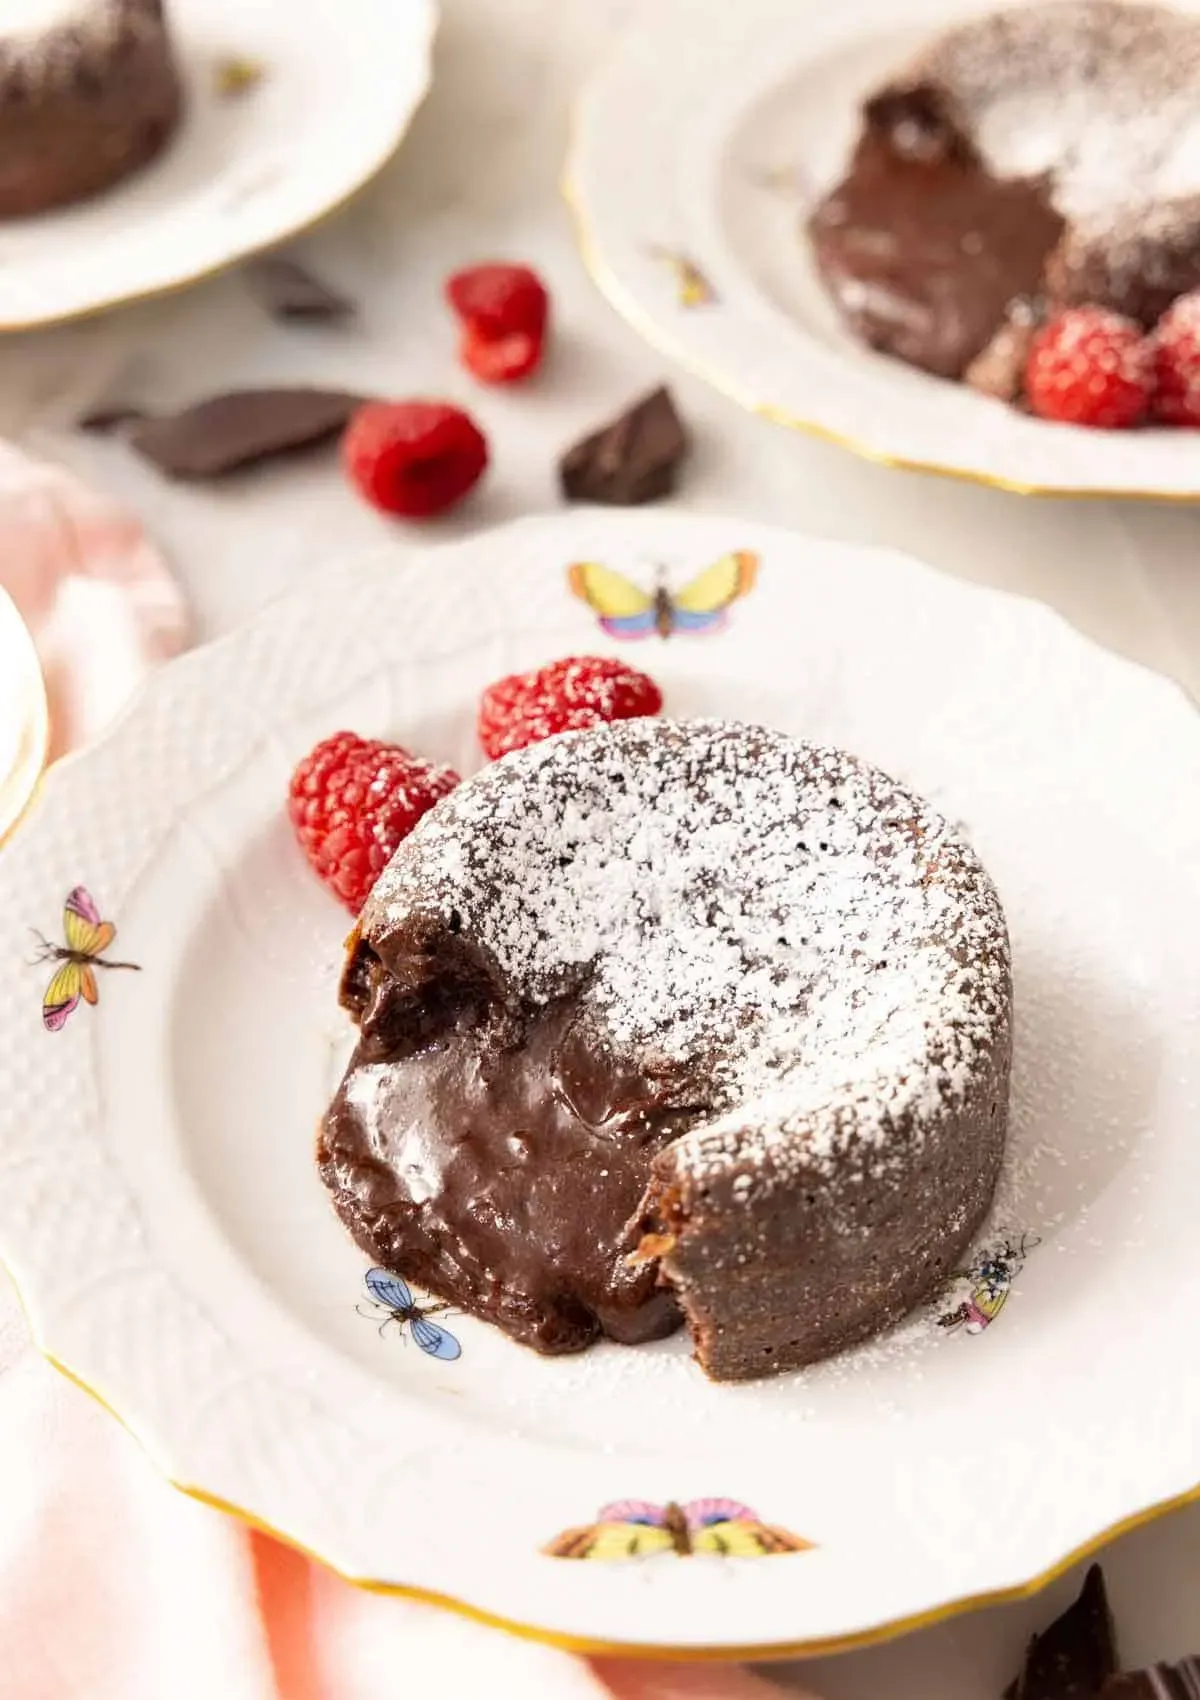
The Grand Reveal: Serving Your Molten Masterpiece
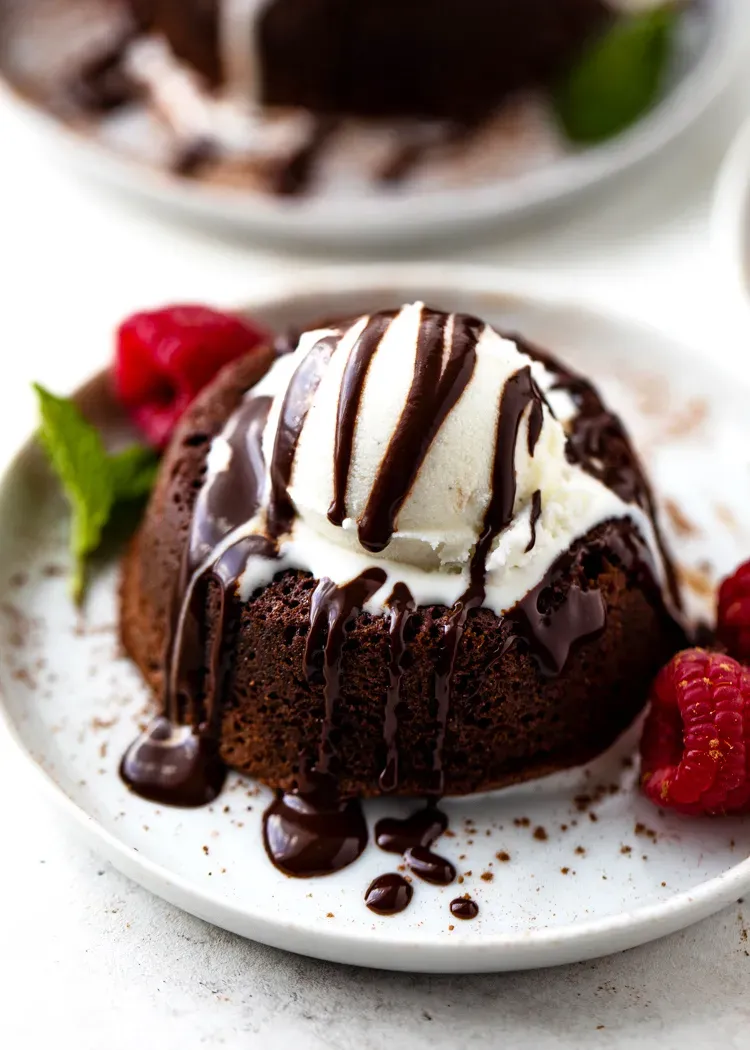
the oven timer has screamed, you've pulled out these little cups of potential magic, and now comes the moment everyone's waiting for. Let them sit for just a minute or two before attempting extraction. Seriously, resist the urge to immediately flip them. That slight pause lets the edges firm up enough to survive the journey from ramekin to plate. To get them out cleanly, run a small, sharp knife around the edge of the cake inside the ramekin. Then, place your serving plate upside down over the ramekin and, with a quick, confident flip, invert the whole thing. Give the ramekin a gentle lift. If you prepped those ramekins right (greased and floured/cocoa-dusted), it should slide right out, revealing that beautiful, slightly sunken top, a promise of the gooey goodness inside. Serve them warm, immediately. This isn't a cake that improves with age sitting on the counter.
Dealing with Leftovers: The Cold, Hard Truth
Let's talk about the less glamorous side: leftovers. While these molten wonders are absolutely best eaten straight from the oven, sometimes you make too many or life intervenes. Storing them is simple enough – cover them tightly (either still in the ramekin or transferred to an airtight container) and pop them in the fridge. Here's the critical bit: the "lava" center, which was gloriously liquid and flowing when warm, will solidify as it cools. It turns into a dense, fudgy center, which isn't bad, just different. Think of it more like a rich, underbaked brownie center now.
So, if you're hoping for that molten core experience again, you'll need to reheat them. A quick zap in the microwave usually does the trick. Start with 30-second intervals, checking in between, until the center is warm and gooey again. Be careful not to overheat, or you'll cook the center solid. Alternatively, you can warm them gently in a low oven. Just don't expect them to be *exactly* the same as fresh, but they're still a darn good chocolate treat.
What's the best way to reheat a stored lava cake?
- Microwave: 30-second bursts until center is warm and soft.
- Oven: Low heat (around 300°F or 150°C) for 5-10 minutes, or until warmed through.
Future You Will Thank You: Making Ahead
Planning a dinner party or just want to have dessert ready to go on a whim? This lava cake recipe with chocolate chips is fantastic for making ahead. You have a couple of options. The easiest is to make the batter completely, pour it into your prepped ramekins, and then cover them tightly with plastic wrap. Stick these filled ramekins in the fridge for up to 2 days before baking. When you're ready to bake, pull them out of the fridge about 20-30 minutes before going into the hot oven to take the chill off slightly (though some people bake them straight from the fridge, they might just need an extra minute or two). The other option is to bake them almost completely, stopping just short of the time you normally would, let them cool, store them, and then reheat them as described above. But honestly, making the batter ahead and baking fresh is the superior method for maximum lava flow.
Your Molten Masterpiece Awaits
So there you have it. No need for reservations or exorbitant dessert menus. You've navigated the few simple steps required to bring a truly impressive dessert to life right in your own kitchen. This lava cake recipe with chocolate chips delivers that signature molten core without the fuss, proving that sometimes, the most decadent things in life are also the most straightforward to create. Go ahead, grab a spoon. You earned it.