Table of Contents
Ever stare at a dessert menu, eyes locking onto "Molten Chocolate Lava Cake," and just know that's the move? That moment when you slice into it, and the warm, liquid chocolate spills out like pure, edible gold? Yeah, that's the good stuff. Maybe you've ordered it, maybe you've even tried making one at home only to end up with a slightly sad, fully-baked chocolate puck. It happens. But what if you could bottle that restaurant-quality decadence, specifically, the kind that makes you think of premium chocolate like Godiva? Crafting a truly spectacular lava cake isn't some culinary myth reserved for fancy kitchens.
Gathering Your Decadent Ingredients for the Godiva Chocolate Lava Cake
Gathering Your Decadent Ingredients for the Godiva Chocolate Lava Cake
Alright, let's talk turkey, or rather, talk chocolate. You can't conjure a truly decadent godiva chocolate lava cake recipe out of thin air or, worse, with mediocre ingredients. Think of this as building a tiny edible monument to indulgence. The foundation is everything. You need quality chocolate, and since we're aiming for Godiva-level richness, grab some good stuff. Dark chocolate is non-negotiable for that deep flavor and perfect melt. Don't cheap out here; your taste buds will file a formal complaint. Beyond the star player, you'll need unsalted butter (because you control the salt), granulated sugar, eggs, a touch of flour, and maybe a pinch of salt to bring out the chocolate's complexity. Freshness matters, especially with eggs. An old egg isn't going to give you that light, airy lift you need before the center melts.
- High-quality dark chocolate (around 60-70% cocoa is ideal)
- Unsalted butter
- Granulated sugar
- Large eggs (fresh is best)
- All-purpose flour
- A pinch of salt
StepbyStep Guide: Crafting the Perfect Godiva Chocolate Lava Cake Batter
StepbyStep Guide: Crafting the Perfect Godiva Chocolate Lava Cake Batter
Melting Chocolate and Butter: The Foundation of Flow
you've got your fancy Godiva chocolate and butter ready. First move: melt them together. Don't just nuke it in the microwave unless you enjoy potentially scorching expensive chocolate. A double boiler is your friend here, or a heatproof bowl set over a pot of simmering water. Gentle heat is the name of the game. Stir occasionally until it's smooth, glossy, and utterly irresistible. This isn't a race; patience prevents grainy chocolate disasters. Once it's melted, pull it off the heat and let it cool slightly. You don't want to scramble your eggs in the next step.
Whipping Eggs and Sugar: Building Structure and Sweetness
While your chocolate cools a bit, grab a separate bowl for the eggs and sugar. You need to whisk these together until they're pale yellow and slightly thickened. This incorporates air, which gives the cake structure before the center collapses into molten goodness. Don't just stir; actually whisk with some vigor. Think of it as a mini workout before you indulge. Some recipes skip separating eggs, using whole eggs for simplicity. That works fine, but beating whole eggs with sugar until slightly frothy is key.
Ingredient | Purpose | Handling Tip |
|---|---|---|
Dark Chocolate | Flavor & Molten Core | Melt gently over simmering water. |
Unsalted Butter | Richness & Texture | Melt with chocolate; use unsalted to control saltiness. |
Eggs | Structure & Lift | Whisk with sugar until pale and slightly thick. |
Granulated Sugar | Sweetness & Structure | Whip well with eggs to dissolve and aerate. |
Combining Mixtures and Adding Flour: Bringing it All Together
Now for the marriage of chocolate and egg. Slowly pour the slightly cooled melted chocolate mixture into the egg and sugar mixture. Fold it in gently with a spatula. Don't overmix; you're not trying to develop gluten here. Just combine until it's a uniform, dark, beautiful batter. Finally, sift in that small amount of flour. This flour provides just enough structure around the edges to hold the cake together while the center remains liquid. Again, fold it in just until you don't see any dry streaks. Overmixing the flour means tough cakes, and nobody wants that. This batter should be relatively thick but pourable.
Baking Bliss: Achieving That Molten Center in Your Godiva Chocolate Lava Cake
Baking Bliss: Achieving That Molten Center in Your Godiva Chocolate Lava Cake
Prepping Your Ramekins: The Non-Stick Zone
Alright, you've got this gorgeous, dark batter that screams potential. Now, where does it go? Ramekins are your vessel of choice for the perfect individual godiva chocolate lava cake recipe. But just dumping batter in is a rookie move. You need to prep these little dishes properly, unless you enjoy serving cakes stuck firmly to the sides. Butter them generously, and I mean *generously*. Get into every nook and cranny. After buttering, dust them with cocoa powder. Not flour. Cocoa powder gives you a lovely, non-white edge and adds another layer of chocolate flavor. Tap out the excess. This creates a non-stick barrier that ensures your molten masterpiece slides out cleanly onto the plate. Nothing ruins the drama of a lava cake like having to dig it out.
Into the Heat: Timing is Everything
Oven's preheated, ramekins are prepped and filled about three-quarters full. Now for the critical step: baking. This is where the magic happens, or where it all goes wrong if you're not paying attention. Lava cakes bake at a relatively high temperature, usually around 400°F (200°C). The goal is to set the outside edges and top while leaving the center completely liquid. This takes surprisingly little time, typically between 10 and 14 minutes, depending on your oven and the size of your ramekins. Don't wander off and start scrolling through social media. Stand by the oven and watch them.
- Oven Temperature: 400°F (200°C)
- Bake Time: 10-14 minutes (approx.)
- Look For: Set edges, slightly puffed top, wobbly center
- Avoid: Overbaking until the top looks completely firm
Spotting the Sweet Spot: When to Pull Them
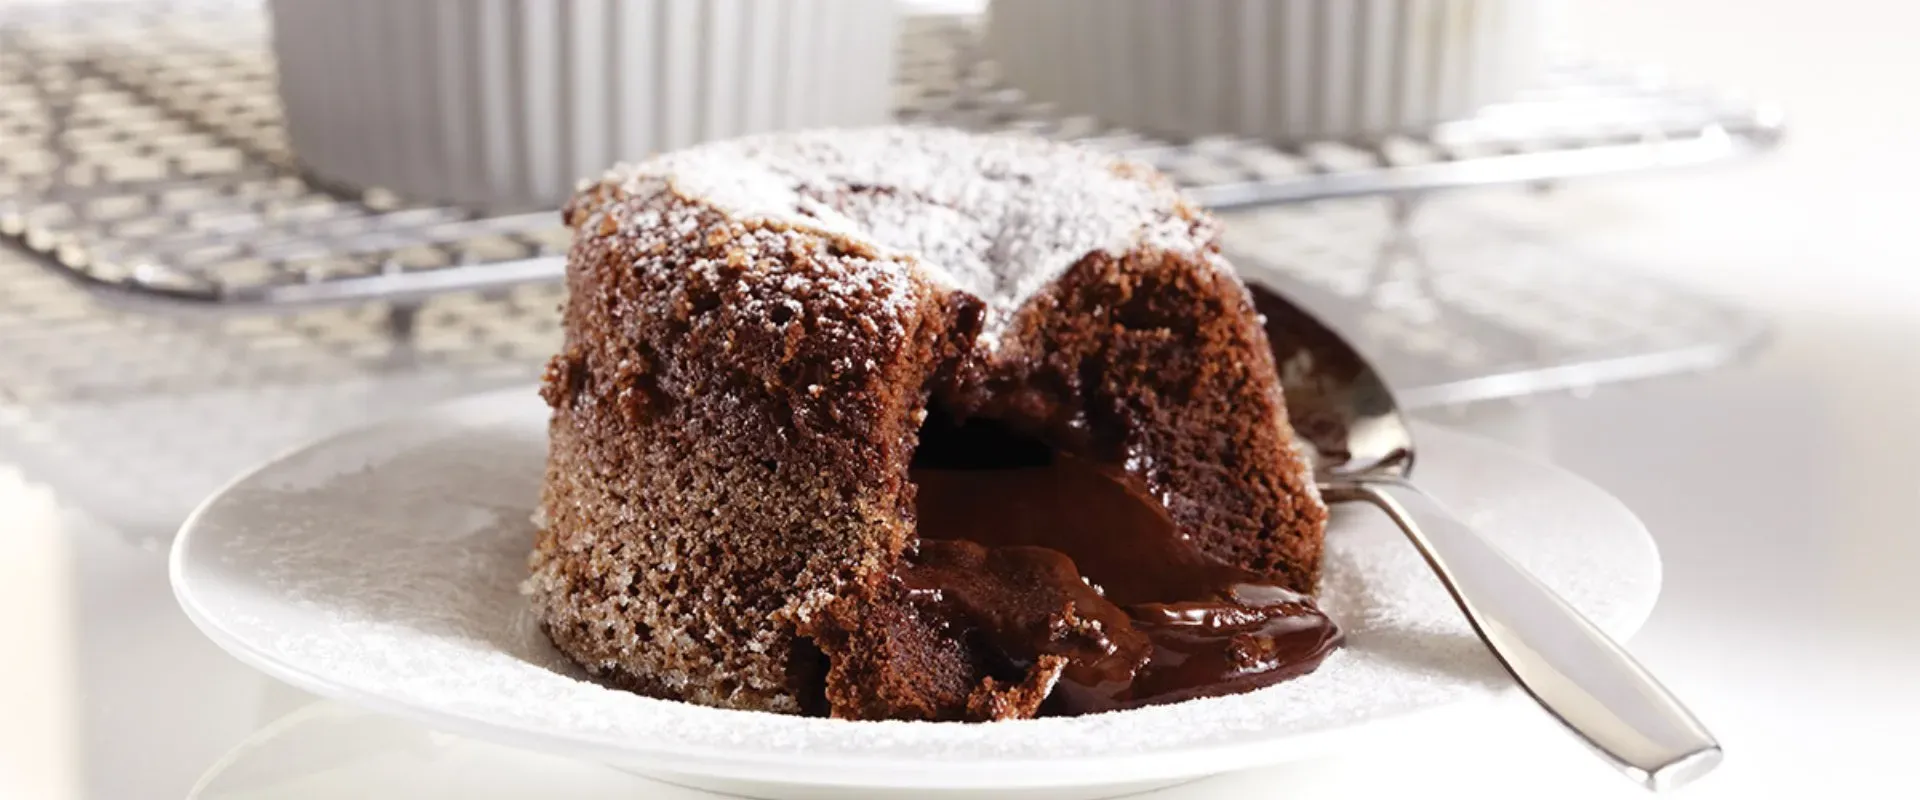
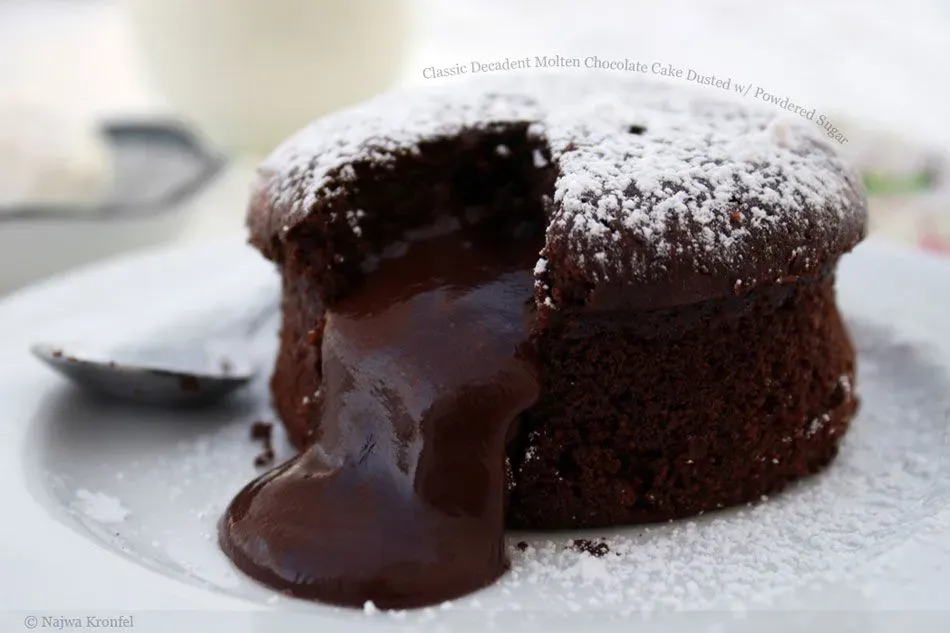
How do you know they're done without overcooking the core? Look for visual cues. The edges of the cake should appear set and slightly pulled away from the ramekin sides. The top will look mostly baked, maybe slightly puffed, but here's the key: the very center should still look soft and, if you gently jiggle the ramekin, it should wobble. Like a slightly nervous jelly. That wobble is your molten core waiting to happen. If the entire top looks firm and solid, you've likely gone too far, and you've got a regular chocolate cake on your hands. It'll still taste good, probably, but it won't deliver the lava. Pull them out of the oven and let them rest for just a minute or two before attempting to invert them.
Serving Secrets and Troubleshooting Your Lava Cakes
Serving Secrets and Troubleshooting Your Lava Cakes
The Grand Reveal: Getting That Cake Out
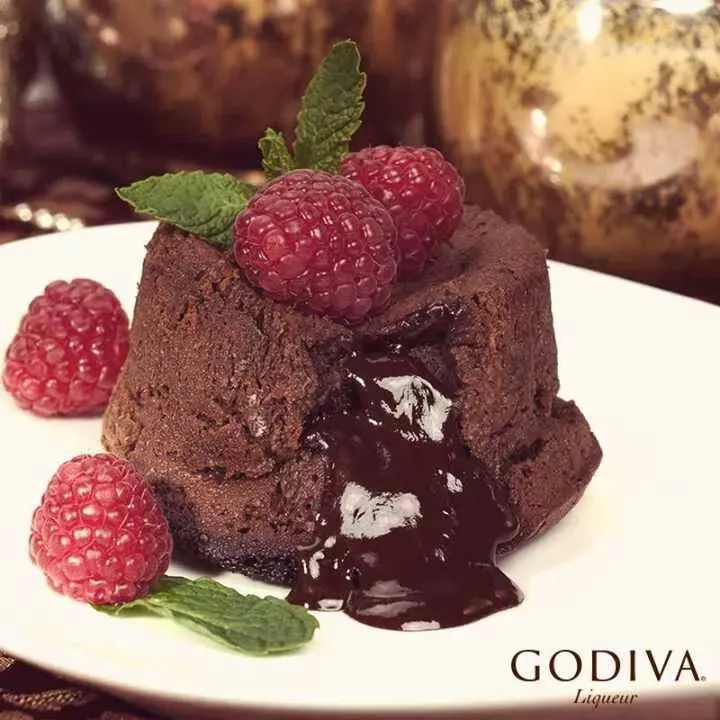
So, you've pulled your perfect little godiva chocolate lava cake recipe creations from the oven, they've rested for a minute or two, and now comes the moment of truth: getting them out of the ramekin and onto the plate without them collapsing into a sad heap. Have your serving plates ready. Place a plate upside down over the top of a ramekin. Hold the plate and the ramekin together firmly and, in one swift, confident motion, flip them over. Don't hesitate. Set the plate down and lift the ramekin straight up. With properly buttered and cocoa-dusted ramekins, the cake should slide right out, standing tall and proud, its molten center ready to make its dramatic appearance.
Sometimes, despite your best efforts, one might stick a little. Don't panic and start digging with a fork – you'll just mutilate your masterpiece. If it seems hesitant, give the bottom of the ramekin a gentle tap or two. If it's still stubborn, you might have overbaked it slightly, or maybe didn't butter thoroughly enough. Consider it a learning experience for the next batch. A slightly stuck cake is still delicious, just perhaps less photogenic for Instagram.
- Have plates ready before inverting.
- Place plate upside down over ramekin.
- Flip confidently and quickly.
- Lift ramekin straight up.
- Gentle tap bottom if needed.
When Things Go Wrong: Troubleshooting Your Molten Dreams
Let's be real, not every attempt at a godiva chocolate lava cake recipe is going to be flawless right out of the gate. What if your cake doesn't have a molten center? Most likely, you overbaked it. Ovens vary, and even a minute too long can turn lava into solid cake. Next time, start checking a minute or two earlier. The edges should be set, but that center needs to wobble. If the opposite happens and the whole thing collapses into a puddle, it might be underbaked or perhaps you didn't whip the eggs and sugar enough for structure, or maybe the flour wasn't quite incorporated. Pay close attention to those visual cues during baking.
Variations and Pairing Ideas for Your Godiva Creation
Variations and Pairing Ideas for Your Godiva Creation
you've nailed the classic godiva chocolate lava cake recipe. The molten core flows, the edges are perfect. Now what? Stick with plain chocolate? Please. This is your chance to play. Think variations. A tiny splash of espresso powder in the batter? Hello, mocha lava. A hint of orange zest? Instant Jaffa cake vibes. A pinch of cayenne for a subtle kick? Spicy chocolate is a thing for a reason. And the pairings! Vanilla bean ice cream is the obvious go-to for that hot-and-cold contrast, but don't stop there. A dollop of slightly sweetened whipped cream is simple elegance. Fresh raspberries or strawberries cut through the richness beautifully. A drizzle of raspberry coulis? Chef's kiss. Or, if you're feeling truly decadent, a scoop of good quality pistachio or even salted caramel ice cream. The world is your oyster, or rather, your lava cake.
- Espresso powder in batter for mocha
- Orange zest for citrus notes
- Pinch of cayenne for a spicy kick
- Pair with vanilla bean ice cream
- Top with fresh berries or raspberry coulis
- Try unconventional ice cream flavors like pistachio or salted caramel
Your Godiva Lava Cake Triumph
So, you faced down the molten challenge. You measured, you mixed, you watched the oven like a hawk, probably muttering encouragement. And now? You've got not just a dessert, but a moment. That first spoonful, the warm chocolate spilling out – it's the payoff for every precise step. Forget the sad, solid attempts of the past. You've earned this rich, flowing victory, proving that the restaurant magic is absolutely reproducible in your own kitchen. Enjoy the decadence; you made it happen.