Table of Contents
Picture this: you're out camping, the stars are coming out, and everyone's craving something sweet, something gooey. Or maybe you're just in your backyard, wanting a dessert that feels a bit adventurous without a ton of fuss. Forget complicated baking. We're talking about a dessert that delivers big flavor with minimal drama, perfect for cooking outdoors or even just making cleanup easier at home. That's where the magic of a good `dutch oven chocolate lava cake recipe` comes in.
Whipping Up Your Dutch Oven Chocolate Lava Cake Mix
Whipping Up Your Dutch Oven Chocolate Lava Cake Mix
Alright, let's talk about getting this party started. The genius behind this specific dutch oven chocolate lava cake mix is that we're not reinventing the wheel; we're just giving it a serious upgrade. You grab a standard boxed chocolate cake mix – yeah, the stuff you probably have lurking in the back of your pantry. Don't overthink it, any decent chocolate mix works. You'll dump that into a bowl, then add some brown sugar, some white sugar, and a bit of cocoa powder. This sugar and cocoa blend is crucial; it's the magic layer that helps create that molten center when the hot liquid hits it. Finally, pour in some hot coffee. The coffee doesn't make it taste like your morning brew; it just deepens the chocolate flavor significantly. Whisk it all together until it's mostly smooth. Lumps happen, don't panic. This isn't French pastry; it's campfire dessert.
Setting the Stage: Prepping Your Dutch Oven for Lava Cake
Setting the Stage: Prepping Your Dutch Oven for Lava Cake
Picking the Right Pot and Getting it Clean
before you even think about pouring that glorious dutch oven chocolate lava cake mix into anything, you need the star of the show: the Dutch oven itself. We're talking cast iron, folks. A 4-quart size is usually perfect for this recipe, big enough to handle the batter and the magic layer without making a mess. Make sure it's clean. I mean *really* clean. Any lingering savory smells from last night's chili will absolutely ruin your chocolate dream. Wash it out, maybe even give it a quick heat-up to evaporate any moisture, especially if you're using charcoal later.
Greasing is Not Optional, It's Essential
This isn't the time to be shy with the shortening. You need to grease the inside of that Dutch oven like you mean it. Get it everywhere – the bottom, the sides, all the way up. This is your insurance policy against ending up with chocolate welded to the pot. Nothing kills the lava cake vibe faster than scraping burnt bits off the bottom instead of scooping out molten goodness. Use solid vegetable shortening; it holds up well under the heat. Butter can work, but shortening seems to create a better non-stick surface for this particular job.
- Use a 4-quart cast iron Dutch oven.
- Ensure the Dutch oven is squeaky clean before starting.
- Generously grease the *entire* inside surface with solid vegetable shortening.
- Greasing prevents the cake from sticking and makes serving easier.
Hot Coffee is Your Secret Weapon
Remember that hot coffee we talked about adding to the batter? You'll need more. A good amount of *hot* coffee (or water, but coffee is better) is poured over the top of the batter and the sugar/cocoa layer *before* baking. This is the critical step that creates the "lava." The hot liquid dissolves that sugar/cocoa layer as it bakes, forming that rich, syrupy molten center. Make sure it's hot when you pour it. Lukewarm just won't cut it for maximum lava effect.
Baking Magic: Cooking Your Dutch Oven Chocolate Lava Cake

Baking Magic: Cooking Your Dutch Oven Chocolate Lava Cake
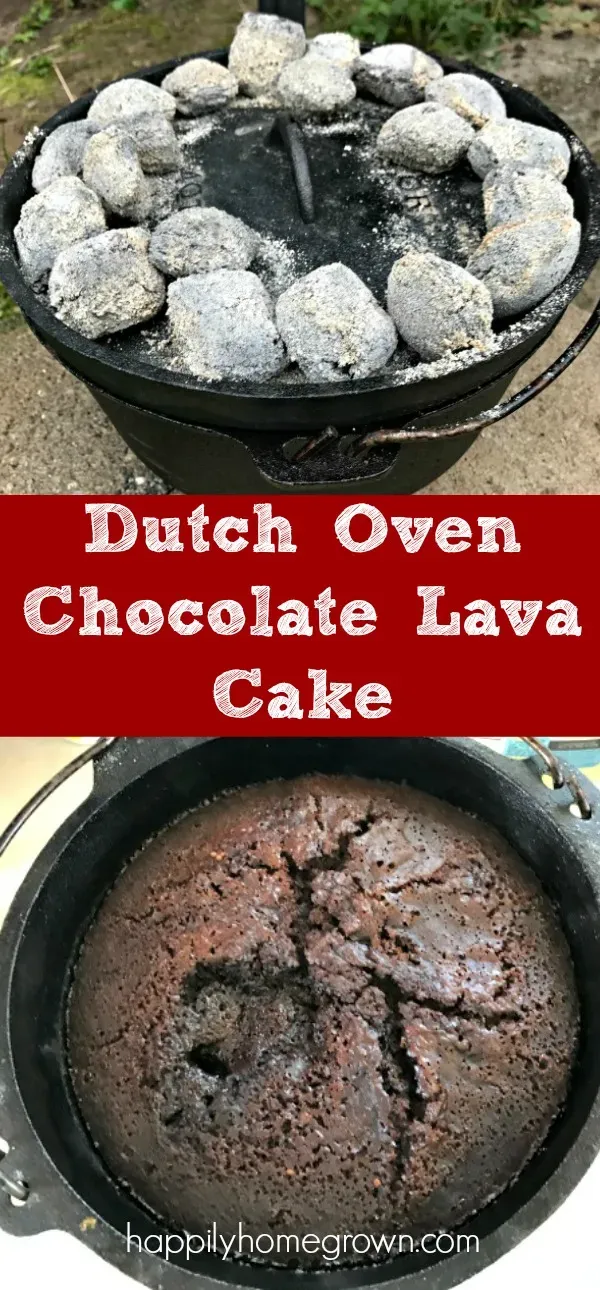
Getting the Coals Just Right for Baking
you've got your Dutch oven prepped and filled with that promising dutch oven chocolate lava cake concoction. Now comes the fire part. If you're doing this the classic way, over charcoal, the heat distribution is key. You don't want all the heat blasting from the bottom, which will scorch your lovely cake before the top even thinks about setting. The trick is to mimic an oven: more heat on top than on the bottom. For a 4-quart Dutch oven, a good starting point is usually 8 charcoal briquettes underneath and 16 on the lid. This creates convection, baking the cake evenly. Give those briquettes time to get good and hot, covered in gray ash, before you place the Dutch oven.
Watching the Clock and Checking for Doneness
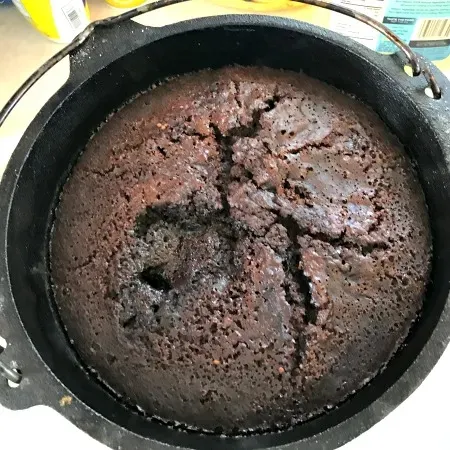
Once the coals are set, carefully place your Dutch oven on the bottom briquettes and put the lid on with the remaining briquettes arranged evenly on top. Now, settle in for about 55 minutes. Resist the urge to peek every two minutes! Opening the lid lets out precious heat and messes with your baking time. After about 50 minutes, you can carefully lift the lid (use heavy-duty gloves and a lid lifter!) and check. The cake should look set around the edges, maybe pulling away slightly from the sides of the pot. The center will still be soft and jiggly – that's the lava! A toothpick inserted into the outer edge should come out mostly clean, but one in the center should come out gooey or with wet crumbs. If it looks too liquidy around the edges, give it another 5-10 minutes, checking frequently.
- Use charcoal briquettes, not direct flames.
- Aim for approximately 8 coals underneath and 16 on the lid for a 4-quart Dutch oven.
- Ensure coals are fully ashed over before starting.
- Bake for roughly 55 minutes.
- Avoid lifting the lid during baking.
- Check for doneness: edges set, center soft and gooey.
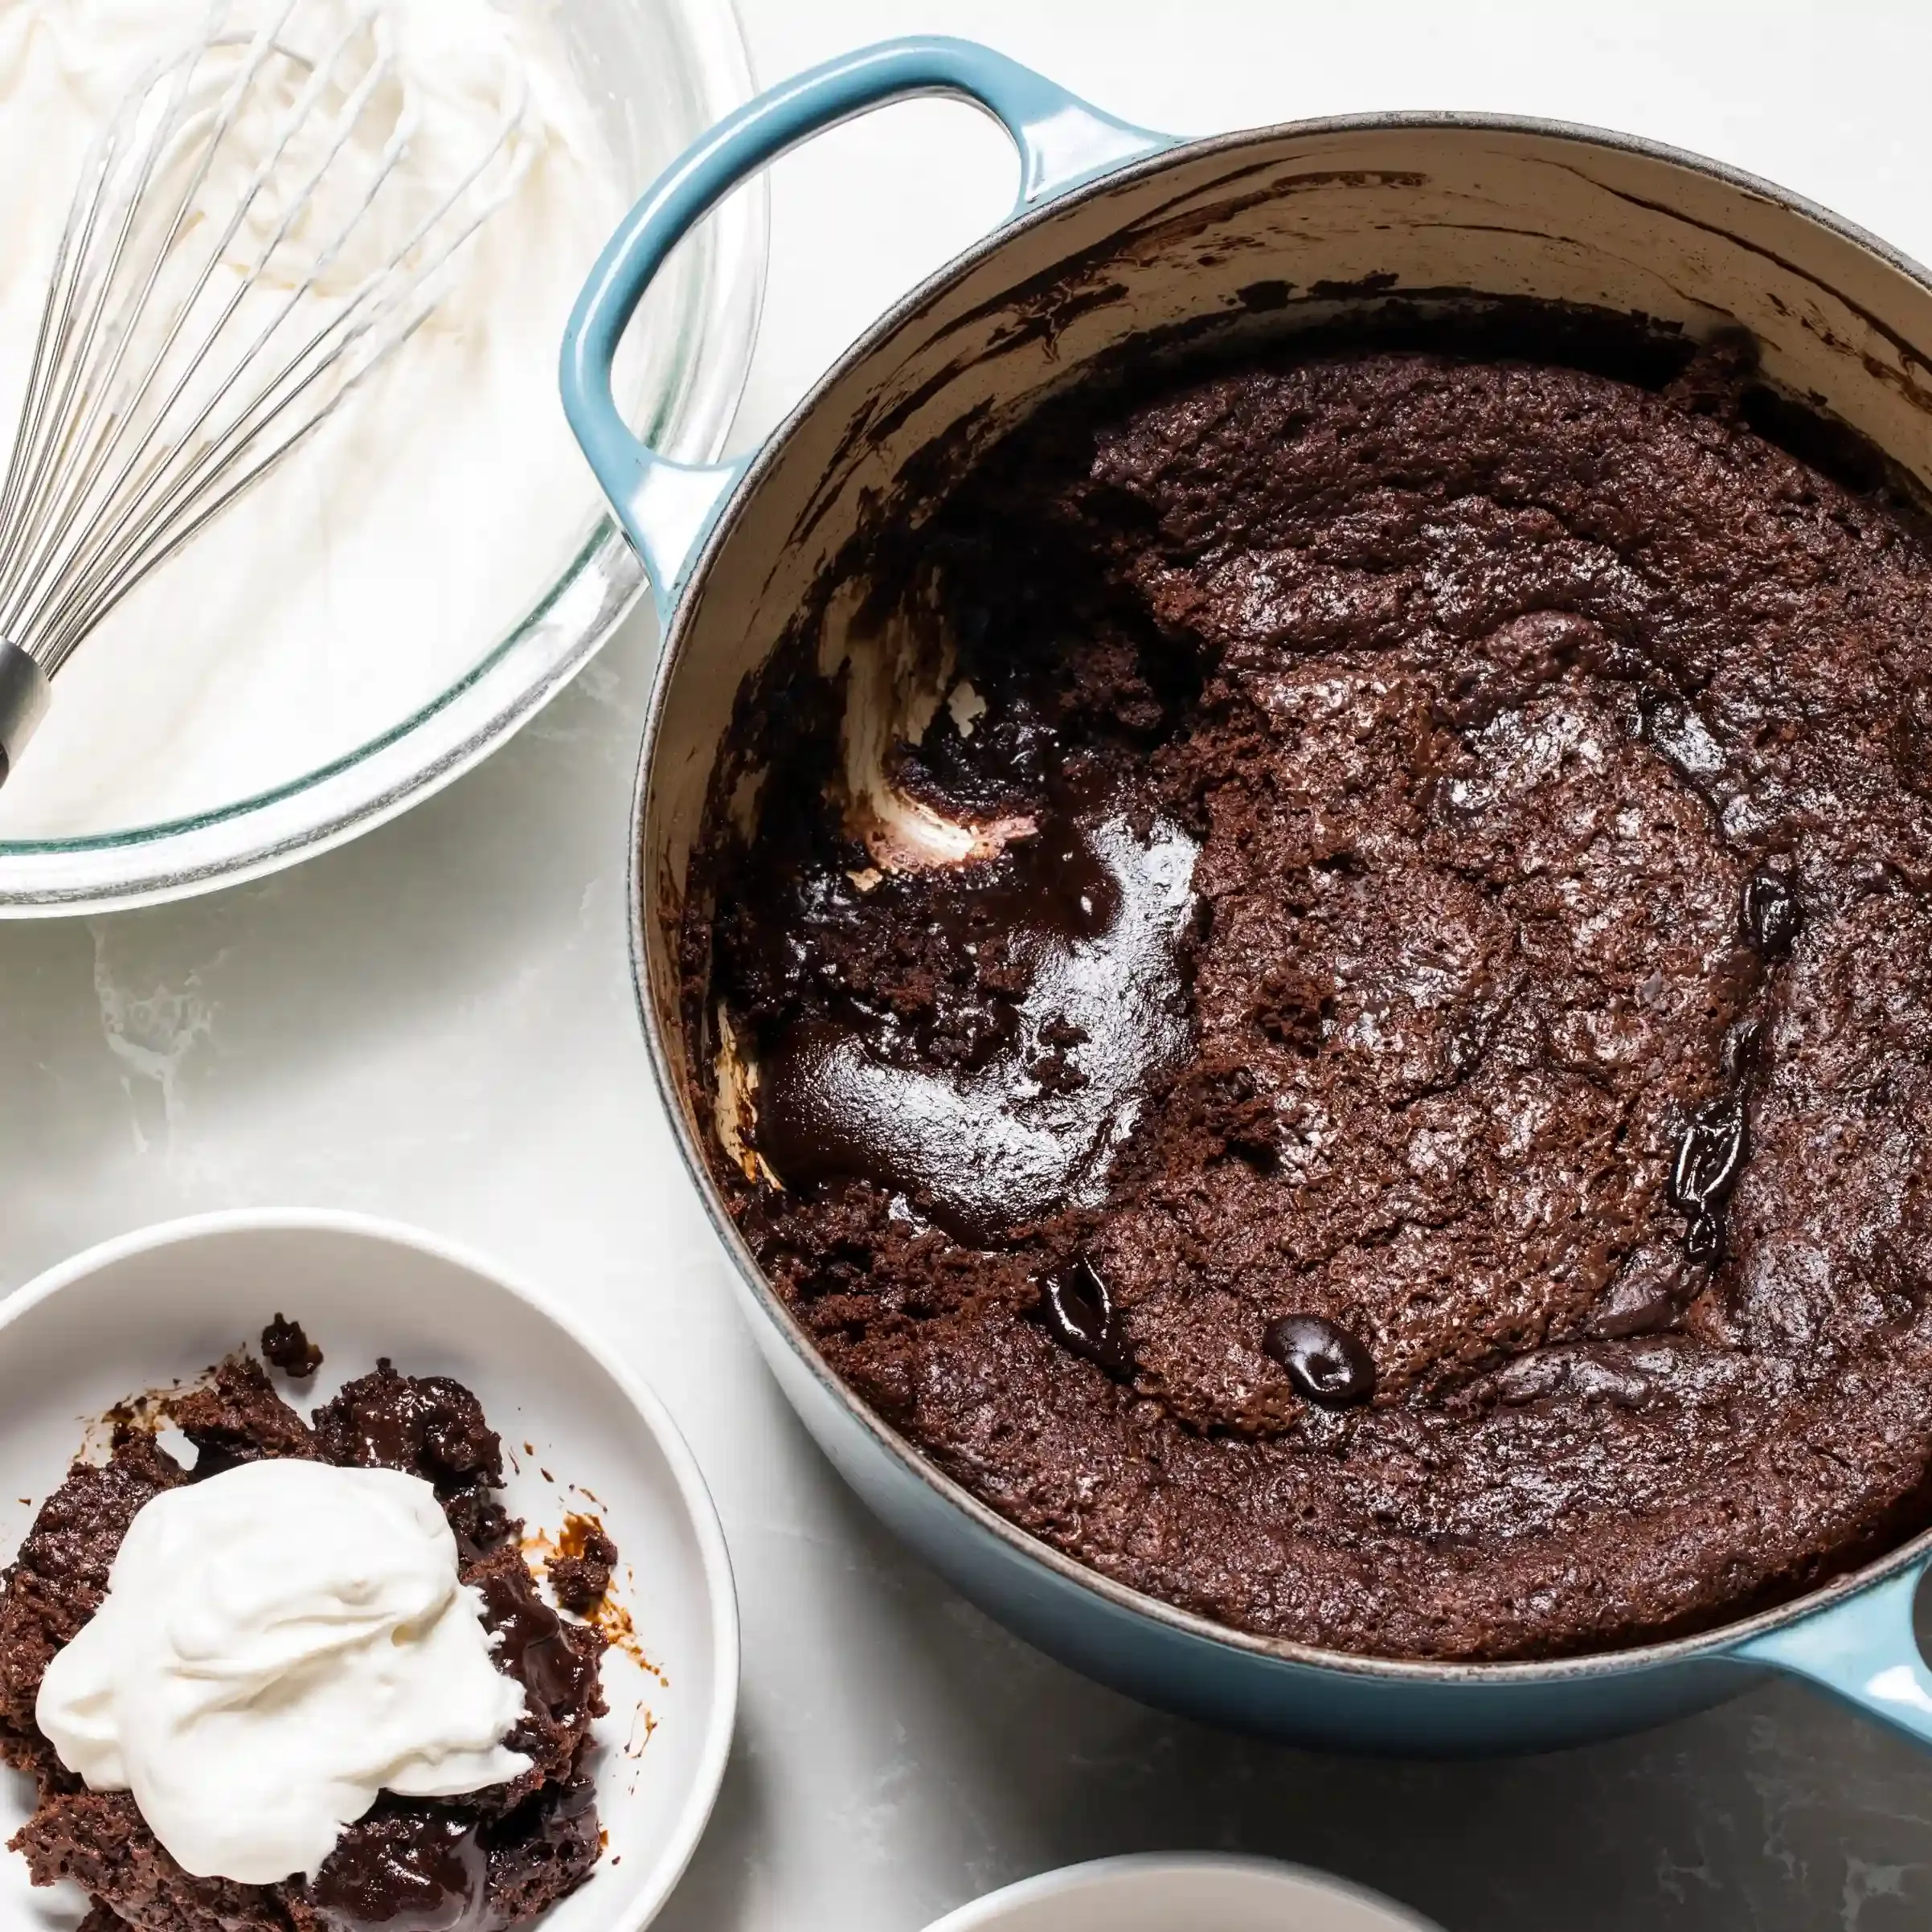
Digging In: Serving That Molten Chocolate Goodness
Digging In: Serving That Molten Chocolate Goodness
the moment of truth arrives. You've checked it, it's done, and the aroma is driving everyone wild. Carefully lift that hot lid. What you should see is a cake that looks baked around the edges but still has a gloriously soft, maybe even bubbling, center. Don't flip it! Don't try to slide it out onto a plate like a regular cake. The magic is *inside*. The best way to serve this dutch oven chocolate lava cake is to simply spoon it directly from the pot into bowls. Get a good scoop of the cakey part and make sure you dip down into that molten chocolate river at the bottom.
- Serve immediately while it's piping hot for maximum lava effect.
- A scoop of good quality vanilla ice cream melting into the warm chocolate is pretty non-negotiable. Whipped cream is also a solid contender.
- Use a sturdy spoon or ladle to scoop generous portions, making sure each bowl gets a healthy dose of both the cake and the gooey center.
- Warn everyone it's hot! That lava isn't just for show.
Tips, Tricks, and Twists for Your Dutch Oven Lava Cake
Tips, Tricks, and Twists for Your Dutch Oven Lava Cake
Adjusting for Different Heat Sources
Look, charcoal is great for that authentic campfire vibe, but maybe you're dealing with a gas grill, a propane camp stove, or even just your regular kitchen oven. You can absolutely make this dutch oven chocolate lava cake work. If you're using a gas grill or stove, you'll want indirect heat. Set burners around the edge and place the Dutch oven in the center, or use a heat diffuser plate underneath. Monitor the temperature; you're aiming for around 350-375°F (175-190°C). In a conventional oven, preheat to 350°F. Place the covered Dutch oven inside. The baking time might be slightly shorter or longer than with charcoal, maybe 45-60 minutes. The visual cues – set edges, gooey center – are your best guide, not the clock alone.
Playing with Flavors and Add-Ins
While the classic dutch oven chocolate lava cake recipe is a winner on its own, don't be afraid to mess with it a little. Want more depth? Add a teaspoon of espresso powder to the hot coffee before pouring it over the top layer. A splash of vanilla extract in the batter never hurt anyone. For a fruity twist, toss in a handful of dried cherries or raspberries with the cake mix. A sprinkle of chocolate chips or white chocolate chunks over the sugar layer before the coffee goes down adds extra pockets of melted goodness. Just remember, keep it simple; this recipe thrives on its straightforward nature.
Got Questions About Your Lava Cake?
- Why isn't my center gooey? You might not have used enough hot liquid (coffee/water) or baked it too long.
- Can I use a different size Dutch oven? Yes, but adjust your coal count or oven temp/time accordingly. A smaller pot needs less heat, a larger one might need more or a longer bake.
- Can I make it ahead? You can mix the dry ingredients ahead of time, but don't mix the wet until you're ready to bake.
- What if I don't have coffee? Hot water works, but the coffee really does boost the chocolate flavor.
Wrapping Up Your Dutch Oven Lava Cake Adventure
So there you have it. A Dutch oven chocolate lava cake that actually works, whether you're roughing it or just avoiding messing up your kitchen oven. It's proof that sometimes the simplest things, like a boxed mix and a bit of heat management, can create something pretty spectacular. This recipe earned its stripes with a bunch of tough critics – hungry kids – and it's held up ever since. Give it a shot next time you need a dessert that delivers on the gooey, chocolatey promise without requiring a culinary degree. Just try not to eat the whole thing yourself. Or do. I won't tell.