Table of Contents
Ever dreamt of a chocolate cake so rich, so moist, and so utterly divine that it sends shivers down your spine? Well, get ready, because we're about to embark on a baking adventure to create the ultimate decadent layer chocolate cake. This isn't your average cake; it's a masterpiece of chocolate indulgence, where each layer is a symphony of flavor and texture. Forget those dry, crumbly cakes you've had before because we’re going for the gold standard of chocolate decadence. We will guide you through the process, from baking the perfect, moist chocolate cake layers to whipping up a velvety smooth buttercream frosting. You'll learn how to assemble your cake with flair, and we'll even share some secret tips to ensure your cake is a showstopper. We'll also cover variations, storage, and serving advice, so you'll be equipped to make this cake for any occasion. So, grab your apron, preheat your oven, and get ready to create a decadent layer chocolate cake that will impress everyone.
Baking the Perfect Decadent Chocolate Cake Layers
Baking the Perfect Decadent Chocolate Cake Layers
Okay, so you want to bake the *perfect* chocolate cake layers? It's not as scary as it sounds, I promise! The key is all about getting a few basics right. First off, let's talk ingredients. We're not using just any old chocolate here; we want good quality dark chocolate. Think of it like the foundation of your cake – if it's not solid, the whole thing falls apart, right? And when I say "solid," I mean rich, deep chocolate flavor. You'll also need good quality cocoa powder, not the stuff that’s been sitting in the back of your pantry for ages. Fresh cocoa powder means a richer, more intense chocolate flavor. Also, don't underestimate the power of room-temperature ingredients. I know, it sounds like a fussy chef thing but trust me, it makes a huge difference. When your butter, eggs, and milk are all at the same temperature, they blend together so much better, creating a smooth batter that bakes into a moist cake. We're not aiming for dry and crumbly, that's for sure!
Also, a little tip from someone who’s had some cake fails, measure your flour correctly. Don’t just scoop it out of the bag with your measuring cup. That’s a recipe for disaster. Instead, fluff it up in the bag, then spoon it into the cup and level it off with a knife. Over-measuring flour is one of the biggest reasons for dry cakes and nobody wants that. And lastly, don't overmix the batter. Once the dry ingredients are mixed in, stop the mixer. Overmixing develops the gluten in the flour, which makes the cake tough. Mix until just combined, you’ll notice the difference!
Ingredient | Why it Matters |
|---|---|
Good Quality Dark Chocolate | Provides the rich, deep chocolate flavor. |
Fresh Cocoa Powder | Ensures a more intense chocolate flavor. |
Room Temperature Ingredients | Help create a smooth batter and moist cake. |
Correctly Measured Flour | Prevents dry cakes by using the right amount of flour. |
Don't overmix the batter | Prevents tough cakes. |
Crafting the Ultimate Chocolate Buttercream for Your Layer Cake
Crafting the Ultimate Chocolate Buttercream for Your Layer Cake
The Buttercream Basics
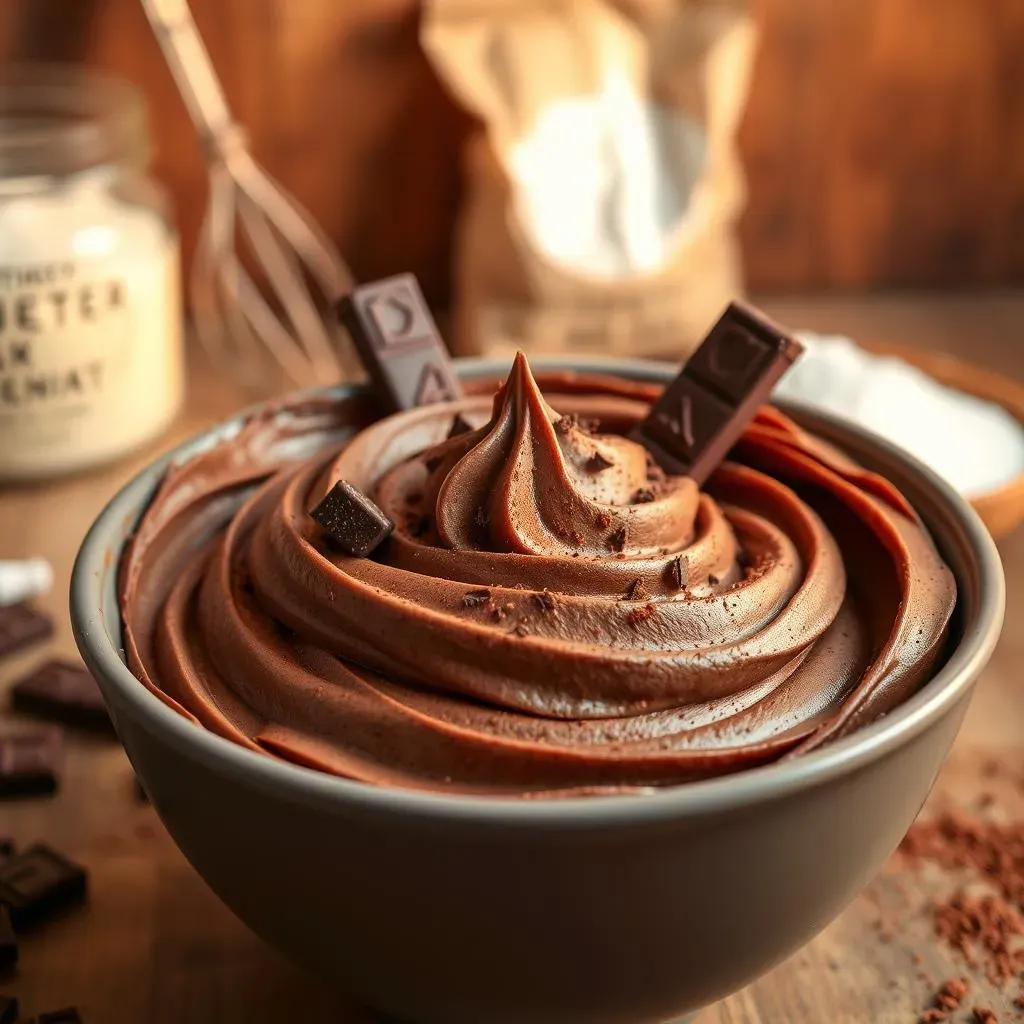
Alright, now that we've got those gorgeous cake layers sorted, let's talk frosting. Because let's be real, what's a cake without a killer buttercream? It’s like a superhero without a cape, still awesome, but something's missing. We’re not just slapping any old frosting on this decadent layer chocolate cake. We are going for something that is smooth, rich, and chocolatey enough to make your taste buds sing. So, first things first, you need good quality unsalted butter. And it needs to be at room temperature. Seriously, don't try to cheat and microwave it. You'll end up with a greasy mess. Room temperature butter is soft and pliable, which is exactly what we need for a light and fluffy buttercream.
Next, we're going to use dark cocoa powder. It's the secret weapon for that intense chocolate flavor. Don't grab the light stuff; we want deep, dark cocoa goodness. And then, the key to a smooth and luxurious buttercream? Heavy cream. It adds moisture and helps create that perfect, spreadable consistency. You can start with a couple of tablespoons and add more until you get the texture you're looking for. It's all about finding that sweet spot between too stiff and too runny. And don't forget a pinch of salt to balance out the sweetness. It sounds crazy, but it truly elevates the flavor.
Making it Perfect
Now, let's talk technique. Don't just throw all the ingredients in a bowl and hope for the best. Start by beating that room temperature butter until it’s light and fluffy. This might take a few minutes, but it's worth it. Then, add in your powdered sugar, a little at a time. If you dump it all in at once, you’ll end up with a cloud of sugar dust and a kitchen that looks like a snowstorm hit. Once the sugar is incorporated, add in your dark cocoa powder, and give it a good mix. Finally, drizzle in your heavy cream, one tablespoon at a time, until you achieve your perfect consistency. And remember that pinch of salt. It's like the secret ingredient that no one can quite put their finger on, but it makes all the difference.
And this is important. Taste as you go, you might want to adjust the sweetness or add a little more cocoa powder for an even more intense chocolate flavor. It's your buttercream, make it your own! And if it’s too thick, add a tiny bit more heavy cream. If it’s too thin, add a little bit more powdered sugar. Remember, making buttercream is not an exact science, it's about understanding the basics and adjusting to your taste. And if you're not using it right away, you can store your buttercream in the fridge for up to a month in an airtight container. This makes it so easy to make ahead of time.
Ingredient | Purpose |
|---|---|
Unsalted Butter (Room Temp) | Forms the base, provides richness and fluffiness. |
Dark Cocoa Powder | Gives the deep, intense chocolate flavor. |
Heavy Cream | Adds moisture and creates a smooth consistency. |
Powdered Sugar | Provides sweetness and structure. |
Pinch of Salt | Balances the sweetness and enhances flavor. |
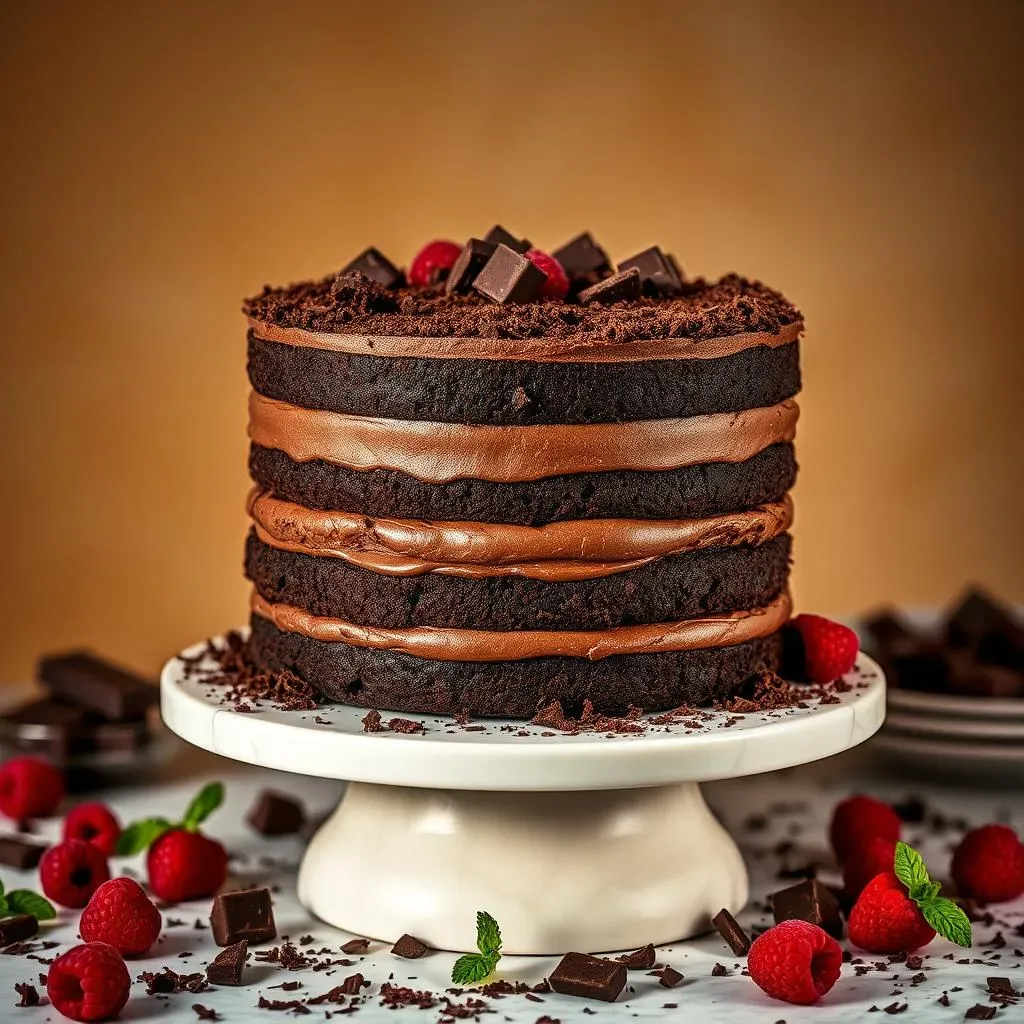
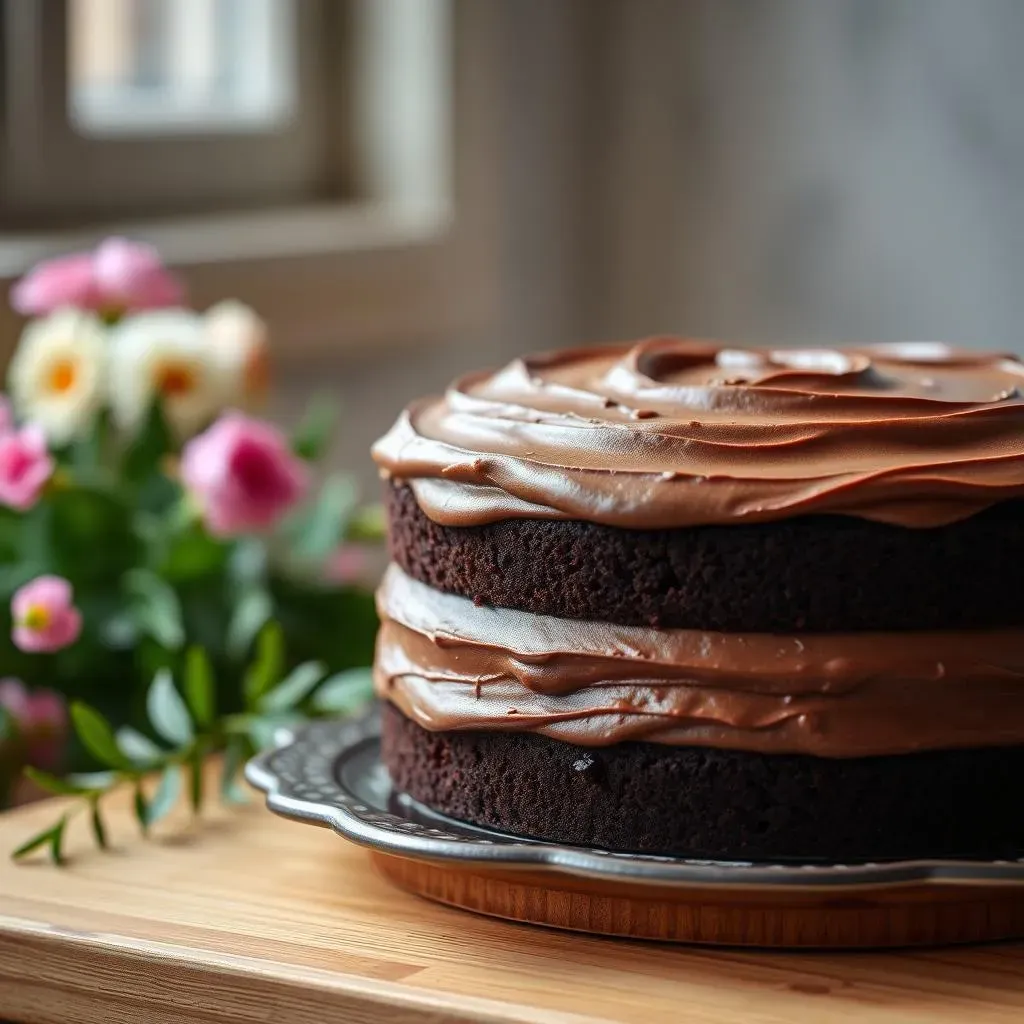
Assembling and Decorating Your Decadent Layer Chocolate Cake
Assembling and Decorating Your Decadent Layer Chocolate Cake
Okay, so you've got your perfectly baked cake layers and your luscious chocolate buttercream all ready to go. Now comes the fun part: assembly and decoration! It's like building a delicious chocolate tower, and who doesn't love a good tower? First, make sure your cake layers are completely cool. If they're even a little bit warm, the frosting will melt and you'll have a sticky mess on your hands. Place your first cake layer on a cake stand or plate and use a long serrated knife to even out the top if it's domed. This will give you a nice, flat surface for your frosting. Then, grab a generous dollop of your chocolate buttercream and spread it evenly over the top of the cake layer. Don't be shy with the frosting; we want a good, thick layer. It's what holds the cake together and adds that extra bit of chocolatey goodness.
Next, carefully place your second cake layer on top and repeat the frosting process. If you're making a three-layer cake (and why wouldn’t you?), continue layering and frosting until you've used all your cake layers. Once you have all the layers stacked, it's time for a crumb coat. This is a thin layer of frosting that seals in all the crumbs and creates a smooth base for your final layer of frosting. Don't worry if it looks a little messy; it's just a base. Pop the cake in the fridge for about 20 minutes to let the crumb coat set. After the crumb coat is set, add your final layer of frosting, making sure to cover the entire cake evenly. You can use a spatula or a frosting knife to smooth it out. If you want a really smooth finish, you can dip your knife in hot water and wipe it dry before smoothing the frosting. It's like magic, I tell you!
Step | Description |
|---|---|
Cool Cake Layers | Ensure cake layers are completely cool before frosting. |
Even Layers | Use a serrated knife to level off any domed tops. |
Frosting | Apply a generous layer of buttercream between each cake layer. |
Crumb Coat | Apply a thin layer of frosting to seal in crumbs and chill. |
Final Frosting | Apply a smooth, final layer of buttercream. |
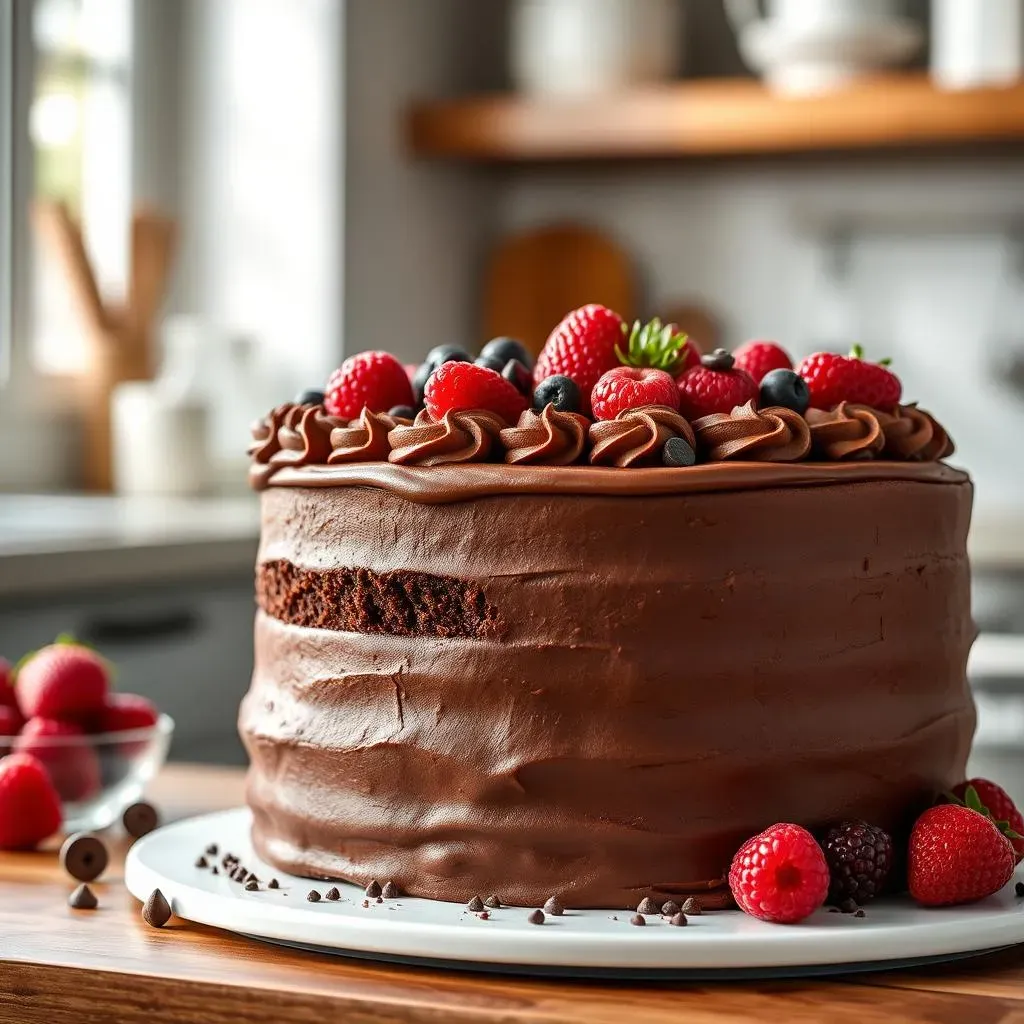
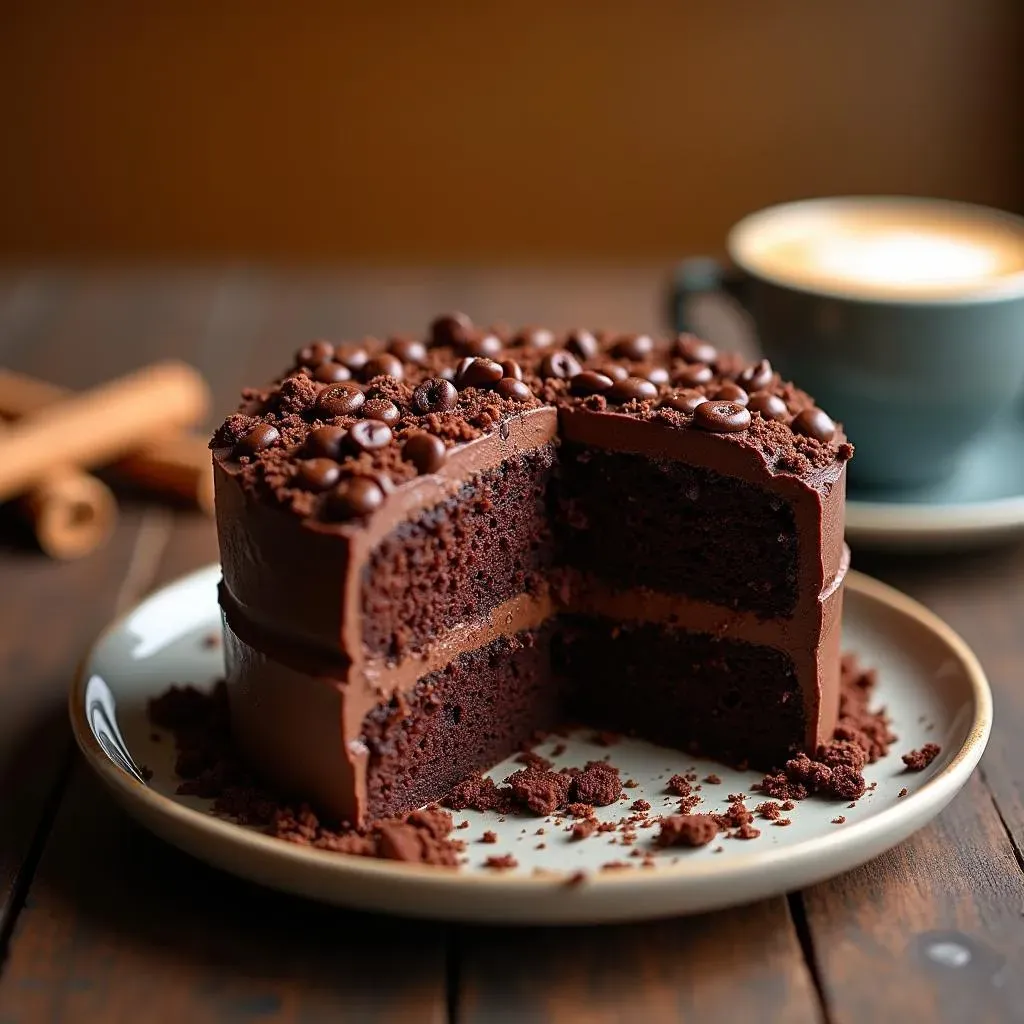
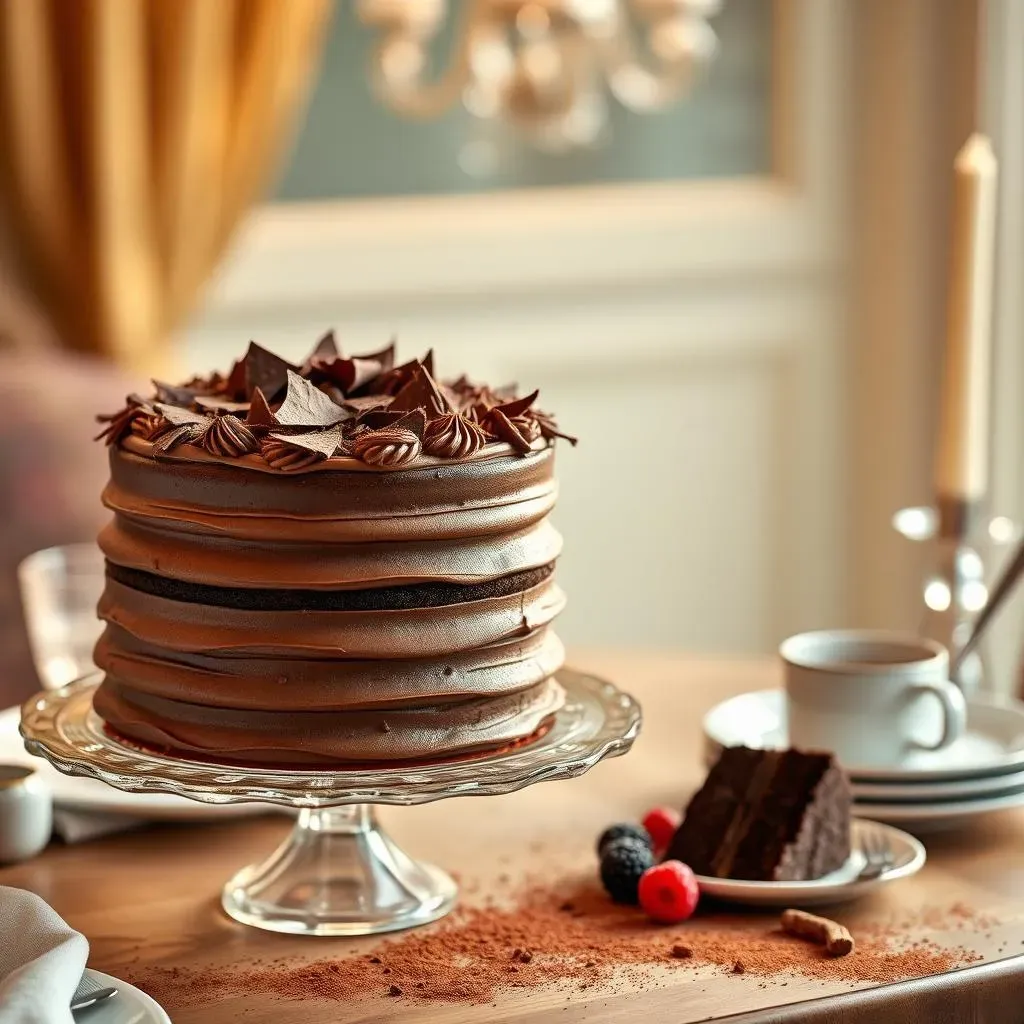
Now, for the decorating! This is where you can really let your creativity shine. You can keep it simple with a smooth, even layer of frosting, or you can get fancy with swirls, rosettes, or even chocolate ganache drips. If you want to add some extra texture, consider coating the cake with mini chocolate chips. The possibilities are endless! If you're feeling adventurous, you could add some fresh berries or edible flowers. Don't be afraid to experiment and have fun with it. It’s your cake, so decorate it however you like! And remember, even if it doesn’t look perfect, it will still taste amazing. It’s a decadent layer chocolate cake, after all, and that's what really matters.
Remember, there's no right or wrong way to decorate a cake. It's all about expressing your creativity and having fun in the process. So don't get caught up in trying to make it look like a professional cake. Just enjoy the process and create a delicious masterpiece. And if you find yourself with some extra frosting, use it to cover any cut pieces of the cake to keep it fresh and moist. Nobody likes a dry piece of cake, especially a decadent layer chocolate cake.
Tips and Tricks for a Flawless Decadent Chocolate Cake
Tips and Tricks for a Flawless Decadent Chocolate Cake
Baking Like a Pro
Okay, let's talk secrets to make your decadent layer chocolate cake truly flawless. First off, and this is a big one, don't open the oven door while the cake is baking! I know, it's tempting to peek, but every time you open the door, you let out heat, which can cause your cake to sink in the middle. Just trust the process and let it bake. Also, use an oven thermometer to make sure your oven is actually at the temperature you set it to. Ovens can be sneaky and run hotter or colder than what the dial says. And while we're at it, use the middle rack of your oven, this will help with even baking. We want a cake that's evenly baked and not burnt on the bottom or raw in the middle.
Another tip, and this might seem obvious, but use good quality ingredients. This isn't the time to skimp on cheap chocolate or old baking powder. Fresh ingredients make a big difference in the final product. And speaking of baking powder, make sure it's fresh! If your baking powder is old, it won't leaven properly, and you'll end up with a dense, flat cake. So, do yourself a favor and get new baking powder. Finally, when the cake is done, let it cool in the pan for about 10 minutes before inverting it onto a wire rack. This will help prevent the cake from breaking apart. Let it cool completely before frosting. I know it's hard to wait, but trust me, it's worth it.
Tip | Why It Matters |
|---|---|
Don't Open Oven Door | Prevents the cake from sinking. |
Oven Thermometer | Ensures accurate baking temperature. |
Middle Rack | Promotes even baking. |
Good Quality Ingredients | Improves the overall flavor and texture. |
Fresh Baking Powder | Ensures proper rising of the cake. |
Cool in Pan | Helps prevent the cake from breaking. |
Frosting Finesse
Now, for the frosting, let's talk about how to get that perfect, smooth finish. If your frosting is too thick, it'll be hard to spread, and you'll end up with a cake that looks like it's been attacked by a frosting monster. If it's too thin, it will just slide right off. So, if your frosting is too thick, add a tablespoon of heavy cream at a time until it reaches the right consistency. If it’s too thin, add a tablespoon of powdered sugar at a time. Also, don't overbeat your frosting. Overbeating can incorporate too much air, which can make it less stable. Beat it just until it's smooth and creamy. And if you're having trouble getting a smooth finish, try dipping your spatula or frosting knife in hot water and wiping it dry before smoothing the frosting. It's a game changer.
Also, I like to use a turntable when frosting my cakes, this helps a lot. It makes it so much easier to get a smooth, even layer of frosting all around the cake. And if you're going for a super smooth finish, you can even use a cake scraper. It's a flat piece of metal or plastic that you hold against the side of the cake while you spin the turntable. It helps to remove any excess frosting and create a perfectly smooth surface. And finally, if you're not serving the cake right away, store it in an airtight container in the fridge. This will keep the cake moist and prevent the frosting from drying out.
"The secret ingredient is always love." - Unknown
How to Adapt Your Decadent Layer Chocolate Cake
How to Adapt Your Decadent Layer Chocolate Cake
Changing Up the Flavors
Okay, so you've mastered the basic decadent layer chocolate cake, but what if you're feeling a little adventurous? Don't worry, this cake is super adaptable! You can totally play around with the flavors to make it your own. Let's start with the cake layers themselves. Instead of just plain dark chocolate, why not try adding a shot of espresso to the batter? It’ll enhance the chocolate flavor and give it a little extra kick. Or, for a hint of warmth, you could add a teaspoon of cinnamon or a pinch of chili powder. You could also use different types of chocolate, like milk chocolate or white chocolate, for a different flavor profile. If you want to go wild, try adding some chopped nuts, like walnuts or pecans. It'll add a nice crunch and some extra flavor.
And let's not forget the frosting! The chocolate buttercream is amazing, but you can also change it up. You could add a tablespoon of peanut butter for a chocolate peanut butter flavor. Or what about some raspberry jam for a chocolate raspberry twist? You can also add different extracts, like vanilla, almond, or peppermint, for a subtle flavor change. Or, if you want to go really crazy, try using a cream cheese frosting instead of buttercream. It’ll add a bit of tanginess that will balance the sweetness of the cake. The possibilities are endless, so don't be afraid to experiment and have fun with it! Just remember to start with small changes and taste as you go. You don’t want to ruin your perfect cake by adding too much of one flavor.
Adaptation | Flavor Profile |
|---|---|
Espresso | Enhances chocolate flavor, adds a kick. |
Cinnamon or Chili Powder | Adds warmth and a hint of spice. |
Different Chocolate Types | Creates varied chocolate flavors. |
Chopped Nuts | Adds texture and flavor. |
Peanut Butter Frosting | Chocolate peanut butter flavor. |
Raspberry Jam Frosting | Chocolate raspberry twist. |
Different Extracts | Subtle flavor changes. |
Cream Cheese Frosting | Adds tanginess to balance sweetness. |
Adjusting for Dietary Needs
Now, let's talk about adapting this cake for different dietary needs. Because everyone deserves a slice of decadent layer chocolate cake, right? If you need a gluten-free version, you can easily swap out the regular flour for a gluten-free blend. Just make sure it's a blend that's specifically designed for baking, so you don't end up with a dry, crumbly cake. And if you're making it for someone who's vegan, you can use plant-based butter and milk, and replace the eggs with a flax egg or applesauce. It might take a little bit of experimenting to get it just right, but it's definitely doable.
Also, if you're looking to cut down on sugar, you can use a sugar substitute. But just be aware that some sugar substitutes can affect the taste and texture of the cake, so you may need to adjust the recipe. You could also try using unsweetened cocoa powder to reduce the overall sweetness. And if you're dealing with allergies, make sure to double-check all your ingredients to ensure they're safe. You might need to make some substitutions, like using soy milk instead of dairy milk or almond flour instead of regular flour. It's all about being mindful and making the necessary adjustments to accommodate everyone's needs. It is possible to make a decadent layer chocolate cake that everyone can enjoy.
"The best way to spread love is through baking." - Unknown
Changing the Cake's Size and Shape
Lastly, let's talk about adapting the size and shape of this cake. If you don't need a huge layer cake, you can easily make it into a sheet cake or cupcakes. Just adjust the baking time accordingly. For cupcakes, you'll probably need to bake them for about 20 to 25 minutes. For a sheet cake, you'll likely need to bake it for about 30 to 40 minutes. You can also make mini layer cakes, using smaller cake pans. This is great for individual desserts or if you're just baking for a small group. And if you're feeling fancy, you could even make a cake pop version of this decadent layer chocolate cake. Just crumble the cake, mix it with some frosting, and roll it into balls. Dip them in chocolate, and voila! You have cake pops.
The great thing about this recipe is that it's so versatile. Whether you're making a large layer cake for a party or a small batch of cupcakes for a treat, this recipe can be adapted to fit your needs. So, go ahead, get creative, and have fun with it! And remember, baking is all about experimenting and finding what works best for you.
Storing and Serving Your Masterpiece of a Decadent Chocolate Layer Cake
Storing and Serving Your Masterpiece of a Decadent Chocolate Layer Cake
Keeping it Fresh
Alright, so you've poured your heart and soul into creating this magnificent decadent layer chocolate cake. Now, the big question: how do you keep it fresh? Well, first things first, if you're not serving it right away, you need to store it properly. For short-term storage, like a day or two, you can keep it at room temperature, but make sure it's in an airtight container or under a cake dome. This will prevent it from drying out. But, if you're dealing with a warm climate or you need to store it for longer, the fridge is your best friend. Pop that cake in an airtight container, and it'll stay fresh for up to a week. Just be aware that the frosting might firm up a bit in the fridge, so you might want to let it sit at room temperature for a little while before serving.
Now, what if you want to keep it for even longer? Well, that's where the freezer comes in. You can totally freeze your decadent layer chocolate cake, and it will stay good for up to a month. Just make sure it's wrapped tightly in plastic wrap and then foil to prevent freezer burn. When you're ready to serve it, let it thaw in the fridge overnight and then let it sit at room temperature for a little while before slicing. And, if you've already cut into the cake and have leftovers, don't worry! Just use any remaining frosting to cover the cut section. This will help keep it moist and prevent it from drying out. It’s like giving your cake a little extra hug.
Storage Method | Duration | Notes |
|---|---|---|
Room Temperature | 1-2 Days | Airtight container or cake dome. |
Refrigerator | Up to 1 Week | Airtight container, frosting may firm up. |
Freezer | Up to 1 Month | Wrapped tightly in plastic wrap and foil. |
Serving Suggestions
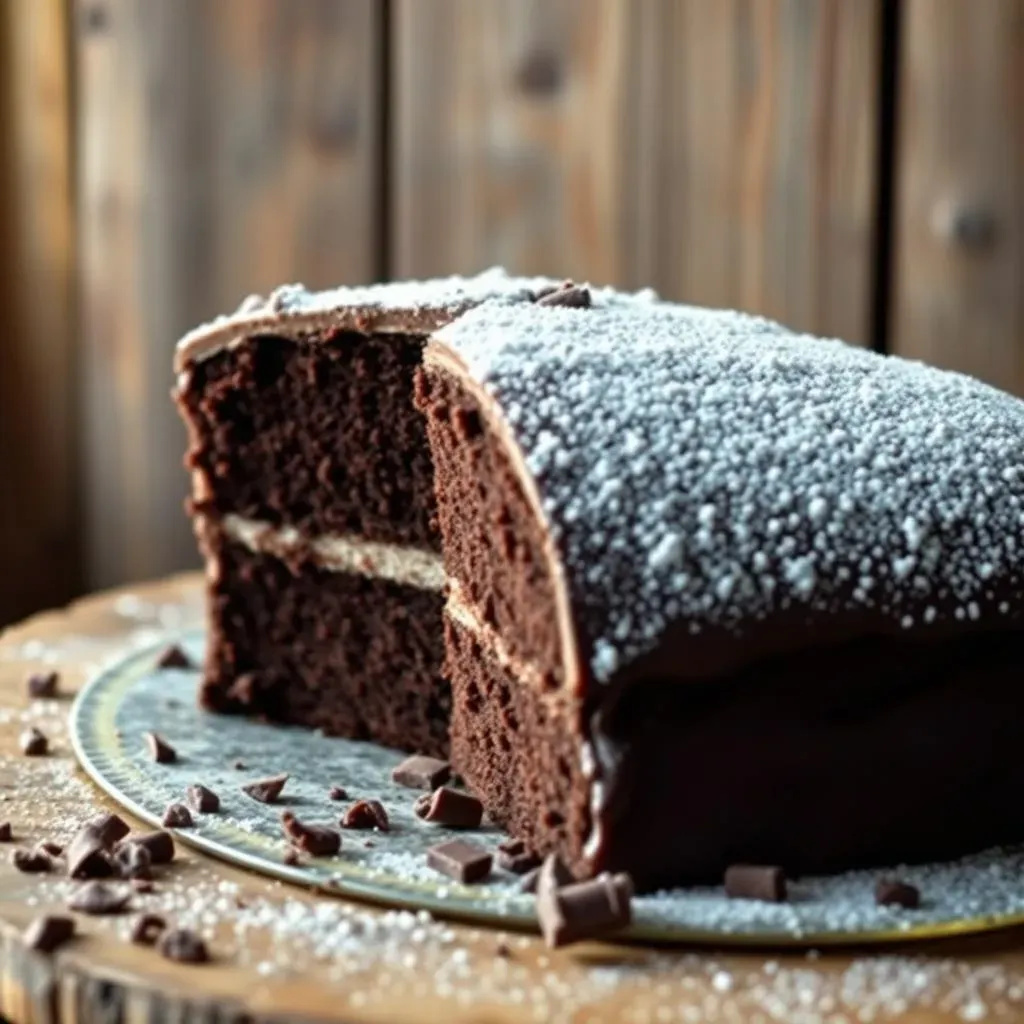
Okay, so your cake is fresh and ready to be devoured. Now, let's talk about how to serve it. First, make sure you have a good, sharp knife. A serrated knife works best for slicing cake, and make sure you wipe it clean between each cut for nice, even slices. And before you slice, make sure the cake is at the right temperature. If it's too cold, it will be hard to cut and the frosting might crack. If it's too warm, the frosting will be too soft and the slices might fall apart. So, let it sit at room temperature for a little while before slicing. Now, when you're ready to serve, don't just plop a slice on a plate. Take a moment to make it look pretty. A simple dusting of cocoa powder or a few fresh berries can make all the difference.
And if you want to get really fancy, you can add a scoop of vanilla ice cream or a dollop of whipped cream. It's all about making it an experience, not just a dessert. And if you’re having a party, consider serving the cake on a beautiful cake stand. It makes the cake look even more impressive. You can also add some decorations around the cake, like candles or flowers. And remember, the best way to enjoy this decadent layer chocolate cake is with good company and a big smile. It's a cake that's meant to be shared and savored.
Extra Touches
And finally, a few extra touches to elevate your cake-serving game. If you're serving the cake at a party, consider adding a little note card with the name of the cake and a list of the ingredients. This is especially helpful if you have guests with allergies. You can also add some small dishes of toppings, like chocolate shavings, sprinkles, or chopped nuts, so people can customize their slices. And remember, the presentation is just as important as the taste. So, take a little extra time to make your cake look as good as it tastes. It's all about creating a memorable experience.
And if you have any leftover cake, don't let it go to waste! You can use it to make a trifle or a cake parfait. Just layer the cake with some custard, whipped cream, and berries. It's a great way to use up any leftover cake and it's a delicious dessert in its own right. So, there you have it, everything you need to know about storing and serving your decadent layer chocolate cake. Now, go forth and share your delicious creation with the world!
"Life is what you bake it." - Unknown