Table of Contents
Introduction
Let's be honest, sometimes you just need chocolate. Not just any chocolate, but the kind that melts in your mouth and maybe, just maybe, flows like a warm river when you cut into it. That's where the magic of a good molten chocolate cake comes in. It’s the dessert that promises decadence without demanding hours in the kitchen, a neat trick if you ask me. Getting that perfect gooey center, though? That's the trick worth mastering. This article lays out the classicdark chocolate lava cake recipe, the one that consistently delivers that signature molten core. We're going to walk through the straightforward steps, dive into the secrets behind achieving that irresistible warm, liquid chocolate middle, and even touch on how to serve it right and get a head start if you're planning ahead. Forget complicated techniques; we're keeping it real so you can nail this dessert every single time.
Why Dark Chocolate Lava Cake Captivates
Why Dark Chocolate Lava Cake Captivates
The Allure of the Unexpected Center
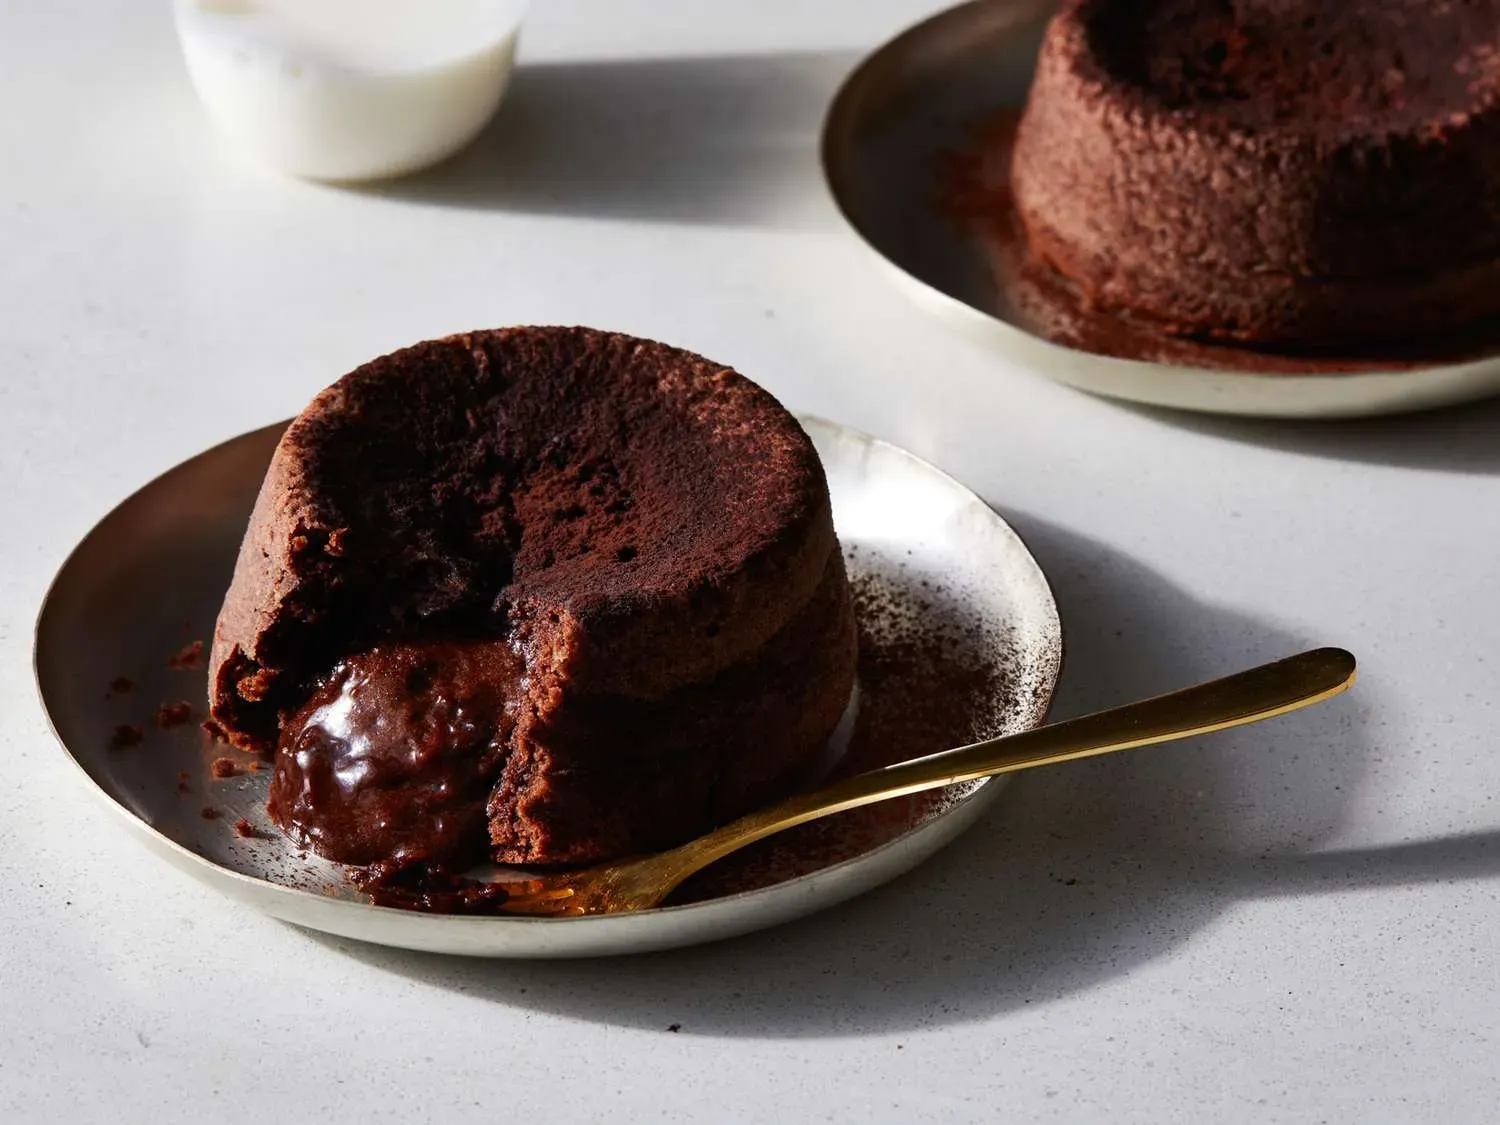
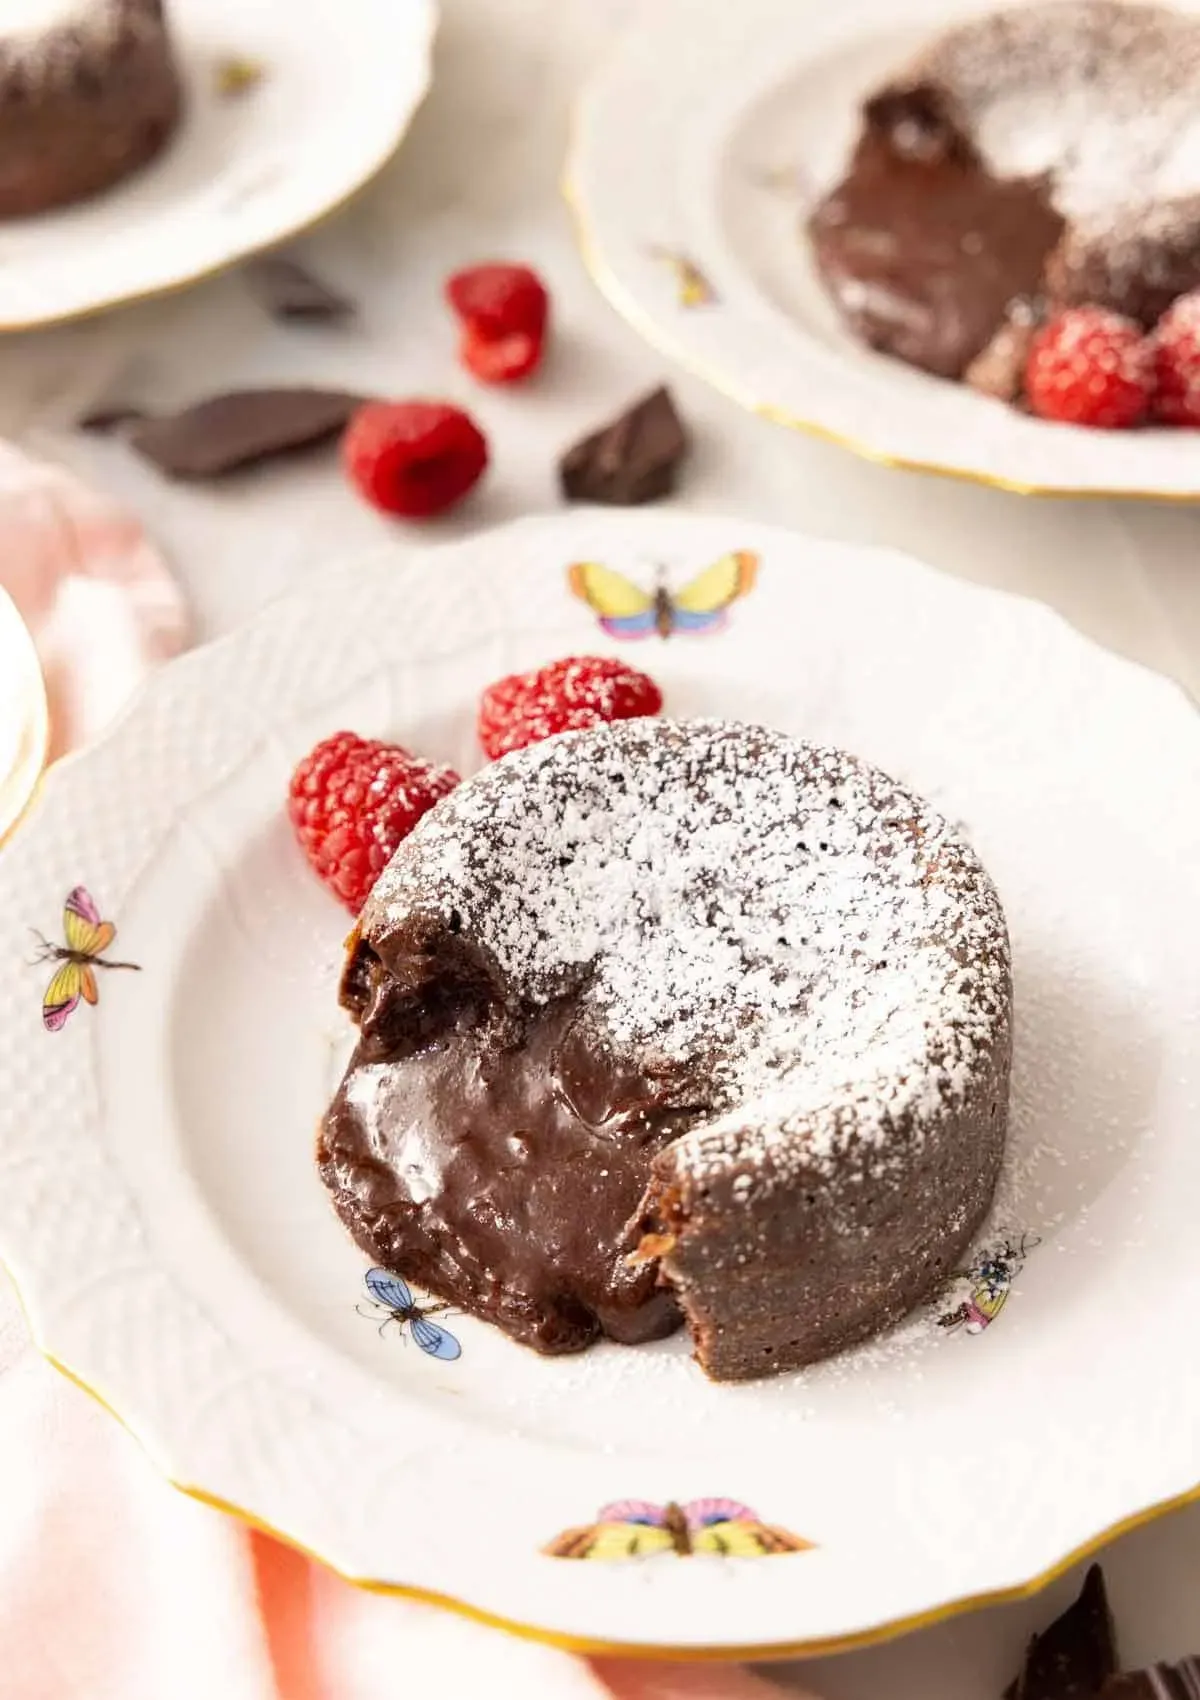
There's something undeniably theatrical about cutting into a seemingly simple chocolate cake only to have a warm, molten river spill out. It's a dessert that plays with expectations. You anticipate cake, sure, but the liquid center transforms it into something else entirely – a rich, gooey, slightly messy indulgence. This element of surprise is a huge part of its charm. It’s not just eating dessert; it's experiencing a moment of culinary drama right there at the table. This contrast between the firm outer crust and the flowing interior is what makes thedark chocolate lava cake captivatesso many people. It’s a textural masterpiece.
Sensory Overload in a Small Package
Beyond the visual spectacle, the sensory experience of a dark chocolate lava cake hits on multiple levels. You get the intense aroma of warm chocolate even before the first bite. The fork sinks through the delicate crust, then through the softer cake layer, finally hitting that liquid core. The taste is a deep, rich chocolate, often bittersweet, balanced by whatever you pair it with – maybe a scoop of vanilla ice cream melting into the warm chocolate, or a tart raspberry sauce cutting through the richness. It’s a powerful flavor punch in a relatively small dessert, making it feel incredibly luxurious and satisfying without being overwhelmingly large.
- The "Wow" Factor: The visual of the molten center spilling out.
- Texture Contrast: Firm cake exterior meets liquid interior.
- Intense Flavor: Deep, rich dark chocolate dominates.
- Perfect Pairing Base: Works beautifully with ice cream, fruit, or cream.
The Classic Dark Chocolate Lava Cake Recipe Steps
The Classic Dark Chocolate Lava Cake Recipe Steps
Melt Chocolate and Butter Like a Boss
Alright, let's get down to business with the actualdark chocolate lava cake recipe steps. First things first, you've got to get your chocolate and butter melted together. None of that questionable chocolate here; grab some good quality bittersweet stuff. Chop it up nice and small so it melts evenly. Toss it in a heatproof bowl with your unsalted butter. You can do this over a pot of simmering water (a double boiler situation) or, if you're feeling brave and your microwave is predictable, zap it in short bursts, stirring often. The goal is smooth, glossy, and completely melted. Don't scorch it, or you'll have bitter sadness instead of molten joy. Set it aside for a minute to cool slightly while you move on.
Whisk in Eggs and Sugar (Gently!)
While that chocolate cools just a tad, grab a separate bowl. Crack in your eggs and those extra egg yolks. This is where the magic happens for that rich texture. Add your sugar. Now, whisk them together, but don't go crazy trying to incorporate air like you're making a soufflé. We're just mixing until they're combined and slightly pale. Over-whisking will give you too much structure, and we want that glorious collapse in the middle. Once that's done, pour your slightly cooled melted chocolate and butter mixture into the egg and sugar mix. Fold it together gently with a spatula until it's just combined. Don't beat the life out of it.
- Use high-quality bittersweet chocolate (around 60-70% cocoa).
- Chop chocolate finely for even melting.
- Melt butter and chocolate gently, either over water or in short microwave bursts.
- Let the chocolate mixture cool slightly before combining with eggs.
- Whisk eggs and sugar until just combined, not frothy.
- Fold the chocolate mixture into the egg mixture gently.
Add Flour and Bake Hot and Fast
Now for the dry stuff. Sift in your flour and a pinch of salt. Sifting helps prevent lumps, which are definitely not invited to this party. Fold the flour in *just* until you don't see any dry streaks. Stop there. Overmixing the flour develops gluten, and that leads to tough cake, not delicate molten goodness. Your batter is now ready. Pour it into your prepared ramekins. Don't fill them to the brim; leave a little space for it to rise. Bake these puppies in a hot oven, usually around 450°F (230°C). The high heat is key to getting the outside cooked quickly while the inside stays liquid. They typically only need 9 to 12 minutes. You're looking for the edges to look set and pulling away slightly, while the center still looks a bit soft and jiggly. Pull them out *immediately*. This timing is critical for that molten center.
Secrets to a Perfect Molten Center in Your Dark Chocolate Lava Cake

Secrets to a Perfect Molten Center in Your Dark Chocolate Lava Cake
The Critical Role of Baking Time and Temperature
Getting that gorgeous, flowing center in yourdark chocolate lava cake recipehinges almost entirely on the oven. Think of it as a race against time and heat. You need the outside to cook through and form a stable cake structure, but the inside has to remain undercooked, liquid chocolate. This is why the high temperature, typically 450°F, is non-negotiable. It blasts the outside, setting it quickly. But the real secret sauce? The timing. You're looking for a very specific window. The edges should be visibly baked and pulling away from the ramekin, while the very center still looks soft, maybe even a little jiggly if you gently nudge the ramekin. Over-bake it by even a minute or two, and you've got yourself a perfectly fine, but not molten, chocolate cake. Under-bake it, and it might collapse entirely when you try to unmold it. It takes a keen eye and sometimes, a little trial and error with your specific oven.
Eggs, Flour, and the Gentle Touch
Beyond the oven, the batter itself holds secrets to the molten core. The ratio of eggs, especially the inclusion of extra yolks, is crucial. Those yolks add richness and fat, which contributes to that luxurious, fudgy texture around the molten part, and helps prevent the whole thing from setting too firmly. Then there's the flour – and this is where many go wrong. You add just enough flour to give the cake structure once it's baked, but *not* so much that it absorbs all the moisture or creates a dense crumb. The absolute key here is how you mix it in. Once the dry ingredients hit the wet, you fold gently. Stop the moment you don't see dry streaks. Aggressive mixing develops gluten, and gluten makes cake tough. We want tender cake encasing a liquid core, not a rubber ball.
- High oven temperature (450°F) is essential for fast outer cooking.
- Watch for edges setting and center still looking soft/jiggly.
- Err on the side of slightly under-baked if unsure.
- Extra egg yolks contribute to richness and proper texture.
- Add flour just until combined; avoid overmixing at all costs.
Elevating Your Dark Chocolate Lava Cake Serving
Elevating Your Dark Chocolate Lava Cake Serving
Classic Pairings That Just Work
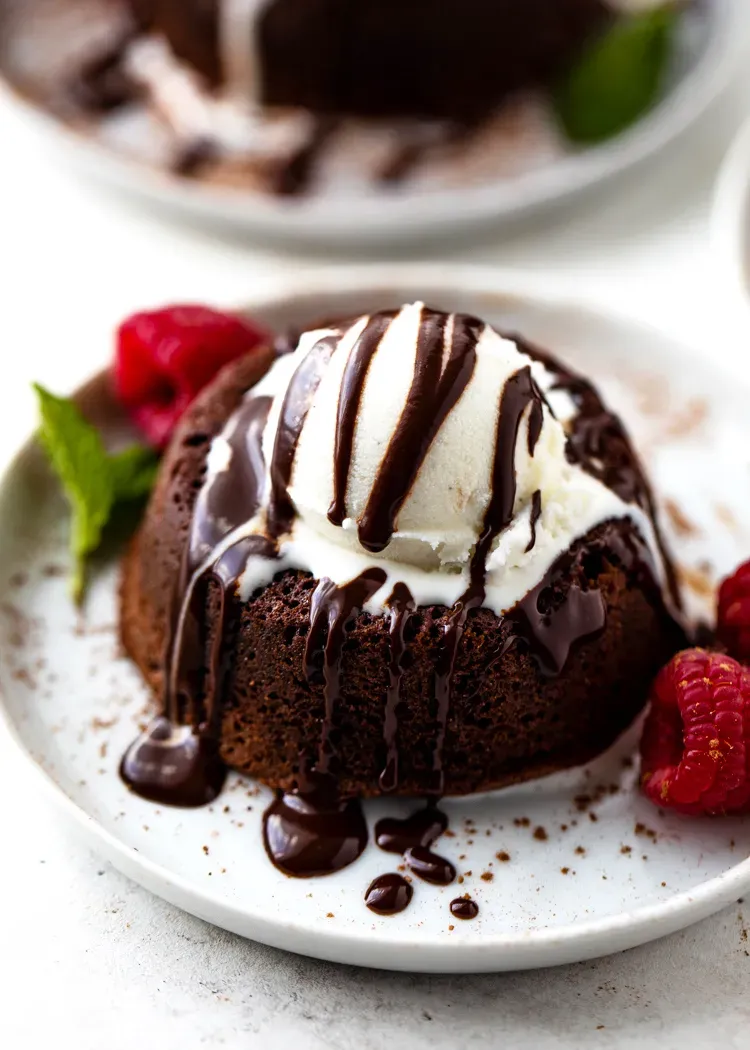
so you've nailed the molten center with yourdark chocolate lava cake recipe. Now comes the fun part: making it look and taste even better on the plate. The absolute no-brainer, go-to pairing is cold vanilla ice cream. The contrast between the hot, rich chocolate and the cold, creamy vanilla is pure magic. The ice cream starts to melt into the warm lava, creating this incredible sauce situation right there in your bowl. Another classic move? A scattering of fresh berries, like raspberries or strawberries. Their slight tartness cuts through the intense richness of the dark chocolate, which is a welcome balance. A simple dusting of powdered sugar is also never a bad idea for a touch of elegance.
Getting a Little More Creative with Garnishes
If you want to go beyond the basics whenelevating your dark chocolate lava cake serving, there are plenty of ways to play. Think about textures and flavors that complement dark chocolate. A dollop of freshly whipped cream is always a winner, maybe infused with a hint of espresso or orange zest. For something with crunch, toasted nuts like pistachios or hazelnuts add a lovely counterpoint to the soft cake. You could also drizzle a simple raspberry sauce (just puréed raspberries and a touch of sugar, strained) or a warm caramel sauce over the top. Don't overthink it, but a little extra touch can turn a great dessert into an unforgettable one. Here are a few ideas to try:
- A scoop of high-quality vanilla bean ice cream.
- Fresh raspberries or a mixed berry compote.
- A light dusting of powdered sugar or cocoa powder.
- Whipped cream (plain or flavored).
- Toasted nuts (pistachios, hazelnuts, almonds).
- A drizzle of raspberry sauce or salted caramel sauce.
- A sprig of fresh mint for color.
Prep Ahead: Your Dark Chocolate Lava Cake Strategy
Prep Ahead: Your Dark Chocolate Lava Cake Strategy
Making Life Easier, One Ramekin at a Time
Let's talk strategy, specifically how to get these molten beauties ready before your guests arrive or before that intense chocolate craving hits. The brilliant thing about thisPrep Ahead: Your Dark Chocolate Lava Cake Strategyis that the batter holds up remarkably well in the fridge. You can whip up the batter, pour it into your buttered and floured ramekins, and then just cover them tightly with plastic wrap. Pop them in the refrigerator, and they're good to go for several hours, even up to a day or two. This means you can do all the messy prep work earlier in the day, or even the day before, and then just slide them into the hot oven right before you want to serve. No last-minute scrambling, just effortless molten perfection when you need it.
Mastering the Molten Magic
So there you have it. The classicdark chocolate lava cake recipeisn't some mythical beast reserved for fancy restaurants. It's a straightforward process built on quality ingredients and a bit of timing. Getting that molten center is less about luck and more about understanding the bake time. Whether you serve it hot from the oven with a scoop of ice cream or plan ahead for a dinner party, this recipe delivers. Skip the fuss, follow the steps, and enjoy the simple, undeniable pleasure of warm, flowing dark chocolate.