Table of Contents
Alright, let's talk chocolate lava cake. That moment you slice into a warm, tender chocolate cake and a river of molten goodness spills out. Pure magic, right? It's the kind of dessert that makes people think you've got some serious pastry skills, even if it's surprisingly simple. But what happens when the craving hits and you realize your ramekins are nowhere to be found, maybe they're dirty, maybe you never owned any? Does that mean the dream of that gooey chocolate center is dead? Absolutely not.
Craving Molten Magic? What to Do When You Don't Have Ramekins
Craving Molten Magic? What to Do When You Don't Have Ramekins
So, you've got that intense, undeniable urge for a warm, gooey chocolate lava cake. You can almost taste the rich, molten center. You head to the kitchen, pull out the chocolate, the butter, the sugar... and then it hits you. No ramekins. Zip. Nada. Just empty cupboard space where those handy little ceramic cups should be. It's a kitchen crisis of moderate proportions, a true test of dessert determination. Do you abandon ship and settle for a boring old brownie? Do you brave the grocery store just for four small bowls? Or do you get creative and figure out how to make that decadent chocolate lava cake recipe without ramekins?
Clever Ways to Make Chocolate Lava Cake Recipe Without Ramekins
Clever Ways to Make Chocolate Lava Cake Recipe Without Ramekins
Alright, so the ramekins are out. Don't panic. This is where we get resourceful. The good news is that the fundamental idea behind a lava cake – a cake baked just long enough around the edges to hold its shape while the center stays molten – doesn't *strictly* require that specific ceramic form factor. What you need is a container that can handle oven heat, has a relatively consistent shape to ensure even baking, and isn't so large that the cake bakes through completely before the center melts. Thinking outside the ramekin means looking at what's already sitting in your cupboards. You'd be surprised how many everyday items can step up to the plate (or, well, the oven-safe cup) and help you execute a perfect chocolate lava cake recipe without ramekins.
- Muffin Tins (standard or jumbo)
- Oven-Safe Mugs or Coffee Cups
- Small Oven-Safe Bowls (like those for French Onion Soup)
- Empty, Cleaned Cans (like tuna or tomato paste - line them!)
- Small Mason Jars (check they are oven-safe)
The GoTo Chocolate Lava Cake Recipe (Adapted for Anything But Ramekins)
The GoTo Chocolate Lava Cake Recipe (Adapted for Anything But Ramekins)
Simple Ingredients, Serious Flavor
enough talk about what you *don't* have. Let's focus on what you *do* have and how to turn it into molten glory. The beauty of a classic chocolate lava cake recipe is its simplicity. You don't need a pantry full of obscure ingredients. We're talking about seven basic things, maybe eight if you count a little salt, that come together in minutes. Think good quality chocolate (this is non-negotiable for that liquid center), butter, eggs, a bit of sugar, a touch of flour, and vanilla. That's it. No weird emulsifiers or stabilizers needed. The magic happens with temperature and timing, not complexity.
Whipping Up the Batter
Making the batter is almost ridiculously easy. First, you'll melt your chocolate and butter together. Do this gently, either over a double boiler or carefully in the microwave, stirring frequently so it doesn't seize or burn. While that cools slightly, you'll whisk eggs and sugar until they're pale and slightly thickened – this adds structure and richness. Then, you fold the melted chocolate mixture into the egg mixture, followed by the flour and vanilla. Don't overmix! A few gentle stirs until everything is just combined is all it takes. Lumps are fine; overdeveloped gluten is not. This batter is your ticket to a chocolate lava cake recipe without ramekins, no matter the vessel.
Essential Ingredients Checklist
- High-quality semi-sweet or dark chocolate
- Unsalted butter
- Large eggs
- Granulated sugar
- All-purpose flour
- Vanilla extract
- Pinch of salt (optional but recommended)
Baking Without the Usual Suspects
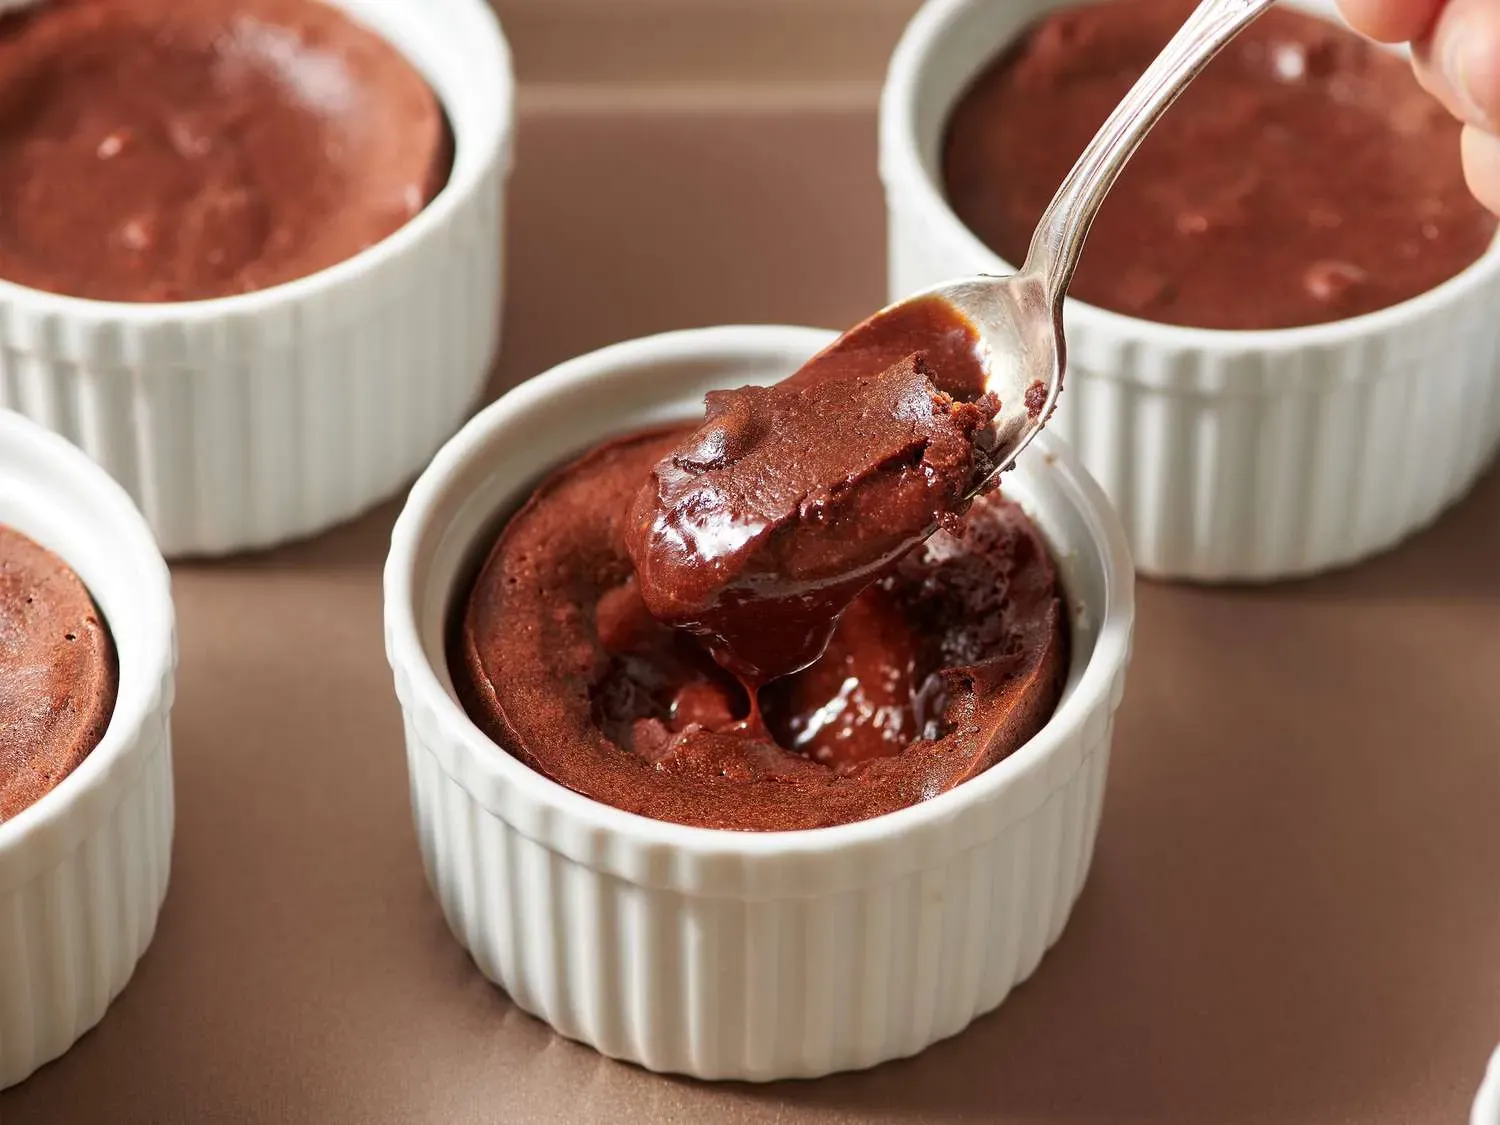
Now comes the part where we ditch the ramekins. Pour your luscious batter into your chosen, prepped containers – whether they're greased muffin cups, buttered coffee mugs, or lined soup bowls. Fill them about two-thirds full. The key here is the high oven temperature and short bake time. You're looking for the edges to set firm while the very center remains wobbly and liquid. This typically takes anywhere from 8 to 15 minutes at 425°F (220°C), depending entirely on the size and material of your improvised ramekin. A muffin tin will bake faster than a thick ceramic mug. Keep a close eye on them; a minute too long turns lava into cake.
Tips and Tricks for Perfect Chocolate Lava Cake Without Ramekins
Tips and Tricks for Perfect Chocolate Lava Cake Without Ramekins
Prep is Paramount, Regardless of the Vessel
Look, making a chocolate lava cake recipe without ramekins is totally doable, but you can't just pour the batter into any old cup and hope for the best. The number one thing people mess up when improvising is the prep of their container. You need that cake to slide out cleanly so you get that beautiful, intact structure with the molten center inside. This means buttering and flouring (or cocoa powdering, for chocolate cakes) *thoroughly*. Get into every nook and cranny, especially if you're using something with ridges or corners. Don't be shy with the butter and dusting agent. Think of it as insurance against a stuck, sad, non-lava cake.
Timing is Everything (And It Changes)
This is probably the trickiest part when you're not using standard ramekins: bake time. The recipe might say 12-14 minutes, but that's for a specific size and material. A thin metal muffin cup conducts heat way faster than a thick ceramic mug. You have to pay attention, not just follow the clock blindly. You're looking for the top edge of the cake to look set and slightly puffed, while the very center still looks a bit wet and jiggly when you gently nudge the container. If the whole top looks firm and dry, you've probably gone too far, and you've got a regular chocolate cake on your hands. Check early and often, maybe starting at 8 minutes for smaller, thinner containers.
What should you look for?
- Edges appear set and slightly pulled away from the sides.
- The center looks darker and softer than the edges.
- A gentle shake makes the center wobble like jelly.
- A toothpick inserted *just* off-center comes out with moist crumbs, not wet batter or completely clean.
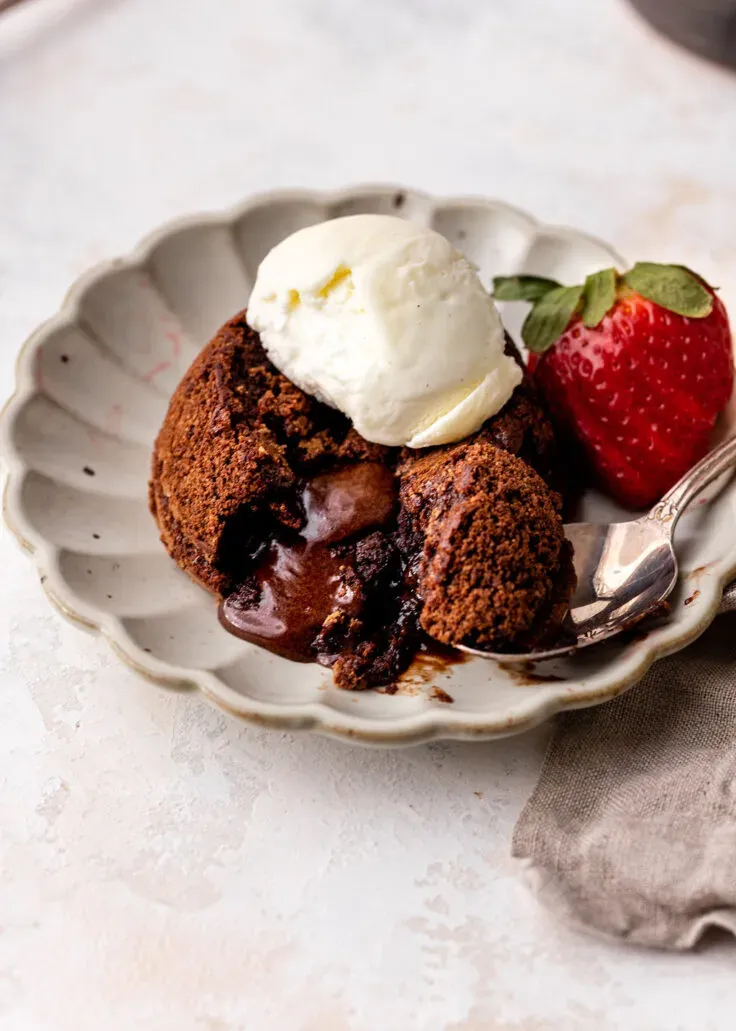
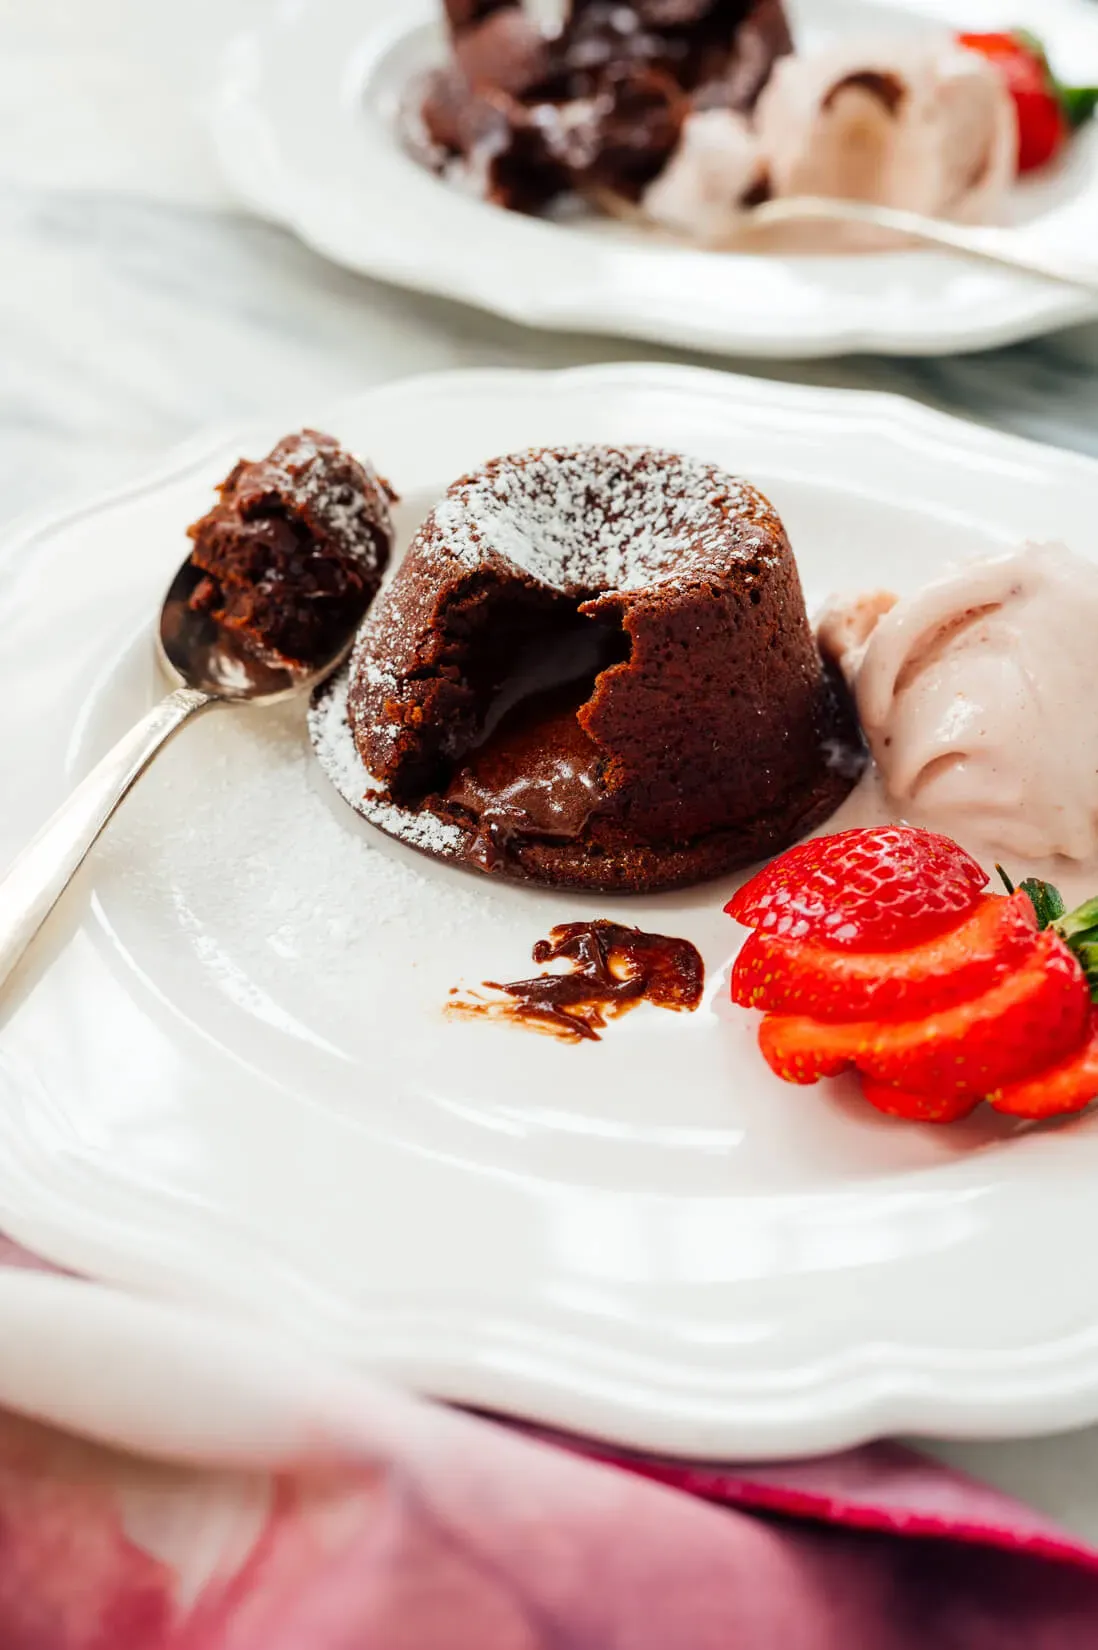
Serving Success: The Flip and the Flourish
they're out of the oven, looking promising. Now for the grand reveal. Let them sit for just a minute or two – no longer! – before attempting to invert them. This short rest helps the edges firm up just enough to hold their shape. Place your serving plate upside down over the container, then confidently flip the whole thing over. Give it a second, maybe a gentle tap, and lift the container straight up. With any luck, you'll have a perfectly formed cake with that glorious molten core pooling onto the plate. Serve immediately! This isn't a dessert that waits around. A scoop of vanilla ice cream melting into the warm chocolate is practically mandatory, or maybe some fresh berries for a little contrast. Don't overthink the garnishes; the star is the lava.
Molten Chocolate Dreams Realized, Ramekins Optional
So there you have it. The next time a serious chocolate craving strikes and your ramekins are playing hide-and-seek (or just don't exist in your kitchen universe), don't despair. As we've seen, a glorious, molten-centered chocolate lava cake is absolutely within reach using everyday items like muffin tins or even just small bowls. It's less about the fancy dish and more about the technique and, let's be honest, getting that chocolate-to-batter ratio just right. Go ahead, give it a shot. You might just find your new favorite way to make this decadent classic, proving once again that sometimes, the best desserts come from making do with what you've got.