Table of Contents
Let's be honest. You're here because you've seen the pictures, maybe even suffered through a disappointing restaurant version, and now you crave that perfect, molten center. That moment when you plunge a fork into a seemingly innocent chocolate cake and a warm, dark river flows out? That's the goal. Forget complicated techniques or ingredients you can't pronounce. We're talking about finding a truly great chocolate lava cake recipe that delivers on its promise: pure, unadulterated, tasty chocolate bliss. Too many recipes promise the moon and give you a slightly underbaked brownie. Not this one. This isn't about showing off; it's about achieving that decadent, gooey eruption reliably, every single time. We’ll walk you through exactly what you need and the surprisingly simple steps to get there. Get ready to conquer your dessert destiny, because mastering this chocolate lava cake recipe tasty is far easier than you think, and the payoff is absolutely worth it.
Cracking the Code: Why This Chocolate Lava Cake Recipe is Truly Tasty
Cracking the Code: Why This Chocolate Lava Cake Recipe is Truly Tasty
Enough Failed Attempts Already
Let's cut to the chase. You've probably been there. You see a picture of a perfect chocolate lava cake, molten core oozing onto the plate, and think, "How hard can it be?" Then you try a recipe. Maybe it's too dry, just a regular chocolate cupcake. Maybe it's raw batter all the way through. Or perhaps it sticks to the ramekin like superglue, leaving you with sad, mangled chocolate crumbs instead of a glorious dessert. Finding a truly reliable, genuinely tasty chocolate lava cake recipe feels like searching for a unicorn in a crowded mall. It shouldn't be this complicated, yet so many versions miss the mark entirely. It makes you question everything you thought you knew about butter, sugar, and chocolate.
The Science Behind the Goo
So, what makes *this* chocolate lava cake recipe different? It boils down to a few key factors that often get overlooked. It's not magic; it's method and ratios. The balance of fat, sugar, and flour is critical. Too much flour, and you get cake. Not enough fat, and it won't melt properly. The type of chocolate matters too – you need something that melts smoothly and has enough cocoa butter. This recipe nails that balance, ensuring the edges bake up firm enough to hold their shape while the center remains gloriously liquid. It’s about controlled underbaking, not just pulling something out of the oven hoping for the best.
- Use good quality dark chocolate (around 60-70% cocoa). Chocolate chips often contain stabilizers that prevent smooth melting.
- Don't overmix the batter once the flour goes in. Gluten development leads to cake, not gooey lava.
- Accurately measure ingredients, especially the flour. A little extra flour is the enemy of molten centers.
- Chill the batter briefly. This helps the outside set faster in the oven, insulating the center.
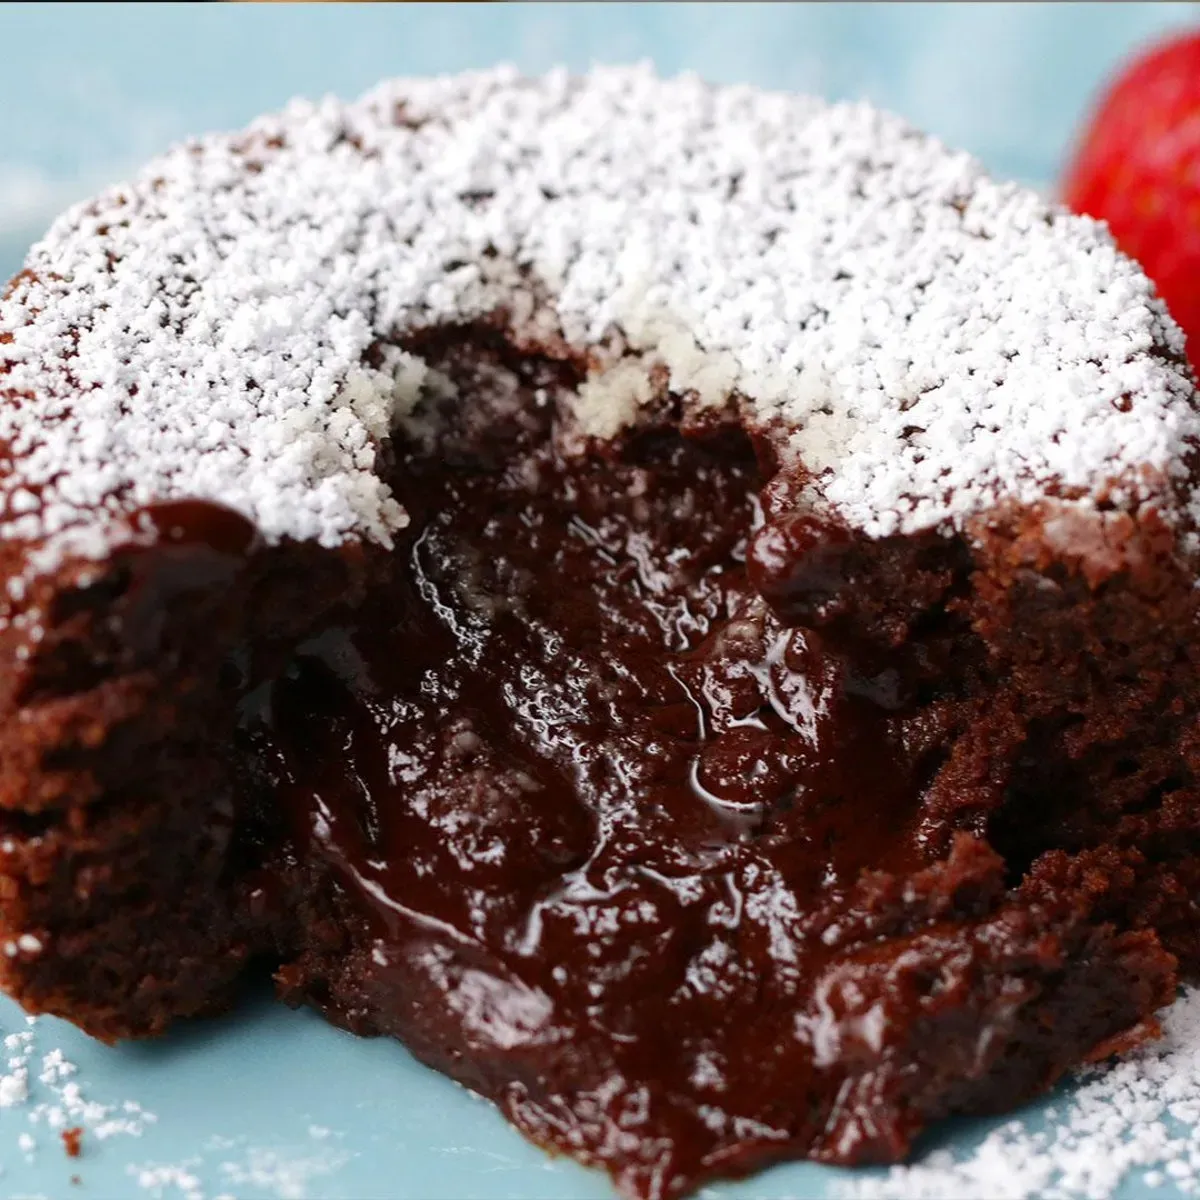
The Payoff: A Truly Tasty Experience
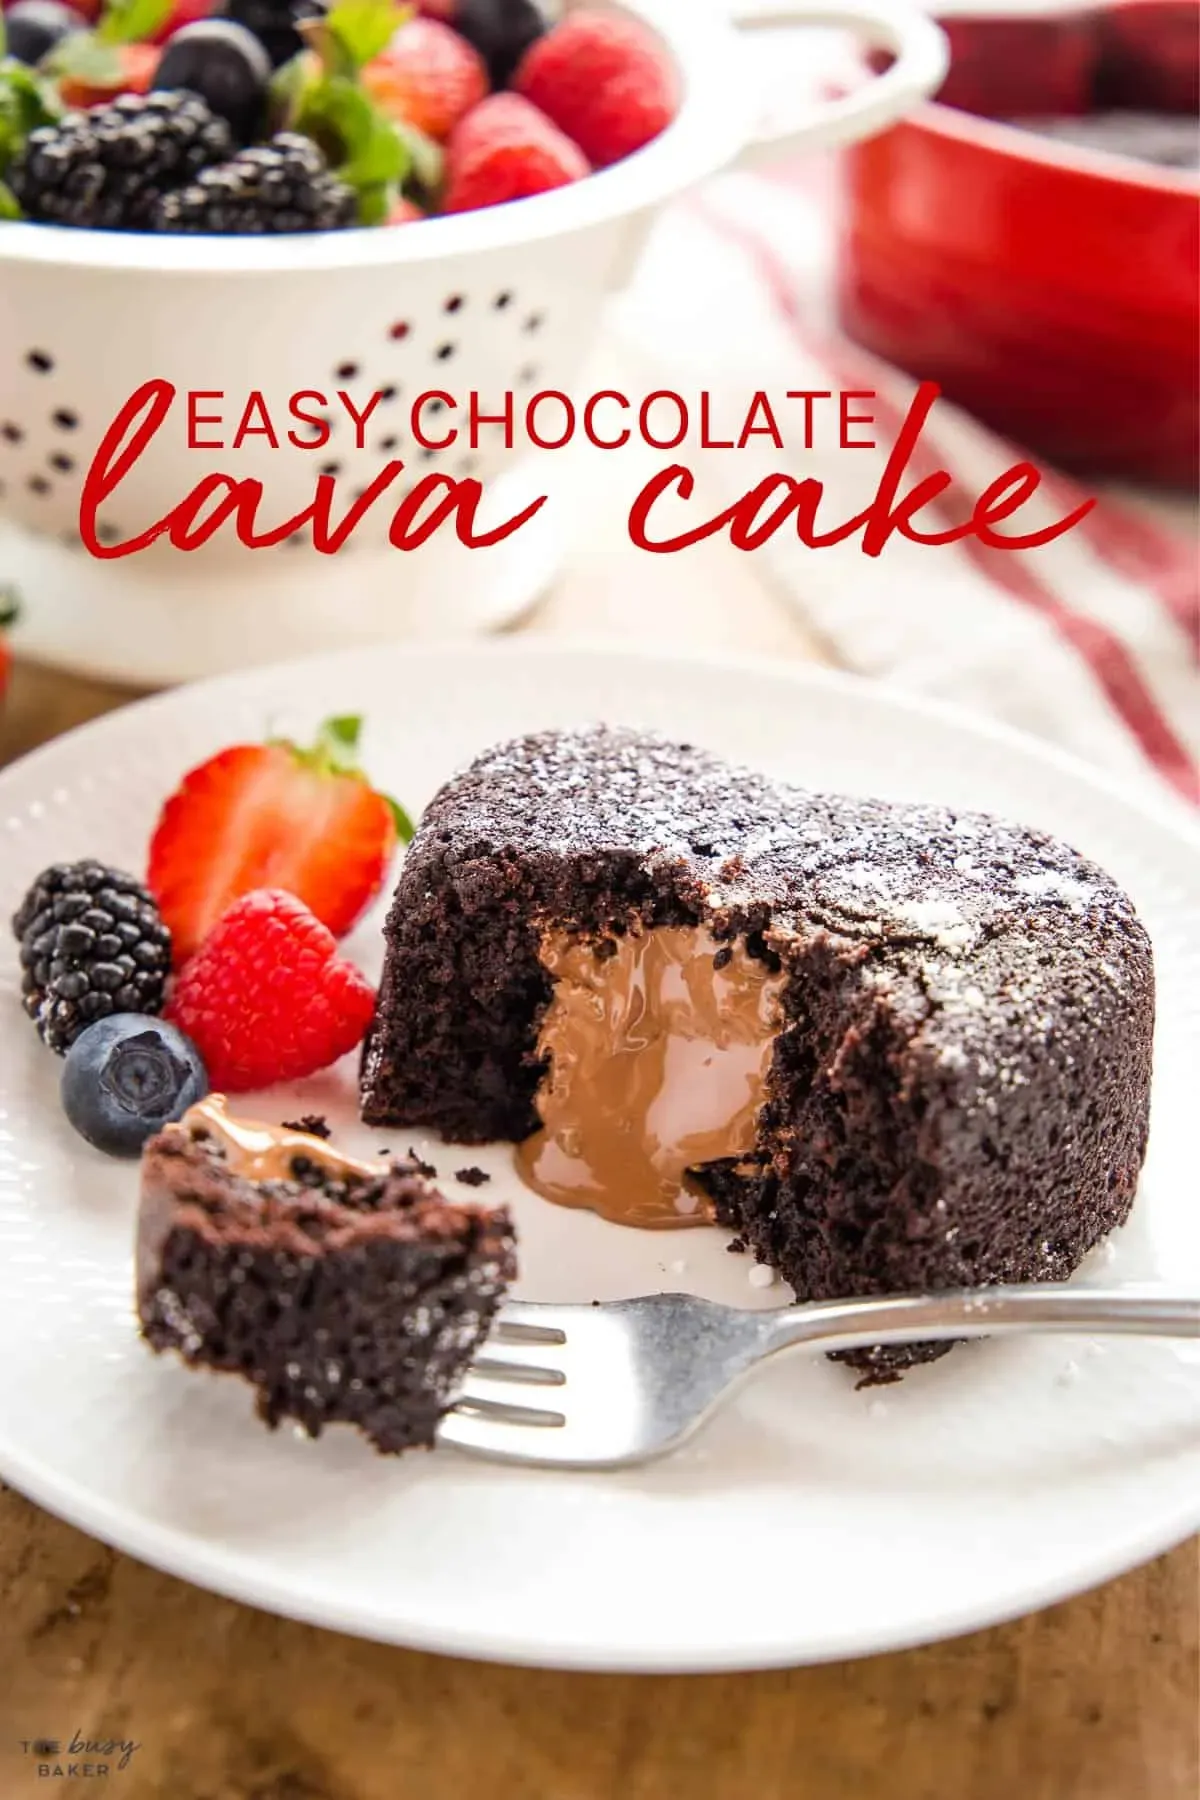
When done correctly, this chocolate lava cake recipe delivers an experience, not just a dessert. The slight bitterness of dark chocolate cuts through the sweetness, creating a rich, deep flavor. The contrast in textures – the tender, slightly crisp edge giving way to the warm, flowing center – is what makes it so compelling. It’s decadent without being cloying, simple yet sophisticated. This isn't just a dessert; it's a moment. A spoonful of warm cake, molten chocolate, maybe some cold ice cream melting into the mix. That's why we bother. That's the truly tasty chocolate lava cake we're after.
The Lineup: Ingredients for Your Molten Masterpiece
The Lineup: Ingredients for Your Molten Masterpiece
The Non-Negotiables for Deliciousness
Alright, so you're convinced. You want the good stuff, the truly tasty chocolate lava cake. This isn't the time to skimp. The success of your molten center hinges on the quality of what goes into the bowl. Think of your ingredients as the foundation of a small, delicious building that's designed to collapse perfectly in the middle. You wouldn't build a house with flimsy materials, right? Same principle applies here. We need good chocolate, real butter, fresh eggs, and just the right amount of sugar and flour. Each plays a critical role in getting that rich flavor and, more importantly, that signature gooey core we're chasing.
Here’s the essential lineup you'll need for your chocolate lava cake recipe:
- Unsalted butter: 1 stick (1/2 cup or 113g)
- Good quality dark chocolate (60-70% cocoa): 4 ounces (about 113g), finely chopped
- Granulated sugar: 1/2 cup (100g)
- Large eggs: 2 whole eggs
- Large egg yolks: 2
- All-purpose flour: 1/4 cup (30g)
- Pinch of salt
- Optional: Cocoa powder or granulated sugar for dusting ramekins
Baking Brilliance: The Simple Steps to Your Chocolate Lava Cake Recipe
Baking Brilliance: The Simple Steps to Your Chocolate Lava Cake Recipe
Prep Work: Greasing and Melting Your Way to Success
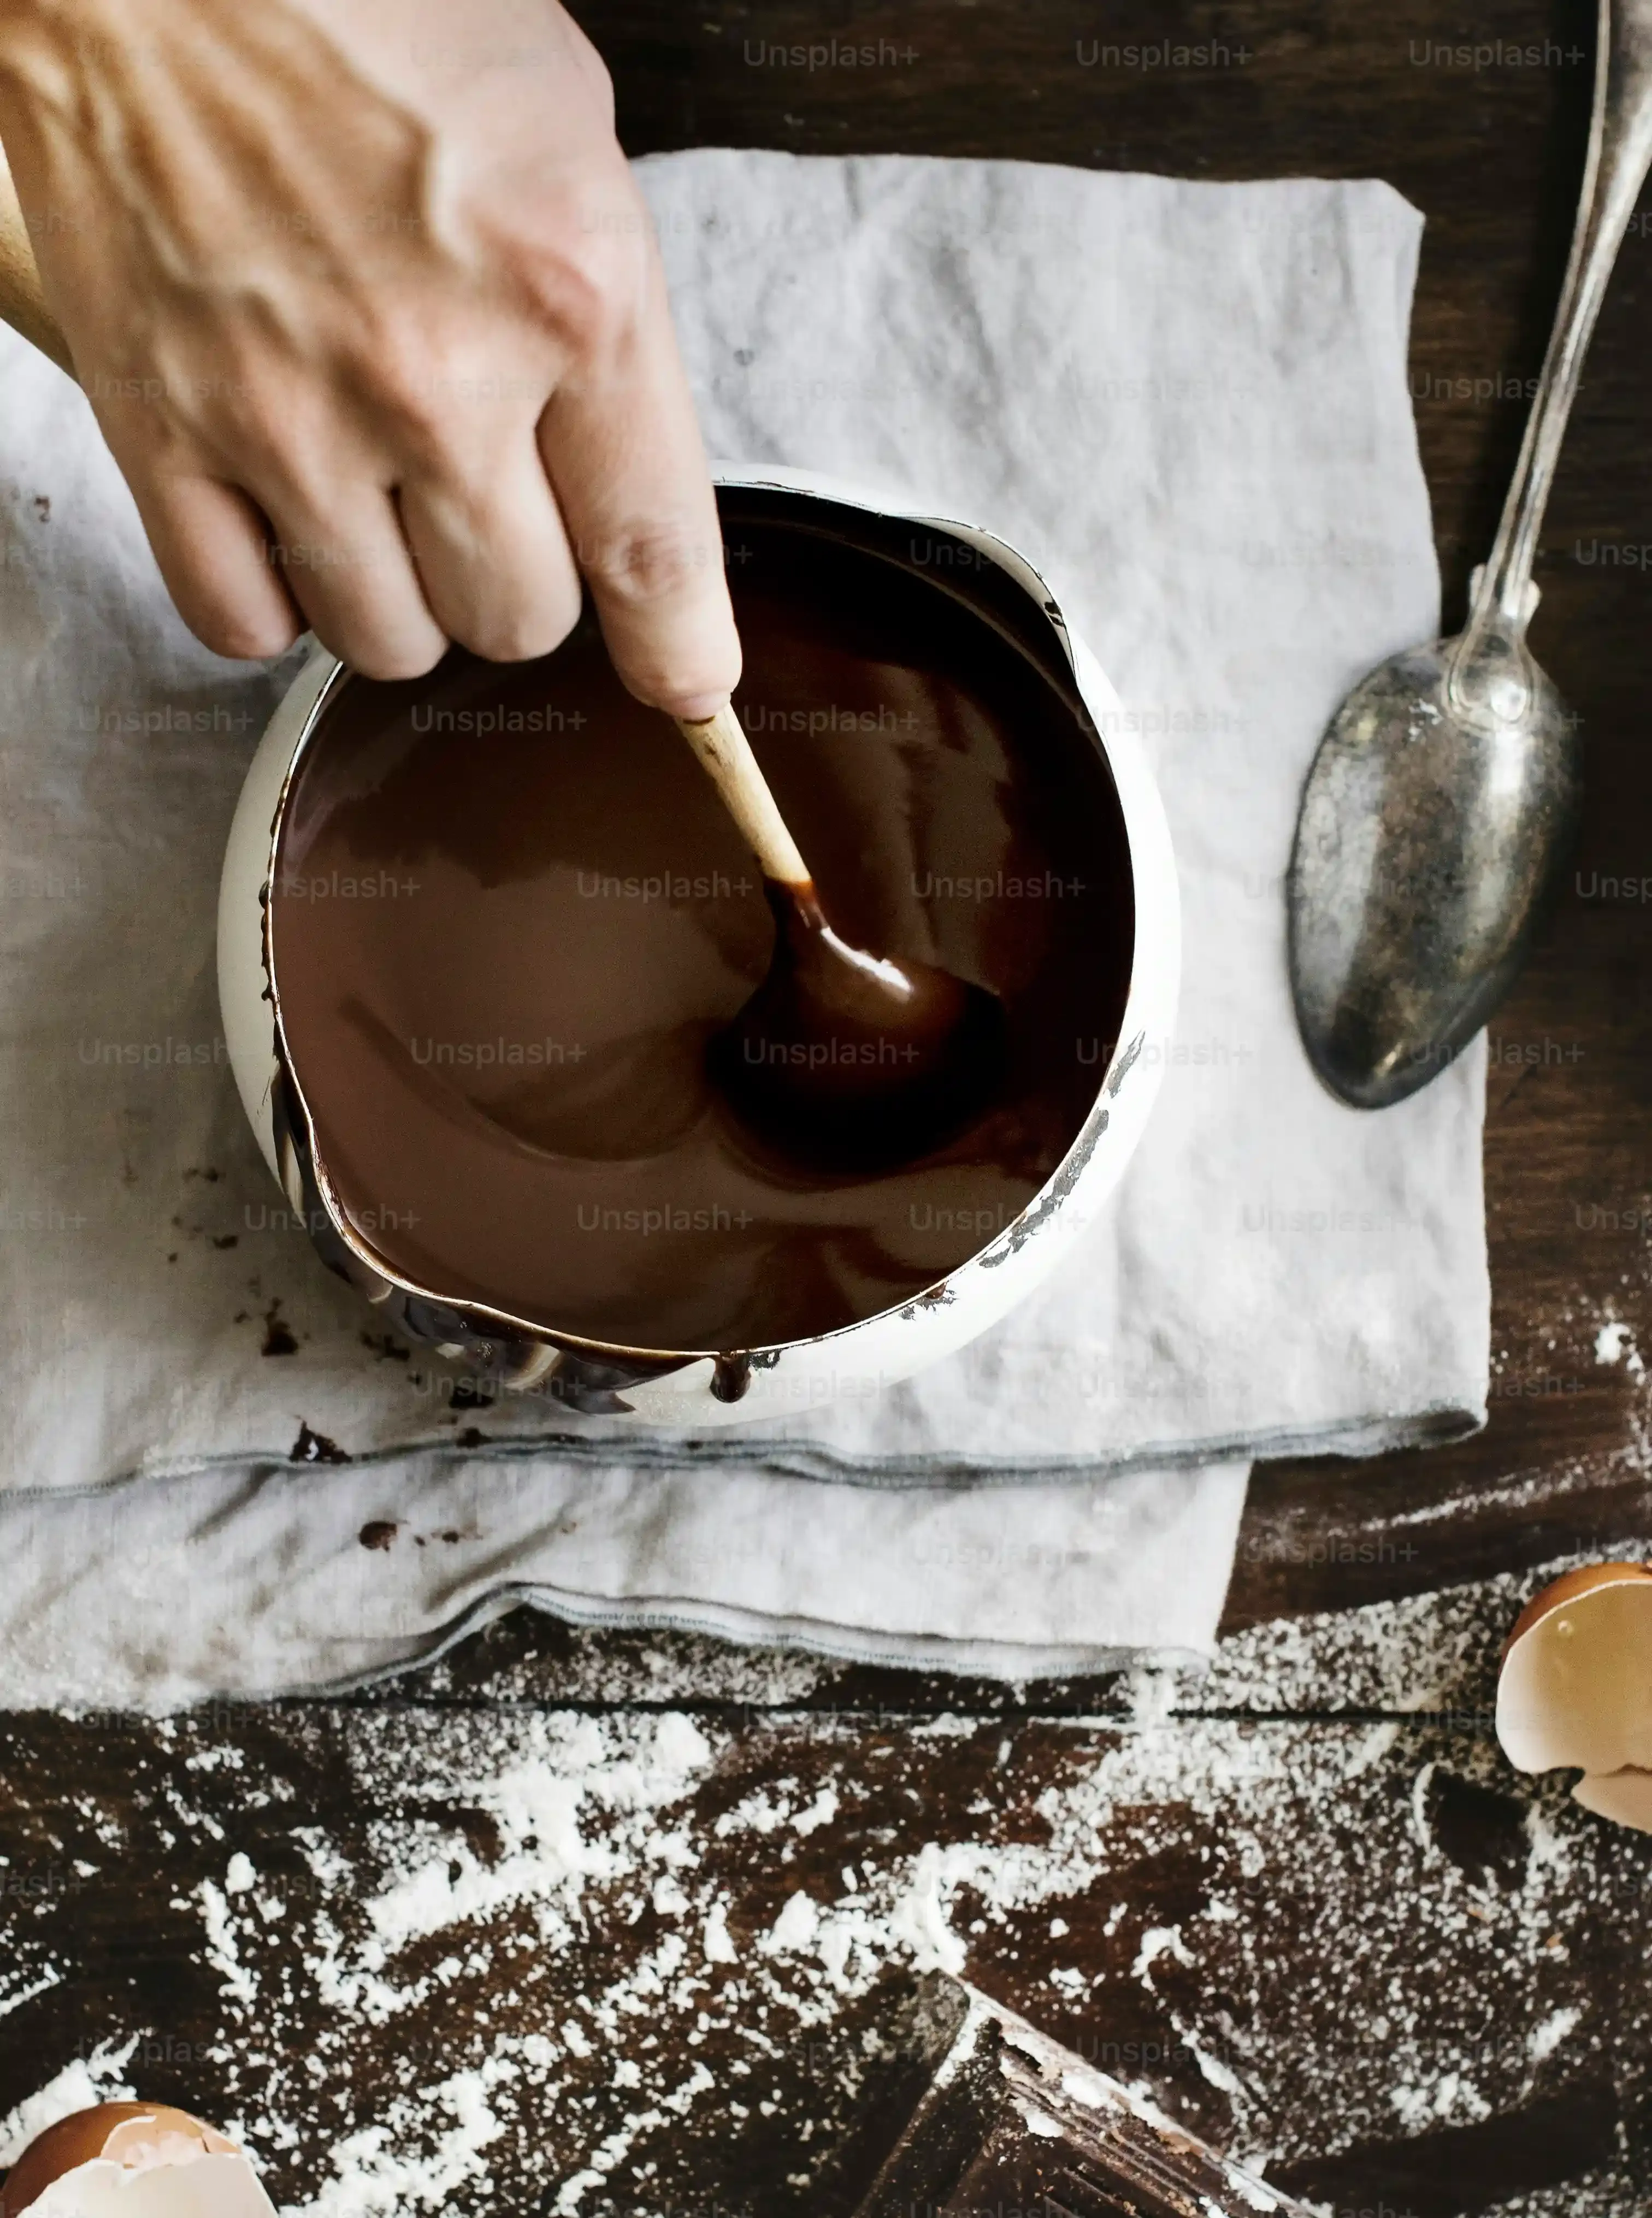
let's get down to business with this chocolate lava cake recipe tasty. First things first, you need to prep your stage – that means your ramekins. Butter them generously. And when I say generously, I mean like you're trying to make them waterproof. Then, give them a good dusting. You can use cocoa powder for a deeper chocolate flavor or granulated sugar for a slightly crisp edge that pulls away cleanly. Tap out the excess. This step is non-negotiable unless you enjoy chiseling dessert out of ceramic. Next, we tackle the chocolate and butter. Gently melt them together. A double boiler is the classic route, but the microwave works fine if you go low and slow, stirring every 30 seconds. You want it smooth and glossy, no lumps, no scorching. This molten mixture is the heart of your lava.
Mixing the Magic: Eggs, Sugar, and Just Enough Flour
Now for the batter assembly. In a separate bowl, whisk together your whole eggs, egg yolks, and sugar until they're pale yellow and slightly thickened. This whips a little air in and gets the sugar dissolving. Don't go crazy; you're not making a meringue. Gently fold the melted chocolate and butter mixture into the egg mixture. Be smooth, be deliberate. Finally, the flour. Add the measured flour and that pinch of salt. Fold it in *just* until you see no dry streaks. Seriously, stop there. Overmixing develops gluten, turning your potential lava into cake. Divide the batter evenly among your prepared ramekins. They should be about three-quarters full. A brief chill in the fridge at this point, say 15-20 minutes, helps firm things up slightly before baking, which is key to that perfect center.
Here's a quick checklist for this stage:
- Generously butter and dust ramekins.
- Melt chocolate and butter until smooth.
- Whisk eggs and sugar until pale.
- Gently fold melted chocolate into egg mixture.
- Fold in flour *just* until combined.
- Fill ramekins three-quarters full.
- Chill filled ramekins if time allows.
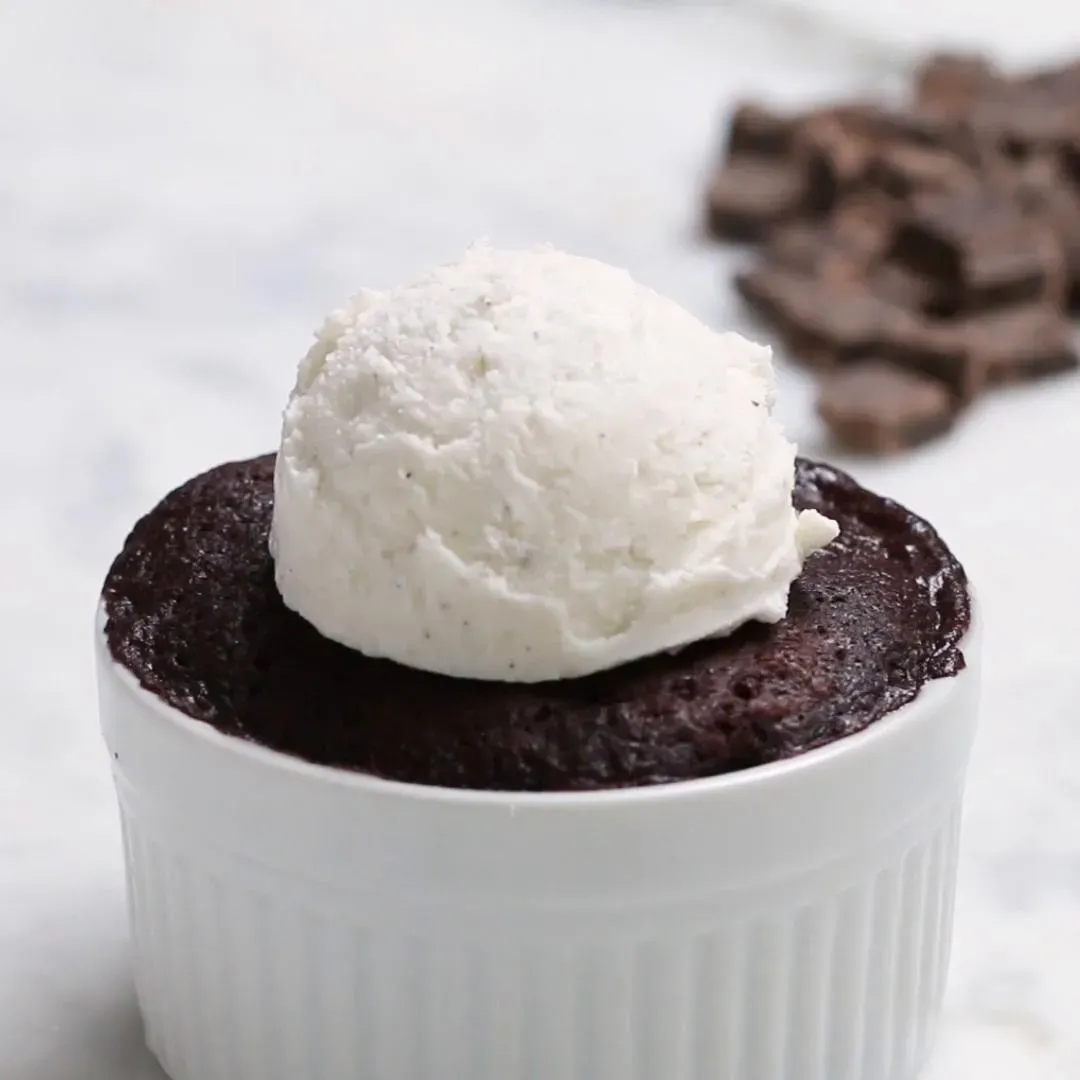
Serving Up Success: Getting that Tasty Gooey Center Just Right
Serving Up Success: Getting that Tasty Gooey Center Just Right
The Moment of Truth: Into the Oven They Go
your beautiful, chilled (or not, if you're impatient, I get it) ramekins are ready. Preheat your oven to a relatively high temperature – 400°F (200°C) is usually the sweet spot for this kind of controlled chaos. The high heat helps set the outside quickly while leaving the inside relatively untouched. Place your ramekins on a baking sheet to make them easier to handle and catch any potential overflow (though if your ramekins are properly filled, there shouldn't be any). Slide them into the hot oven. Now, this is where the magic, and the slight anxiety, happens. Baking time is crucial and can vary slightly depending on your oven and the exact size of your ramekins. We're looking for a specific visual cue, not just hitting a timer and hoping for the best. Typically, it takes around 10-14 minutes. Don't walk away and start scrolling through cat videos just yet. Keep an eye on them.
Spotting the Perfect Lava
Knowing when they're done is the key to that glorious, molten core. You're not baking a regular cake here where a toothpick comes out clean. That would be a disaster. What you want is for the edges to look set and slightly pulled away from the sides of the ramekin. The center should still look soft and perhaps a tiny bit jiggly when you gently nudge the ramekin. If the entire top looks completely firm and dry, you've gone too far, and you'll have a very good, but non-lava, chocolate cake. Pull them out of the oven when the edges are set but the center yields slightly to a gentle touch. They will continue to cook *very* slightly out of the oven, so err on the side of caution if you're unsure.
- Edges are set and firm.
- Center looks soft and slightly wet.
- Gentle nudge causes a slight jiggle in the middle.
- Top might have a slight crack around the edges.
Beyond the Basics: Making Your Lava Cake Even More Tasty
Beyond the Basics: Making Your Lava Cake Even More Tasty
Adding Layers of Flavor to Your Lava
So, you've nailed the classic molten core with your chocolate lava cake recipe. Bravo. But why stop there? Once you have the technique down, you can start playing around. Think of the lava itself as a canvas. A splash of espresso powder dissolved in the melted butter and chocolate? Instant depth, turning the chocolate flavor from good to *seriously* grown-up. A teaspoon of orange zest stirred into the batter adds a bright, surprising counterpoint to the richness. Or maybe a pinch of cayenne pepper for a subtle, warming kick that hits you after the chocolate rush fades. These small additions don't mess with the structure; they just make the whole "tasty" part even more, well, tasty.
Elevating the Experience with Toppings and Pairings
The cake itself is the star, sure, but the supporting cast matters. Forget just plopping a scoop of vanilla ice cream on top (though, let's be real, that's never a *bad* option). Consider a scoop of high-quality raspberry sorbet for a vibrant, tangy contrast. Or maybe a dollop of freshly whipped cream, maybe infused with a little vanilla bean or a hint of liqueur. A sprinkle of flaky sea salt just before serving enhances the chocolate's complexity. For something truly next level, try a quick berry compote – just heat some mixed berries with a little sugar and lemon juice until they break down. The warm, slightly tart fruit is a perfect foil for the rich, sweet lava. Presentation counts too. Serve them warm, always. That's non-negotiable for maximum lava flow.
Consider these upgrades for your chocolate lava cake recipe:
- Espresso powder for depth
- Orange zest for brightness
- Cayenne pepper for a kick
- Sea salt for complexity
- Raspberry sorbet or berry compote for contrast
- Vanilla bean or liqueur-infused whipped cream
Your Molten Victory
So there you have it. You put in a little effort, followed some straightforward steps, and now you've got a warm, chocolatey masterpiece sitting in front of you. No complex pastry school tricks needed, just decent ingredients and a timer. That moment you break through the top and see the molten center spill out? Yeah, that's the good stuff. Enjoy the win. You earned this small, deeply satisfying indulgence. Now go eat it before it cools down and just becomes regular excellent chocolate cake (which isn't the point, is it?).