Table of Contents
Ever stared at a picture of a perfect chocolate lava cake, that rich, dark exterior promising a molten, gooey center, and thought, "Yeah, right. Mine would just be a sad, dry puck"? You're not alone. The fear of serving a cake that refuses to 'lava' is real, a culinary anxiety nightmare. But what if I told you getting that dramatic, chocolatey cascade isn't some dark art reserved for fancy restaurants? What if a reliable **chocolate lava cake recipe allrecipes** style was actually within your grasp, requiring basic ingredients and just a few minutes of your time? This isn't about magic; it's about timing, temperature, and knowing a few simple tricks. Forget complicated steps and intimidating techniques. We're going to walk through creating individual molten chocolate masterpieces that deliver on their promise every single time. Get ready to ditch the dessert doubts and embrace the delicious, oozing reality.
Mastering the Chocolate Lava Cake Recipe Allrecipes Loves
Mastering the Chocolate Lava Cake Recipe Allrecipes Loves
Why Bother with the Gooey Core?
so you've seen the pictures. That perfect little cake, maybe dusted with powdered sugar, and then you slice into it, and *whoosh* – molten chocolate spills out like a delicious, dark river. That's the magic, right? It's not just a chocolate cake; it's an experience. People think it's super tricky, something only fancy chefs can pull off. But the core idea behind a great **chocolate lava cake recipe allrecipes** style is surprisingly simple. It’s all about getting that balance: cooked edges holding it together, and a warm, liquid center that hasn't quite set.
The Secret Sauce (Spoiler: It's Underbaking)
Here’s the deal: the "lava" isn't some separate filling you inject. It's the same batter as the cake, just intentionally undercooked in the middle. When you bake it, the outside sets up first, creating the cake structure. The heat penetrates inward, warming the center but not baking it solid before the timer dings. Pull it out at the right moment, and you've got that glorious contrast. This specific approach, like you find in many reliable **chocolate lava cake recipe allrecipes** variations, focuses on precise timing and oven temperature to nail that delicate state between batter and cake.
Common Lava Cake Pitfalls (and How to Dodge Them)
- **Too Solid:** Baked too long. The center cooked through.
- **Too Runny:** Not baked long enough, or oven too cool. The edges didn't set.
- **Sticking:** Ramekins weren't prepped properly (butter and cocoa/flour).
- **Flat Tops:** Batter might be too thin or not enough leavening (though less critical here).
Reliability is Key
What makes a **chocolate lava cake recipe allrecipes** often a go-to is its dependability. These aren't fussy, cheffy instructions designed to make you feel inadequate. They're usually stripped-down, focusing on the essentials: good quality chocolate, proper melting, mixing just enough, and getting the bake time right. They understand you just want a damn good dessert that works. It’s about repeatable results, so you can make this for a date night, a small gathering, or just because it's Tuesday and you deserve it, without stressing if the lava will actually flow.
Gathering Your Gooey Chocolate Lava Cake Ingredients
Gathering Your Gooey Chocolate Lava Cake Ingredients
What You Need for That Molten Miracle
Alright, so you're ready to actually make this happen. Forget weird, obscure ingredients. The beauty of a solid **chocolate lava cake recipe allrecipes**-style is that the shopping list is pretty standard. You'll need good quality chocolate – this is non-negotiable. Don't grab the waxy stuff you use for holiday candy melts. Think semi-sweet or bittersweet bars, something you'd actually eat on its own. Butter, of course, because everything good starts with butter. Eggs are crucial for structure and richness. Sugar for sweetness, naturally. A little flour to hold things together, but not too much, or you kill the lava dream. And cocoa powder? That just amps up the chocolate intensity. Salt is surprisingly important; it balances the sweetness and makes the chocolate taste even more... chocolatey. That’s pretty much it. No dragon tears or unicorn dust required, just basic pantry staples elevated by technique.
Mixing and Baking Your Perfect Chocolate Lava Cakes
Mixing and Baking Your Perfect Chocolate Lava Cakes
Getting the Batter Just Right
so you've got your ingredients lined up. Now comes the part where things start looking like actual dessert batter. The first move, and it’s non-negotiable for a good **chocolate lava cake recipe allrecipes** style, is melting the chocolate and butter together. Do it gently. A double boiler is classic, but a microwave on low power, stirring every 30 seconds, works fine too. Just don't scorch the chocolate unless you enjoy the taste of sadness. Once that's smooth and glossy, let it cool slightly. Why cool? Because you don't want to scramble the eggs you're about to add. Whisk the eggs and sugar together until they're just combined – you're not making a meringue here, just integrating them. Then, whisk the cooled chocolate mixture into the egg mixture. Finally, gently fold in the flour, salt, and cocoa powder. Don't overmix. You're not developing gluten; you're just bringing it all together. Lumps? A few small ones are fine. Overmixing? That leads to tough cakes, and nobody wants a tough lava cake.
The Critical Bake Time
Now for the moment of truth: the oven. Your perfectly prepped ramekins (remember to butter and cocoa them!) are waiting. Pour the batter in, filling them about two-thirds to three-quarters full. Pop them into a hot oven – typically around 400°F (200°C) is the sweet spot for many a reliable **chocolate lava cake recipe allrecipes**. The bake time is where the magic, or the disaster, happens. It's usually short, like 10-13 minutes. You're looking for the edges to be set and pulling away slightly from the ramekin, while the center still looks a little soft and maybe a tiny bit wobbly if you gently nudge the ramekin. This is the point of no return. Too early, and it's soup. Too late, and it's just a small chocolate cake. Trust your gut, but mostly, trust the clock *and* your eyes.
Key Baking Pointers:
- Preheat your oven properly. A hot oven is key for fast setting edges.
- Grease and flour/cocoa those ramekins generously. Seriously, don't skip this.
- Fill ramekins evenly so they bake at the same rate.
- Start checking around the minimum bake time. Ovens vary.
- Look for set edges and a soft center.
- Don't be afraid to pull them out when they look *almost* done. Carryover heat does the rest.
Serving Up Your Molten Chocolate Lava Cake Masterpiece
Serving Up Your Molten Chocolate Lava Cake Masterpiece
Getting That Gooey Goodness Onto the Plate
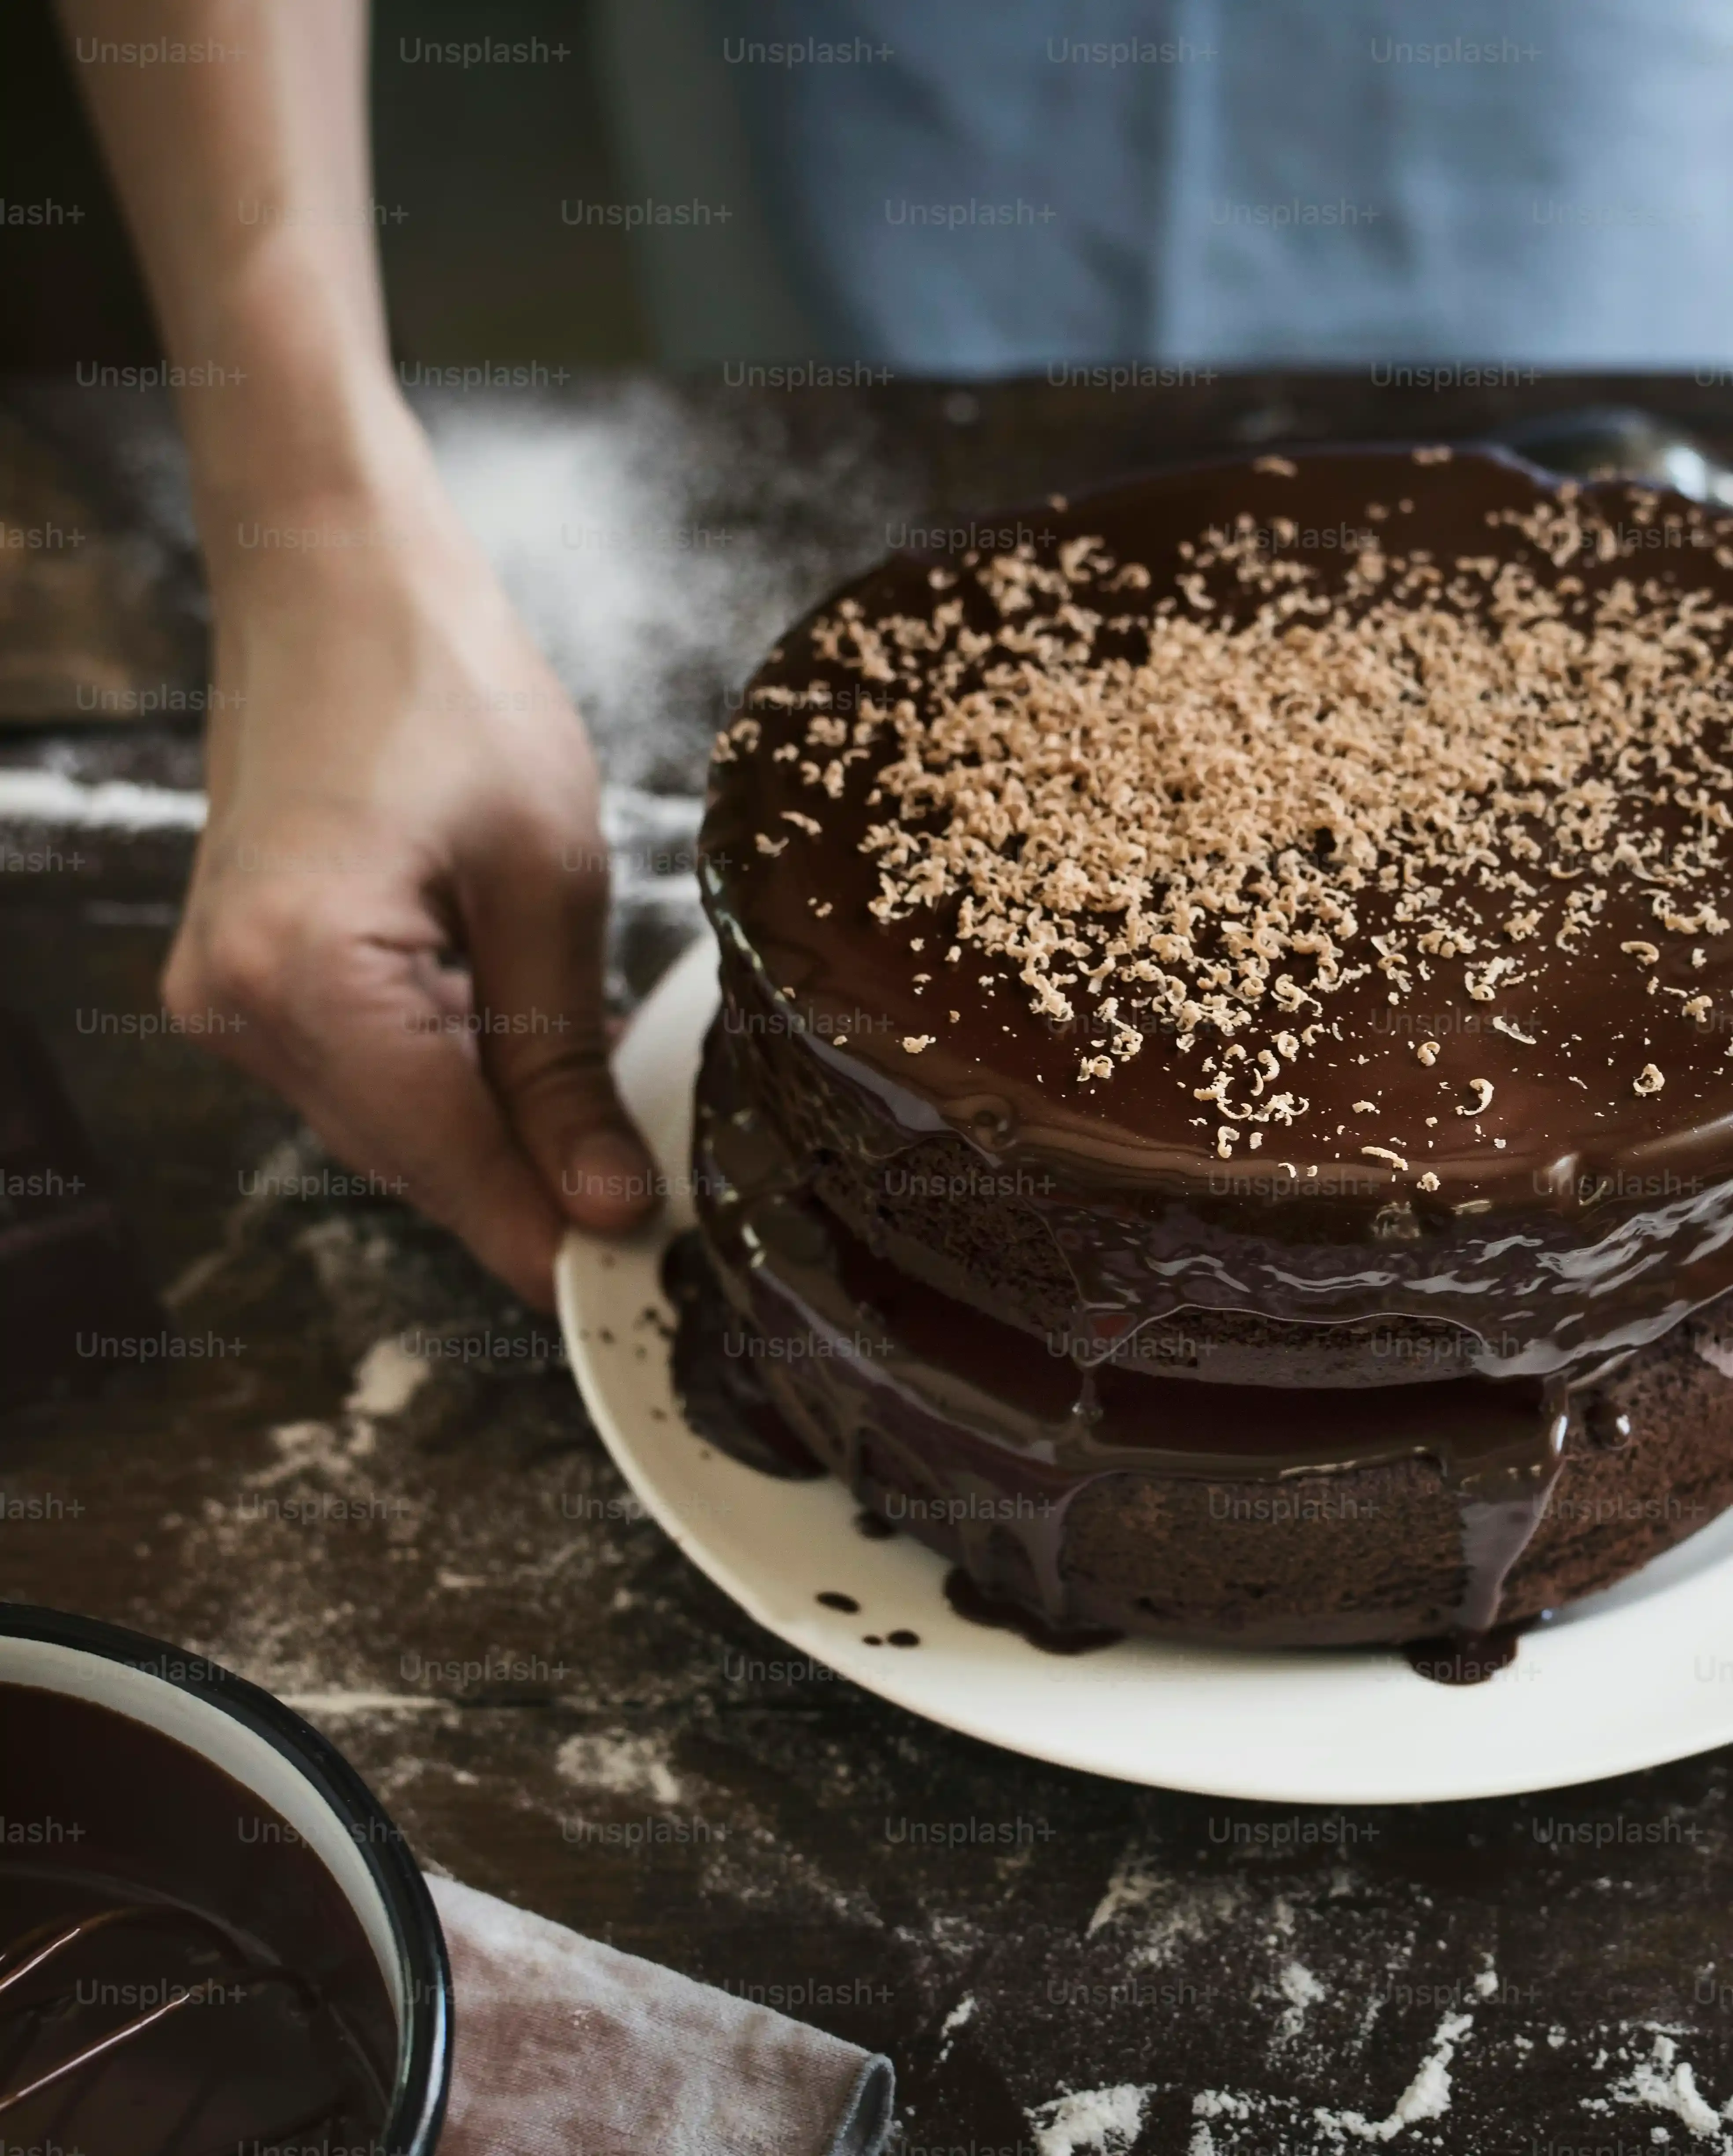
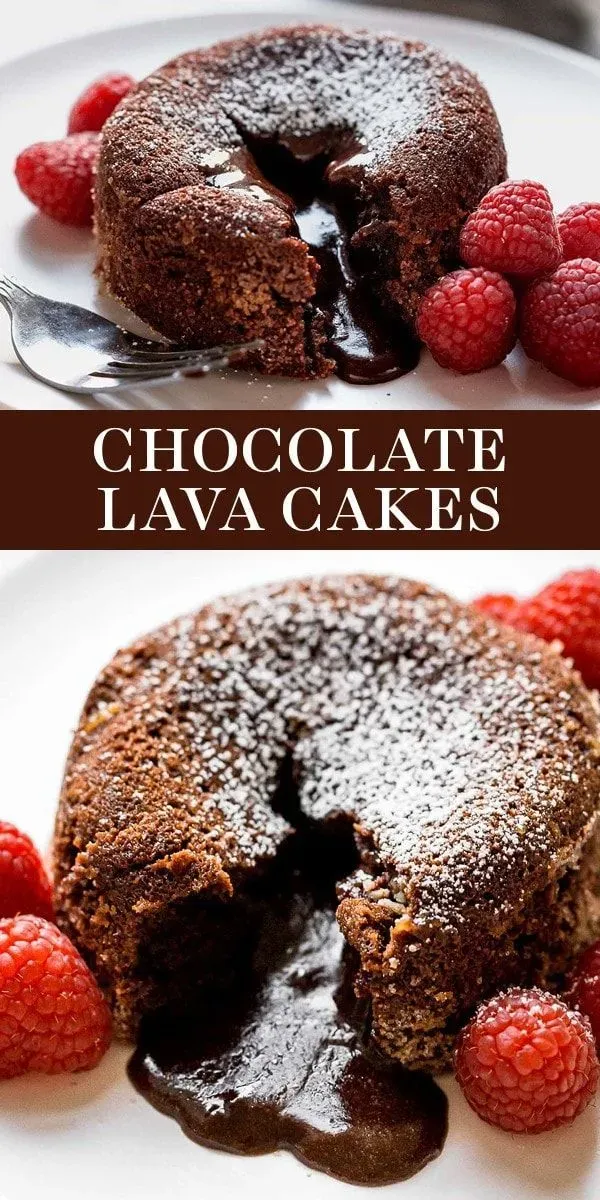
the timer's off, and your lava cakes are out of the oven, looking glorious with those slightly pulled-away edges. This is the moment of truth for presentation. Don't rush it! Let them sit for just a minute or two in the ramekins. This lets the edges firm up a tiny bit more, making the transfer easier. Have your serving plates ready. Place a plate upside down over the ramekin. Then, with a quick, confident flip (like you're showing off a little kitchen skill), invert the ramekin and plate together. Give the bottom of the ramekin a gentle tap or two. The cake should slide right out, hopefully leaving a perfect little mound ready to erupt. If it sticks, sometimes running a thin knife gently around the edge before flipping helps, but proper greasing usually prevents this drama.
The Final Flourish: Toppings and Presentation
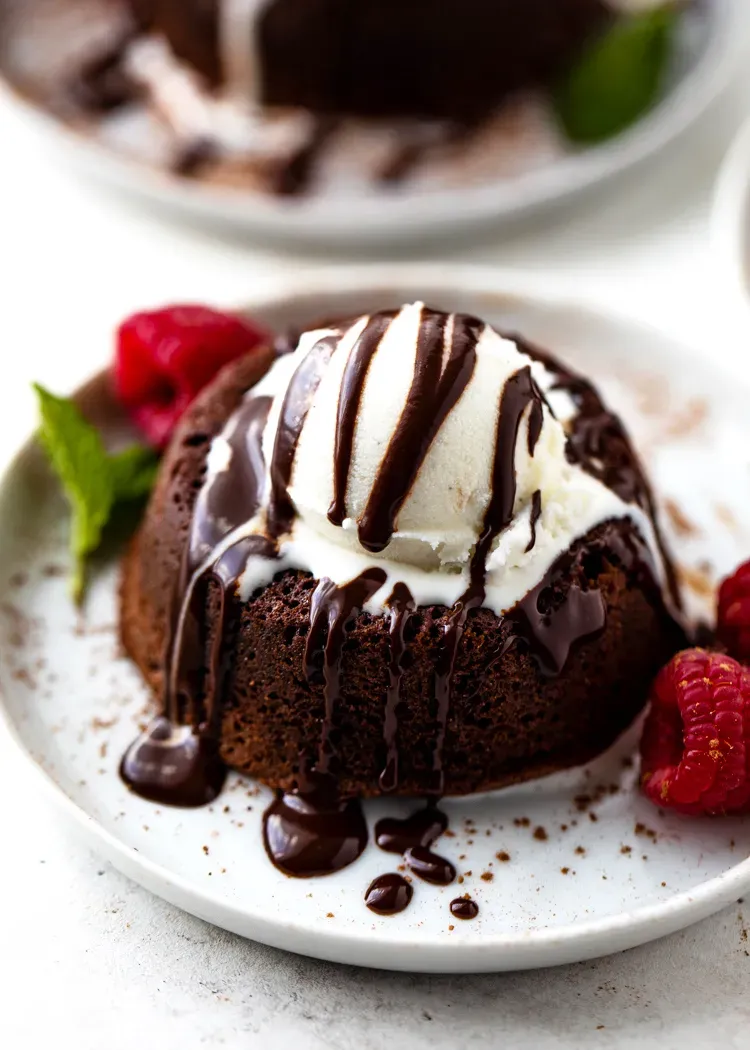
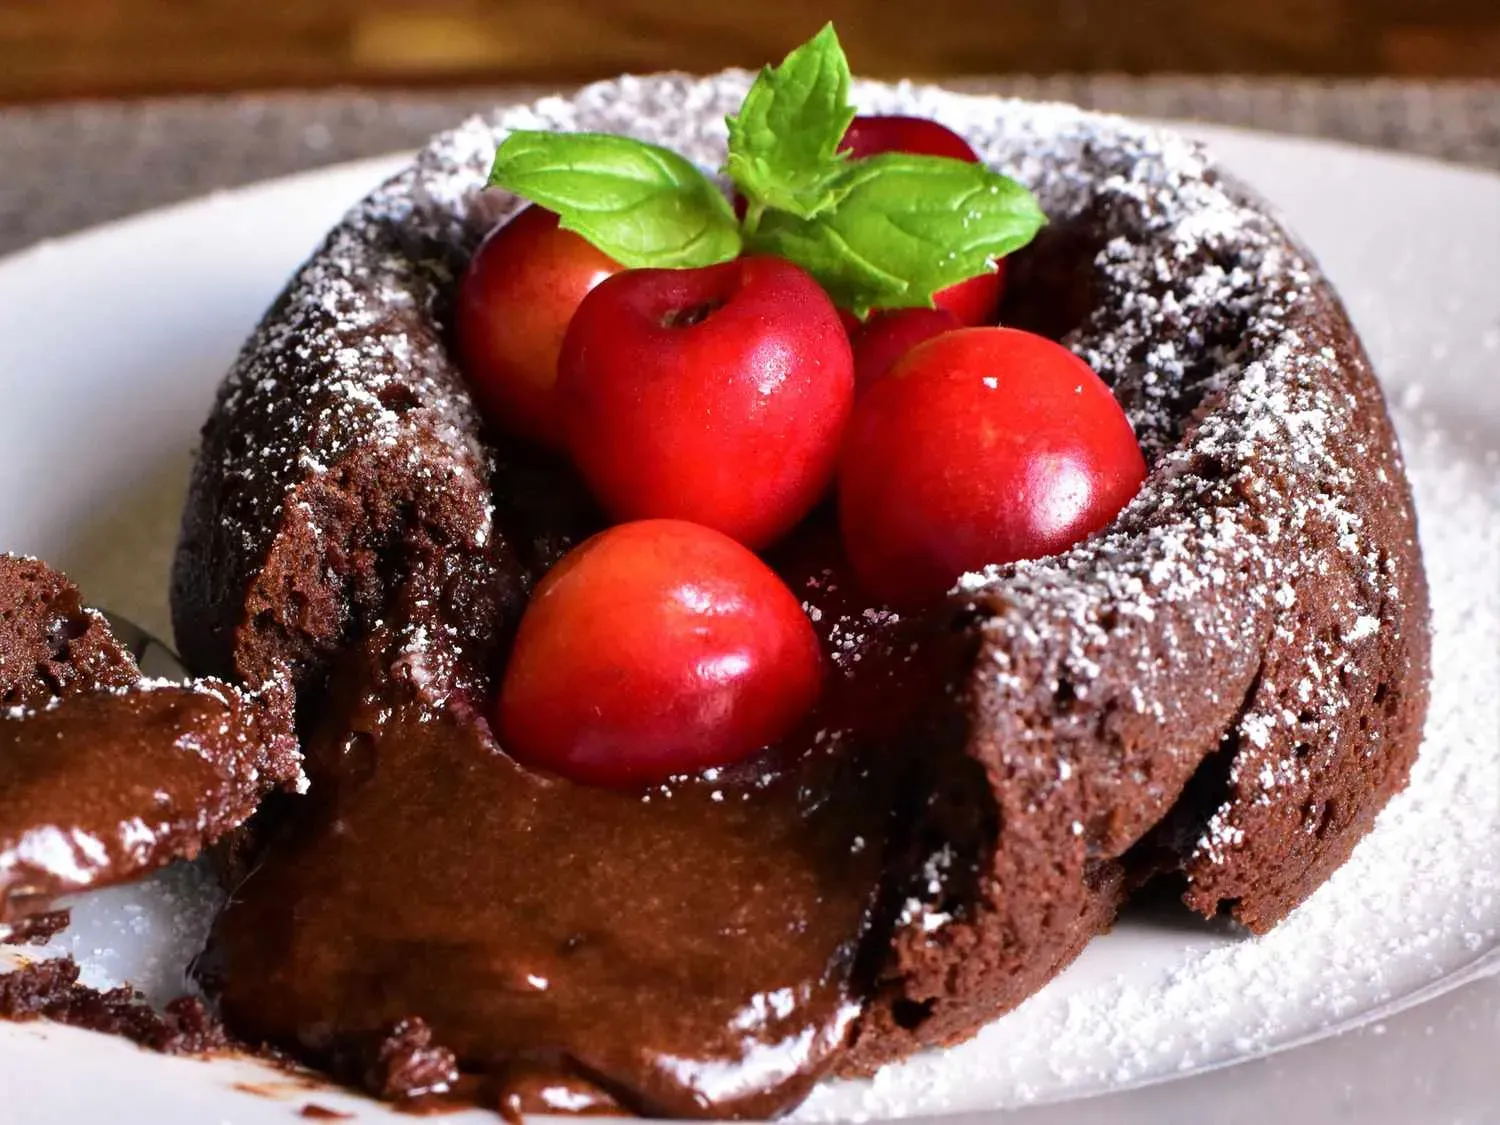
Alright, your molten masterpiece is on the plate. Now, how do you make it look and taste even better? A simple dusting of powdered sugar is classic and elegant. It's like a little snowcap on your chocolate mountain. But don't stop there if you don't want to! A scoop of cold vanilla ice cream right on top is a classic pairing – the contrast between the warm, rich cake and the cool, creamy ice cream is pure bliss. Fresh berries, like raspberries or strawberries, add a nice tart counterpoint to the sweetness. A drizzle of raspberry sauce or even a little extra melted chocolate takes it over the top. Remember, the goal of a great **chocolate lava cake recipe allrecipes** style isn't just the lava; it's the whole experience, and presentation plays a big role.
Top Serving Suggestions:
- A simple dusting of powdered sugar
- A scoop of high-quality vanilla ice cream
- Fresh berries (raspberries are a personal favorite)
- A drizzle of raspberry or chocolate sauce
- A sprinkle of sea salt flakes (for a salty-sweet kick)
Troubleshooting Your Chocolate Lava Cake Recipe
Troubleshooting Your Chocolate Lava Cake Recipe
Why Your Lava Cake Refuses to Flow
So, you followed the **chocolate lava cake recipe allrecipes** pulled up, flipped your ramekin with confidence, and... nothing. No molten chocolate river, just a small, slightly dense chocolate cake. The most common culprit? You baked it too long. It’s the culinary equivalent of watching paint dry, only you walked away for a few minutes too many. When the heat stays on the cake for too long, the center sets up just like the edges. Every oven is different, and even a minute or two can be the difference between glorious ooze and solid sadness. Your oven thermometer is your best friend here. Also, altitude can mess with bake times, making things cook faster. Keep a closer eye on it next time, starting to check several minutes *before* the recipe's minimum recommended time.
When Your Cake is More Soup Than Solid
On the flip side, maybe you flipped it, and instead of a beautiful cake with a liquid center, you got a chocolate puddle. This usually means it didn't bake *enough*. The edges didn't have time to set and form that crucial structure needed to hold the molten core. This could be because your oven wasn't hot enough (again, check that thermometer!), the batter was too cold going in, or maybe your measurements were a little off, resulting in a batter that was too thin. Ensure your oven is fully preheated and try adding a minute or two to the bake time next go-around, watching carefully for the edges to firm up.
Common "Too Liquid" Causes:
- Oven temperature too low
- Batter not in the oven long enough
- Ramekins were too cold
- Ingredient measurements slightly off (too much liquid, not enough flour)
Dealing with Sticky Situations and Uneven Bakes
Beyond the lava flow itself, other annoyances can pop up. The cake sticks stubbornly to the ramekin, ruining your dramatic reveal. This is almost always down to insufficient greasing and cocoa/flour dusting. You need a generous, even coating. Don't be stingy. Another issue can be uneven baking – one cake is perfect, the other is still too liquid. This often points to hot spots in your oven. Rotating the ramekins halfway through the bake can help mitigate this. Sometimes, using metal ramekins instead of ceramic can help with more even heat distribution, a tip worth considering for your next batch of **chocolate lava cake recipe allrecipes** testing.
Problem | Likely Cause | Fix It Next Time |
|---|---|---|
Cake sticks to ramekin | Insufficient greasing/dusting | Grease and dust *generously* and evenly. Use butter + cocoa powder. |
Uneven baking | Oven hot spots | Rotate ramekins halfway through baking. Check oven thermometer. |
Edges burnt, center still raw | Oven too hot or rack position wrong | Lower oven temp slightly. Move rack to the middle. |
Your Lava Cake Triumph
So there you have it. Not a mythical beast, but a straightforward process resulting in a dessert that consistently delivers that dramatic molten core. You mixed, you baked, you waited just long enough. The result sitting before you, perhaps slightly intimidating in its richness, is proof that you don't need a culinary degree to achieve this particular bit of decadence. Enjoy the mess, embrace the chocolate, and maybe make a mental note of who you're willing to share the last bite with.