
Table of Contents
Ever wondered how to achieve that perfect, glossy chocolate frosting that makes cakes and cupcakes look like a million bucks? Or maybe you've encountered frustrating frosting mishaps – lumps, cracks, or a consistency that’s just…off. This article tackles all your burning questions about chocolate frosting, providing answers to common chocolate frosting FAQs. We’ll explore everything from selecting the ideal type of chocolate to achieve the desired flavor and texture to mastering the perfect consistency for spreading, piping, or even creating stunning frosting designs. We'll also give you insider tips and tricks for troubleshooting common problems, ensuring your frosting always turns out flawlessly. From storage solutions to freezing techniques, we've got you covered. Get ready to elevate your baking game and create chocolate frosting that's not just delicious, but truly show-stopping. So, let's dive into the world of chocolate frosting FAQs and unlock your potential as a frosting master!
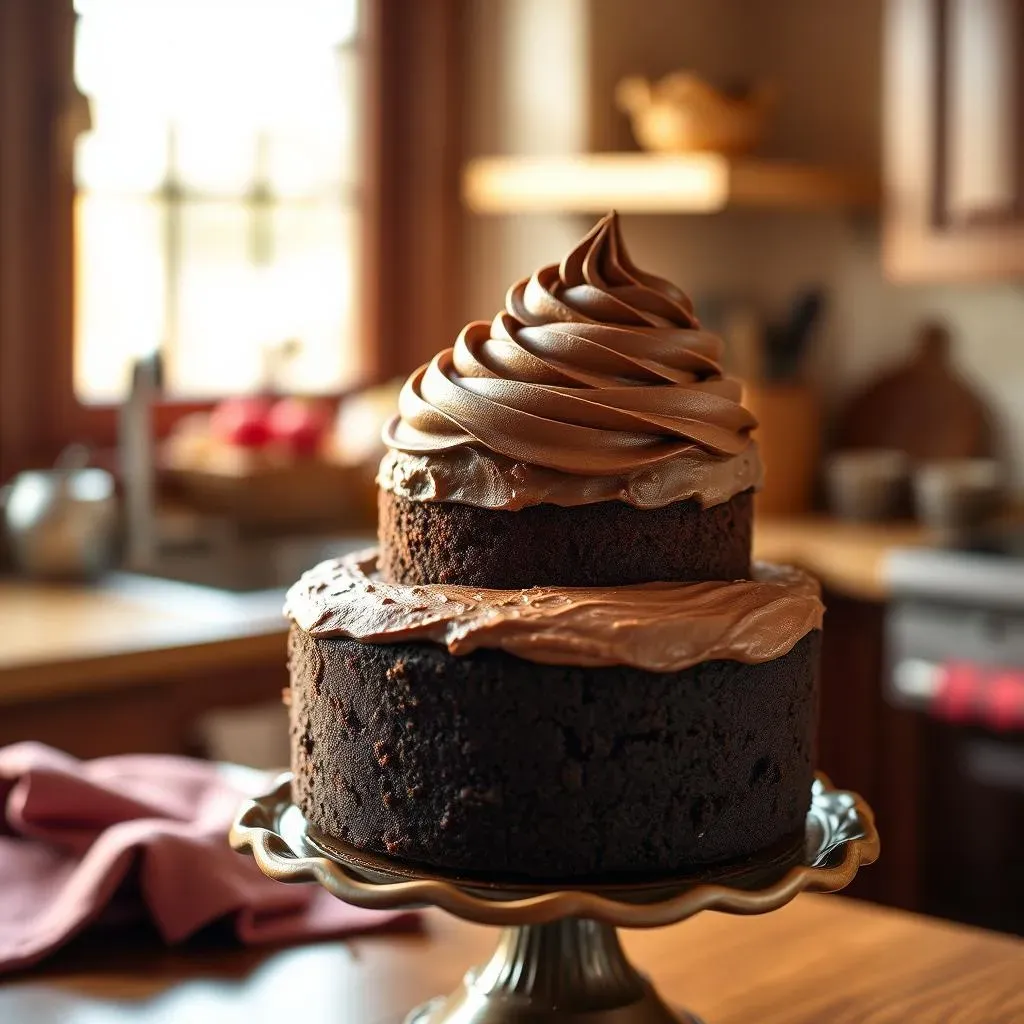
Chocolate Frosting FAQs: Troubleshooting Common Problems

Chocolate Frosting FAQs: Troubleshooting Common Problems
My Frosting is Too Thin!
Ah, the dreaded runny frosting! This usually happens when you haven't beaten your butter and sugar mixture long enough, or if your butter was too soft to start with. Think of it like trying to build a sandcastle with wet sand – it just won't hold its shape. The key is to make sure your butter is cold but still workable, and to beat it until it's light and fluffy. This incorporates air, giving your frosting structure and preventing that dreaded watery look.
Another culprit? Too much liquid! If you're using a recipe that calls for milk or cream, adding a little too much can drastically thin your frosting. Next time, err on the side of caution and add the liquid gradually, mixing until you reach the perfect consistency. Remember, you can always add more, but you can't take it away!
Problem | Solution |
|---|---|
Runny Frosting | Add more powdered sugar, 1 tablespoon at a time, until desired consistency is reached. |
Lumpy Frosting | Make sure your butter is softened but not melted. Beat thoroughly until smooth. |
My Frosting is Too Thick!
On the flip side, if your frosting is too thick, it's probably because you’ve added too much powdered sugar or your butter wasn't soft enough. A stiff frosting is a nightmare to spread and pipe—it's like trying to write with a dry pen! To fix this, add a splash of milk, cream, or even a bit of melted butter. Start with a small amount and add more as needed until you achieve a smooth, spreadable consistency. Remember to mix thoroughly after each addition to avoid large lumps.
This is where patience is key. Adding too much liquid at once can lead to a watery mess, so be sure to add it gradually, mixing well between additions. Think of it like adding spices to a stew – a little goes a long way.
- Add a teaspoon of milk or cream at a time, mixing until smooth.
- If using melted butter, add it in ¼ teaspoon increments.
- If the frosting is still too thick after adding liquid, let it sit for a few minutes to soften.
Chocolate Frosting FAQs: Choosing the Right Chocolate

Chocolate Frosting FAQs: Choosing the Right Chocolate
Chocolate Type: Dark, Milk, or Semi-Sweet?
Choosing the right chocolate is like picking the perfect paint color for your masterpiece – it sets the tone for the whole experience! For a deep, intense chocolate flavor, dark chocolate (with a higher percentage of cocoa solids) is your best bet. It delivers a rich, sophisticated taste that's perfect for those who appreciate a bolder chocolate profile. But be warned, a higher cocoa percentage also means a more bitter taste, so adjust the sugar in your recipe accordingly.
Milk chocolate offers a milder, sweeter flavor that appeals to a broader audience. It's incredibly versatile and works beautifully in frostings intended for cakes and cupcakes aimed at children or those with a preference for less intense chocolate flavors. It creates a creamy, dreamy texture that's hard to resist. Semi-sweet chocolate sits somewhere in between, balancing the richness of dark chocolate with the sweetness of milk chocolate, giving you a pleasantly complex flavor.
Chocolate Type | Flavor Profile | Best For |
|---|---|---|
Dark Chocolate (70% cocoa and above) | Intense, rich, slightly bitter | Adults, sophisticated desserts |
Milk Chocolate | Milder, sweeter | Children, casual gatherings |
Semi-Sweet Chocolate | Balanced, complex | Broad appeal |
Cocoa Powder vs. Melted Chocolate: The Great Debate
Now, here's where things get interesting. Many chocolate frosting recipes use either cocoa powder or melted chocolate (or both!). Cocoa powder provides a deep chocolate flavor and a nice matte finish. It's also a more economical option. However, it can sometimes result in a slightly drier frosting, so you might need to adjust the liquid content in your recipe. Melted chocolate, on the other hand, adds a luxurious sheen and an intensely rich, decadent flavor. It’s the ultimate indulgence, and provides a more intensely chocolatey flavor.
The best approach? Often, using a combination of both cocoa powder and melted chocolate yields the most satisfying results. The cocoa powder adds depth and complexity, while the melted chocolate lends richness and a beautiful glossy finish. It's like adding the perfect finishing touch to a painting. Experiment to find your favorite balance!
- Cocoa Powder: Economical, deep chocolate flavor, matte finish.
- Melted Chocolate: Luxurious, intense flavor, glossy finish.
- Combination: Best of both worlds!
Beyond the Basics: Exploring Unique Chocolate Flavors
Don't be afraid to think outside the box! Why stick to plain old dark, milk, or semi-sweet when there's a whole world of exciting chocolate flavors waiting to be explored? Consider using white chocolate for a lighter, sweeter frosting, or try adding a touch of espresso powder to your dark chocolate frosting for an irresistible mocha flavor. You could even incorporate different types of cocoa powder, like Dutch-processed cocoa for a deeper, less acidic taste, or even flavored cocoa powders like peppermint or orange.
The possibilities are truly endless! Experiment with different chocolate types and flavor combinations to create your signature chocolate frosting. Think about the occasion, the cake's flavor profile, and your own personal preferences. Remember, the best chocolate frosting is the one that brings you the most joy – and that may involve some delicious experimentation!
Mastering Chocolate Frosting Consistency: Tips and Tricks

Mastering Chocolate Frosting Consistency: Tips and Tricks
Achieving the Perfect Spreadable Consistency
Let's talk about that Goldilocks zone of frosting consistency – not too thick, not too thin, but just right! The key here is understanding the role of your ingredients. Think of powdered sugar as the "structure" of your frosting; it's what gives it body and prevents it from being too runny. Too much powdered sugar, and you'll end up with a stiff, difficult-to-spread frosting. Not enough, and it'll be too thin, like trying to frost a cake with water!
The butter acts as the "binder," holding everything together and creating that creamy texture. If your butter is too cold, it won't cream properly with the sugar, resulting in lumps. If it's too soft, or even melted, your frosting will be too thin. Aim for a butter that's soft enough to easily indent with your finger, but still holds its shape. The liquid you add (milk, cream, etc.) plays the role of "adjuster," allowing you to fine-tune the consistency to your liking. Add it gradually, mixing well after each addition, so you don't accidentally make it too thin.
Ingredient | Role | Effect on Consistency |
|---|---|---|
Powdered Sugar | Structure | Too much: Stiff; Too little: Runny |
Butter | Binder | Too cold: Lumpy; Too soft: Thin |
Liquid | Adjuster | Too much: Runny; Too little: Stiff |
Tips for Piping and Decorating
Once you've achieved the perfect spreadable consistency, you might want to adjust it slightly for piping or decorating. For piping intricate designs, you'll need a firmer frosting that holds its shape. This is where adding a little more powdered sugar comes in handy. Think of it as adding more "glue" to your frosting to make it more stable. Conversely, if you're working with a frosting that's too thick for piping, adding a tiny bit of liquid will help to loosen it up, making it easier to work with. Remember, small adjustments make a big difference.
The temperature of your frosting also plays a role in its consistency. A warm frosting will be softer and easier to pipe, while a colder frosting will be firmer. If you're having trouble with your frosting being too stiff, try letting it sit at room temperature for a few minutes to soften slightly. Conversely, if it's too soft, chill it in the refrigerator for a short period to firm it up. This is all about finding that perfect balance for your specific needs and the environment you are working in.
- For piping: Add more powdered sugar for a firmer consistency.
- For spreading: Add a little liquid for a smoother consistency.
- Adjust temperature: Let it sit at room temperature to soften, or chill to firm.
Chocolate Frosting FAQs: Storage, Freezing, and Beyond
Chocolate Frosting FAQs: Storage, Freezing, and Beyond
Storing Your Chocolate Frosting
Proper storage is key to keeping your delicious chocolate frosting fresh and delicious. For short-term storage (up to a week), airtight containers are your best friend. Keep them in the refrigerator to prevent spoilage. If you're planning on using the frosting within a few days, you can leave it at room temperature, but make sure it's covered to prevent it from drying out. Think of it like keeping a delicate flower fresh – a little care goes a long way!
When you're ready to use your refrigerated frosting, let it come to room temperature before using it. This will make it easier to spread and pipe, and will prevent it from being too stiff or lumpy. A little patience yields a much better result. Give it a good stir to smooth out any separation that may have occurred during refrigeration.
Storage Method | Duration | Notes |
|---|---|---|
Refrigerator (airtight container) | Up to 1 week | Bring to room temperature before use. |
Room temperature (airtight container) | Up to 3 days | Keep covered to prevent drying. |
Freezing Chocolate Frosting for Future Use
Want to make a big batch of frosting and save some for later? Freezing is a fantastic option! To freeze your frosting, first, let it cool completely. Then, transfer it to an airtight, freezer-safe container. Make sure to press out as much air as possible to prevent ice crystals from forming. Freezing your frosting is like putting it into a delicious time capsule – you can enjoy it later whenever you have a cake craving! Properly frozen frosting can last for up to three months.
When you're ready to use your frozen frosting, thaw it in the refrigerator overnight. Once thawed, give it a good beat with a mixer to restore its creamy texture. You might need to add a little milk or cream to adjust the consistency if it's too thick. Think of it as waking up a sleeping giant – it needs a little help to get back to its former glory!
- Freeze in an airtight, freezer-safe container.
- Thaw in the refrigerator overnight.
- Beat with a mixer to restore creamy texture.
- Add a little liquid if necessary to adjust consistency.