Table of Contents
Ever dreamed of a dessert that's both intensely chocolatey and delightfully airy? Well, get ready to meet your match: the chocolate cake with mousse filling. This isn't just any cake; it's a triple threat of rich, moist cake, a cloud-like chocolate mousse, and a glossy ganache that'll make your eyes roll back in pleasure. We are going to break it down, so even if you're more of a "box mix" person, you can create this masterpiece. First, we'll build the foundation with a dark chocolate cake that's anything but basic. Then, we'll whip up a simplified chocolate mousse that's so good, you might just eat it with a spoon. And finally, we'll tie it all together with a luscious chocolate ganache. We'll cover how to layer your chocolate cake with mousse filling like a pro. Whether you’re celebrating a special occasion or just want a treat for yourself, this is the recipe you need. So, grab your apron and let’s get baking!
Building Blocks of a Perfect Chocolate Cake with Mousse Filling
Building Blocks of a Perfect Chocolate Cake with Mousse Filling
The Cake's Foundation: Rich Chocolate Layers
Okay, let's talk cake. For a chocolate cake with mousse filling that sings, you can't just grab any old recipe. We're aiming for something with deep, dark chocolate flavor that's also moist and tender. Think of it as the sturdy base for our creamy masterpiece. The secret? Using a mix of unsweetened natural cocoa and dark cocoa powder. It's like a one-two punch of chocolate goodness. Don't skimp on the hot water or buttermilk either, they're the secret to keeping your cake moist and delicious. This is where many folks go wrong, they focus on the mousse so much, that they forget the cake.
Now, you could go the easy route with a box mix, and honestly, sometimes I do too. But for this, we’re making it from scratch. It's not as hard as it sounds, I promise. We’re talking simple ingredients like flour, sugar, eggs, and oil, all coming together to create magic. The key is to not overmix the batter. Overmixing develops the gluten in the flour and that's what makes the cake tough. We want a light and airy cake, not a hockey puck. So, mix until just combined, and then get it in the oven. Patience is a virtue, especially in baking.
Key Ingredients for a Great Chocolate Cake
Ingredient | Why It Matters |
|---|---|
Dark Cocoa Powder | Adds deep chocolate flavor and color. |
Buttermilk | Keeps the cake moist and tender. |
Hot Water/Coffee | Enhances the chocolate flavor. |
Oil | Contributes to a moist texture. |
Eggs | Adds structure and richness. |
The Mousse Magic
The mousse is the soul of this dessert. It should be light, airy, and intensely chocolatey. We're skipping the fussy stuff and creating a simplified mousse that's still unbelievably delicious. No need for gelatin or raw eggs here. Our secret weapon is melted dark chocolate, which stabilizes the whipped cream and gives it that dreamy, creamy texture. Make sure to use high-quality chocolate, because it really makes a difference. You can taste the difference when you do not skimp on quality products.
Whipping the cream to the right consistency is important. You want soft peaks, not butter. And when you fold in the melted chocolate, be gentle. We’re not trying to deflate all that lovely air you whipped in. This is where you can customize the flavor a bit. A splash of vanilla extract, a dash of coffee liqueur, or even a pinch of sea salt can elevate the mousse to the next level. It’s all about finding that perfect balance of sweetness and chocolatey goodness. Remember the mousse is the star of the show, so we have to treat it as such.
Mousse Tips
- Use quality dark chocolate for the best flavor.
- Whip the cream to soft peaks, not stiff.
- Fold the melted chocolate gently to keep the mousse light.
- Chill the mousse before assembling the cake.
Crafting the Dreamy Chocolate Mousse Filling
Crafting the Dreamy Chocolate Mousse Filling
The Heart of the Mousse: Chocolate
Alright, let's get real about the chocolate in our mousse. It's not just any chocolate, it's gotta be good chocolate. Think of it as the star of the show, the diva that demands attention. We're using dark chocolate here, not milk chocolate, because we want that deep, intense flavor that cuts through the sweetness. Now, the quality of the chocolate you use will directly affect the taste of your mousse. So, splurge a little, it's worth it. I like to use a good quality chocolate bar, something that I would eat on its own. Avoid those cheap baking chips, they just don't have the same oomph. Chop your chocolate finely, so it melts evenly and smoothly.
Melting the chocolate is an art, not a science. Low and slow is the way to go. You can do it in a double boiler or in the microwave, but whatever you do, don't let it burn. Burnt chocolate tastes bitter and ruins the whole batch. If you're microwaving, do it in short intervals, stirring in between. Once it's melted, set it aside to cool slightly. You don't want to add hot chocolate to your whipped cream, it will melt it and we will have a soupy mess.
Whipping Up the Creamy Base
Next up, the whipped cream. This is what gives our mousse its light and airy texture. We're looking for soft peaks, not stiff ones. Stiff peaks will make the mousse too dense. I like to use heavy cream, the kind with the highest fat content, because it whips up the best. Make sure your cream is cold, straight from the fridge, and use a cold bowl and whisk too. That makes it whip up faster and easier. You can use a hand mixer, a stand mixer, or even a whisk if you're feeling ambitious. Just don't over whip it, or you'll end up with butter. Once you've got those soft peaks, it's time to gently fold in the melted chocolate.
Folding is a technique, not just mixing. It's all about preserving those precious air bubbles we worked so hard to create. Use a rubber spatula and gently fold the chocolate into the whipped cream, lifting from the bottom and folding over the top. Don't stir, that will deflate the mousse. Keep folding until it's just combined. It should be a beautiful, glossy, chocolatey cloud. Now, here's a pro tip, chill the mousse for at least 30 minutes before you assemble the cake. This will help it set up a bit and make it easier to work with. Patience is key, but the results are worth it.
Mousse Flavor Boosters
Now, let's talk about taking our mousse to the next level. While the chocolate and cream combo is delicious on its own, a few little additions can really make it sing. A splash of vanilla extract is always a good idea. It enhances the chocolate flavor and adds a touch of warmth. You could also add a teaspoon of instant coffee to bring out the richness of the chocolate or a tablespoon of your favorite liqueur. A little sea salt can also elevate the mousse by creating a salty and sweet balance. The possibilities are endless.
Flavor Booster | Why It Works |
|---|---|
Vanilla Extract | Enhances chocolate flavor, adds warmth. |
Instant Coffee | Deepens chocolate notes. |
Liqueur (e.g., coffee, raspberry) | Adds depth and complexity. |
Sea Salt | Balances sweetness, enhances flavor. |
Assembling and Decorating Your Chocolate Mousse Cake
Assembling and Decorating Your Chocolate Mousse Cake
Layering Up: The Assembly Process
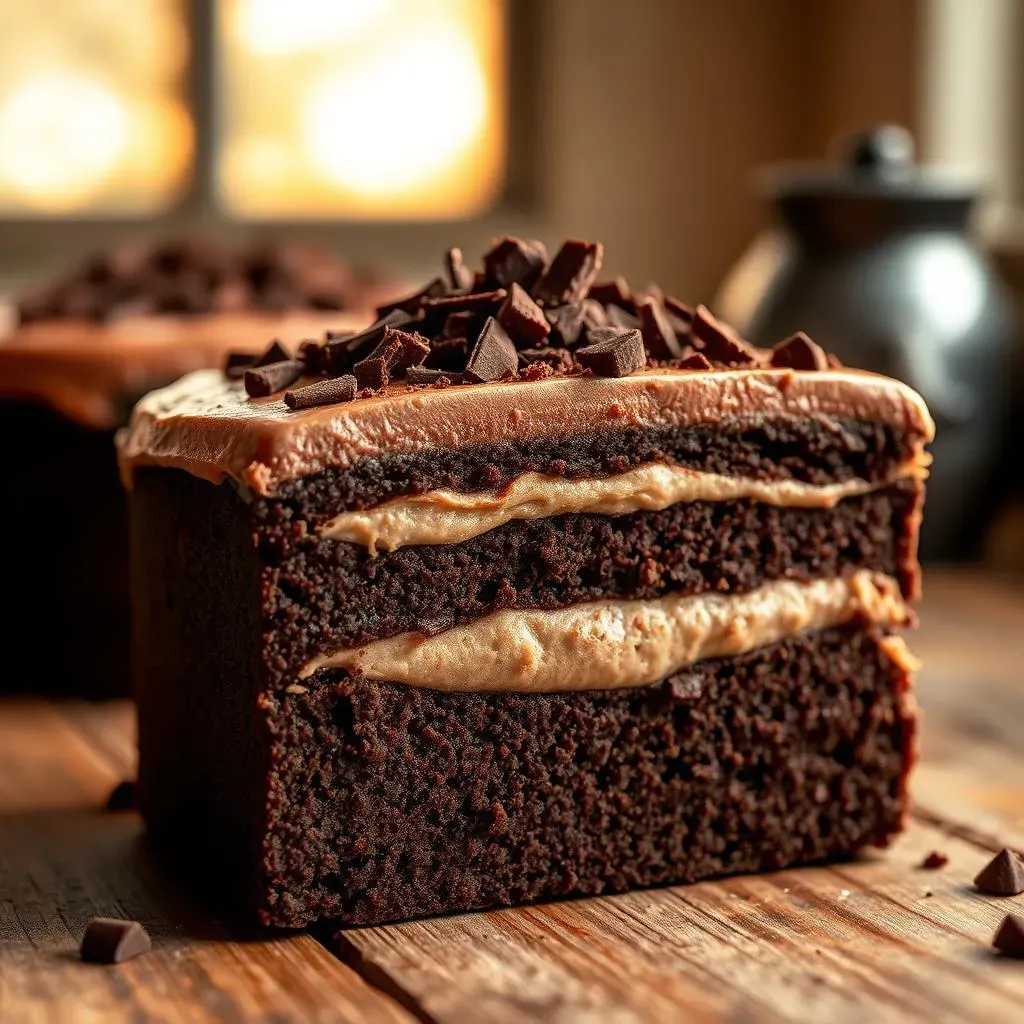
Alright, you've got your killer chocolate cake layers and your dreamy chocolate mousse, now comes the fun part: putting it all together. Think of it as building a delicious, edible tower. First, grab your cake layer and place it on your serving plate or cake stand. If you want super clean sides, you can line your cake pan with acetate before you bake, or use a cake ring to assemble it. Then, spread a generous layer of that luscious mousse over the cake. Don’t be shy, we want a good amount of that creamy goodness in there. If you're making a two-layer cake, just repeat with the second layer. If you're going for a taller cake, you can keep stacking. Remember, each layer is a chance to pack in more flavor. After you have all the layers, pop the whole thing in the fridge for about 30 minutes, that will help the mousse firm up a bit before we add the ganache.
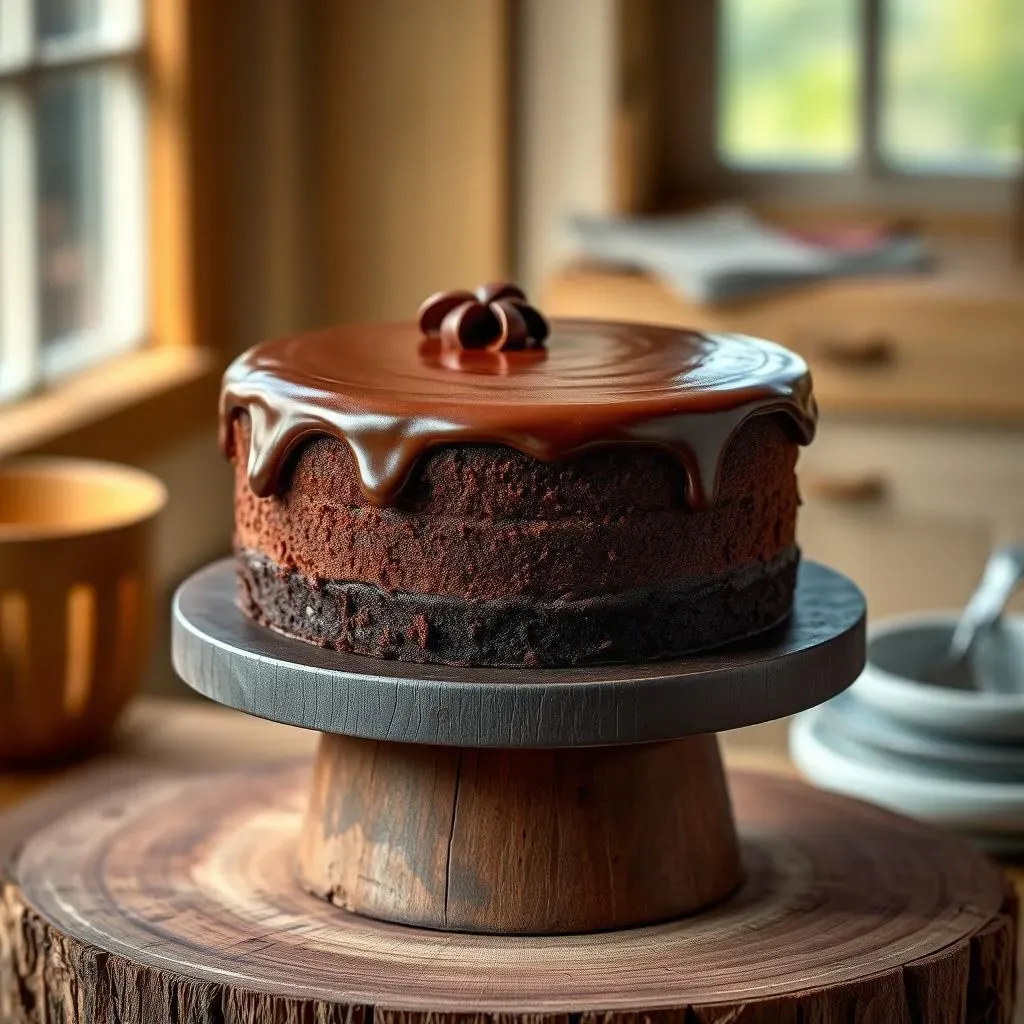
Now, let's talk ganache. This is where the magic happens. The ganache is like the icing on the cake, literally. It adds a beautiful shine and an extra layer of chocolate flavor. You can go with a simple chocolate ganache, or you can get creative and add some flavorings, like espresso or a liqueur. Make sure your ganache is at the right consistency before you pour it over the cake. It should be pourable, but not too runny. If it's too thick, it will be hard to spread, if it's too thin, it will run right off the cake. The key is to let it cool down a little bit before pouring. Pour the ganache over the chilled cake, making sure it covers the entire top and drips down the sides. Let the ganache set for a bit, and then it's time to decorate.
Decoration Station
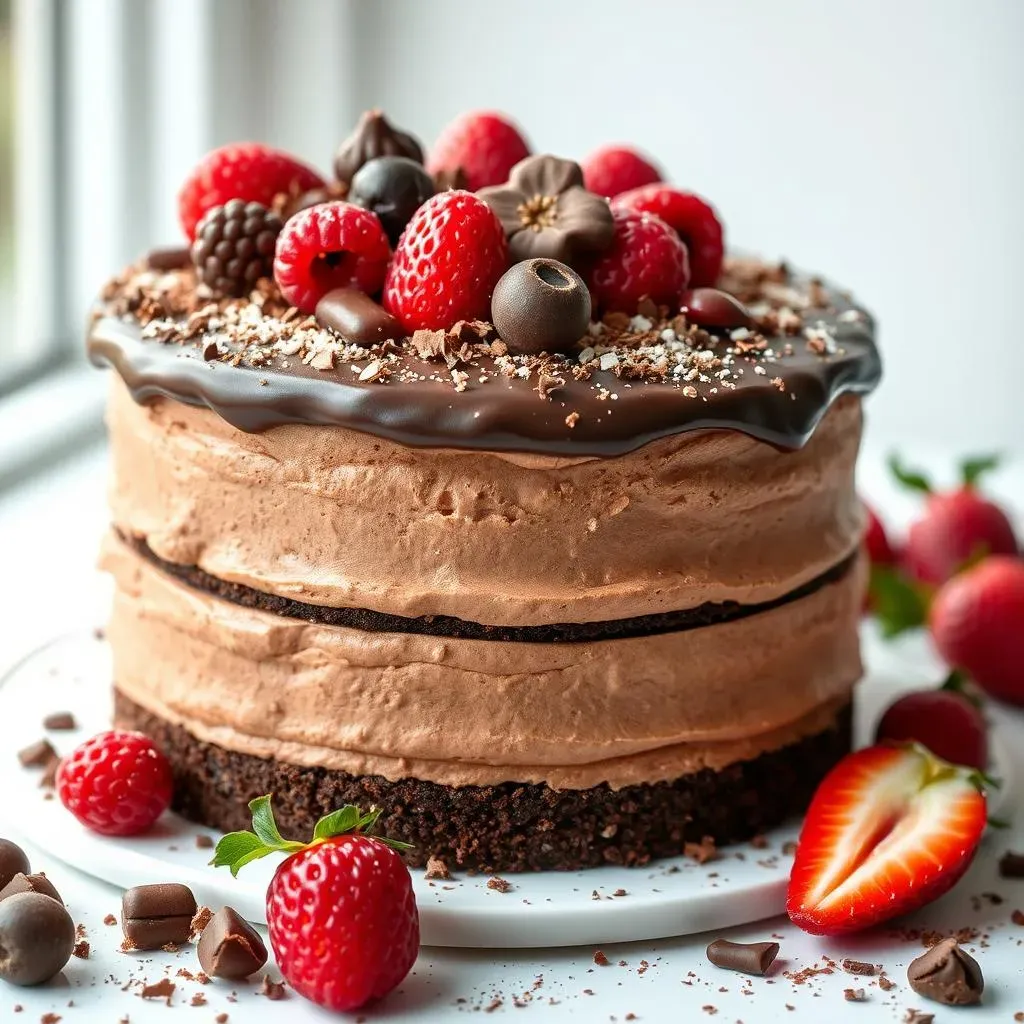
This is where you get to show off your creative side. You can keep it simple with some chocolate shavings or fresh berries. Or you can go all out with piped chocolate decorations and edible glitter. The options are endless. I like to use a mix of textures and colors to make the cake visually appealing. Fresh raspberries, strawberries, or blueberries add a pop of color and a touch of freshness. Chocolate curls or shavings add a touch of elegance. And a sprinkle of edible glitter adds a bit of sparkle. You can also use a piping bag to create decorative swirls or patterns on top. If you're not confident with your piping skills, don't worry, you can always use a stencil. The most important thing is to have fun and let your personality shine through.
Once you're done decorating, let the cake chill in the fridge for at least an hour, or even better, overnight. This will allow the flavors to meld together and the mousse to set up completely. When you're ready to serve, slice it up and enjoy the fruits of your labor. This chocolate cake with mousse filling is not just a dessert, it's an experience. It's a combination of textures and flavors that will make your taste buds sing. It's the perfect treat for special occasions or just a day when you need a little bit of chocolate in your life.
Decoration Ideas
- Fresh Berries: Raspberries, strawberries, blueberries add color and freshness.
- Chocolate Shavings: Use a vegetable peeler or grater for easy curls.
- Edible Glitter: Adds a touch of sparkle.
- Piped Chocolate: Create decorative swirls or patterns.
- Stencils: Use stencils for precise designs.
- Cocoa Powder: Dust with cocoa powder for a simple elegant touch.