Table of Contents
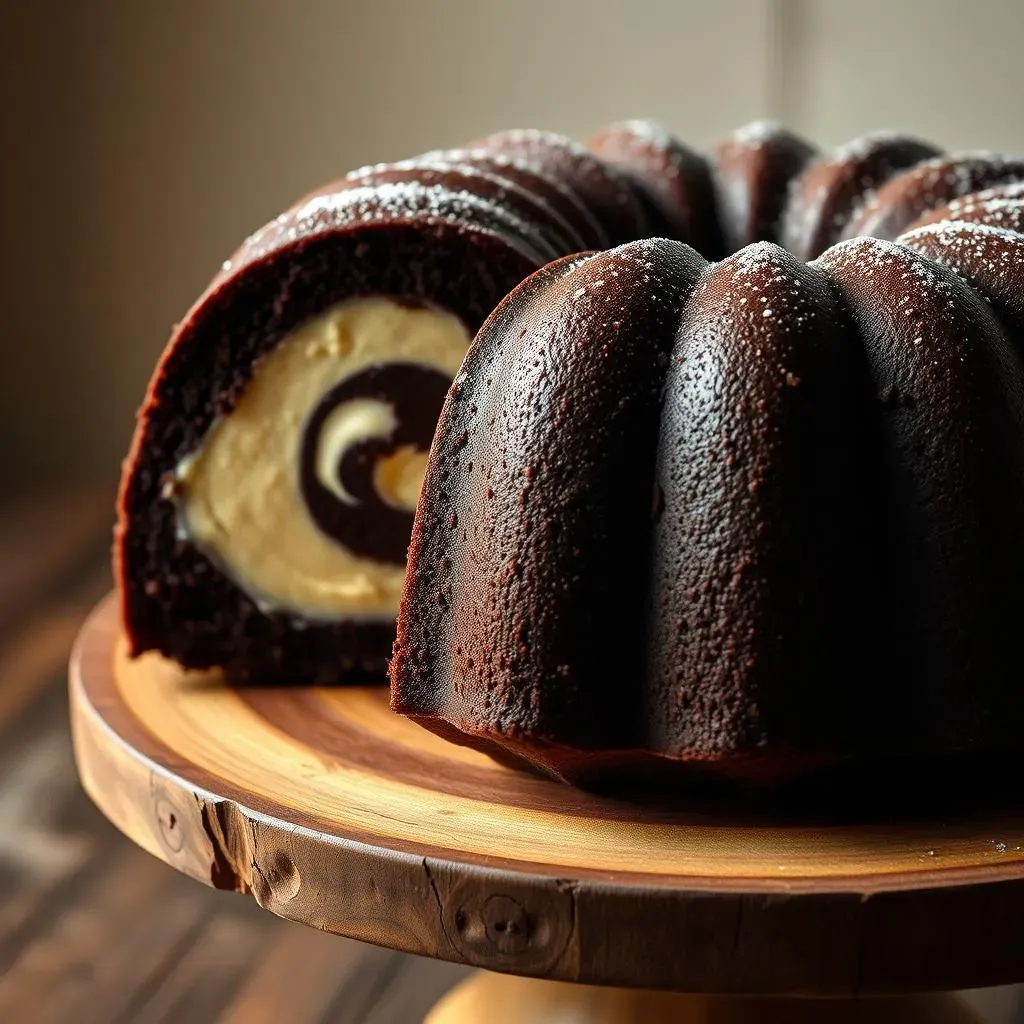
Ever dream of a dessert that’s both deeply chocolatey and surprisingly creamy? Then you've come to the right place. We're about to embark on a baking adventure to create the most amazing chocolate cake with cream cheese filling. This isn't your average cake; it's a bundt cake, which means it's not only delicious, but also beautiful. Think of a rich, moist chocolate cake with a swirl of tangy-sweet cream cheese baked right in the middle. It’s like a little treasure hidden inside. In this article, we will show you how to make this show-stopping dessert, from mixing the batter to the final flourish. We will explore the importance of using the right ingredients, the best techniques for baking, and even tackle some common baking mishaps. So, grab your apron, preheat your oven, and let's get started on this journey to chocolate cake with cream cheese filling perfection. By the end, you’ll not only have a delectable cake but also some baking wisdom to share.
The Magic of Chocolate Cake with Cream Cheese Filling
The Magic of Chocolate Cake with Cream Cheese Filling
The Allure of the Swirl
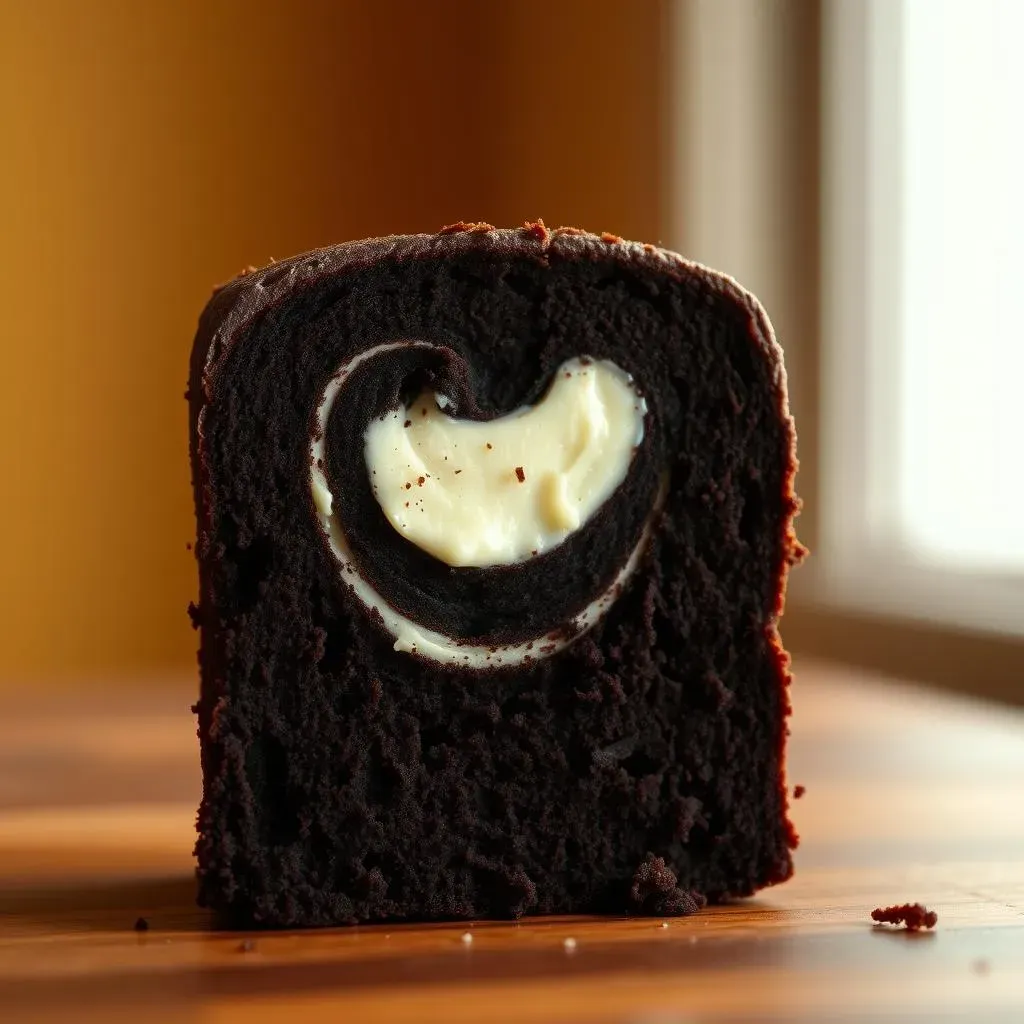
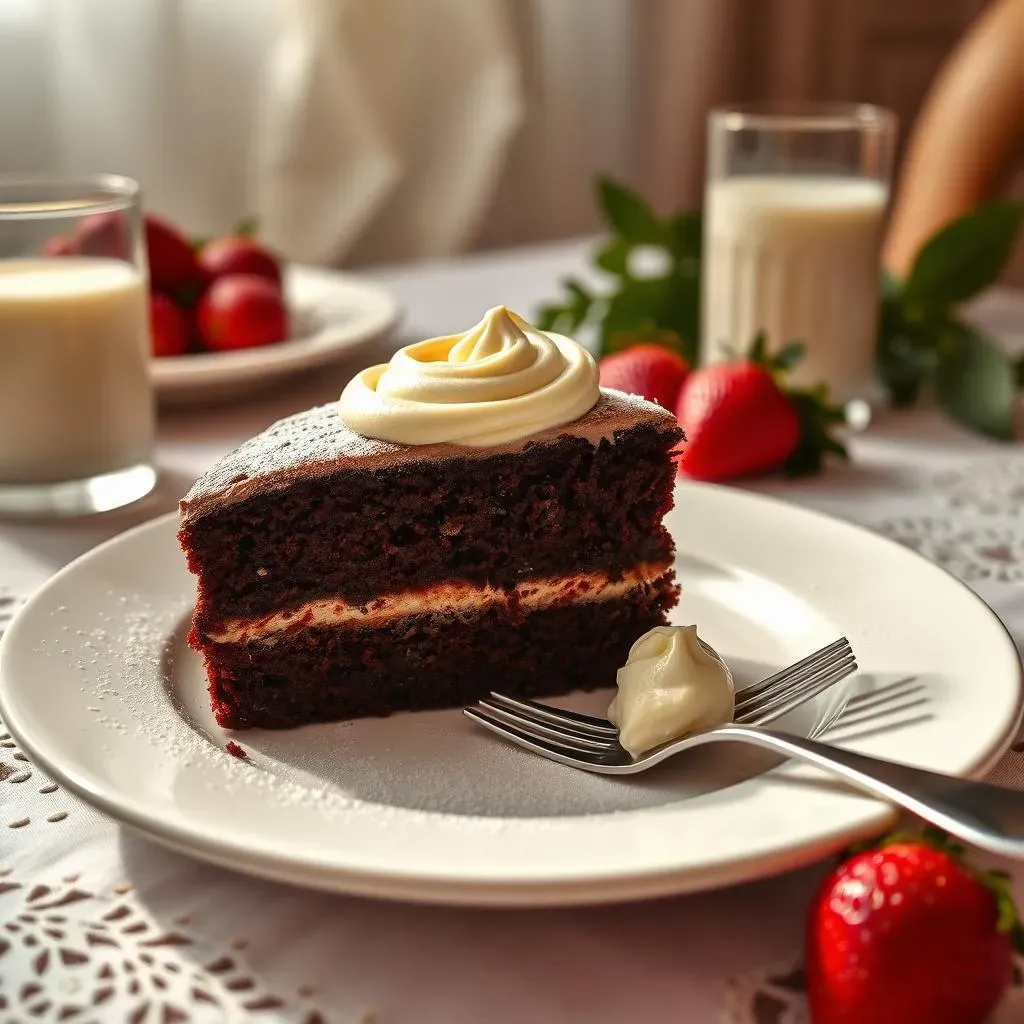
Okay, so, let's talk about why this cake is just *different*. It's not just chocolate cake. It's not just cream cheese. It's the combo, the way they play together that makes it special. Imagine biting into a rich, dark chocolate cake, and then bam! You hit this pocket of tangy, sweet cream cheese. It's like a surprise party in your mouth, every single time. It’s a flavor adventure that keeps you coming back for more, a little bit sweet, a little bit tangy, and a whole lot of deliciousness.
I think, the real magic of this cake isn’t just in the taste, it's also in the way it looks. That swirl of white against the dark chocolate is just so darn pretty. It’s like art you can eat. When you cut into it, you get this marbled effect, which is totally impressive. And let’s be honest, who doesn't want to make something that looks as good as it tastes? It's a showstopper, perfect for special occasions, or, you know, just a Tuesday when you need a little pick-me-up.
Flavor Profile | Texture | Visual Appeal |
|---|---|---|
Rich, chocolatey with tangy sweetness | Moist cake with creamy pockets | Marbled swirl effect |
More Than Just a Cake
It’s funny how a simple cake can bring so much joy, right? This chocolate cake with cream cheese filling isn't just a dessert; it’s a comfort, a celebration, a moment of pure indulgence. I remember my first time trying it. It was at a friend's birthday, and I was hooked from the first bite. It's one of those things that has the power to make any day feel a little bit more special.
And you know what? It's also a bit of a baking challenge, in the best way possible. It's not hard, but it's got enough steps to make you feel like you've accomplished something. Plus, when you pull it out of the oven and see that gorgeous swirl, you just feel like a baking rockstar. It’s the kind of cake that people ask you for the recipe, and that’s always a good feeling.
- Comfort food
- Celebration cake
- Baking challenge
Crafting the Perfect Chocolate Cake

Crafting the Perfect Chocolate Cake
The Foundation: Choosing Your Chocolate
Alright, let's get down to the nitty-gritty of making a killer chocolate cake. It all starts with the chocolate itself. You can’t just grab any old cocoa powder and hope for the best. I've learned this the hard way. Go for a good quality unsweetened cocoa powder; it makes a world of difference. And here's a little secret I picked up: blooming the cocoa powder in hot water before adding it to the batter? Game changer. It really brings out the rich chocolate flavor and gives the cake a deeper, more intense taste. Trust me on this one, it’s worth the extra step.
I know, I know, it might sound a bit extra, but it's these small details that elevate a cake from "meh" to "OMG." Think of it like this: you wouldn’t use cheap paint on a masterpiece, would you? Same goes for chocolate cake. The better your ingredients, the better your cake will be. And who doesn’t want a cake that tastes like it came from a fancy bakery?
Ingredient | Why It Matters |
|---|---|
Quality Unsweetened Cocoa Powder | Provides rich, intense chocolate flavor |
Hot Water | "Blooms" the cocoa, enhancing its flavor |
The Wet Ingredients: Moisture is Key
Now that we've got our chocolate sorted, let's talk about the wet stuff. This is where things can get a little tricky, but don't worry, I've got your back. The key here is moisture. We don't want a dry, crumbly cake, right? We're aiming for moist, tender, and melt-in-your-mouth deliciousness. So, don’t skimp on the liquids. I like to use a combination of oil and sour cream. The oil keeps the cake moist, and the sour cream adds a lovely tanginess that complements the chocolate perfectly.
And here's another tip: don’t overmix the batter once you add the dry ingredients. Overmixing develops the gluten in the flour, which can make the cake tough. Mix until just combined, and then stop. It's better to have a few lumps than an overmixed batter. It's like when you're making pancakes, you know? The same rules apply. Less is more when it comes to mixing.
- Use oil for moisture.
- Sour cream adds tanginess.
- Don't overmix the batter
The Cream Cheese Filling: A Sweet Surprise
The Cream Cheese Filling: A Sweet Surprise
The Creamy Core: Simple Ingredients, Big Flavor
Okay, so the chocolate cake is the star, right? But the cream cheese filling? It's the plot twist that makes this dessert unforgettable. It's ridiculously easy, too. We're talking cream cheese, sugar, an egg, and a splash of vanilla. That's it! But don't let the simplicity fool you, these four ingredients create a tangy, sweet, and utterly creamy filling that is just perfect. The key here is to make sure your cream cheese is nice and soft before you start mixing. Otherwise, you'll end up with a lumpy filling, and nobody wants that.
I like to use a hand mixer for this part, it makes the process quick and smooth. You're aiming for a smooth, almost pourable consistency. Think of it like a thick, luscious sauce. And don't be tempted to add more sugar than the recipe calls for. The tanginess of the cream cheese is what balances the richness of the chocolate cake, so you want to keep that balance just right. It's like a perfect harmony of flavors, where the sweet and the tangy dance together in your mouth.
Ingredient | Purpose |
|---|---|
Cream Cheese | Provides the creamy, tangy base |
Sugar | Adds sweetness |
Egg | Binds the filling and adds richness |
Vanilla Extract | Enhances the flavor |
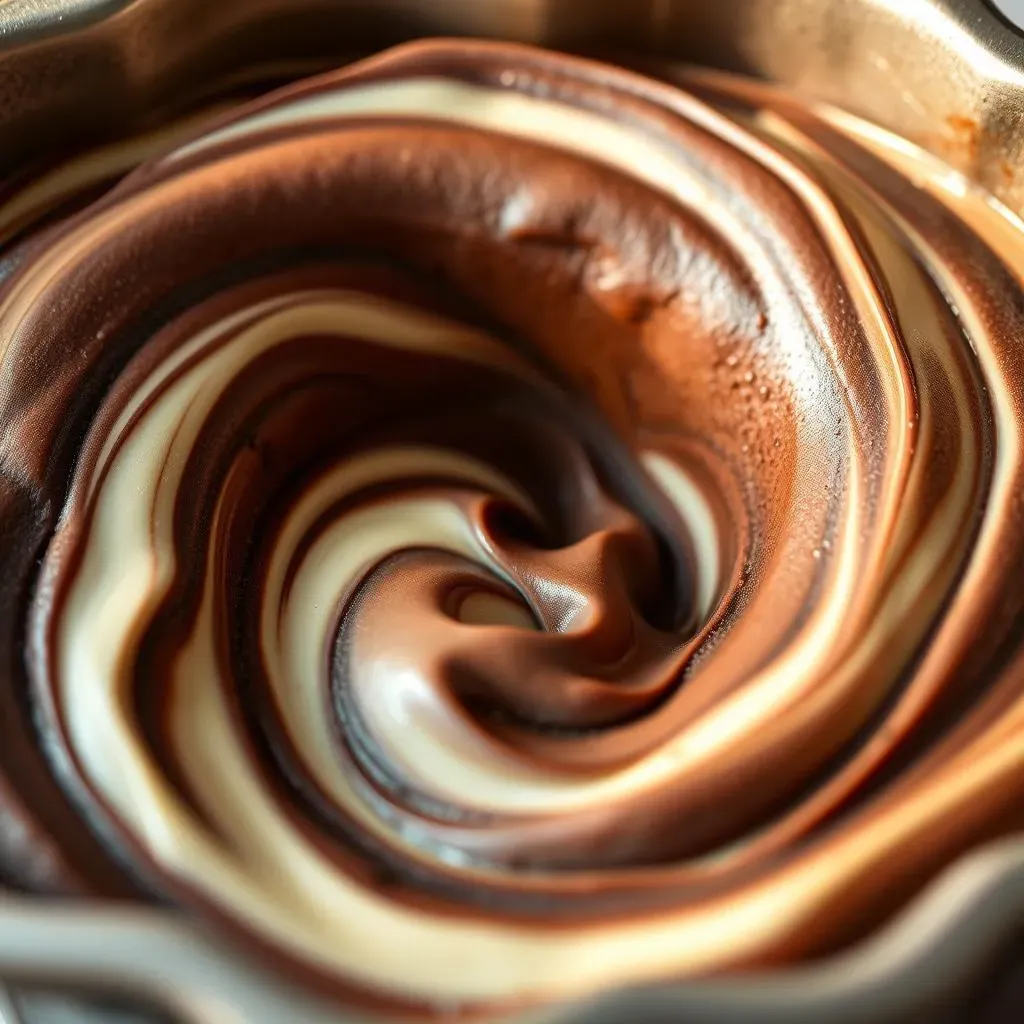
Layering the Goodness: The Swirl Technique
Now, here's where the fun begins – layering that cream cheese goodness into our chocolate cake batter. It's like creating a beautiful piece of art. I usually pour about half of the chocolate batter into my bundt pan, and then I dollop that cream cheese filling over the top. After that, I spread the remaining chocolate batter. To achieve that beautiful swirl effect, you can use a knife or a skewer, gently dragging it through the batter and the filling. Don't overdo it, a few swirls are all you need.
And remember, this doesn't have to be perfect. Imperfection is part of the charm. The goal is to get a nice distribution of the filling throughout the cake. And when it bakes, that cream cheese will create these amazing pockets of creamy goodness that will make each bite a delight. The key here is to be gentle, don’t stir it too much, just a few swirls to get the desired effect. It's like when you're creating a marble effect with paint, you want to be careful not to muddy the colors.
- Pour half of the chocolate batter into the pan.
- Dollop the cream cheese filling over the batter.
- Cover with the remaining chocolate batter.
- Swirl gently with a knife or skewer.
Assembling and Baking the Bundt Cake
Assembling and Baking the Bundt Cake
Prepping the Pan: The Key to Easy Release
Okay, so we've got our batter ready, the cream cheese filling is prepped, and now it's time to get this show on the road. But before we even think about pouring anything into our bundt pan, we need to make sure it's properly prepped. I cannot stress this enough: a well-greased pan is your best friend when it comes to bundt cakes. There's nothing more heartbreaking than a cake that sticks to the pan. I like to use a generous amount of baking spray, making sure to get into all those nooks and crannies. You can also use butter and flour if you prefer, but I find the spray to be quicker and more effective.
And here’s a pro tip: after greasing, I like to sprinkle a little bit of cocoa powder into the pan. This helps to prevent any white spots from the flour clinging to the cake and also adds a little extra chocolatey flavor. It's a small step, but it makes a big difference in the final look of your cake. Think of it like putting on your best outfit before going out, you want to make sure everything is just right.
Baking to Perfection: Time and Temperature
Alright, now that our pan is prepped and ready, it’s time to bake! I usually preheat my oven to 350°F (175°C). This is the sweet spot for bundt cakes, it's not too hot that it burns the outside and not too low that it doesn't cook the center. Once the oven is ready, carefully place the bundt pan in the center rack. Baking time can vary a bit depending on your oven, but usually, it takes around 55-65 minutes. The best way to check if your cake is done is to insert a wooden skewer or toothpick into the center, if it comes out clean, you're good to go.
And remember, patience is key when baking. Don't be tempted to open the oven door too early, that can cause the cake to collapse. Just let it do its thing, and trust the process. It’s like watching a plant grow, you can’t rush it. Once the cake is baked, let it cool in the pan for about 15-20 minutes before inverting it onto a wire rack to cool completely. This helps it to release easily and prevents it from breaking.
Step | Action | Why It Matters |
|---|---|---|
Grease the Pan | Apply baking spray or butter and flour | Prevents the cake from sticking |
Sprinkle Cocoa Powder | Dust the greased pan with cocoa | Prevents white spots and adds flavor |
Preheat Oven | Set oven to 350°F (175°C) | Ensures even baking |
Bake | Bake for 55-65 minutes | Cooks the cake through |
Cool | Let cool in pan for 15-20 minutes | Allows cake to set before inverting |
Serving and Enjoying Your Creation
Serving and Enjoying Your Creation
The Grand Finale: Slicing and Serving
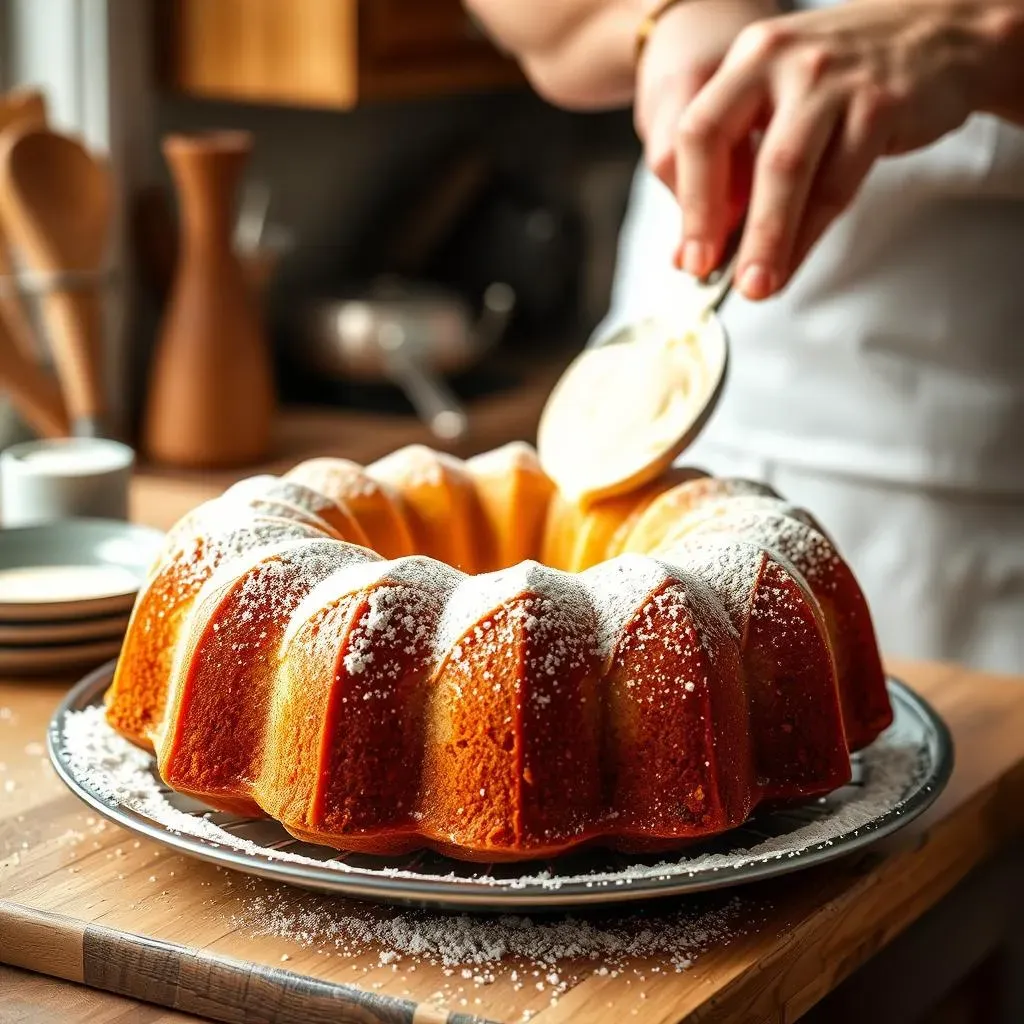
Okay, so your cake is out of the oven, it’s cooled, and it looks absolutely amazing. Now comes the best part: slicing and serving. I like to use a long, serrated knife for this, it cuts through the cake cleanly without tearing it. And here’s a tip: don’t rush it. Take your time and make sure each slice is nice and even. After all, we want each piece to be as beautiful as it is delicious. And remember, when you cut into the cake, you're revealing that gorgeous swirl of cream cheese. It's like unveiling a masterpiece.
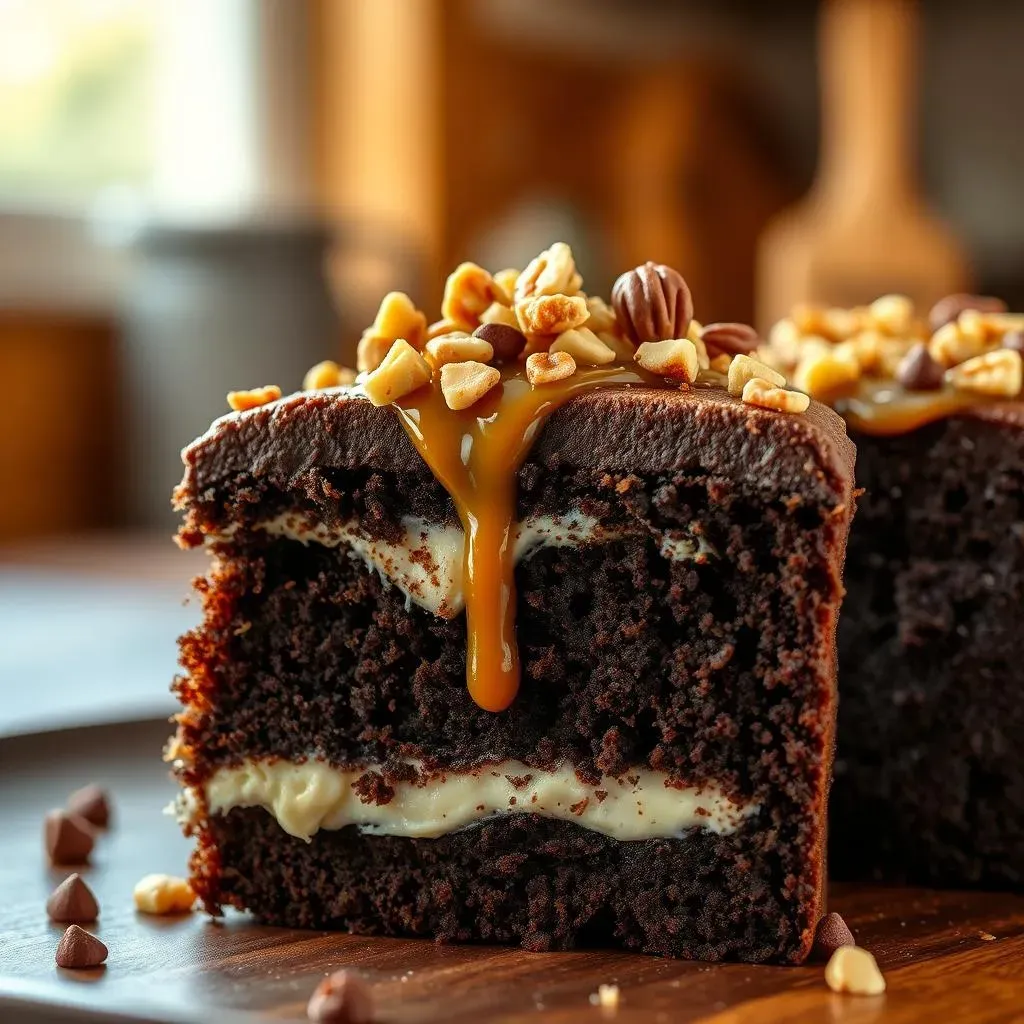
As for serving, this cake is fantastic on its own, but if you want to elevate it even further, a little dusting of powdered sugar or a drizzle of salted caramel can take it to the next level. You could also serve it with a scoop of vanilla ice cream or a dollop of whipped cream. The possibilities are endless. The most important thing is to share it with people you love. This cake is meant to be enjoyed with friends and family, it's a celebration on a plate. It's like the final act of a great performance, a chance to savor the fruits of your labor.
- Use a serrated knife for clean slices.
- Take your time, slice evenly.
- Dust with powdered sugar or drizzle with caramel.
- Serve with ice cream or whipped cream, if desired.
Enjoying the Moment: A Cake for Every Occasion
Ultimately, this chocolate cake with cream cheese filling is more than just a dessert; it’s an experience. It’s the perfect treat for birthdays, holidays, potlucks, or even a cozy night in. I’ve made it for so many different occasions, and it’s always a hit. It’s one of those cakes that people ask for again and again. And it’s really fun to see the looks on people’s faces when they taste it for the first time. It's like watching a magic trick, but instead of cards, it's cake.
And here’s a little secret: this cake is even better the next day. The flavors have had time to meld together, and the cake becomes even more moist. So, if you have any leftovers (which is rare in my house!), you’re in for a treat. It's like a gift that keeps on giving. So, whether you’re a seasoned baker or a newbie in the kitchen, give this recipe a try. I promise you won’t be disappointed. And who knows, maybe it’ll become your go-to cake for every special moment. It's like creating a memory, one slice at a time.
Occasion | Why It's Perfect |
|---|---|
Birthdays | A showstopper cake that everyone will love |
Holidays | A festive and delicious treat |
Potlucks | A crowd-pleasing dessert that's easy to transport |
Cozy Nights In | A comforting and indulgent treat |
Tips, Tricks, and Troubleshooting
Tips, Tricks, and Troubleshooting
Baking Fails and How to Avoid Them
Okay, so let’s be real, baking isn’t always smooth sailing. Sometimes things go wrong, and that’s okay. But, I've been there, and I've learned a few tricks along the way to help you avoid some common pitfalls. For example, if your cake is sinking in the middle, it could mean your oven temperature is too low, or you've overmixed the batter. And if your cake is dry, you might have used too much flour or not enough liquid. The key is to pay attention to the details and to not be afraid to experiment a little. Think of it like detective work, you're trying to figure out what went wrong, and how to fix it.
Another common issue is the dreaded sticky cake. This usually happens when the cake hasn't cooled completely before you try to remove it from the pan. Patience is key here, let it cool in the pan for the recommended time, and then invert it onto a wire rack. And If you are finding that your cream cheese filling is sinking to the bottom, try to make sure that your cream cheese is not too soft before layering, and also that your chocolate cake batter is thick enough to hold the cream cheese. Remember, baking is like science, you need to have the right balance to get the perfect results.
Problem | Possible Cause | Solution |
|---|---|---|
Cake Sinks in the Middle | Oven too low or overmixed batter | Increase oven temp or mix less |
Dry Cake | Too much flour or not enough liquid | Measure ingredients accurately |
Sticky Cake | Not cooled enough before removing | Cool completely before inverting |
Cream Cheese Sinks | Cream cheese too soft or batter too thin | Use firmer cream cheese and thicker batter |
Ingredient Swaps and Substitutions
Sometimes, you might not have all the ingredients on hand, or you might have dietary restrictions. Don’t worry, you can still make this amazing cake! For example, if you don't have sour cream, you can substitute it with plain yogurt. If you're out of vanilla extract, a little bit of almond extract can work in a pinch. And if you're looking to make this cake dairy-free, you can use a plant-based cream cheese and substitute the butter with oil. The key is to find substitutions that have similar properties to the original ingredients. It's like cooking a dish and swapping one spice for another, you want to maintain the flavor profile.
And if you’re feeling adventurous, you can also experiment with different flavors. Try adding a teaspoon of espresso powder to the chocolate batter for a richer flavor, or add some chocolate chips for extra chocolatey goodness. You could also add a hint of orange zest to the cream cheese filling for a citrusy twist. The possibilities are endless. Baking is all about having fun and making it your own, so don’t be afraid to get creative. It’s like being an artist, you can use the basic recipe as a canvas and add your own personal touches.
- Sour cream: substitute with plain yogurt
- Vanilla extract: substitute with almond extract
- Dairy-free: use plant-based cream cheese and oil
- Add espresso powder for richer chocolate flavor
- Add chocolate chips for extra chocolate
- Add orange zest for citrusy twist
Reader Reviews and Adaptations
Reader Reviews and Adaptations
Real People, Real Results
Okay, so I've given you all my tips and tricks, but what do real people think about this recipe? Well, I'm happy to report that it's a hit! I've had so many readers try this chocolate cake with cream cheese filling, and the feedback has been overwhelmingly positive. People love how moist and flavorful the cake is, and that cream cheese swirl is always a crowd-pleaser. Many have commented on how easy it is to make, and that's what I love to hear. It's not about being a professional baker, it's about creating something delicious that you can be proud of. I think, that's the best part of sharing recipes, seeing how other people enjoy them.
And it's not just about the positive comments, I also appreciate the constructive feedback. Some readers have shared their own adaptations and substitutions, which is awesome! For example, one reader used a different type of chocolate, and another added a pinch of sea salt to the cream cheese filling. It's these little tweaks that can make a recipe your own. It is like a conversation with everyone who decides to bake, and I love that, it makes baking a collaborative experience.
Adaptations and Creative Twists
I have seen people get super creative with this cake. Some readers have used different extracts in the batter, like peppermint or almond. Others have experimented with different toppings, like a chocolate ganache or a sprinkle of chopped nuts. I've even seen someone use a caramel drizzle with sea salt, that was amazing. And you know what? It all works. That's the beauty of baking, you can take a basic recipe and make it your own. It is like having a blank canvas, and you can paint whatever your imagination allows you to.
And here’s the thing, I encourage you to do the same. Don't be afraid to experiment and put your own spin on this chocolate cake with cream cheese filling. If you have a favorite ingredient or flavor, try adding it. You never know, you might discover something amazing. Baking is all about having fun and making it your own. It's like making music, you can use the basic notes to create your own unique melody.
Adaptation | Reader's Notes |
|---|---|
Different Extracts | Peppermint or almond for a twist |
Chocolate Ganache | Added richness and shine |
Chopped Nuts | Added texture and flavor |
Caramel Drizzle | Added a touch of salt and caramel flavor |
Sea Salt | Added to the cream cheese filling for balance |