Table of Contents
Let's face it, sometimes you just need chocolate. Not just a little square, but a full-blown, face-first dive into cocoa heaven. For many, that means a classic combination: rich, moist chocolate cake paired with light, airy chocolate mousse. It's a dessert that whispers luxury but, done right, doesn't require a culinary degree to pull off. Finding a reliable **chocolate cake with chocolate mousse recipe** can feel like searching for buried treasure – you want one that delivers on flavor without making you pull your hair out in frustration.
Why You Need This Chocolate Cake with Chocolate Mousse Recipe
Why You Need This Chocolate Cake with Chocolate Mousse Recipe
Because Life Needs More Decadence
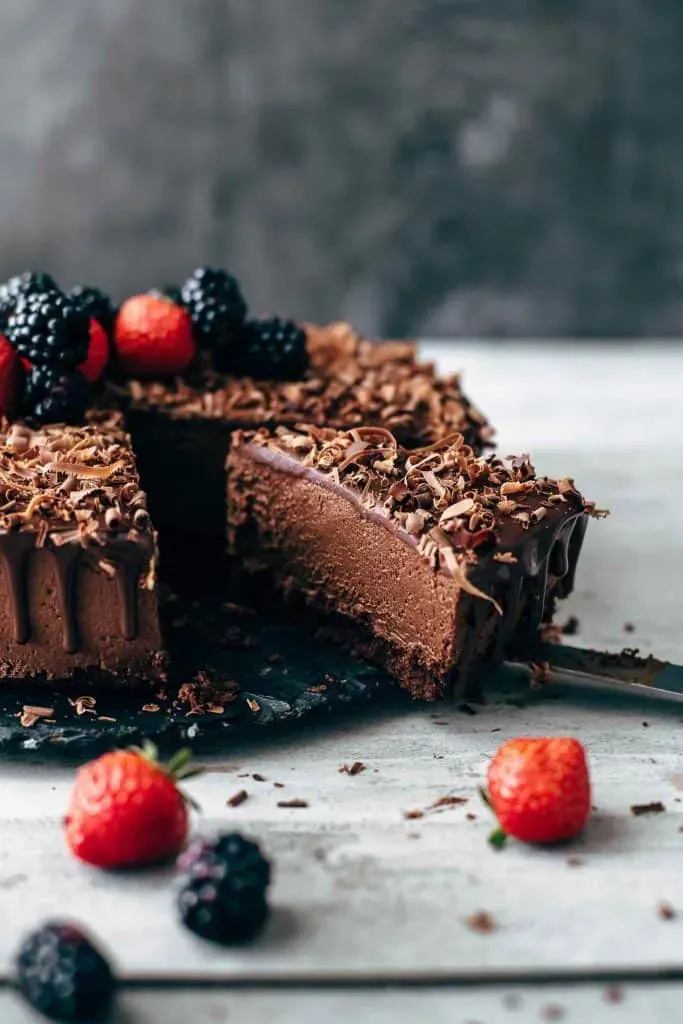
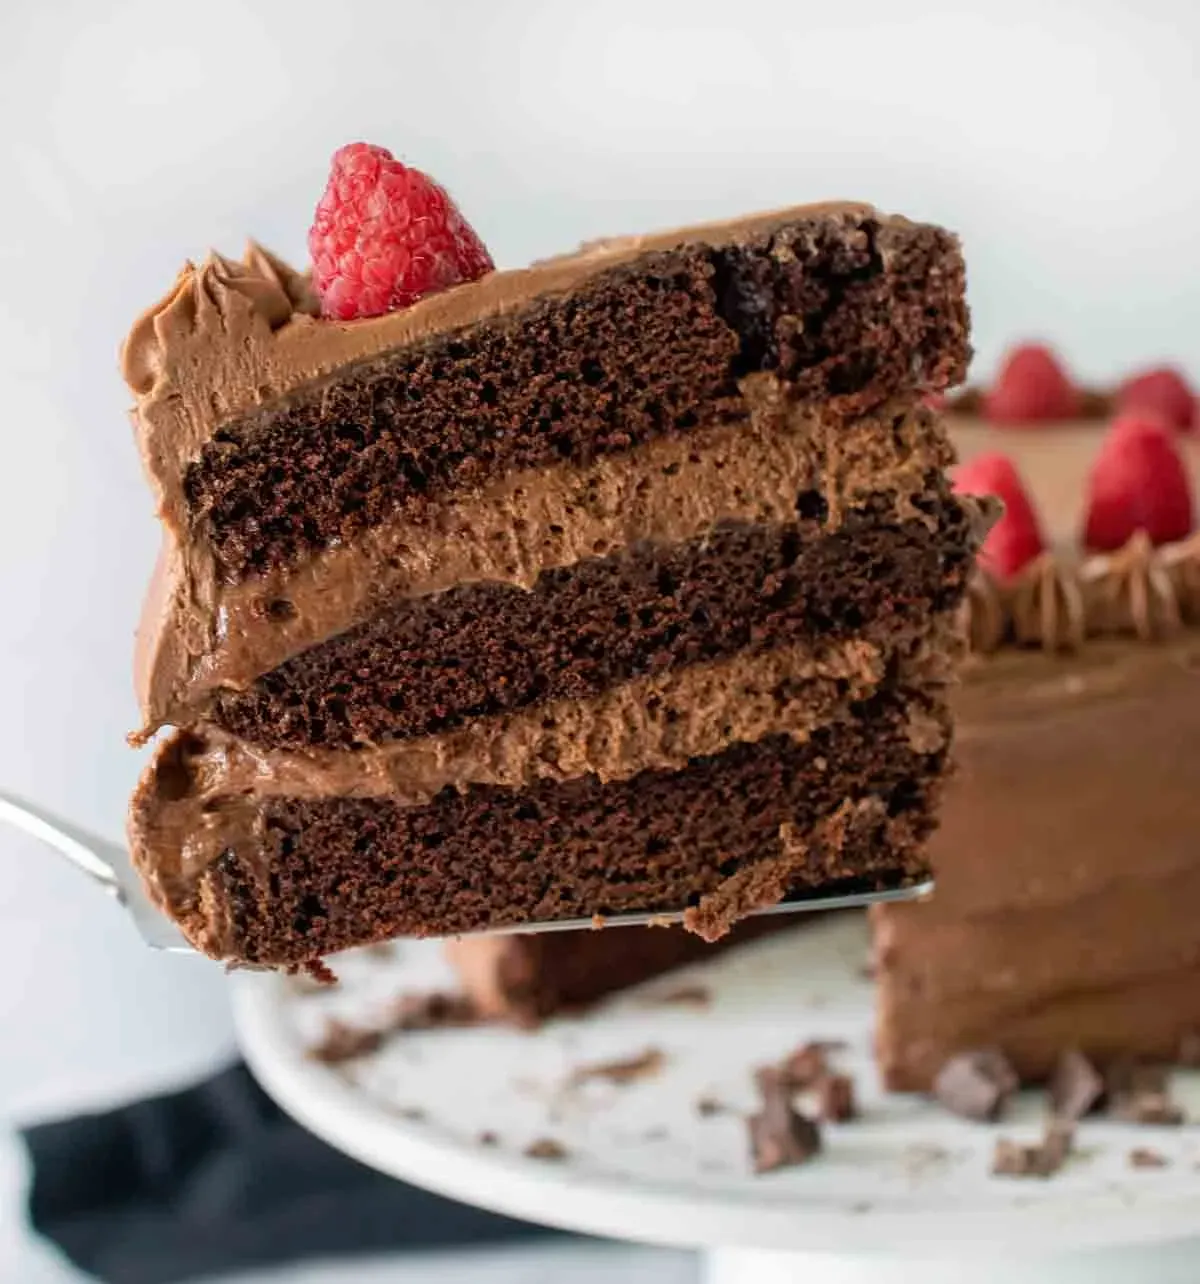
let's be real. Why *this* specific **chocolate cake with chocolate mousse recipe**? Because sometimes, a regular chocolate cake just doesn't cut it. You crave layers of deep, dark cocoa flavor, not just sweetness. You want that cloud-like texture of a proper mousse filling that melts in your mouth, providing a stunning contrast to the tender crumb of the cake. This isn't just baking; it's crafting an experience. It's about creating something that looks as good as it tastes, the kind of dessert that silences a room when the first bite is taken.
Forget those dry, crumbly cakes with weirdly stiff fillings. We're aiming for moist perfection and airy delight. This recipe is designed to deliver that luxurious feeling without requiring you to spend three days in the kitchen or source ingredients from a hidden artisanal chocolate shop on a mountaintop. It’s achievable decadence.
It's the Ultimate Crowd-Pleaser (or Self-Pleaser)
Think about the occasions that call for something truly special. Birthdays, anniversaries, holidays, or maybe just a Tuesday that feels like a Friday. A stellar **chocolate cake with chocolate mousse recipe** is your secret weapon. It’s universally loved. Seriously, who says no to chocolate cake AND chocolate mousse? It’s a combination that transcends preferences and dietary restrictions (unless you can't have chocolate, in which case, I'm truly sorry). Serving this cake elevates any event from 'nice' to 'unforgettable'.
And hey, even if you're just baking for yourself, you deserve this kind of treat. There's a unique satisfaction in creating something this beautiful and delicious with your own two hands. It’s a project with a truly rewarding outcome. Plus, you get to eat the results. Win-win.
Why Bake This Cake?
- Unmatched chocolate flavor depth.
- Perfect contrast of textures: moist cake, airy mousse.
- Impressive looks with manageable steps.
- Ideal for special occasions or just because.
- Serious bragging rights (optional, but encouraged).
Gather Your Gear: What You Need for This Chocolate Cake with Chocolate Mousse Recipe
Gather Your Gear: What You Need for This Chocolate Cake with Chocolate Mousse Recipe
Stocking Your Pantry for Chocolate Glory
Alright, let's talk ingredients. You can't build a chocolate masterpiece without the right raw materials. For the cake part of this **chocolate cake with chocolate mousse recipe**, you'll need standard baking stuff: flour, sugar, eggs, butter, milk. But the chocolate flavor? That comes down to cocoa powder. Don't cheap out here. A good quality unsweetened cocoa powder makes a world of difference. Think Dutch-process for a smoother, darker flavor or natural for something a bit brighter and more acidic. Honestly, using a mix can give you the best of both worlds, hitting those deep notes while still having a slight edge.
Now, the mousse. This isn't just whipped cream with some cocoa dumped in. We're using real chocolate. Semi-sweet or dark chocolate, chopped finely, is key. Combine that with heavy cream, a touch of sugar, maybe some vanilla. Simple, yes, but the quality of your chocolate is paramount. Don't grab the cheapest chocolate chips on the shelf and expect magic. Spend a few extra bucks on a decent bar or wafer, around 60-70% cocoa for a nice balance.
Essential Tools for Your Baking Mission
Beyond the ingredients, you need the right tools. Nothing fancy, mostly things you probably already have. Two 8 or 9-inch cake pans are a must. Line the bottoms with parchment paper; you don't want your beautiful cake layers sticking. A good mixer, stand or hand-held, makes whipping the mousse and creaming the butter and sugar much easier. You'll need bowls, measuring cups and spoons, a spatula, and a whisk.
For the mousse, a double boiler or a heatproof bowl set over a simmering pot of water is necessary for melting the chocolate gently. And a sharp knife for chopping that chocolate. Don't forget a wire rack for cooling the cakes completely before you even think about assembling. Trying to fill a warm cake is a recipe for disaster – melted mousse everywhere.
Quick Gear Checklist:
- Good quality unsweetened cocoa powder
- Semi-sweet or dark chocolate (60-70%)
- Standard baking staples (flour, sugar, eggs, butter, milk, leavening)
- Heavy cream
- Vanilla extract
- Two 8 or 9-inch cake pans
- Parchment paper
- Mixer (stand or hand-held)
- Bowls, measuring tools, spatula, whisk
- Double boiler or heatproof bowl
- Sharp knife
- Wire cooling rack
Baking the Perfect Base: Your Chocolate Cake Layers

Baking the Perfect Base: Your Chocolate Cake Layers
Mixing Your Way to Moist Perfection
Alright, you've got your ingredients and tools ready. Now for the foundation of this glorious **chocolate cake with chocolate mousse recipe**: the cake layers. Forget those dry, crumbly disasters. We're aiming for moist, tender, and deeply flavored. The key starts with how you mix. Cream your butter and sugar until light and fluffy – this incorporates air and creates a tender crumb structure. Add your eggs one at a time, mixing well after each addition. Whisk together your dry ingredients (flour, cocoa, baking soda/powder, salt) and your wet ingredients (milk, vanilla, maybe some sour cream or buttermilk for extra moisture and tang). Alternate adding the dry and wet mixtures to the butter mixture, starting and ending with the dry. Don't overmix! Mix just until combined. Overmixing develops the gluten too much, leading to tough cake. Handle that batter like it's fragile cargo.
Into the Oven and Out Again
Once your batter is ready, divide it evenly between your prepared cake pans. Smooth the tops. Now, into a preheated oven they go. Temperature matters here – usually around 350°F (175°C). Baking time will vary depending on your pan size and oven, but typically it's 25-35 minutes for 8 or 9-inch layers. How do you know they're done? A toothpick inserted into the center should come out with a few moist crumbs attached, not wet batter. If it comes out clean, you might be veering into dry territory. Don't wait for a completely clean toothpick. Let the cakes cool in the pans for about 10-15 minutes before inverting them onto a wire rack to cool completely. Seriously, *completely*. A warm cake will melt your carefully crafted mousse faster than you can say "chocolate emergency."
Tips for Terrific Cake Layers:
- Use room temperature ingredients (butter, eggs, milk).
- Sift your cocoa powder and flour to avoid lumps.
- Don't overmix the batter after adding dry ingredients.
- Check for doneness with a toothpick – a few moist crumbs are good.
- Cool cakes fully on a wire rack before assembling.
Crafting the Cloud: Making the Chocolate Mousse Filling
Crafting the Cloud: Making the Chocolate Mousse Filling
Building the Silky Base: Melting the Chocolate
so you've got your cake layers cooling, smelling amazing. Now for the star of the show: the chocolate mousse. This isn't the stuff that comes out of a box, trust me. We're making proper mousse, light and airy but packed with intense chocolate flavor. It starts with melting your good quality chocolate. Chop it up finely – smaller pieces melt more evenly. The best way to do this is over a double boiler. Set a heatproof bowl over a pot of simmering water, making sure the bottom of the bowl doesn't touch the water. Drop your chopped chocolate in and stir gently until it's smooth and completely melted. Don't rush it or let the water boil too vigorously; you risk scorching the chocolate. Once melted, take it off the heat and let it cool slightly. You don't want it hot when you fold it into the cream, or things will get messy fast.
While the chocolate cools a bit, you might need a few other things depending on your specific **chocolate cake with chocolate mousse recipe**. Some recipes add a bit of warm milk or cream to the melted chocolate to make it more fluid. Others might whisk in an egg yolk for richness (though I prefer simpler versions without raw eggs for ease and safety). The key is getting that melted chocolate to a state where it's still liquid but not hot enough to deflate your whipped cream later. It should be warm to the touch, but you should be able to hold your finger in it for a few seconds without yelping.
Whipping the Dream: Folding in the Cream
Here’s where the magic really happens, turning that melted chocolate into a fluffy cloud. You need cold heavy cream. Seriously, make sure it's straight from the fridge. Pour it into a clean, cold bowl (chilling your bowl and whisk attachments beforehand helps immensely). Start whipping it, gradually increasing the speed. Add a little confectioners' sugar and perhaps a splash of vanilla extract as it thickens. You're looking for medium peaks – where the cream holds its shape but the tips curl over slightly. Don't go all the way to stiff peaks; you want it slightly softer for folding.
Now for the careful part: combining the cooled melted chocolate with your whipped cream. This isn't a race. Take about a third of the whipped cream and gently fold it into the melted chocolate using a spatula. This lightens the chocolate mixture. Then, add the rest of the whipped cream in two additions, folding gently after each. The goal is to incorporate the whipped cream without deflating it. Use a cutting and folding motion, bringing the mixture from the bottom up and over. Stop as soon as it's streaks are gone and the mousse is uniform in color. Overmixing will knock all the air out, leaving you with a dense filling instead of that lovely, airy mousse this **chocolate cake with chocolate mousse recipe** promises.
- Ensure chocolate is melted smoothly, no lumps.
- Let melted chocolate cool slightly before combining.
- Whip heavy cream to medium peaks, not stiff.
- Fold gently to keep the mousse light and airy.
- Don't overmix once cream is added.
Putting It All Together: Assembling and Finishing Your Chocolate Cake with Chocolate Mousse
Putting It All Together: Assembling and Finishing Your Chocolate Cake with Chocolate Mousse
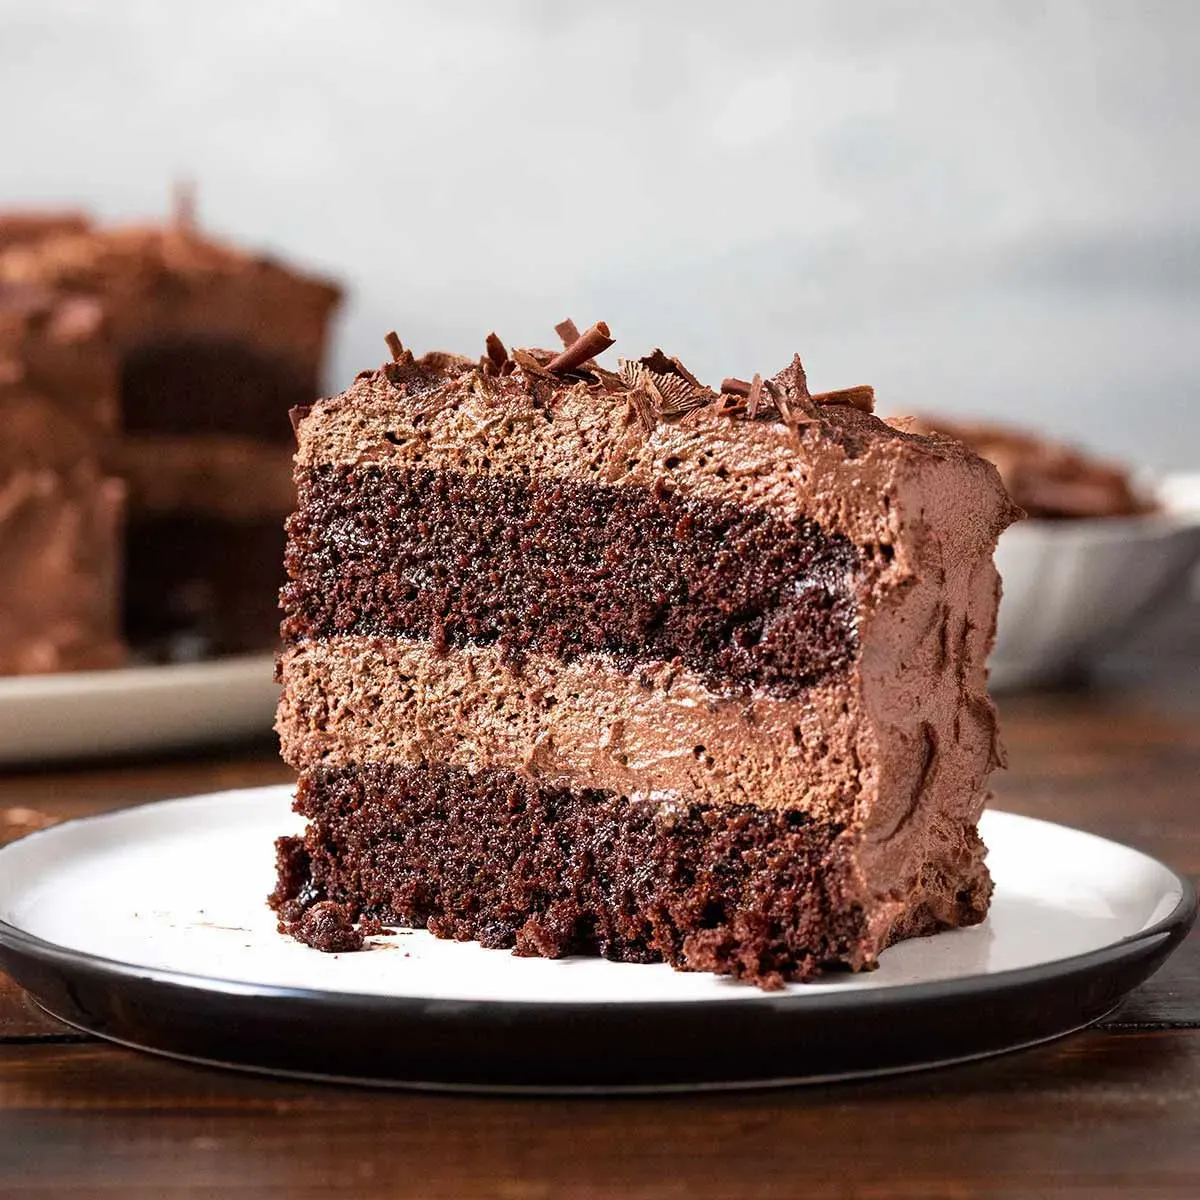
The Grand Finale: Stacking Your Decadence
the moment of truth! Your cake layers are cool – absolutely, positively cooled down – and your chocolate mousse is ready, light and fluffy. Now comes the fun part of putting this **chocolate cake with chocolate mousse recipe** together. Grab your serving plate or cake stand. Place the first cake layer down. I like to put it top-side down sometimes; it gives a nice flat surface on top for the next layer. Then, pile on a generous amount of that gorgeous chocolate mousse. Spread it evenly right to the edges. Don't be shy; this is where the magic happens. Place the second cake layer carefully on top. Gentle pressure is key here; you don't want to squeeze all that precious mousse out. If you're doing a ganache or frosting, this is when you'd apply it to the top and sides. Smooth it out, make pretty swirls, or go for a rustic look – it's your masterpiece.
Enjoying Your Chocolate Mousse Masterpiece
You've navigated the layers, whipped the mousse to cloud-like perfection, and assembled a dessert that looks and tastes like it came from a fancy patisserie. This **chocolate cake with chocolate mousse recipe** isn't just about following steps; it's about creating something truly decadent from scratch. Slice into it and see for yourself – the tender cake, the rich, airy mousse, the pure satisfaction. It's the kind of dessert that makes the effort worthwhile, proving that sometimes, the best things come from a little time in the kitchen.