
Table of Contents
Picture this: You've just finished dinner, and that familiar dessert craving hits. You want something rich, decadent, and maybe a little dramatic. Something with a warm, gooey center just waiting to spill out. We're talking about the legendary choco lava cake, a dessert that looks fancy but is surprisingly achievable right in your own kitchen. Forget ordering takeout; mastering a reliable choco lava cake recipe in oven is easier than you think. Sure, maybe you've tried before and ended up with a solid chocolate puck or a runny mess. We've all been there. But don't toss your ramekins just yet. This guide is designed to walk you through exactly what you need and how to do it, step-by-step. We'll cover the simple ingredients, the right gear, the foolproof method for that perfect molten core, and even tackle those common hiccups that might pop up. Ready to impress yourself (and anyone else lucky enough to be around)? Let's get started on making that dreamy chocolate lava flow happen.
What Exactly is a Choco Lava Cake Anyway?
What Exactly is a Choco Lava Cake Anyway?
Beyond Just Chocolate Cake: The Molten Mystery
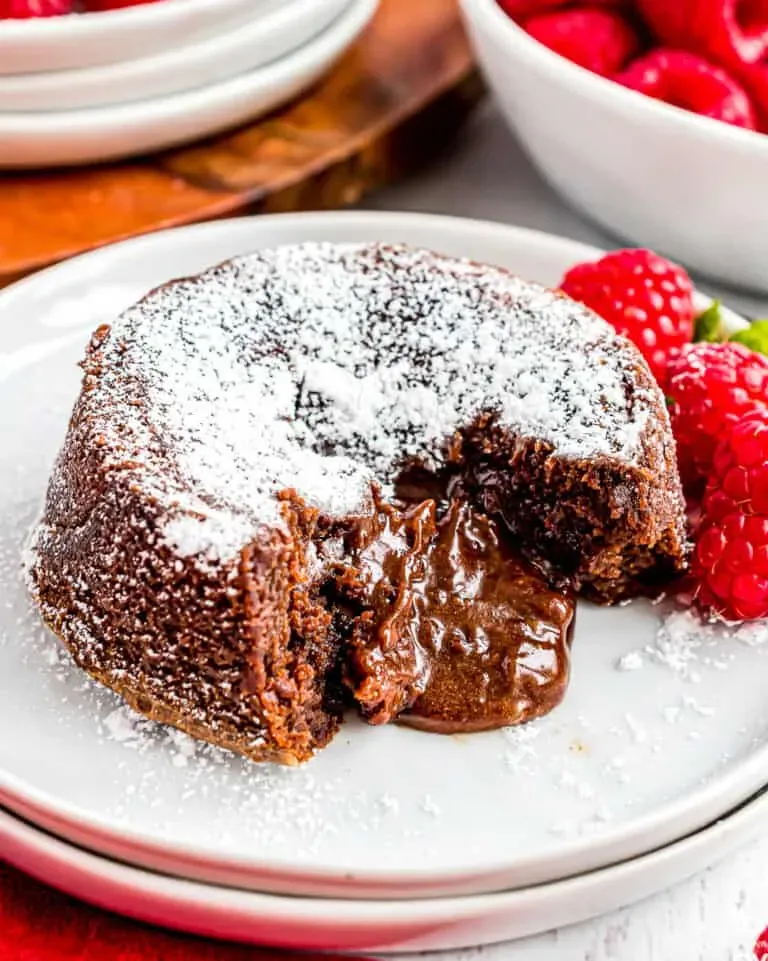
So, what's the big deal with a choco lava cake? It's not just some fancy name for a slightly undercooked brownie. Think of it as a small, individual chocolate cake with a secret. That secret is a warm, liquid chocolate center that oozes out the moment you break the surface with your fork. It's the defining feature, the whole point of the exercise. It's the drama on the plate, frankly. You get the tender crumb of cake around the edges, and then BAM – a flow of rich, melted chocolate. It’s this contrast that makes it so addictive.
The Science Behind the Goo: Why It Melts
How does that magic molten core happen? It's not witchcraft, though it feels like it sometimes. The trick lies in the baking time and temperature, especially when using a reliable choco lava cake recipe in oven. You bake the cake just long enough for the outside edges and top to set and become cake-like, but the very center, which is essentially still batter, remains liquid. It's a delicate balance, a race against time in a hot oven. Pull it too early, and the whole thing collapses. Leave it in too long, and you just have a very small, dense chocolate cake with no lava in sight. The high butter and chocolate content in the batter helps keep that center smooth and liquid at serving temperature.
- It's small, usually baked in a ramekin.
- The exterior is set, like a regular cake.
- The interior is intentionally liquid batter/melted chocolate.
- Timing in the oven is critical.
- High fat content is key to the molten center.
More Than Just Dessert: An Experience
Cutting into a choco lava cake isn't just eating dessert; it's an event. There's a moment of anticipation as the fork goes in, and then the payoff as the warm chocolate spills onto the plate. It's a simple pleasure, sure, but potent. It's not a layered cake, not a brownie, not a mousse. It stands alone because of that dynamic texture shift. Getting a bite with both the firm cake edge and the warm, flowing center is the goal. It’s a dessert that demands a bit of attention, a small, edible performance art piece you get to devour.
Gathering Your Arsenal: Ingredients and Equipment for Your Choco Lava Cake Recipe in Oven
Gathering Your Arsenal: Ingredients and Equipment for Your Choco Lava Cake Recipe in Oven
The Essential Edibles: What You'll Need
let's talk ingredients. You don't need anything exotic for a solid choco lava cake recipe in oven. We're sticking to the basics, but quality matters here. Think good chocolate, not the stuff you'd toss in a kid's trick-or-treat bag. Semi-sweet or bittersweet chocolate is your friend; it provides the richness without being sickly sweet. You'll also need butter, and a decent amount of it – this is not diet food, let's be clear. Eggs are crucial for structure and richness. Sugar, a little flour to bind things, maybe some vanilla extract for depth, and a pinch of salt to balance everything out. That's pretty much it. Simple stuff, but the interaction of these few items creates something magical. Don't skimp on the chocolate; it's the star of the show.
Tooling Up: Gear for Lava Cake Success
Beyond the pantry staples, you'll need a few pieces of equipment to bring your choco lava cake recipe in oven to life. Ramekins are non-negotiable. These are the small, individual baking dishes that give the cake its shape and allow the center to stay molten while the edges set. Make sure they're properly buttered and floured or coated with cocoa powder to prevent sticking – nothing's sadder than a lava cake that refuses to leave its mold. You'll also need a mixing bowl, a whisk or electric mixer, a spatula, and a way to melt chocolate and butter (a double boiler or microwave works). An oven, obviously, and a baking sheet to place your ramekins on for easier handling and catching any potential spills. That's about it. No fancy gadgets required, just the right tools for the job.
Ingredient Type | Specifics to Look For |
|---|---|
Chocolate | High-quality semi-sweet or bittersweet chocolate, around 60-70% cocoa. Chips work, but chopped bars melt better. |
Butter | Unsalted is best so you control the salt level. |
Eggs | Large eggs, at room temperature if possible for better incorporation. |
Flour | All-purpose flour, just a tiny bit. |
Sugar | Granulated sugar. |
Baking Bliss: The StepbyStep Choco Lava Cake Recipe in Oven Process
Baking Bliss: The StepbyStep Choco Lava Cake Recipe in Oven Process
Melting and Mixing the Foundation
Alright, so you've got your ingredients lined up and your ramekins ready to go. Now for the fun part: bringing it all together. The first step in any good choco lava cake recipe in oven is getting that chocolate and butter melted into a smooth, glossy pool. You can do this gently over a double boiler – a bowl set over a pot of simmering water – which gives you more control and reduces the risk of burning. Or, if you're feeling brave and have a microwave with a low power setting, you can use that, zapping it in short bursts and stirring frequently. The key is low and slow. Once that's melted and smooth, set it aside for a minute to cool slightly. While that's happening, whisk your eggs and sugar together. You want it pale and a bit frothy. This adds air and structure. Don't go crazy, just a minute or two until it's combined and looks like something other than raw eggs.
Combining and Prepping for the Heat
Now, carefully whisk the slightly cooled melted chocolate and butter mixture into the egg and sugar. Do it gradually, incorporating it fully before adding more. This helps prevent the eggs from cooking from the residual heat of the chocolate. Once that's a uniform, rich brown, it's time for the dry stuff. Gently fold in the small amount of flour and any vanilla extract or a pinch of salt you're using. Don't overmix! You're not developing gluten here; you just want it combined. Lumps are the enemy of a smooth lava flow. Now, pour this glorious batter into your prepared ramekins. Fill them maybe two-thirds to three-quarters full. Don't overfill, or you'll have chocolate volcanoes erupting in your oven, and not the good kind. Place the filled ramekins on a baking sheet – seriously, don't skip this – it makes getting them in and out of the hot oven way easier and catches any drips.
- Melt chocolate and butter gently (double boiler or low-power microwave).
- Whisk eggs and sugar until pale and slightly frothy.
- Gradually whisk melted chocolate mixture into egg mixture.
- Gently fold in flour and any flavorings (like vanilla).
- Do not overmix the batter.
- Pour batter into buttered/floured ramekins (fill 2/3 to 3/4).
- Place ramekins on a baking sheet before baking.
Oops! Troubleshooting Your Choco Lava Cake in Oven Issues
Oops! Troubleshooting Your Choco Lava Cake in Oven Issues
The Case of the Missing Lava
So, you pulled your beautiful little cakes out of the oven, held your breath, plunged your spoon in, and... nothing. No glorious molten chocolate river. Just a solid, albeit tasty, mini cake. This is perhaps the most common heartbreak when attempting a choco lava cake recipe in oven. The culprit is almost always overbaking. You left it in too long, and the heat penetrated all the way to the center, setting the batter completely. Ovens vary wildly, and the exact timing given in a recipe is just a guideline. Your oven might run hot, or perhaps your ramekins conduct heat differently. Next time, start checking a minute or two earlier than the recipe suggests. The edges should look set and slightly pulled away from the sides, but the very center should still look a bit soft or jiggly when you gently tap the ramekin. It takes a bit of trial and error, sure, but finding that sweet spot is key to lava success.
Stuck in the Ramekin Blues
Another frustrating scenario: the cake looks perfect, you invert it onto the plate, and half of it stays stubbornly glued to the inside of the ramekin. You're left with a mangled mess instead of an elegant dessert. This usually boils down to insufficient or improper preparation of your ramekins. Simply giving them a quick wipe with butter isn't enough. You need to butter them thoroughly, getting into every nook and cranny, right up to the rim. After buttering, dust them with flour or, for an extra chocolatey barrier and invisible protection, cocoa powder. Tap out the excess. This creates a non-stick layer that allows the cake to release cleanly. Don't rush this step; it's a small effort that prevents big disappointment. Cold butter is harder to spread evenly, so slightly softened butter helps here.
- **Overbaking:** The most common issue, resulting in no molten center. Check doneness earlier.
- **Underbaking:** The cake collapses into a puddle. Needs another minute or two in the oven.
- **Sticking:** Cake won't release from the ramekin. Ensure thorough buttering and flouring/cocoa dusting.
- **Uneven Baking:** One cake is perfect, another isn't. Could be oven hot spots or uneven batter distribution. Rotate ramekins halfway through.
- **Tough Texture:** Usually caused by overmixing the batter once the flour is added. Fold gently.
The Dreaded Collapse
On the flip side of overbaking is underbaking, which leads to a different kind of failure: the sad, deflated puddle. You take it out, it looks promising for a second, and then it just sinks into a formless blob. This means the structure didn't set enough to hold its shape once it left the heat of the oven. While you want a molten center, the outer cake needs to be baked through enough to provide that crucial support structure. If your cake collapses, it needed another minute or two in the oven. Trust the visual cues: the edges should be firm and set, the top slightly matte, and that center just a little bit jiggly. It's a fine line, but with practice and paying close attention to your specific oven and ramekins, you'll nail the timing for your go-to choco lava cake recipe in oven.
Serving Up Sweetness: Enjoying Your Hot Choco Lava Cake
Serving Up Sweetness: Enjoying Your Hot Choco Lava Cake
The Crucial Waiting Game (It's Shorter Than You Think)
you've successfully navigated the baking minefield and pulled those beautiful, slightly puffed ramekins from the oven. Now comes the hardest part for some: waiting. Seriously, resist the urge to immediately flip them onto a plate. That molten center needs a minute to settle and firm up just enough so it doesn't completely explode into a formless chocolate puddle when you invert it. Let them rest in their ramekins on a wire rack for about 5 to 10 minutes. This brief pause allows the outer cake structure to stabilize while the center stays perfectly gooey. It feels like an eternity when you know what's inside, but trust the process. Skipping this step is a rookie mistake that results in disappointment.
Presentation is Key: Releasing the Lava
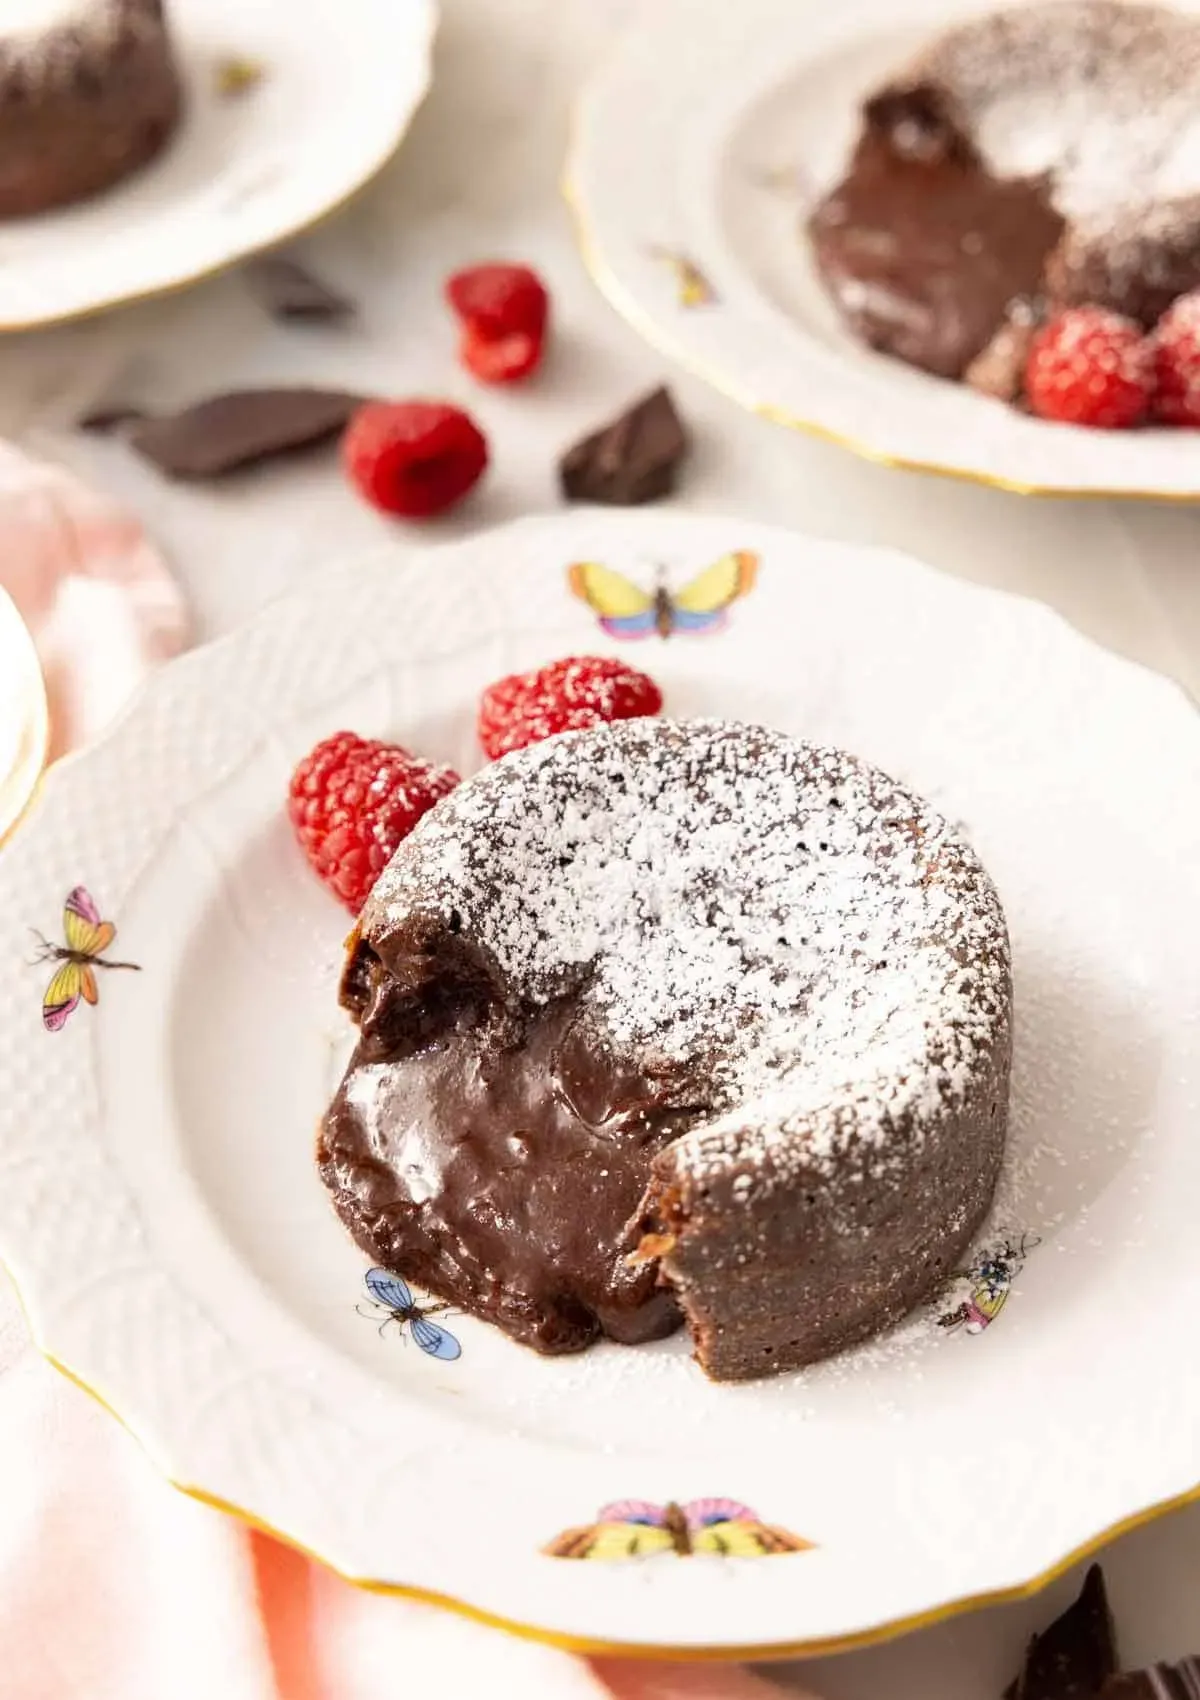
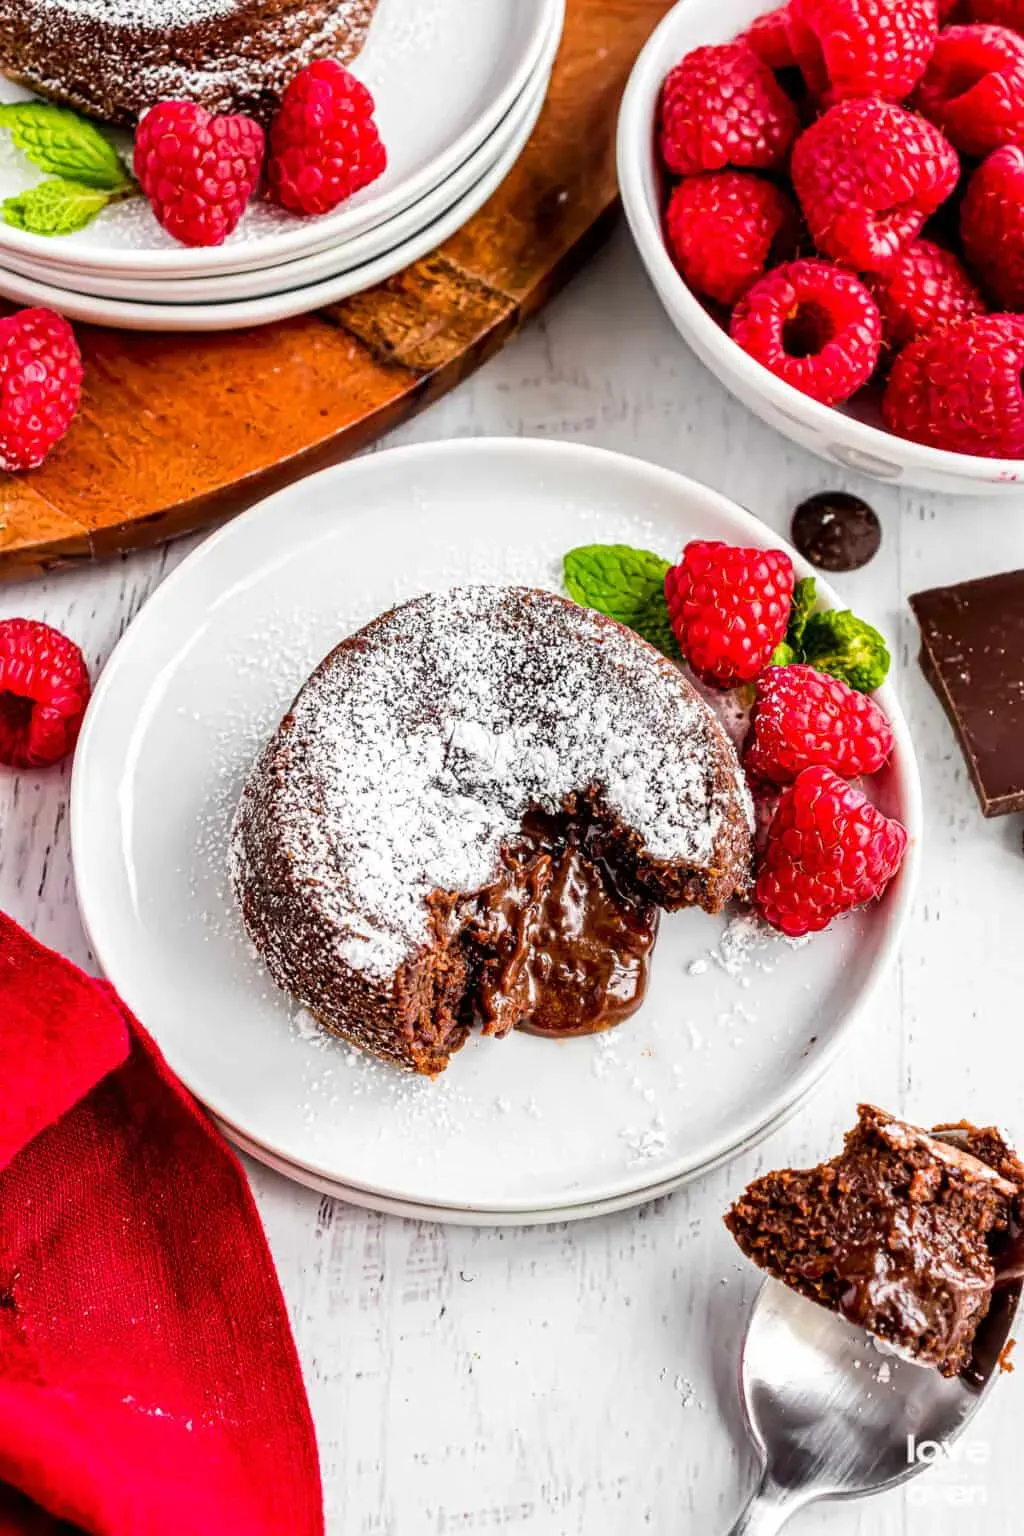
After that agonizingly short wait, it's showtime. Run a thin knife around the edge of each cake to loosen it from the ramekin. Be gentle; you don't want to mangle your masterpiece. Place a serving plate upside down over the ramekin. Hold the plate and ramekin together firmly and, with a confident flourish, flip them over. Give the ramekin a little shake or a gentle tap on the bottom. With any luck (and proper ramekin prep!), the cake should slide out cleanly onto the plate, standing tall and proud. Now, the fun really begins. You can serve it plain, letting the rich chocolate speak for itself, or dress it up. A dusting of powdered sugar is classic and adds a touch of elegance. A scoop of vanilla ice cream melting into the warm lava is practically mandatory for the full sensory experience. Fresh berries cut through the richness nicely. Whatever you choose, get that fork ready. The moment of truth, the glorious lava flow from your perfect choco lava cake recipe in oven, is finally here.
Serving Suggestions for Maximum Impact:
- Classic: A dusting of powdered sugar.
- Decadent: A scoop of high-quality vanilla bean ice cream.
- Fruity: Fresh raspberries or strawberries.
- Saucy: A drizzle of raspberry coulis or caramel sauce.
- Simple & Pure: Just the cake, letting the lava shine.
Your Molten Masterpiece Awaits
So there you have it. No need for a fancy pastry degree or a trip to a high-end restaurant to get your hands on this chocolatey magic. You've got the lowdown on the ingredients, the process, and how to troubleshoot if things go slightly sideways. Baking a choco lava cake in your oven isn't some mystical art; it's just following a few steps and keeping an eye on the clock. The real reward isn't just the cake itself, but that moment when you plunge your spoon in and the warm, liquid chocolate oozes out. Go ahead, give it a shot. Worst case, you end up with a delicious, slightly-less-gooey chocolate cake. Still not a bad outcome, if you ask me.