
Table of Contents
Craving a dessert that's both refreshing and decadent? Look no further! We're diving headfirst into the world of frozen delights with the best mint chocolate chip ice cream cake recipe you'll ever try. Forget those store-bought, freezer-burned slabs – we're talking layers of homemade goodness, from a rich chocolate ganache to a crunchy cookie crust, all perfectly complementing that cool, minty ice cream.
Crafting the Ultimate Mint Chocolate Chip Ice Cream Cake: Ingredients and Tools
Crafting the Ultimate Mint Chocolate Chip Ice Cream Cake: Ingredients and Tools
Gathering Your Mint Chocolate Chip Dream Team
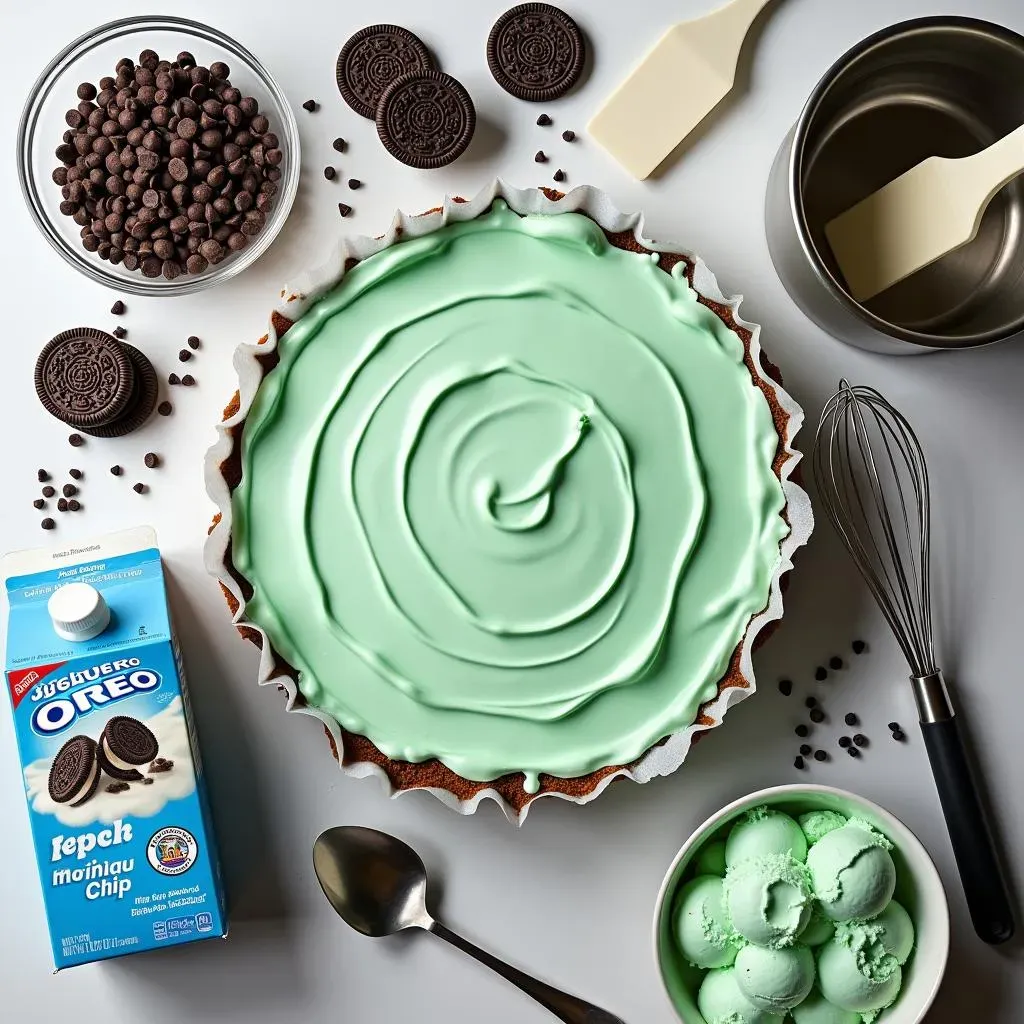
Alright, future ice cream cake architects, let's talk supplies! To whip up the best mint chocolate chip ice cream cake, you'll need a mix of quality ingredients and trusty tools. We're not skimping here – the better the ingredients, the tastier the final product. Think of it as building a house; you want a solid foundation, right? So, let's start with the stars of the show: your favorite mint chocolate chip ice cream (duh!), some good-quality chocolate for a killer ganache, and the cookies that'll form the base of your masterpiece.
Don't underestimate the power of a good Oreo crust! It adds a delightful crunch that balances the creamy ice cream perfectly. And for that luscious ganache, opt for semi-sweet chocolate chips; they strike the right balance of sweetness and richness. Finally, a dollop of freshly whipped cream on top? Yes, please! Heavy cream is your best friend here. Trust me, it's worth the extra effort.
Essential Tools for Ice Cream Cake Success
Now that we've got our ingredients sorted, let's talk tools. You don't need a fancy kitchen to make this cake, but a few key items will make your life a whole lot easier. First up, a 9x13 inch pan is ideal for a classic rectangular cake. Alternatively, a springform pan can create a stunning circular cake with clean, professional-looking edges. Either works, so go with what you've got!
Beyond the pan, you'll need a double boiler or a heat-safe bowl and saucepan for melting the chocolate for the ganache. A good whisk is essential for achieving a smooth, glossy ganache, and an offset spatula will make spreading the layers a breeze. Lastly, don't forget the parchment paper! Lining your pan makes removing the cake a cinch. With these tools in hand, you're well on your way to ice cream cake glory!
Ingredient | Quantity | Notes |
|---|---|---|
Mint Chocolate Chip Ice Cream | 1.5 quarts | Your favorite brand! |
Semi-Sweet Chocolate Chips | 12 oz | For the ganache |
Heavy Cream | 1 cup | For the ganache and whipped cream topping |
Oreo Cookies | 1 package | For the crust |
Unsalted Butter | 6 tablespoons | Melted, for the crust |
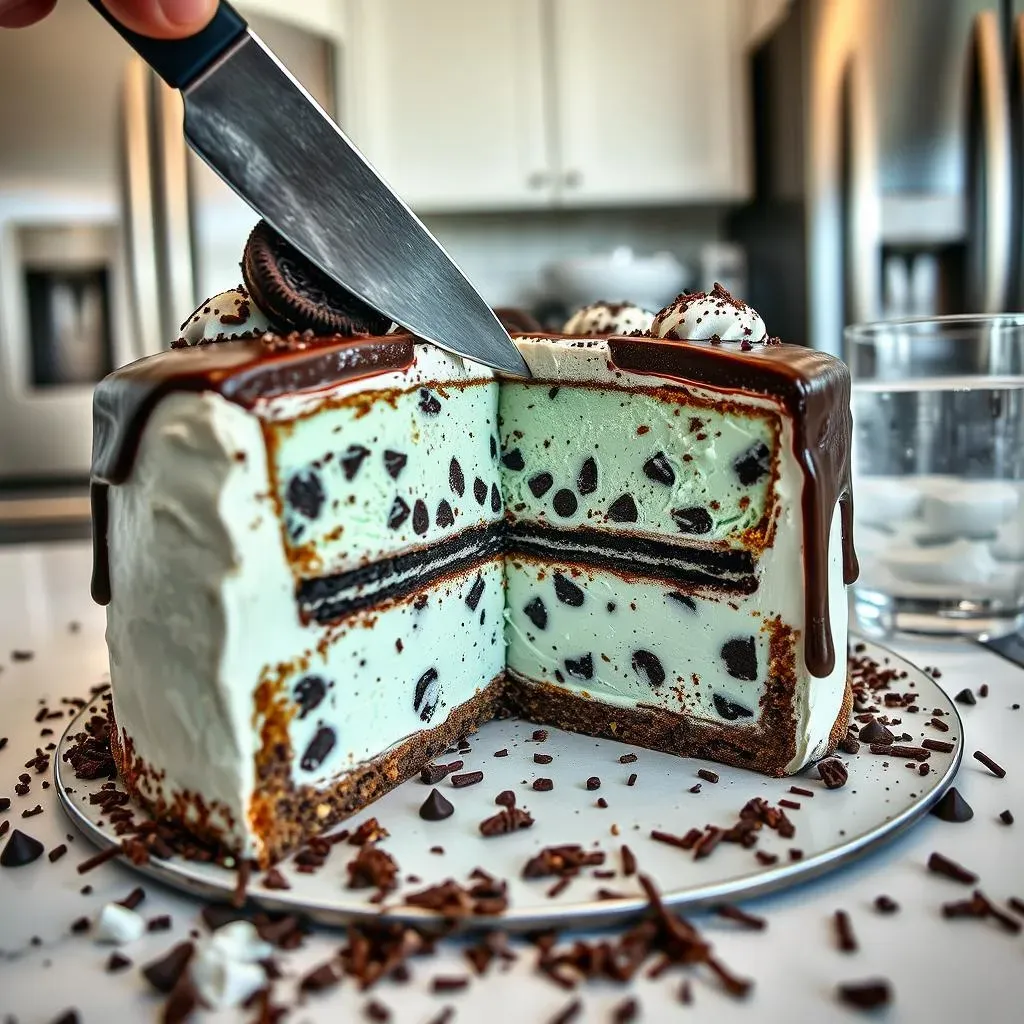
Layering for Success: Assembling Your Mint Chocolate Chip Dream Cake

Layering for Success: Assembling Your Mint Chocolate Chip Dream Cake
Crushing the Crust: The Foundation of Flavor
Alright, let's get this show on the road! First things first, we need to create that glorious Oreo crust. Take your package of Oreos and either toss them into a food processor for a fine crumb, or channel your inner Hulk and crush them in a Ziploc bag with a rolling pin. I personally enjoy the Hulk method – a little stress relief never hurt anyone! Once crushed, mix those crumbs with your melted butter until they're evenly moistened and resemble wet sand. This is the glue that holds our cake together, people!
Now, press that crumb mixture firmly into the bottom of your prepared pan. You want a nice, even layer, so use the bottom of a measuring cup or your fingers to really pack it in there. This is crucial – a well-packed crust will prevent the ice cream from seeping through and creating a soggy mess. Nobody wants a soggy ice cream cake, trust me.
Ganache Glamour: Chocolate River of Dreams
Next up, the ganache! This is where things get seriously decadent. In a double boiler or heat-safe bowl set over a simmering pot of water, combine your semi-sweet chocolate chips and heavy cream. Stir constantly until the chocolate is completely melted and the mixture is smooth and glossy. Be patient – chocolate can be temperamental, so don't rush it. Once it's melted, remove from the heat and let it cool slightly. We don't want to melt our ice cream layer just yet!
Pour the slightly cooled ganache over the Oreo crust, spreading it evenly with an offset spatula. This layer adds a rich, chocolatey goodness that complements the mint ice cream perfectly. Pop the pan into the freezer for about 30 minutes to allow the ganache to set. This will prevent the ice cream from mixing with the ganache, creating distinct and delicious layers.
Ice Cream Dreams: The Minty Crown Jewel
Now for the star of the show: the mint chocolate chip ice cream! Take your ice cream out of the freezer and let it soften slightly – you want it to be spreadable but not completely melted. Working quickly, spread an even layer of ice cream over the set ganache. Again, an offset spatula is your friend here. Smooth it out as best you can and pop the whole thing back into the freezer for at least 2-3 hours, or even better, overnight. This allows the ice cream to firm up completely, making it easier to cut and serve.
Before serving, you can add a final layer of whipped cream for extra indulgence. If you're feeling fancy, pipe it on in decorative swirls. Otherwise, a simple dollop will do the trick. And there you have it – a layered masterpiece that's sure to impress!
Layer | Description | Tips |
|---|---|---|
Oreo Crust | Crushed Oreos mixed with melted butter | Pack it tightly for a firm base |
Chocolate Ganache | Melted chocolate chips and heavy cream | Let it cool slightly before pouring |
Mint Chocolate Chip Ice Cream | Softened ice cream | Spread quickly and evenly |
Mint Chocolate Chip Ice Cream Cake: Tips, Tricks, and Variations for Perfection
Mint Chocolate Chip Ice Cream Cake: Tips, Tricks, and Variations for Perfection
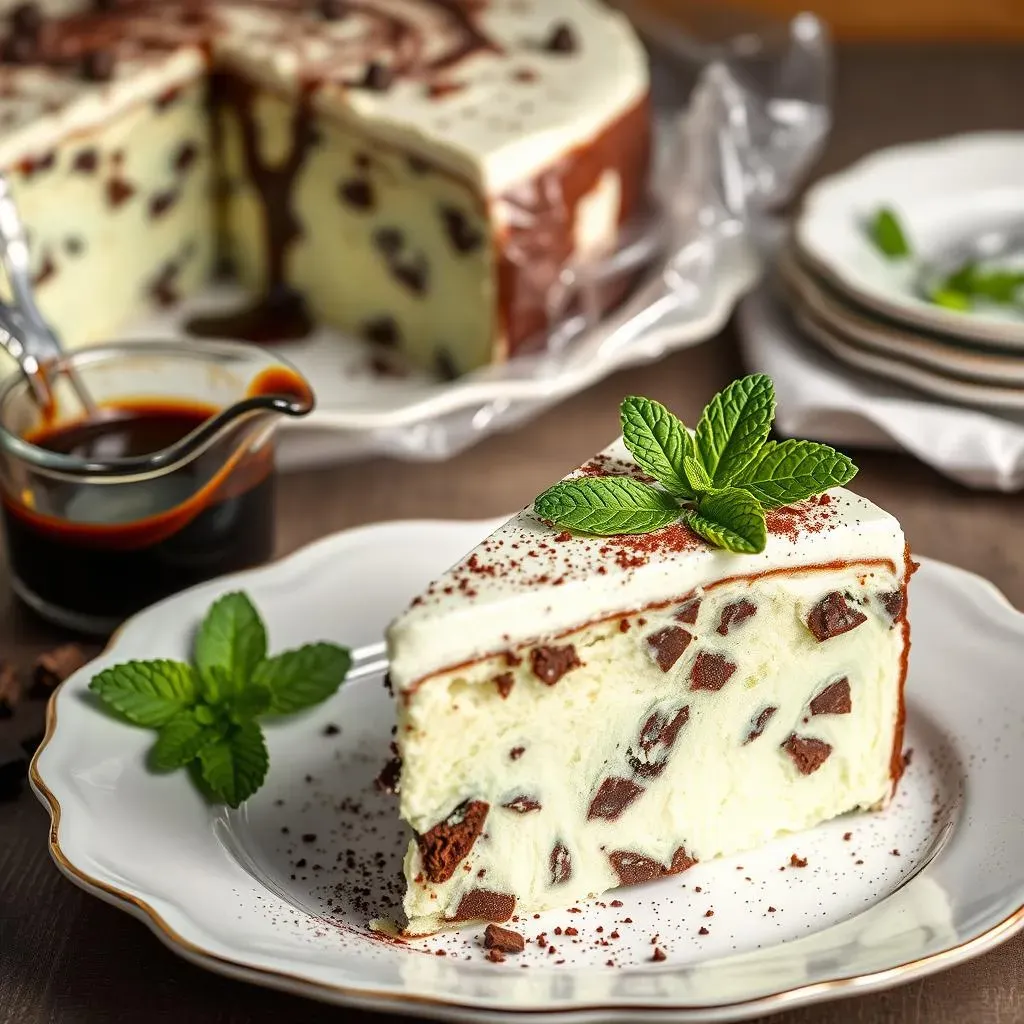
Cutting Like a Pro: Slicing Secrets
Alright, you've got this glorious mint chocolate chip ice cream cake, but how do you cut it without making a melty mess? Here's the secret: hot water is your best friend! Before each slice, dip a long, sharp knife into a glass of hot water. Wipe it dry with a clean towel, and then make your cut. The heat will help the knife glide through the frozen layers like butter. Repeat this process for each slice, and you'll have perfectly clean, Instagram-worthy servings every time.
Another pro tip: if your cake is rock solid, let it sit at room temperature for about 5-10 minutes before cutting. This will soften it just enough to make slicing easier, but not so much that it turns into a puddle. And remember, patience is key! Don't try to force the knife through – let the heat do the work.
Want to be even fancier? Use a hot ice cream scoop to create individual servings. Simply dip the scoop in hot water, wipe it dry, and scoop out a perfect ball of ice cream cake. This is a great way to impress your guests and avoid the hassle of slicing.
Remixing the Recipe: Variations for Every Craving
so you've mastered the basic mint chocolate chip ice cream cake recipe. Now it's time to get creative and put your own spin on it! The possibilities are endless, so don't be afraid to experiment. One of my favorite variations is swapping out the Oreo crust for a chocolate chip cookie crust. Simply use your favorite chocolate chip cookie recipe, bake it in the pan, and let it cool completely before adding the ganache and ice cream. The combination of chocolate chip cookies and mint chocolate chip ice cream is pure heaven!
Another fun idea is to add a layer of hot fudge sauce between the ganache and the ice cream. This adds an extra layer of decadence and richness that's sure to satisfy any sweet tooth. You can also experiment with different types of ice cream. Try using a cookies and cream ice cream or a fudge brownie ice cream for a completely different flavor profile. And if you're feeling really adventurous, you can even make your own homemade ice cream!
Don't forget about toppings! Sprinkles, crushed Oreos, chocolate shavings, and whipped cream are all great options. You can even drizzle some extra hot fudge sauce or caramel sauce over the top for a truly indulgent treat.
Variation | Description | Why it Works |
|---|---|---|
Chocolate Chip Cookie Crust | Substitute Oreo crust with a chocolate chip cookie crust | Adds a warm, comforting flavor |
Hot Fudge Layer | Add a layer of hot fudge sauce between the ganache and ice cream | Increases the richness and decadence |
Different Ice Cream Flavors | Experiment with cookies and cream or fudge brownie ice cream | Creates a unique flavor profile |
Homemade Ice Cream | Make your own mint chocolate chip ice cream | Maximum freshness and customization |
Serving and Storing Your Delicious Mint Chocolate Chip Ice Cream Cake
Serving and Storing Your Delicious Mint Chocolate Chip Ice Cream Cake
The Grand Finale: Serving Suggestions
the moment of truth has arrived! You've crafted this magnificent mint chocolate chip ice cream cake, and now it's time to present it to your eagerly awaiting crowd. But before you just slap a piece on a plate, let's elevate the experience, shall we? Think about the presentation. A simple dusting of cocoa powder or a scattering of mini chocolate chips can add a touch of elegance. Fresh mint leaves not only look beautiful but also enhance the minty flavor. And don't forget the whipped cream! A generous dollop or a fancy piped swirl adds a touch of indulgence that's hard to resist.
Consider serving your ice cream cake with complementary sides. A warm fudge sauce or a drizzle of caramel can add extra decadence. Fresh berries, like raspberries or strawberries, provide a burst of freshness that balances the richness of the cake. And for the adults, a scoop of coffee ice cream or a shot of espresso can create a sophisticated and satisfying dessert pairing.
Freezer Secrets: Storing for Future Indulgence
Let's be real, sometimes you make a cake that's just too big to devour in one sitting (though I wouldn't judge you if you tried!). Knowing how to properly store your mint chocolate chip ice cream cake is essential for preserving its deliciousness. The key is to prevent freezer burn, which can ruin the texture and flavor of your cake. Wrap the cake tightly in plastic wrap, pressing it against the surface to remove any air pockets. Then, wrap it again in aluminum foil for extra protection. This double layer of defense will keep your cake fresh and delicious for up to two weeks.
If you've already cut into the cake, make sure to cover the exposed edges with plastic wrap before wrapping the entire cake. This will prevent the cut edges from drying out. When you're ready to enjoy another slice, let the cake sit at room temperature for a few minutes to soften slightly before cutting. And remember, the sooner you eat it, the better it will taste! So, go ahead, treat yourself – you deserve it!
Storage Tip | Description | Why it Works |
|---|---|---|
Double Wrapping | Wrap tightly in plastic wrap and then aluminum foil | Prevents freezer burn and maintains freshness |
Cover Cut Edges | Cover exposed edges with plastic wrap | Prevents drying out |
Short Storage Time | Consume within two weeks | Ensures optimal flavor and texture |
Sweet Endings: Enjoying Your Mint Chocolate Chip Ice Cream Cake Masterpiece
There you have it – your very own, utterly irresistible mint chocolate chip ice cream cake! From the satisfying crunch of the cookie crust to the creamy, minty layers and the decadent chocolate ganache, every bite is a celebration of flavor and texture. Whether you're serving it up at a summer barbecue, a birthday bash, or simply treating yourself to a well-deserved indulgence, this cake is guaranteed to bring smiles all around. So go ahead, slice yourself a generous piece, and savor the sweet rewards of your baking adventure. And don't forget to share this recipe with your friends – because the best things in life are meant to be shared!