Table of Contents
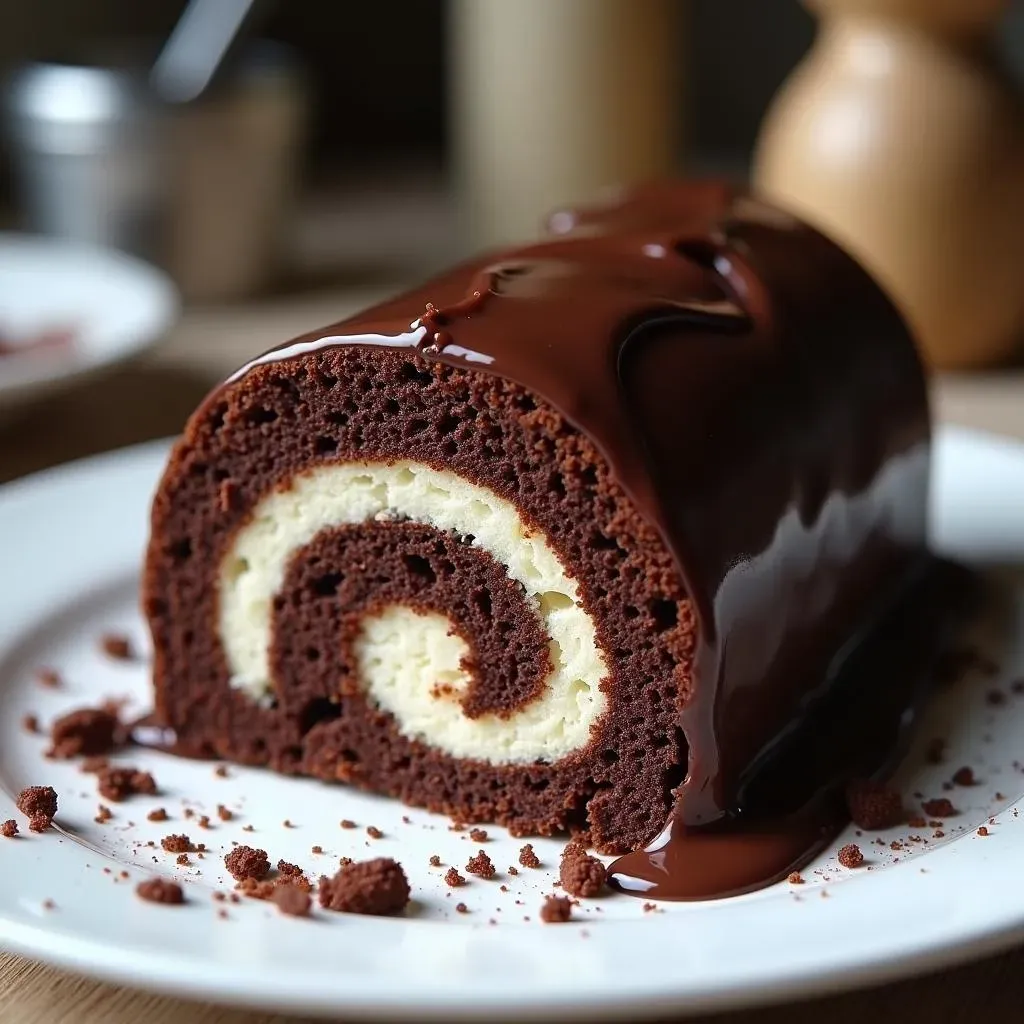
If you're on the hunt for the best chocolate roll cake recipe, you've landed in the right spot. This isn't just another cake recipe; it's a journey into creating a light, airy, and intensely chocolatey dessert that will wow your friends and family. Forget about dry, cracked rolls – we're diving deep into the secrets of a perfect chocolate sponge, a luscious whipped cream filling, and a decadent chocolate ganache that will elevate your baking game.
Mastering the Chocolate Sponge: The Foundation of the Best Chocolate Roll Cake
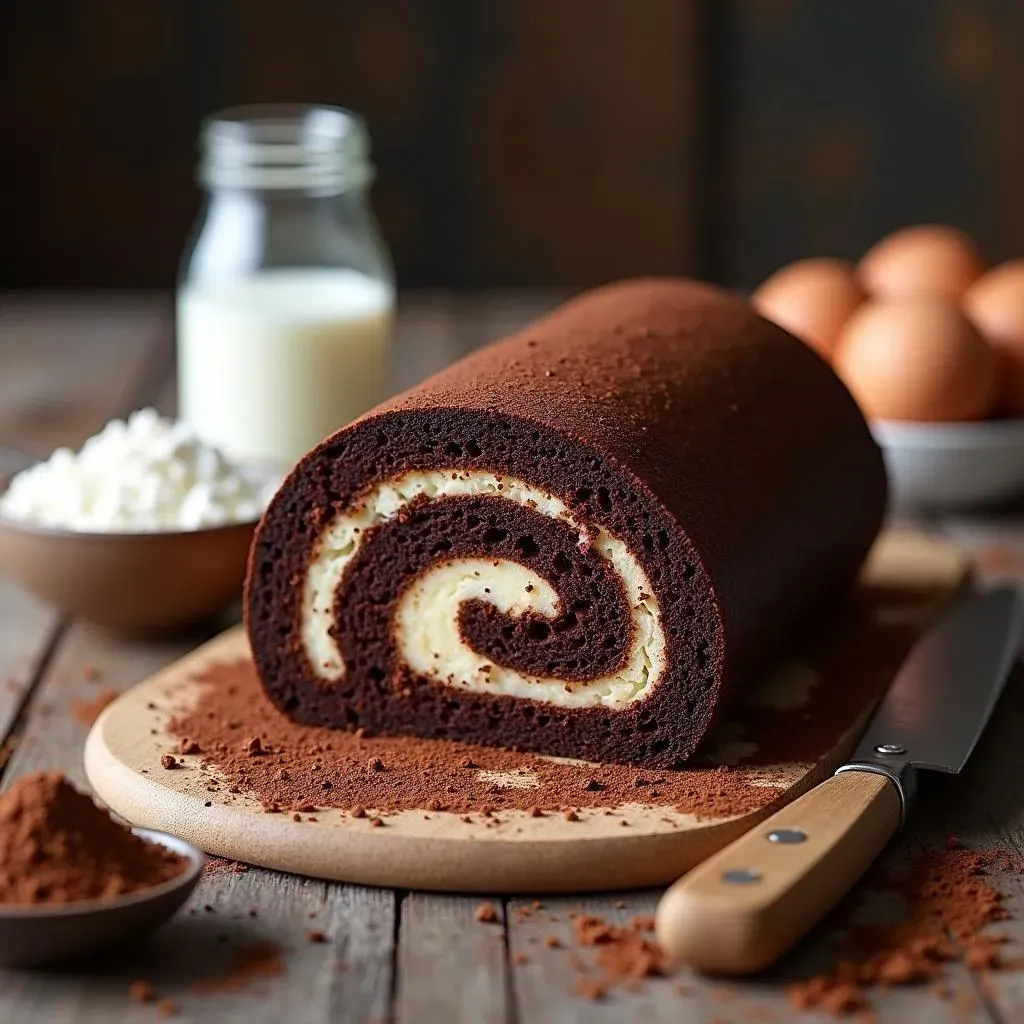
Mastering the Chocolate Sponge: The Foundation of the Best Chocolate Roll Cake
The Right Ingredients: Setting the Stage for Success
let's talk sponge. This isn't your average cake – we're aiming for light, flexible, and full of chocolate flavor. That starts with the right ingredients. Cake flour is your best friend here; it has a lower protein content than all-purpose flour, which means a more tender crumb. Don't skip the cocoa powder either – use a good quality unsweetened cocoa for that deep chocolate richness. And here's a little secret: a touch of espresso powder enhances the chocolate flavor like you wouldn't believe. Trust me on this one.
Eggs are also crucial, and we're going to separate them. The yolks add richness and moisture, while the whites, when whipped to stiff peaks, provide the structure and lift. Oil is our fat of choice because it keeps the sponge moist and pliable. And finally, buttermilk! It adds a subtle tang and helps to tenderize the gluten, resulting in a more delicate cake. These ingredients, when combined correctly, lay the foundation for the best chocolate roll cake you've ever tasted.
The Perfect Technique: Achieving Sponge Nirvana
Now, let's get down to the nitty-gritty of actually making the sponge. The key here is gentle handling and proper aeration. Start by whisking together your dry ingredients – cake flour, cocoa powder, baking powder, salt, and espresso powder – to ensure everything is evenly distributed. In a separate bowl, whisk together the egg yolks, sugar, oil, buttermilk, and vanilla extract until smooth. Then, in another bowl, beat the egg whites with a pinch of salt until stiff, glossy peaks form. This is where the magic happens – these airy egg whites are what give the sponge its lightness.
Gently fold the dry ingredients into the egg yolk mixture, being careful not to overmix. Overmixing develops the gluten in the flour, which can lead to a tough cake. Then, fold in the whipped egg whites in two additions, again being gentle and thorough. Pour the batter into a prepared baking sheet (lined with parchment paper, of course) and spread it evenly. Bake until the sponge is set and springs back lightly when touched. And here's the most important part: as soon as it comes out of the oven, immediately roll it up in a clean kitchen towel and let it cool completely. This "pre-roll" is what prevents cracking later on.
Speaking from experience, I remember the first time I tried to make a chocolate roll cake. My sponge was a disaster – dry, cracked, and definitely not rollable. I learned the hard way the importance of using the right ingredients and techniques. Now, I follow this recipe religiously, and my roll cakes come out perfectly every time.
"The secret to a perfect chocolate roll cake lies in the sponge – it needs to be light, moist, and flexible enough to roll without cracking." - A wise baker
Whipped Cream Dream: Crafting the Perfect Filling for Your Chocolate Roll Cake
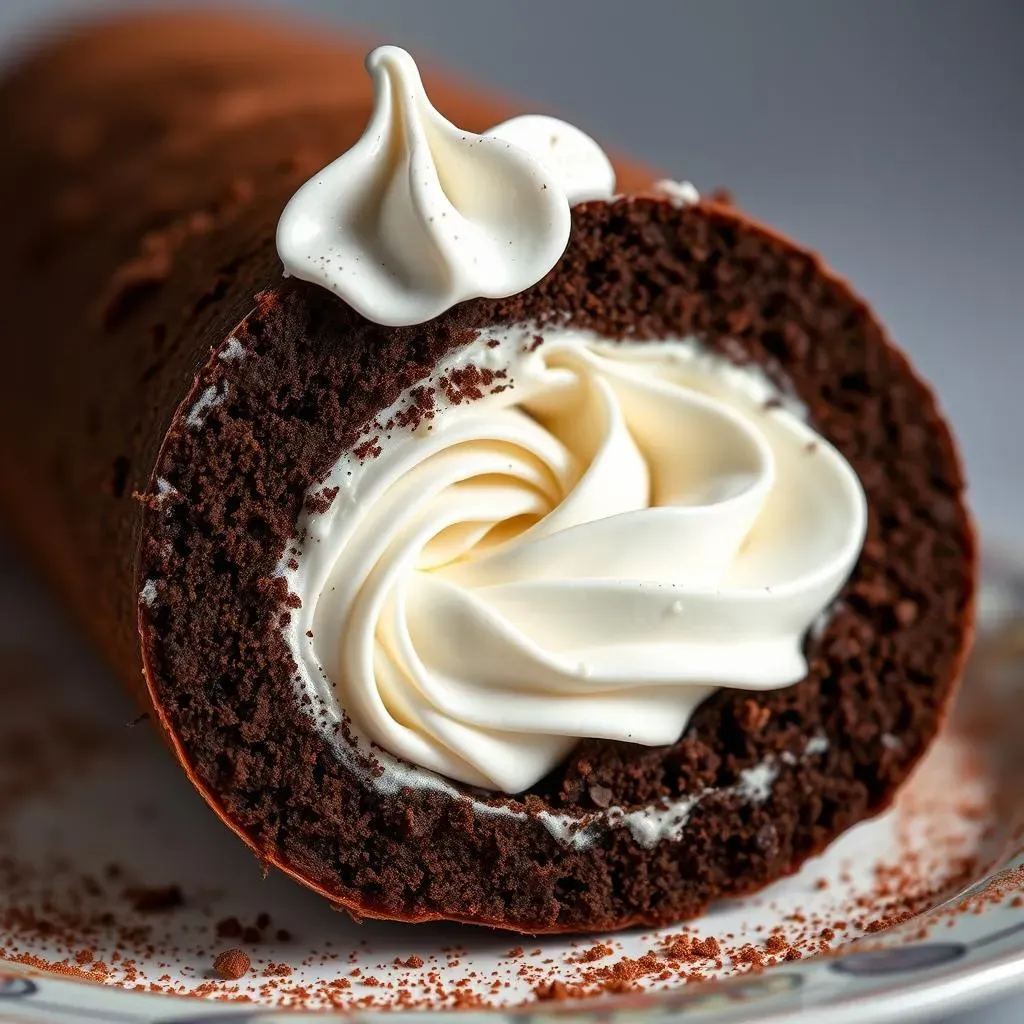
Whipped Cream Dream: Crafting the Perfect Filling for Your Chocolate Roll Cake
The Foundation: Choosing Your Cream and Sweetener
Alright, let's talk whipped cream – the soulmate to our chocolate sponge. Not all creams are created equal, my friend. You absolutely need heavy cream here, and I'm talking about the stuff with at least 36% milkfat. Anything less, and you'll be chasing your tail trying to get those stiff peaks. As for sweetener, classic granulated sugar works just fine, but I'm a big fan of powdered sugar. It dissolves more easily, giving you a smoother, silkier texture. Plus, it contains a touch of cornstarch, which helps stabilize the whipped cream.
And hey, don't be afraid to experiment! A little bit of honey or maple syrup can add a unique flavor dimension. Just remember to adjust the amount to taste. And speaking of flavor, a splash of vanilla extract is a must. It enhances the sweetness and adds a lovely aroma. But here's a pro tip: try using vanilla bean paste instead. It has those gorgeous little vanilla bean specks that make your whipped cream look extra fancy. Plus, the flavor is just incredible.
The Technique: Achieving Stiff Peaks Without Over-Whisking
Now, let's get whipping! The most important thing to remember here is to keep everything cold. I'm talking about your bowl, your beaters, and your cream. Pop them in the freezer for about 15 minutes before you start. Cold ingredients whip up faster and hold their shape better. Pour your heavy cream into the chilled bowl, add your sweetener and vanilla, and start whipping on medium speed. Keep a close eye on it – you want to stop as soon as you see stiff peaks forming. Over-whipping will turn your beautiful whipped cream into butter, and nobody wants that.
Also, a stand mixer is great, but a hand mixer works just as well. Just be prepared for a little arm workout! And if you're feeling adventurous, try adding a tablespoon of mascarpone cheese to your whipped cream. It adds a subtle tang and makes it even more stable. Just make sure to beat it in gently at the end. This is a game-changer, trust me.
"Perfect whipped cream is an art – it's all about the balance of cold ingredients, proper technique, and a little bit of patience." - A cream connoisseur
The Flavor Boost: Adding a Touch of Magic
so you've got your basic whipped cream down. Now, let's take it to the next level with some flavor enhancements. One of my favorite additions is a tablespoon of cocoa powder. It turns your whipped cream into a light and fluffy chocolate mousse. Just make sure to sift it in to avoid any lumps. Another great option is a pinch of cinnamon or nutmeg. It adds a warm and cozy flavor that pairs perfectly with chocolate. And if you're feeling really fancy, try adding a shot of espresso. It gives your whipped cream a delicious mocha flavor.
Also, don't underestimate the power of fruit. Fresh berries, like raspberries or strawberries, add a burst of freshness and acidity that cuts through the richness of the chocolate. Just gently fold them into the whipped cream at the end. And if you're a fan of nuts, try adding some chopped toasted hazelnuts or pecans. They add a lovely crunch and nutty flavor. The possibilities are endless! So go ahead and experiment – find your perfect flavor combination and make your whipped cream truly unforgettable.
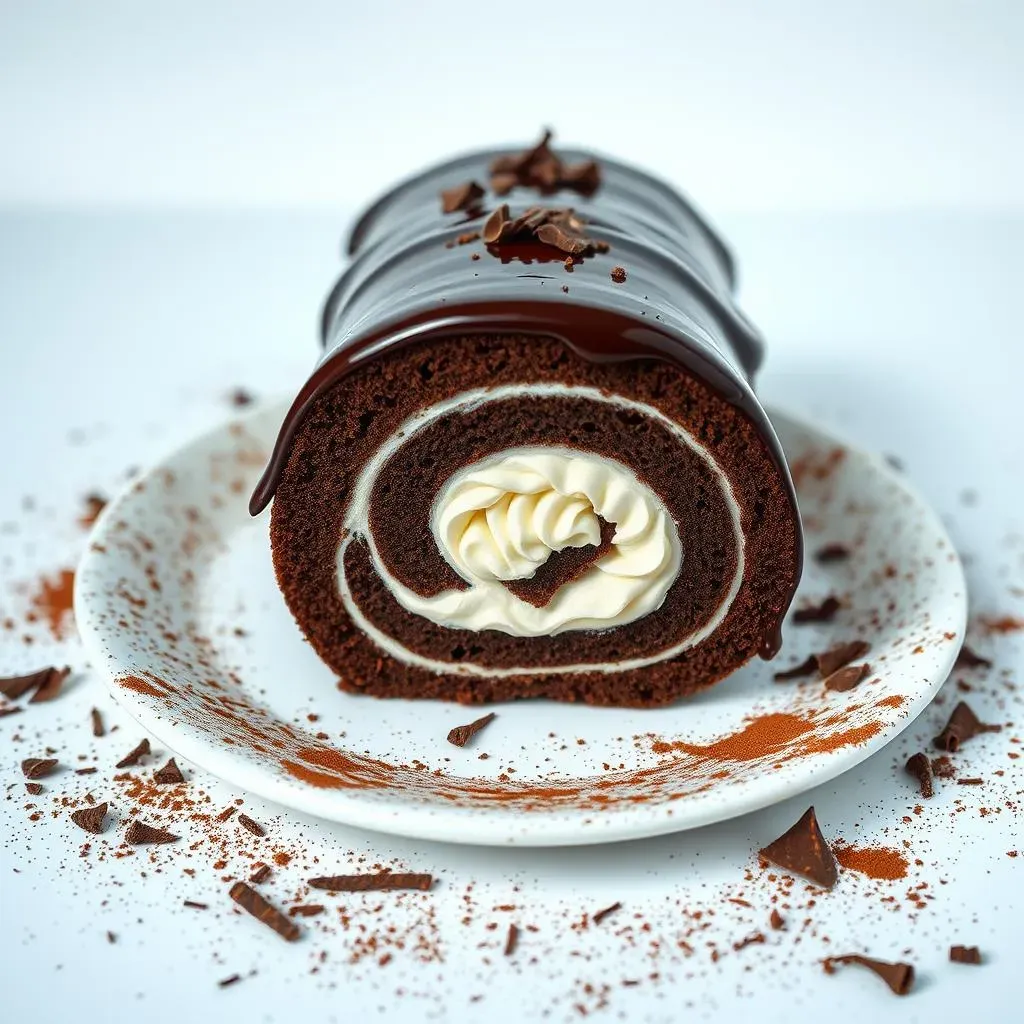
Ganache Glory: Achieving Chocolate Perfection on Your Best Chocolate Roll Cake
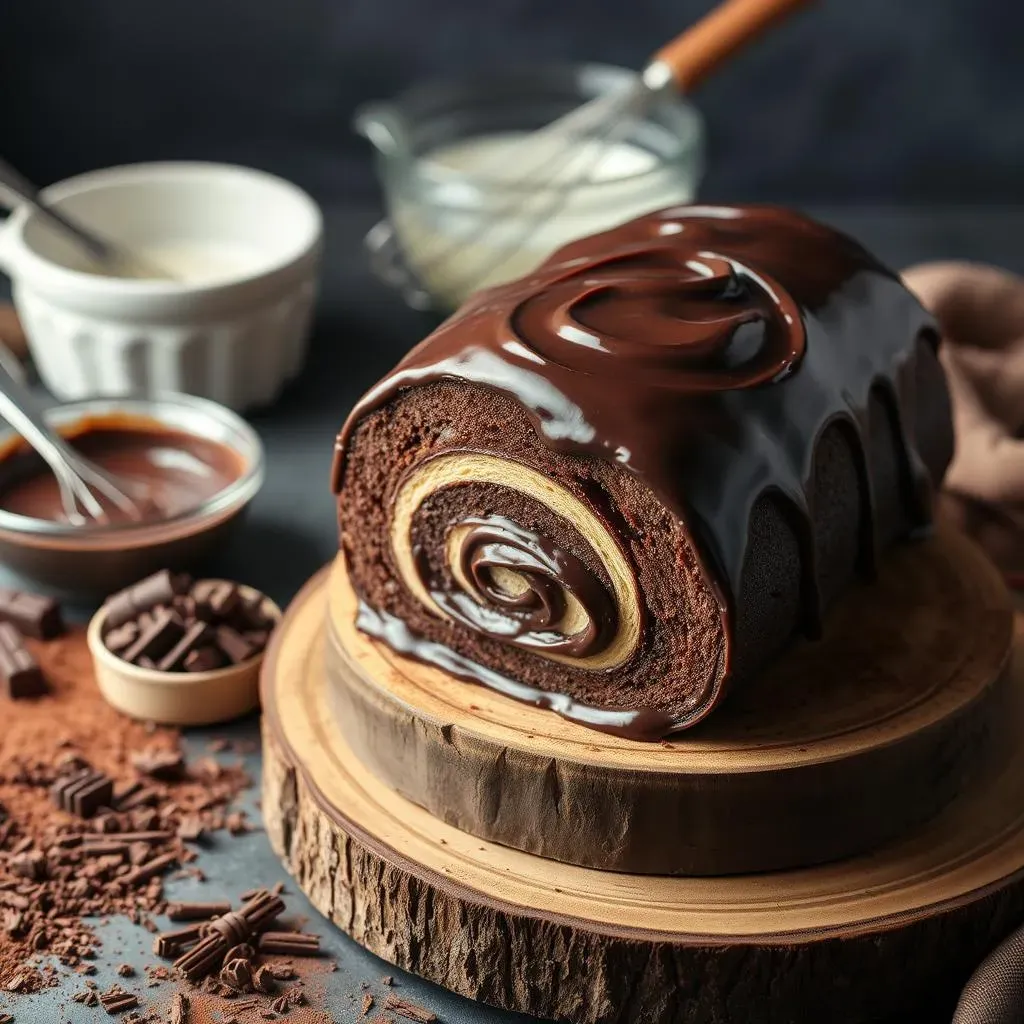
Ganache Glory: Achieving Chocolate Perfection on Your Best Chocolate Roll Cake
The Chocolate Choice: Selecting the Right Kind for Ultimate Flavor
let's get serious about ganache. This isn't just melted chocolate; it's a velvety, decadent blanket that elevates your chocolate roll cake to a whole new level. The key? Choosing the right chocolate. I'm a firm believer in using high-quality dark chocolate, something with at least 60% cacao. It gives you that intense chocolate flavor without being overly sweet. But hey, if you're a milk chocolate fan, go for it! Just be aware that it will result in a sweeter ganache.
Also, don't skimp on the quality. This is where you want to splurge a little. Look for chocolate that has a smooth, glossy finish and a deep, rich aroma. Avoid chocolate chips – they contain stabilizers that can prevent them from melting properly. Instead, opt for a chocolate bar or couverture chocolate. And here's a tip: experiment with different types of dark chocolate. Some have fruity notes, while others have a more earthy flavor. Find one that you love and that complements the other flavors in your cake.
Chocolate Type | Cacao Percentage | Flavor Profile | Best Use |
|---|---|---|---|
Dark Chocolate | 60-70% | Intense, slightly bitter | Classic ganache, rich desserts |
Bittersweet Chocolate | 70-85% | Very intense, pronounced bitterness | For those who love dark chocolate, complex flavors |
Milk Chocolate | 30-40% | Sweet, creamy | Sweeter ganache, kid-friendly desserts |
The Perfect Ratio: Cream to Chocolate Balance
Now, let's talk about the ratio of cream to chocolate. This is crucial for achieving the right consistency. Too much cream, and your ganache will be too thin and runny. Too little cream, and it will be too thick and stiff. I generally recommend a 1:1 ratio for a classic ganache. That means equal parts chocolate and heavy cream. But hey, feel free to adjust it to your liking. If you want a thinner ganache for drizzling, add a little more cream. If you want a thicker ganache for frosting, add a little more chocolate.
Also, the type of chocolate you use will affect the ratio. Dark chocolate, with its higher cacao content, requires a little more cream than milk chocolate. And here's a pro tip: warm your cream before adding it to the chocolate. This helps the chocolate melt more evenly and prevents it from seizing. Just don't let it boil! And finally, be patient. Ganache takes time to come together. Stir it gently until it's smooth and glossy, and resist the urge to whisk it. Whisking can incorporate air into the ganache, which can make it look dull.
Rolling with Confidence: Tips and Tricks for a CrackFree Chocolate Cake Roll

Rolling with Confidence: Tips and Tricks for a CrackFree Chocolate Cake Roll
The Pre-Roll: Your Secret Weapon
Alright, let's talk about the most crucial step in preventing cracks: the pre-roll. This is where you roll up the warm sponge cake in a clean kitchen towel immediately after it comes out of the oven. This "pre-roll" is what prevents cracking later on. The towel helps the cake retain its moisture and encourages it to conform to the rolled shape while it cools. If you skip this step, you're basically asking for cracks.
Also, make sure your kitchen towel is clean and lint-free. You don't want any stray fibers sticking to your cake. And here's a tip: lightly dust the towel with powdered sugar before rolling. This prevents the cake from sticking to the towel. Roll the cake up snugly, but not too tightly. You want it to hold its shape without compressing it too much. Let it cool completely in the towel before unrolling and filling.
The Filling Factor: Avoiding Overfilling
so you've got your perfectly pre-rolled sponge. Now it's time to add the filling. But here's a word of caution: don't overfill! Too much filling will make it difficult to roll the cake without cracking. Plus, it will squish out the sides when you slice it, which isn't exactly pretty. Spread an even layer of filling over the entire surface of the cake, leaving a small border around the edges. This will prevent the filling from oozing out when you roll it up.
Also, make sure your filling is the right consistency. If it's too stiff, it will be difficult to spread evenly. If it's too runny, it will make the cake soggy. Aim for a filling that's light and fluffy, but still holds its shape. And here's a tip: chill your filling for about 15 minutes before spreading it on the cake. This will make it easier to handle and prevent it from melting.
"A successful roll cake is a testament to patience and precision – every step, from the pre-roll to the filling, plays a crucial role in preventing cracks." - A roll cake master
The Gentle Roll: Technique Matters
Alright, the moment of truth has arrived: it's time to roll up the cake. The key here is to be gentle and patient. Start by loosening the edge of the cake that's closest to you. Then, using the towel as a guide, begin rolling the cake up tightly. Keep your hands light and avoid pressing down too hard. As you roll, peel the towel away from the cake. Once you've rolled the entire cake, wrap it tightly in plastic wrap and chill it in the refrigerator for at least 30 minutes. This will help it set and prevent it from unraveling.
Also, don't be afraid to use a little bit of extra filling to seal the seam. Just spread a thin layer of filling along the edge of the cake before you finish rolling. And here's a tip: if you notice any small cracks forming, don't panic! Just gently smooth them over with your fingers or a small spatula. The ganache will cover them up anyway!
Troubleshooting Your Chocolate Roll Cake: Solving Common Problems for the Best Results
Troubleshooting Your Chocolate Roll Cake: Solving Common Problems for the Best Results
Cracks Happen: Addressing and Preventing Cracking
So, your chocolate roll cake cracked? Don't beat yourself up; it happens to the best of us! Cracking is probably the most common issue with roll cakes, but luckily, it's usually preventable. The most frequent culprit is a dry sponge. Remember that pre-roll we talked about? It's essential for keeping the cake moist and flexible. If your cake still cracks despite the pre-roll, try reducing the baking time slightly. Overbaking dries out the sponge, making it more prone to cracking. Also, make sure you're using the right amount of liquid in your batter. A little extra buttermilk can work wonders.
Another potential cause of cracking is rolling the cake too tightly. Be gentle! You want to create a snug roll, but not so tight that the cake is compressed. And finally, make sure your filling isn't too stiff. A stiff filling will resist the rolling process and increase the likelihood of cracks. If you do end up with some cracks, don't worry – the ganache will cover them up! Just smooth them over gently with your fingers before frosting.
"Cracks are just character marks – they add a little bit of rustic charm to your chocolate roll cake!" - A forgiving baker
Soggy Bottom Blues: Avoiding a Soggy Cake
A soggy chocolate roll cake is no fun for anyone. The most common cause of sogginess is too much moisture. This can happen if you overfill the cake with a wet filling or if you don't cool the cake completely before filling it. Always make sure to drain any excess liquid from your filling before spreading it on the cake. And be patient – let the cake cool completely before adding the filling. This will prevent the filling from melting and soaking into the sponge.
Another potential cause of sogginess is storing the cake improperly. Chocolate roll cakes should be stored in the refrigerator, tightly wrapped in plastic wrap. This will prevent them from absorbing moisture from the air. And here's a tip: place a piece of paper towel in the container with the cake. The paper towel will absorb any excess moisture and keep the cake from getting soggy.
Problem | Possible Cause | Solution |
|---|---|---|
Cracking | Dry sponge, overbaking, rolling too tightly | Reduce baking time, add more liquid, roll gently |
Sogginess | Too much moisture, improper storage | Drain filling, cool cake completely, store properly |
Uneven Roll | Uneven batter, uneven filling | Spread batter evenly, spread filling evenly |
The Unraveling Enigma: Keeping Your Roll Intact
So, your chocolate roll cake is unraveling? This can be frustrating, but it's usually an easy fix. The most common cause of unraveling is not chilling the cake long enough after rolling. Chilling allows the filling to set and helps the cake hold its shape. Make sure to chill the cake for at least 30 minutes, or even longer if possible. I like to chill mine for a couple of hours.
Another potential cause of unraveling is not rolling the cake tightly enough. Be firm, but gentle! You want to create a snug roll that holds its shape. And finally, make sure you're using enough filling to seal the seam. A thin layer of filling along the edge of the cake will help to hold it together. If your cake still unravels, try using a toothpick or two to secure the seam. Just remember to remove them before serving!
Indulge in Your Chocolate Cake Roll Masterpiece
Congratulations, you've conquered the chocolate roll cake! From mastering the delicate sponge to swirling in the creamy filling and blanketing it all in rich ganache, you've created a dessert that's both impressive and utterly delicious. Remember, baking is a journey of experimentation, so don't be afraid to tweak the recipe to your liking. Whether you're serving it at a special occasion or simply treating yourself, your homemade chocolate roll cake is sure to bring smiles and satisfied sighs. Now, slice a generous piece, savor every bite, and bask in the glory of your baking success!