Table of Contents
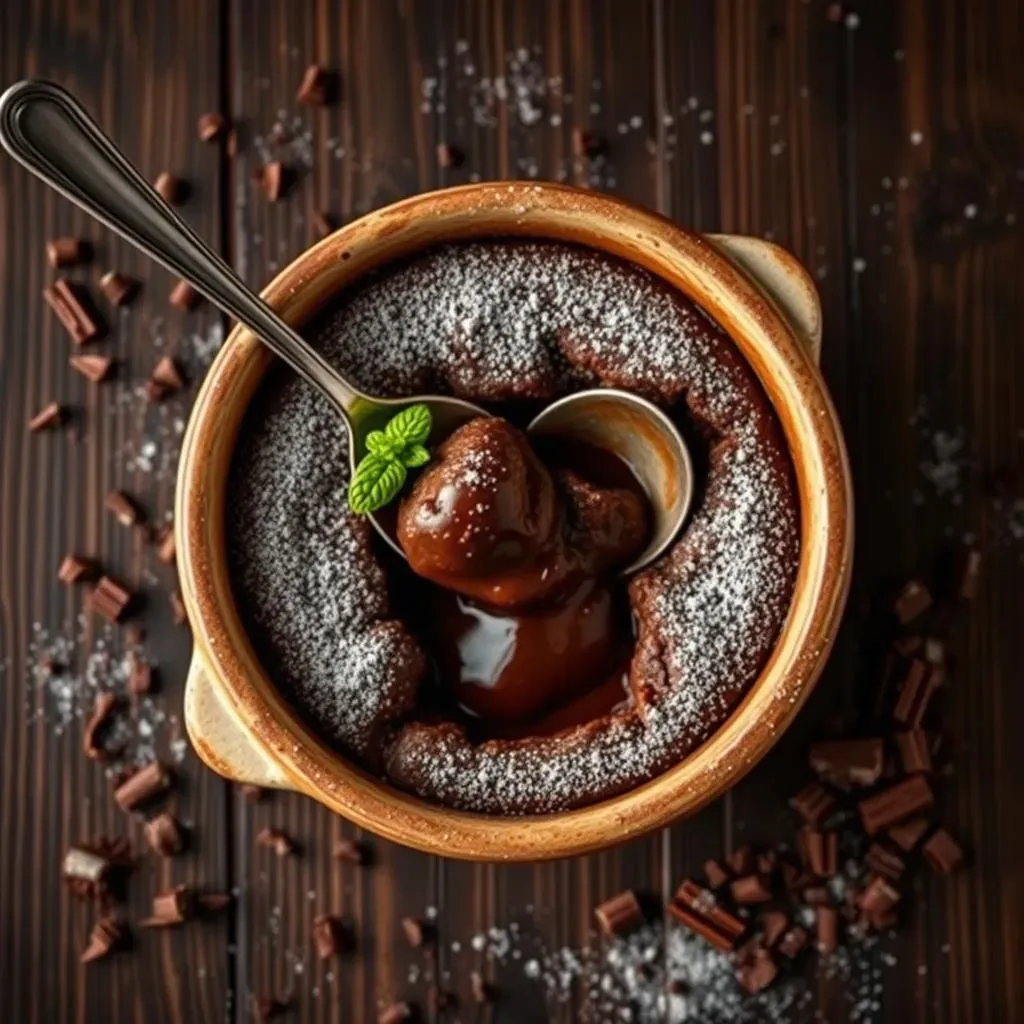
Is there anything more comforting than a warm, gooey chocolate dessert? We think not. That's why we're diving headfirst into what we believe is the best chocolate pudding cake recipe ever concocted. Forget those dry, crumbly cakes of the past. This recipe delivers a moist, rich chocolate cake with a self-made pudding sauce that will have you scraping the bottom of the pan.
The Secret to the Best Chocolate Pudding Cake Recipe: Ingredients and Variations
The Secret to the Best Chocolate Pudding Cake Recipe: Ingredients and Variations
The Chocolate Dream Team: Key Ingredients
Alright, let's talk ingredients. This isn't just about throwing any old chocolate and flour together. We're aiming for a symphony of flavors and textures. So, pay attention! First, you'll need all-purpose flour, but you can totally sub in a gluten-free blend if that's your jam. Next up: sugar, both granulated and brown, for that perfect balance of sweetness and molasses-y depth. Dutch-processed cocoa powder is a must! It gives a richer, less bitter chocolate flavor. Baking powder and baking soda for that perfect rise, salt to enhance all the flavors, milk (dairy or non-dairy works), vegetable oil for moisture, vanilla extract for a touch of magic, and hot coffee to bloom the cocoa and intensify the chocolate flavor. Last but not least, chocolate chips! Because, why not?
Ever wonder why we use hot coffee? It's not just for kicks. The heat helps to dissolve the cocoa powder, releasing its full flavor potential. Plus, it complements the chocolate beautifully, adding a subtle depth that you can't quite put your finger on. Trust me, it's a game-changer.
Cocoa Powders Compared
Let's dive deeper into the cocoa powder. There's natural cocoa powder and Dutch-processed cocoa powder, and they're not interchangeable. Natural cocoa powder is acidic and has a sharper, more intense chocolate flavor. Dutch-processed cocoa powder, on the other hand, has been treated to neutralize the acidity, resulting in a smoother, mellower flavor. For this recipe, Dutch-processed is the way to go. It blends seamlessly into the batter and creates a more harmonious flavor profile.
Now, if you only have natural cocoa powder on hand, don't fret! You can still make the recipe. Just reduce the baking soda by half and add an equal amount of baking powder to compensate for the acidity. It won't be exactly the same, but it'll still be delicious. Think of it as a slightly more rustic, intense chocolate experience.
Have you ever tried using black cocoa powder? It's what gives Oreos their signature dark color and intense chocolate flavor. A little goes a long way, so use it sparingly, but it can add a serious wow factor to your cake.
Cocoa Powder Type | Acidity | Flavor Profile | Best Use |
|---|---|---|---|
Natural Cocoa Powder | Acidic | Sharp, intense chocolate | Recipes with baking soda |
Dutch-Processed Cocoa Powder | Neutral | Smooth, mellow chocolate | Most baking recipes |
Black Cocoa Powder | Low | Very dark, intense chocolate | Adding color and depth |
Customize Your Cake: Flavor Variations
This recipe is a fantastic base for experimentation. Want to kick things up a notch? Try adding a teaspoon of espresso powder to the batter for an extra jolt of coffee flavor. Or, stir in a handful of chopped nuts, like walnuts or pecans, for added texture and richness. You could even fold in some peanut butter chips for a chocolate-peanut butter explosion. The possibilities are endless!
For a minty twist, add a few drops of peppermint extract to the batter and top the cake with crushed candy canes after baking. Or, for a spicy kick, add a pinch of cayenne pepper to the batter. Don't worry, it won't make the cake spicy, but it will enhance the chocolate flavor and add a subtle warmth. Get creative and make it your own!
- Espresso Powder: Deepens the chocolate flavor
- Chopped Nuts: Adds texture and richness
- Peanut Butter Chips: Chocolate-peanut butter heaven
- Peppermint Extract & Candy Canes: Minty fresh
- Cayenne Pepper: Subtle warmth and enhanced chocolate flavor
StepbyStep: Mastering the Best Chocolate Pudding Cake Recipe
StepbyStep: Mastering the Best Chocolate Pudding Cake Recipe
Get Ready to Bake: Prep Work is Key
Before you even think about mixing, let's get organized. Preheat your oven to 350°F (175°C). Grease and flour a 9x13 inch baking pan. I know, it's tempting to skip the flouring, but trust me, it'll save you a headache later when you're trying to get that beautiful cake out in one piece. Gather all your ingredients and measure them out. This is called "mise en place" in fancy chef terms, and it basically means having everything ready to go before you start. It's a lifesaver, especially when you're dealing with a recipe that requires quick execution.
Why a 9x13 inch pan? It's the perfect size for this recipe, giving you a nice, even layer of cake with plenty of pudding sauce. If you want to use a different size pan, you might need to adjust the baking time accordingly. Keep an eye on it and use a toothpick to check for doneness. Remember, we're aiming for a moist, gooey cake, not a dry, overbaked one.
Mixing Magic: Creating the Batter and Sauce
Now for the fun part! In a large bowl, whisk together the flour, sugar, cocoa powder, baking powder, baking soda, and salt. In a separate bowl, combine the milk, oil, and vanilla extract. Pour the wet ingredients into the dry ingredients and mix until just combined. Be careful not to overmix! Overmixing can lead to a tough cake. Pour the batter into your prepared pan and spread it evenly.
Next, in a small bowl, combine the brown sugar and cocoa powder for the sauce topping. Sprinkle this mixture evenly over the cake batter. Finally, pour the hot coffee over the entire thing. Yes, you read that right! Don't worry, it'll seem weird at first, but trust the process. The hot coffee will seep through the batter, creating a luscious, self-made pudding sauce underneath the cake.
Step | Description | Why It Matters |
|---|---|---|
Dry Ingredients | Whisk together flour, sugar, cocoa, etc. | Ensures even distribution of leavening agents |
Wet Ingredients | Combine milk, oil, and vanilla | Creates a moist and flavorful base |
Combine | Mix wet into dry until just combined | Prevents overmixing and tough cake |
Sauce Topping | Sprinkle brown sugar and cocoa | Creates the signature pudding sauce |
Hot Coffee | Pour over the entire cake | Activates the sauce and deepens flavor |
Baking to Perfection: Watching the Magic Happen
Carefully place the pan in your preheated oven and bake for 30-35 minutes, or until a toothpick inserted into the center comes out with moist crumbs. The top of the cake should be set and slightly cracked, and the pudding sauce underneath should be bubbly and irresistible. Keep a close eye on it during the last few minutes of baking to prevent overbaking.
Once the cake is done, remove it from the oven and let it cool slightly before serving. I know, it's tempting to dig in right away, but a few minutes of cooling will allow the pudding sauce to thicken slightly and prevent you from burning your tongue. Trust me, patience is a virtue in this case.
- Bake at 350°F (175°C) for 30-35 minutes
- Toothpick test: Moist crumbs = perfection
- Cool slightly before serving
- Patience = Unburnt tongue
Troubleshooting Your Chocolate Pudding Cake: Tips for Perfection

Troubleshooting Your Chocolate Pudding Cake: Tips for Perfection
Cake's Too Dry? Decoding the Moisture Mystery
so your cake came out drier than the Sahara Desert? Don't panic! The most common culprit is overbaking. Ovens can be temperamental beasts, so start checking for doneness a few minutes before the recommended baking time. Another reason could be too much flour. Always measure your flour accurately, using the spoon and level method (spoon the flour into your measuring cup and level it off with a knife). And lastly, make sure you're using enough liquid. If you accidentally added too little milk, it can definitely dry things out.
Think of it like this: baking is a delicate dance between wet and dry ingredients. If one partner is out of step, the whole thing falls apart. So, pay attention to those measurements and don't be afraid to adjust the baking time if needed. Remember, we're aiming for a moist, gooey cake, not a hockey puck!
Pudding Sauce MIA? Unlocking the Gooey Goodness
No pudding sauce? This is usually due to not enough hot coffee, or the coffee wasn't hot enough. The hot coffee is essential for creating that signature sauce, so make sure it's piping hot when you pour it over the cake. Also, ensure you're spreading the brown sugar and cocoa mixture evenly over the batter. This mixture is what transforms into that luscious pudding sauce, so don't skimp on it! And sometimes, ovens just have hot spots. If your oven is known for uneven baking, rotate the pan halfway through baking to ensure even sauce distribution.
Think of the coffee as the magic wand that transforms a simple cake into a chocolatey masterpiece. Without it, you're just left with a regular cake (which is still good, but not the same!). So, crank up the heat and make sure that coffee is ready to work its magic.
Problem | Possible Cause | Solution |
|---|---|---|
Dry Cake | Overbaking, too much flour, not enough liquid | Check for doneness early, measure accurately, use enough milk |
No Pudding Sauce | Not enough hot coffee, uneven topping | Use piping hot coffee, spread topping evenly, rotate pan |
Cake Stuck in the Pan? Mastering the Release
Ugh, the dreaded cake-stuck-in-the-pan scenario. We've all been there. The best way to avoid this is to grease and flour your pan thoroughly before pouring in the batter. Use shortening or baking spray for best results, and make sure to get into all the nooks and crannies. If your cake still sticks, try running a thin knife or spatula around the edges to loosen it before inverting it onto a plate. And if all else fails, embrace the rustic look and serve it straight from the pan! No one will judge (especially once they taste it).
Think of it as a delicate operation. You want to extract that cake without causing any damage. So, be gentle, be patient, and don't be afraid to get your hands dirty (literally!). A little extra effort can save you from a cake-astrophe.
Serving and Storing Your Delicious Chocolate Pudding Cake
Serving and Storing Your Delicious Chocolate Pudding Cake
Serving Suggestions: Warm, Gooey Bliss
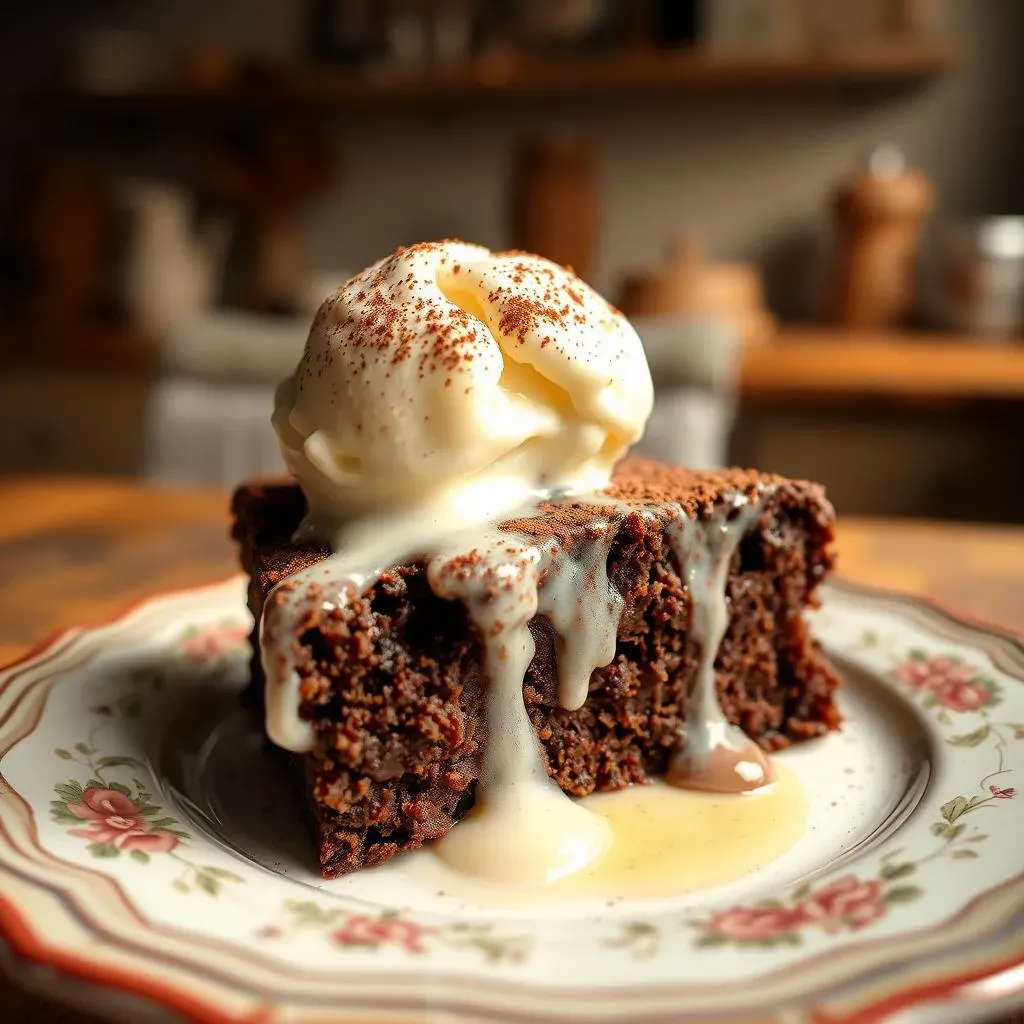
the moment we've all been waiting for: serving this masterpiece! Honestly, the best way to enjoy this chocolate pudding cake is warm, straight from the oven. The pudding sauce is at its gooiest, the cake is at its most tender, and the aroma is simply intoxicating. A scoop of vanilla ice cream on top is highly recommended (or whipped cream, if that's your jam). The cold creaminess against the warm, rich cake is a match made in dessert heaven. A sprinkle of powdered sugar or a dusting of cocoa powder can also add a touch of elegance, if you're feeling fancy. But honestly, it's perfect just as it is.
Want to get extra decadent? Drizzle a little chocolate syrup or caramel sauce over the top. Or, for a more sophisticated touch, add a few fresh berries, like raspberries or strawberries. The tartness of the berries will cut through the richness of the cake and add a pop of color. Think of it as a blank canvas for your dessert desires. Let your creativity run wild!
Storing Secrets: Keeping the Dream Alive
Now, if you somehow manage to have leftovers (which is a rare occurrence in my house), you'll want to store them properly to maintain that deliciousness. The best way to store this cake is in an airtight container in the refrigerator. It'll keep for up to 3-4 days. When you're ready to enjoy it again, simply microwave it for 30-60 seconds, or until warmed through. The pudding sauce may thicken slightly in the fridge, but it'll loosen up again when heated.
Can you freeze this cake? Absolutely! Wrap it tightly in plastic wrap and then place it in a freezer-safe bag or container. It'll keep in the freezer for up to 2-3 months. When you're ready to thaw it, simply transfer it to the refrigerator overnight. Then, reheat as directed above. Just be aware that the texture may change slightly after freezing, but it'll still be delicious. Think of it as a chocolatey insurance policy for future cravings.
Storage Method | Container | Shelf Life | Reheating |
|---|---|---|---|
Refrigerator | Airtight container | 3-4 days | Microwave 30-60 seconds |
Freezer | Plastic wrap + Freezer bag | 2-3 months | Thaw overnight, microwave 30-60 seconds |
Reheating Like a Pro: Restoring the Gooey Goodness
Reheating this cake is a breeze, but there are a few tricks to ensure it's just as good as the first time. The microwave is your best friend for quick and easy reheating. Simply place a slice of cake on a microwave-safe plate and heat for 30-60 seconds, or until warmed through. Be careful not to overheat it, as this can dry it out. If you prefer a more even heating, you can also reheat it in the oven. Preheat your oven to 350°F (175°C) and bake the cake for 10-15 minutes, or until warmed through. This method will take longer, but it'll result in a more evenly heated and slightly crispier cake.
No matter which method you choose, remember to add a scoop of ice cream on top! It's the perfect complement to the warm, gooey cake and will make you feel like you're eating it fresh from the oven all over again. Because let's be honest, this chocolate pudding cake is worth savoring every single bite.
- Microwave: Quick and easy, 30-60 seconds
- Oven: Even heating, 10-15 minutes at 350°F
- Always add ice cream!
Indulge in Sweet Success: Your Best Chocolate Pudding Cake Awaits
There you have it – your guide to baking what we truly believe is the best chocolate pudding cake recipe around. From the simple ingredients to the easy-to-follow steps, this dessert is designed to bring joy to your kitchen and smiles to your table. Whether you stick to the classic recipe or get adventurous with variations, remember that the most important ingredient is love (and maybe a little extra chocolate!). So go ahead, bake this cake, share it with friends and family, and revel in the sweet satisfaction of a dessert well-made. Happy baking!