Table of Contents
Ever crave that intense chocolate indulgence? The kind where a fork sinks into a warm cake, releasing a luscious flow of molten chocolate? That's the magic of a lava cake. Forget the fancy restaurant versions; crafting the absolute best chocolate molten lava cake recipe is surprisingly achievable right in your own kitchen. This isn't about complicated techniques or exotic ingredients.
Getting Started: What You Need for the Best Chocolate Molten Lava Cake Recipe

Getting Started: What You Need for the Best Chocolate Molten Lava Cake Recipe
Alright, so you're ready to tackle the best chocolate molten lava cake recipe? Excellent choice. Before we even think about turning on the oven or melting anything, let's gather our squad of ingredients and tools. You don't need a professional kitchen setup, just a few key players. Think of it like assembling a crack team for a delicious mission. You'll need good quality chocolate (this is non-negotiable, seriously), butter, eggs, a little sugar, some flour, and cocoa powder. That's pretty much it for the core team.
Melting Magic: Prepping Your Chocolate and Butter Base

Melting Magic: Prepping Your Chocolate and Butter Base
The Foundation: Why Melting Matters
let's talk about the heart of the best chocolate molten lava cake recipe: the chocolate and butter base. This isn't just about getting things liquid; it's about creating a smooth, glossy foundation that will become that irresistible gooey center. Think of it like the first layer of a perfect painting – if it's clumpy or burnt, the whole thing is ruined. Getting this step right is crucial for texture and flavor. Skimp on quality chocolate here, and you'll taste it. Burn the chocolate, and you'll smell it, and then you'll cry a little inside as you toss it and start over.
Gentle Heat is Your Friend
You have a couple of options for melting, but the key word is *gentle*. A double boiler is the classic, foolproof method. You set a heatproof bowl over a pot of simmering water – make sure the bottom of the bowl doesn't touch the water. The steam does the work, melting the chocolate and butter slowly and evenly. It takes a bit longer, maybe 5-7 minutes, but it's forgiving. If you're using a microwave, go low and slow. Use 30-second bursts, stirring after each one, until everything is just melted and smooth. Overheating chocolate in the microwave is a fast track to a grainy, sad mess.
- Use a double boiler for best results.
- If microwaving, use 30-second intervals.
- Stir thoroughly after each heating burst.
- Stop heating when just a few small lumps remain, then stir to melt completely.
- Never use high heat; chocolate burns easily.
Achieving Glossy Perfection
Once your chocolate and butter are melted, give them a final good stir until they are completely smooth and look beautifully glossy. There shouldn't be any lumps of chocolate or streaks of unmixed butter. This smooth consistency is what helps create that luxurious molten center later. If it looks grainy, something went wrong – likely too much heat. Don't panic, but you might need to start that part over. A perfect melt is key to moving forward with confidence in crafting your best chocolate molten lava cake recipe.
Mixing It Up: Combining Wet and Dry for Lava Cake Batter
Adding the Eggs and Sugar: Building Structure and Sweetness
you've got that beautiful, glossy chocolate and butter mixture. Now it's time to introduce the other key players: the eggs and sugar. Think of the eggs as the architects here; they're going to provide structure and richness. The sugar, well, that's pretty obvious – it brings the sweetness but also helps create that slightly crisp edge on the outside of the cake, a nice contrast to the molten inside. Whisk your eggs and egg yolks together with the sugar in a separate bowl until they're just combined. You're not trying to whip air into them like meringue, just breaking them up and dissolving the sugar a bit. Then, gently whisk this egg mixture into your melted chocolate and butter. Do it a little at a time, incorporating fully before adding more. You want a smooth, cohesive liquid base before moving on. This step is critical for the final texture of your best chocolate molten lava cake recipe.
Incorporating the Dry Stuff: Flour and Cocoa Powder
Next up are the dry ingredients: a touch of flour and the cocoa powder. The flour is minimal; its job is just to give the cake *just* enough structure to hold its shape while the center stays liquid. The cocoa powder punches up that deep chocolate flavor even more. Sift these together first to avoid any pesky lumps. Now, here's where you need a gentle hand. Add the dry ingredients to your wet mixture and fold them in carefully. Don't grab a whisk and go crazy. A rubber spatula is your best friend here. Fold until you see no dry streaks of flour or cocoa. Overmixing develops gluten in the flour, which can make your cakes tough – the opposite of what we want for a tender lava cake. Stop mixing as soon as everything is just combined. Trust your eyes; if you don't see dry bits, you're good.
Key Mixing Tips:
- Combine eggs and sugar separately before adding to chocolate.
- Whisk gently, don't over-aerate the eggs.
- Add the egg mixture gradually to the chocolate base.
- Sift flour and cocoa powder together.
- Fold in dry ingredients with a spatula, don't whisk vigorously.
- Stop mixing immediately when no dry streaks remain.
Baking to Perfection: Achieving the Molten Core in Your Lava Cakes

Baking to Perfection: Achieving the Molten Core in Your Lava Cakes
Hot Oven, Happy Cakes: Preheating and Preparing
you've got the batter mixed – smooth, dark, and smelling like pure potential. Now comes the moment of truth: the bake. This isn't the time for a leisurely, low-temperature bake. You need high heat, and you need it *now*. Preheat your oven to a scorching 425°F (218°C). That high temperature is your secret weapon for getting the outside of the cake to set quickly while the inside stays gloriously gooey. While the oven heats up, make sure your ramekins or muffin tin are prepped properly. You sprayed them with nonstick spray, right? And then you dusted them with cocoa powder? Don't skip the cocoa dust; it helps prevent sticking and gives the cake a nice finish. It's a small step that makes a big difference when you try to unmold these beauties.
- Preheat oven to 425°F (218°C).
- Spray ramekins or muffin tin generously with nonstick spray.
- Dust prepared molds with cocoa powder, tapping out excess.
- Ensure the oven is fully preheated before baking.
Filling 'Em Up: The Right Amount Matters
Now, spoon that luscious batter into your prepared molds. Don't just glop it in; try to fill them about two-thirds to three-quarters full. Overfilling is a rookie mistake. You'll end up with cakes that spill over or dome excessively, potentially messing up that delicate balance needed for the molten center. Plus, they're harder to unmold cleanly. Fill them evenly so they bake uniformly. Give each filled ramekin a gentle tap on the counter to settle the batter and remove any large air bubbles. They're ready for their fiery transformation into the best chocolate molten lava cake recipe you've ever made.
The Ticking Clock: Nailing the Bake Time
Into the hot oven they go! Place the ramekins on a baking sheet – this makes them easier to get in and out and catches any potential drips (though with proper filling, there shouldn't be many). Now, watch them closely. Baking time is *critical* and can vary slightly depending on your oven and the size of your molds. For standard 6-ounce ramekins, it's typically 12-14 minutes. For muffin tins, it might be closer to 8-10 minutes. How do you know they're done? The edges should look set and slightly pulled away from the sides of the mold, while the center still looks soft and might jiggle just a little when you gently shake the pan. You want the outside firm, the inside liquid. Pull them out *immediately* when they hit this sweet spot. A minute too long, and you'll have a solid cake. A minute too short, and they might collapse. It takes a little nerve, but trust the jiggle test.
Are you brave enough to pull them out while the center still looks wobbly?
Serving and Enjoying Your Best Chocolate Molten Lava Cake

Serving and Enjoying Your Best Chocolate Molten Lava Cake
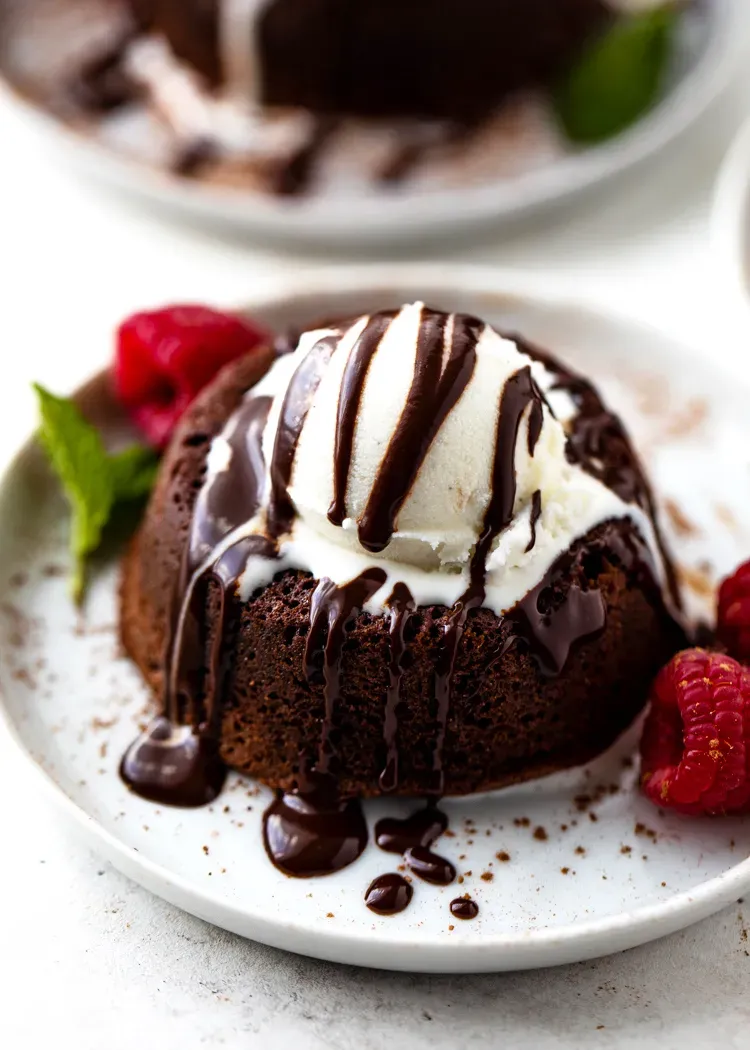
the moment of truth. They're out of the oven, edges set, centers just a little jiggly. Don't just scoop them out with a spoon like a barbarian. This is where a little finesse pays off. Let them sit for just a minute or two – seriously, no more than two minutes. This brief rest allows the edges to firm up slightly, making them easier to unmold. Now, carefully invert each ramekin onto a serving plate. Give the ramekin a firm tap or two on the bottom if needed. With any luck (and proper prepping!), the cake should slide out, revealing that glorious, slightly sunken top that promises molten goodness within. This is the culmination of your efforts on the best chocolate molten lava cake recipe.
Your Molten Masterpiece Awaits
So there it is. The path to the best chocolate molten lava cake recipe isn't paved with unobtainable ingredients or culinary acrobatics. It's about decent chocolate, careful timing, and not overthinking it. You've got the tools now to bypass the dessert menu and create something genuinely impressive. Whether it's a quiet night in or you're trying to flex your kitchen skills, this cake delivers. Go make some chocolate magic happen.