Table of Contents
Ever dream of a dessert that’s both impressive and surprisingly simple? Look no further than the chocolate jelly roll cake, also known as a Swiss roll or even a Ho Ho! This isn't just any cake; it's a delightful swirl of moist chocolate sponge and creamy filling, guaranteed to impress. Forget those dry, cracked rolls of the past. This recipe is specifically crafted to deliver a perfect texture and rich chocolate flavor every single time. Whether you're a seasoned baker or just starting out, this article will guide you through creating the best chocolate jelly roll cake recipe. We'll cover everything from preventing cracks to mastering the ganache, ensuring your cake is a showstopper. Get ready to unlock the secrets to a bakery-worthy treat that will have everyone asking for seconds. So, tie on your apron, preheat your oven, and let's bake the best chocolate jelly roll cake of your life!
Why This Chocolate Jelly Roll Cake Recipe Is the Best

Why This Chocolate Jelly Roll Cake Recipe Is the Best
It's All About the Texture
Let’s be real, nobody wants a dry, crumbly cake that cracks the moment you try to roll it. This best chocolate jelly roll cake recipe prioritizes a moist, tender sponge. The secret? A combination of vegetable oil and buttermilk. The oil keeps the cake soft, while the buttermilk adds a subtle tang and extra moisture, creating the perfect balance for a cake that practically melts in your mouth. No more struggling with a stiff, unyielding cake – just a smooth, pliable sponge ready to embrace its creamy filling.
Flavor That Pops
While texture is key, flavor is king! This best chocolate jelly roll cake recipe doesn't skimp on the chocolate. We're talking deep, rich, and intensely chocolatey. Using high-quality unsweetened cocoa powder is a must, and a touch of espresso powder enhances the chocolate notes, adding a subtle depth that will leave everyone wondering what your secret ingredient is. It's a chocolate lover's dream come true, and the perfect canvas for a luscious whipped cream filling.
Tried, Tested, and Truly Foolproof
This isn't some untested recipe pulled from a dusty cookbook. This best chocolate jelly roll cake recipe has been meticulously refined based on feedback from real bakers like you. We've tackled the common issues – dryness, cracking, uneven baking – and developed a foolproof method that delivers consistent results every single time. With clear, step-by-step instructions and helpful tips along the way, even beginner bakers can confidently create a show-stopping chocolate jelly roll cake that will impress friends and family alike. It's baking success, guaranteed!
Feature | Benefit |
|---|---|
Vegetable Oil & Buttermilk | Moist, tender cake |
High-Quality Cocoa & Espresso | Rich, intense chocolate flavor |
Thoroughly Tested Recipe | Consistent, foolproof results |
Secrets to a CrackFree Chocolate Cake Roll
Secrets to a CrackFree Chocolate Cake Roll
The Warm Roll Is Key
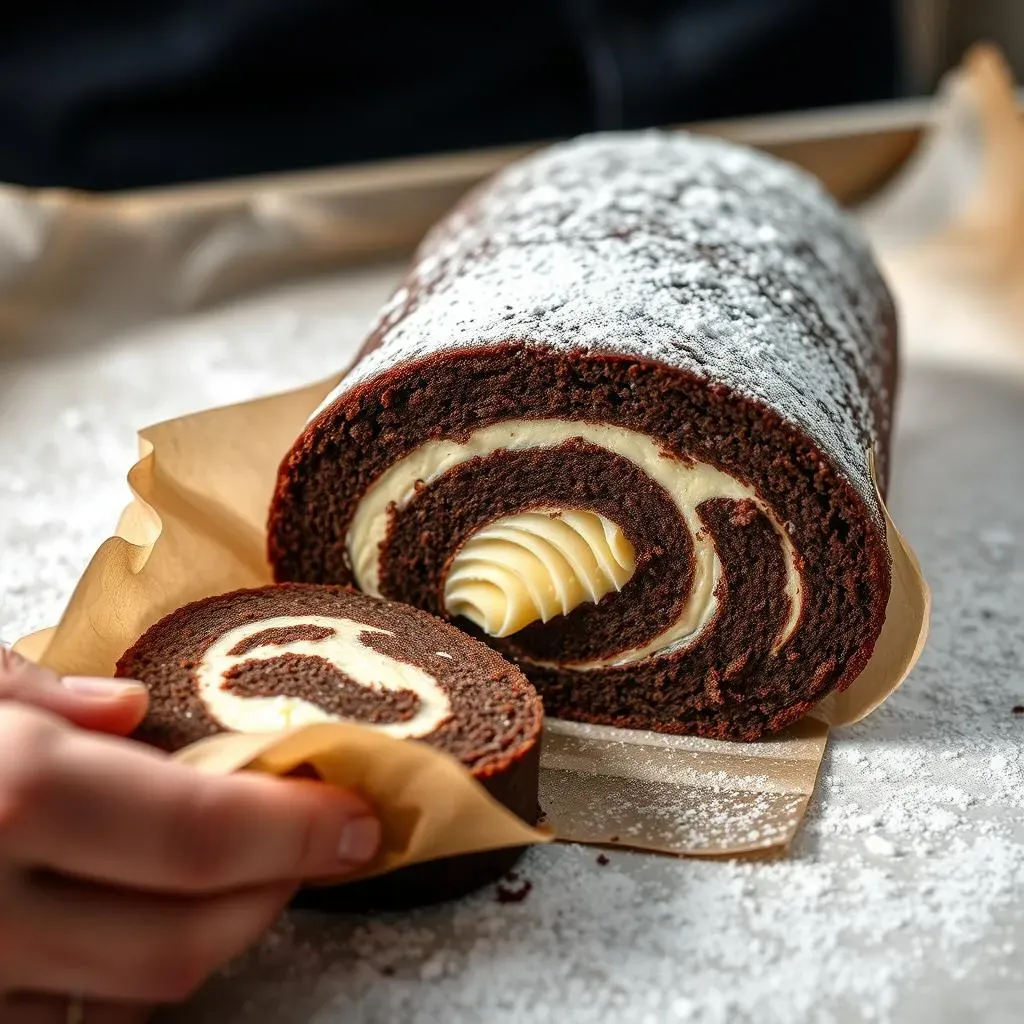
This is the golden rule for avoiding cracks! Rolling the cake while it's still warm from the oven is absolutely crucial. As the cake cools, it becomes less flexible and more prone to cracking. When it's warm, it's pliable and can easily be shaped without breaking. Don't wait until it's completely cool – aim to roll it up within a few minutes of taking it out of the oven. Trust me, this step alone will make a world of difference in achieving that picture-perfect, crack-free roll.
The Right Technique Matters
How you roll the cake is just as important as when you roll it. Use the parchment paper or a clean kitchen towel to gently lift and guide the cake as you roll. Start from one end and roll tightly, but not so tightly that you squeeze out all the filling. The goal is to create a snug roll that holds its shape without putting too much stress on the cake itself. Once rolled, wrap it tightly in the parchment or towel and let it cool completely at room temperature. This allows the cake to "set" in its rolled shape, minimizing the risk of cracks later on.
Moisture Is Your Friend
A dry cake is a cracked cake waiting to happen. That's why moisture is so important in this best chocolate jelly roll cake recipe. Using ingredients like vegetable oil and buttermilk helps to keep the cake soft and pliable, even after it's been baked and rolled. Also, avoid overbaking the cake. Overbaking leads to moisture loss, making it more likely to crack. Keep a close eye on it in the oven and remove it as soon as it's set and springs back lightly when touched. Remember, a moist cake is a happy, crack-free cake!
Don't Skip the Cooling Period
Patience is a virtue, especially when it comes to making a chocolate jelly roll cake. After rolling the warm cake, it's tempting to unwrap it immediately and fill it with cream. However, resist the urge! Allowing the cake to cool completely in its rolled-up state is essential for preventing cracks. This cooling period allows the cake to set in its new shape and prevents it from cracking when you unroll it to add the filling. So, be patient, let it cool completely, and you'll be rewarded with a beautiful, crack-free chocolate jelly roll cake.
Secret | Why It Works |
|---|---|
Roll While Warm | Cake is more pliable and less prone to cracking |
Gentle Rolling Technique | Avoids stressing the cake and causing breaks |
Maintain Moisture | Keeps the cake soft and flexible |
Cool Completely Rolled | Allows the cake to set in its shape |
StepbyStep: Baking Your Best Chocolate Jelly Roll Cake
StepbyStep: Baking Your Best Chocolate Jelly Roll Cake
Get Your Ingredients Ready
Before you even think about turning on the oven, gather all your ingredients. This isn't just about convenience; it's about ensuring you don't have to scramble mid-recipe, potentially compromising the cake's texture. Measure out your flour, cocoa powder, sugar, oil, buttermilk, eggs, and vanilla extract. Prepare your baking sheet by lining it with parchment paper, leaving an overhang on the sides for easy lifting later. Trust me; this little bit of prep will save you a headache down the line and set you up for baking success.
Preheat your oven to the specified temperature (usually around 350°F or 175°C). While the oven heats, take a moment to whisk together your dry ingredients – flour, cocoa powder, baking powder, and salt. This ensures they're evenly distributed, preventing pockets of baking powder that can lead to an uneven rise. In a separate bowl, whisk together your wet ingredients – eggs, sugar, oil, buttermilk, and vanilla extract. Once the oven is ready and your ingredients are prepped, you're ready to move on to the next crucial step.
Mixing, Baking, and Rolling Like a Pro
Now comes the fun part! Gradually add the dry ingredients to the wet ingredients, mixing until just combined. Be careful not to overmix, as this can develop the gluten in the flour, resulting in a tough cake. Pour the batter evenly onto your prepared baking sheet and spread it into a thin, even layer. This ensures that the cake bakes uniformly and rolls easily without cracking. Pop it into the preheated oven and bake for the specified time (usually around 12-15 minutes). Keep a close eye on it – you want it to be set and spring back lightly when touched, but not overbaked.
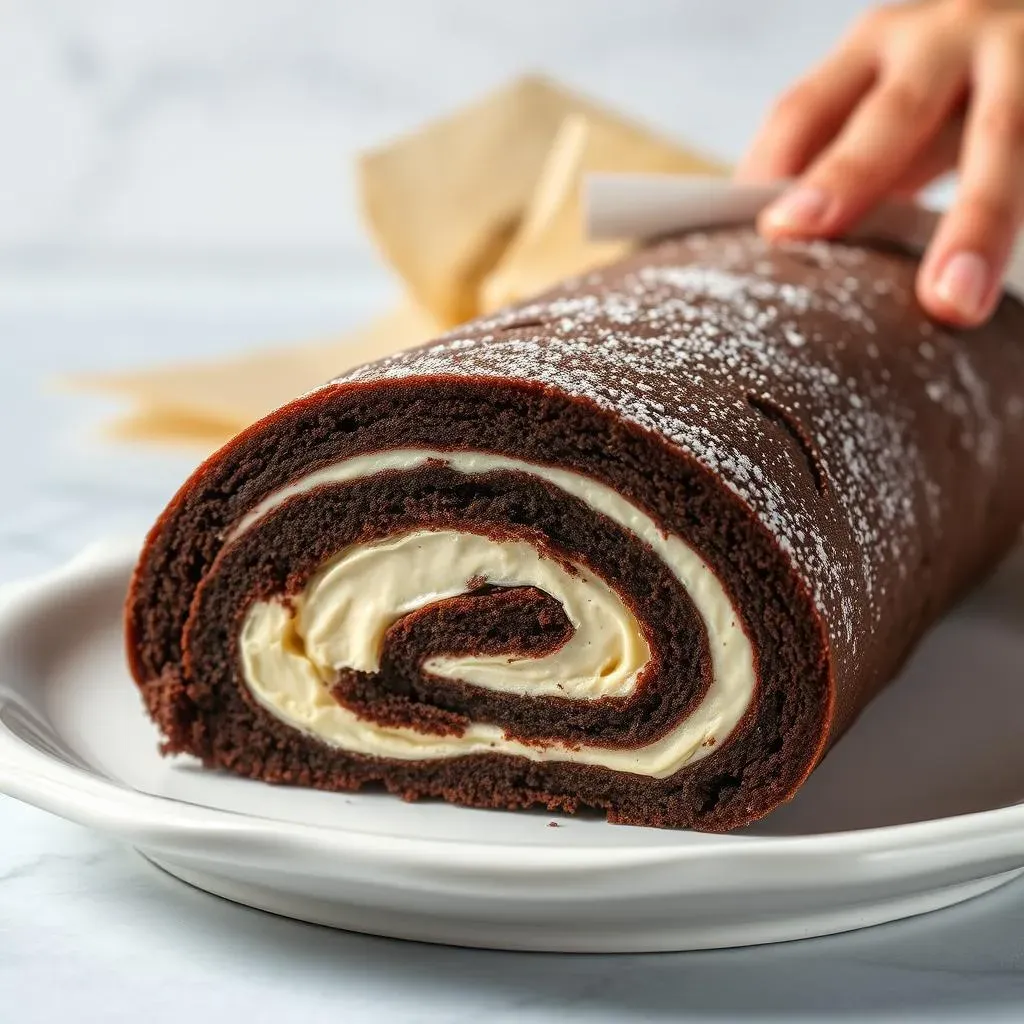
Once the cake is baked, immediately invert it onto a clean kitchen towel or a sheet of parchment paper dusted with powdered sugar. Gently peel off the parchment paper lining the bottom of the cake. Starting from one end, roll the cake up tightly in the towel or parchment paper. This is where the magic happens! The warm cake is pliable and will easily mold into a roll without cracking. Wrap the rolled cake tightly and let it cool completely at room temperature. This allows the cake to set in its rolled shape, preventing cracks when you unroll it to add the filling.
Step | Description | Why It's Important |
|---|---|---|
Prep Ingredients | Measure everything beforehand | Ensures smooth baking process |
Combine Wet & Dry | Mix until just combined | Prevents tough cake |
Bake Evenly | Spread batter in a thin layer | Ensures uniform baking |
Roll While Warm | Roll immediately after baking | Prevents cracking |
Variations & Tips: Elevate Your Chocolate Jelly Roll Cake Recipe
Variations & Tips: Elevate Your Chocolate Jelly Roll Cake Recipe
Flavor Infusions: Beyond Basic Chocolate
Want to take your chocolate jelly roll cake to the next level? Experiment with flavor infusions! Add a tablespoon of instant coffee to the batter for a mocha-flavored cake, or a teaspoon of almond extract for a subtle nutty note. For a citrusy twist, try adding orange or lemon zest to the batter. The possibilities are endless! You can also infuse the whipped cream filling with different flavors. Try adding a tablespoon of your favorite liqueur, such as Kahlua or Baileys, or a pinch of cinnamon or nutmeg for a warm, spicy flavor. Get creative and customize your cake to your liking!
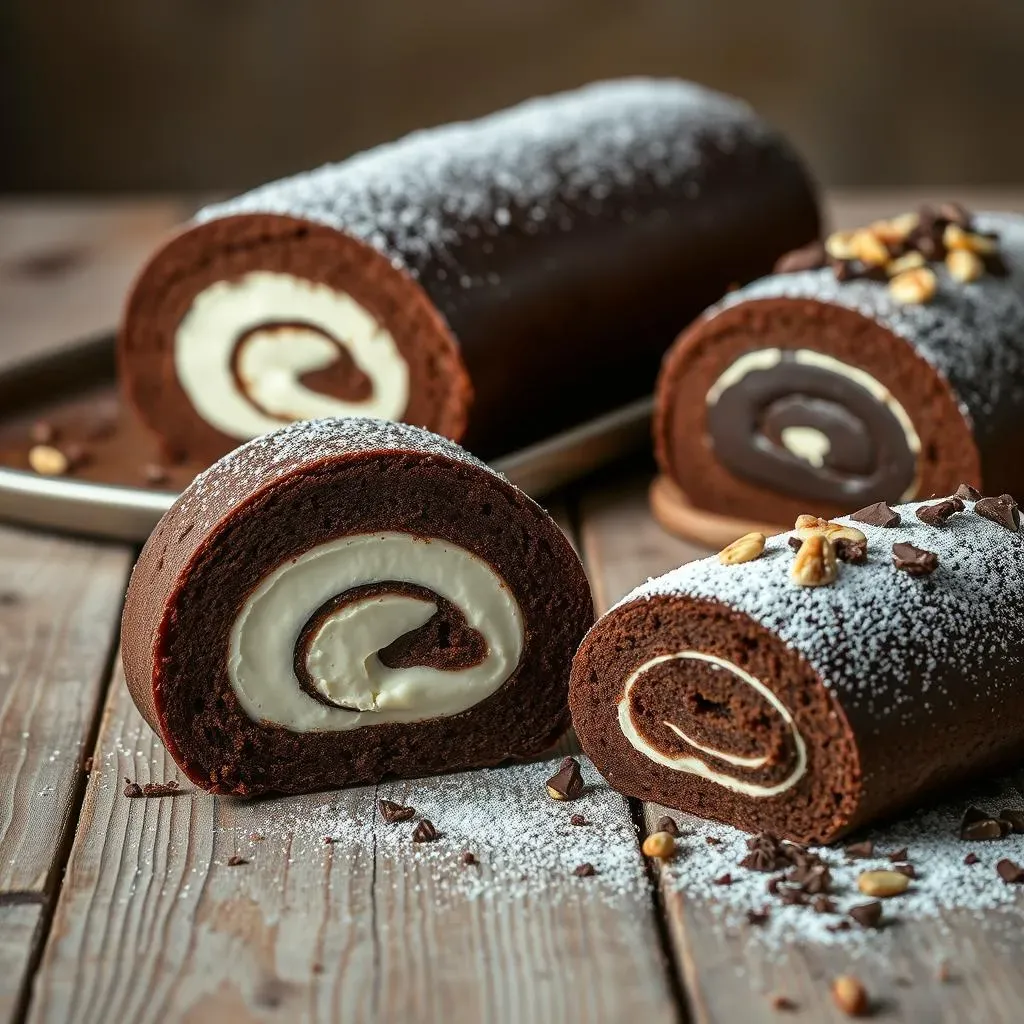
Filling Frenzy: More Than Just Whipped Cream
While classic whipped cream is always a winner, don't be afraid to explore other filling options! Chocolate ganache, pastry cream, or even a tangy cream cheese frosting can all be delicious alternatives. For a lighter option, try using a fruit puree or a homemade jam. You can also add mix-ins to your filling for extra texture and flavor. Chopped nuts, chocolate chips, or even crushed Oreos can take your jelly roll cake to a whole new level. Get adventurous and create a filling that complements the chocolate cake and satisfies your sweet tooth.
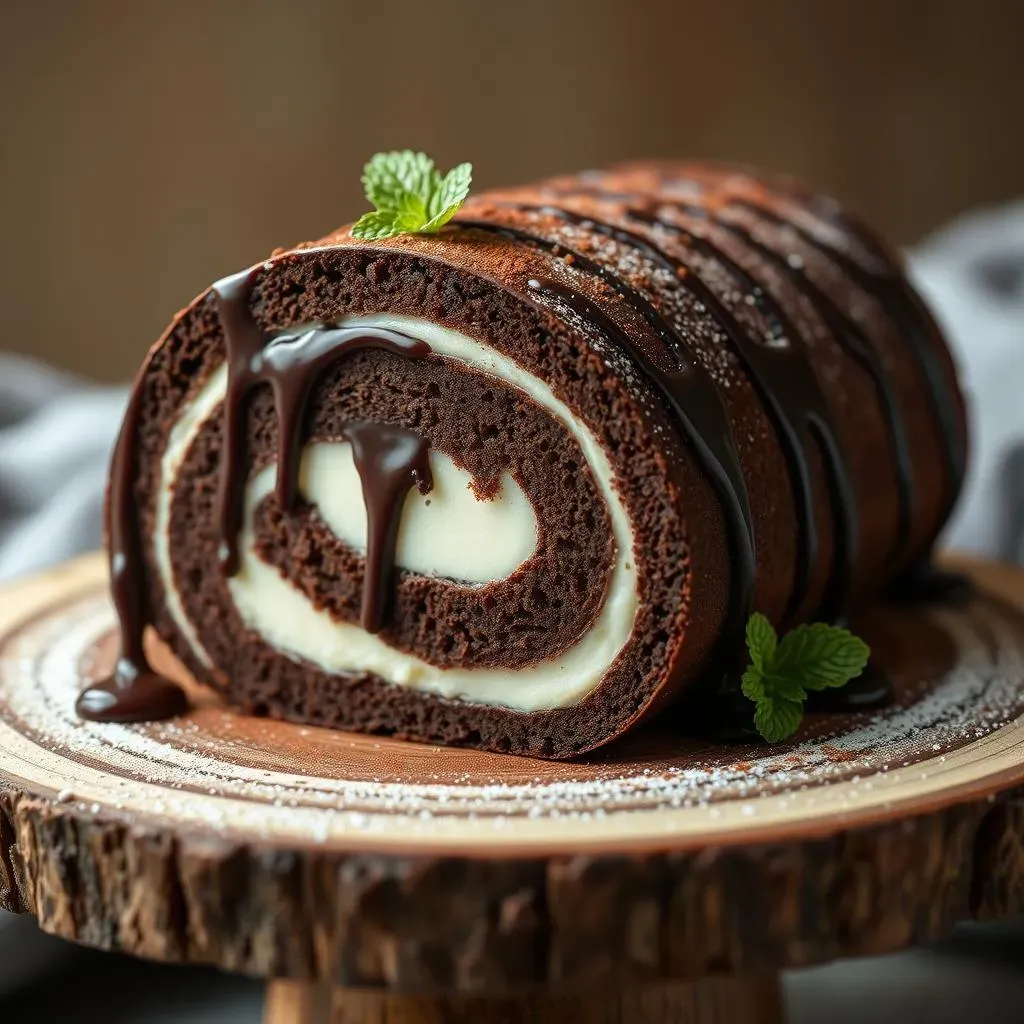
Dress It Up: Garnish Like a Pro
Presentation is key, so don't forget to garnish your chocolate jelly roll cake! A simple dusting of powdered sugar is always elegant, but you can also get more creative. Drizzle melted chocolate over the top, or sprinkle with chopped nuts, chocolate shavings, or even edible flowers. For a festive touch, try decorating with seasonal sprinkles or candies. You can also create a simple chocolate ganache glaze by melting chocolate and heavy cream together and pouring it over the cake. Let your imagination run wild and create a cake that looks as good as it tastes!
Variation | Description |
|---|---|
Mocha Cake | Add instant coffee to batter |
Citrus Cake | Add orange or lemon zest |
Chocolate Ganache Filling | Use chocolate ganache instead of whipped cream |
Fruit Filling | Use fruit puree or jam |
Make-Ahead Magic: Baking on Your Schedule
One of the best things about this chocolate jelly roll cake recipe is that it can be made ahead of time! You can bake the cake and prepare the filling a day in advance, then assemble the cake just before serving. This is perfect for busy bakers who want to impress without spending hours in the kitchen on the day of the event. You can also freeze the assembled cake for up to 2-3 months. Wrap it tightly in plastic wrap and then in foil to prevent freezer burn. When ready to serve, thaw it overnight in the refrigerator and garnish as desired. With a little planning, you can always have a delicious chocolate jelly roll cake on hand for any occasion.
Conclusion: Your Best Chocolate Jelly Roll Cake Awaits
So, there you have it – everything you need to bake the best chocolate jelly roll cake recipe. From understanding the importance of moisture to mastering the perfect roll, you're now equipped to create a dessert that's both visually stunning and utterly delicious. Don't be afraid to experiment with fillings and toppings to make it your own. Whether it's for a special occasion or just a sweet treat for yourself, this cake is sure to impress. Now, go forth and bake! And don't forget to share your creations – and any amazing variations – with friends and family. Happy baking!