Table of Contents
Dreaming of a show-stopping, multi-tiered chocolate cake that doesn't topple over? You're not alone! Many bakers struggle to find a recipe that delivers both intense chocolate flavor and the structural integrity needed for stacking. Forget those dry, crumbly cakes that can barely hold their own weight. This is where your search ends. We're diving deep into what makes the best chocolate cake recipe for stacking, one that promises moist, tender layers capable of supporting even the most ambitious designs.
Why This is the Best Chocolate Cake Recipe for Stacking
Why This is the Best Chocolate Cake Recipe for Stacking
It's All About Structure and Flavor
Let's be real, a cake that looks amazing but tastes like cardboard is a major letdown. This recipe nails both the structural integrity needed for stacking and a rich, decadent chocolate flavor that will have everyone begging for seconds. How? It's a delicate balance of ingredients and technique, carefully crafted to ensure a moist, tender crumb that's also strong enough to support layers of frosting and decorations. We're not just aiming for a pretty cake; we're aiming for a delicious masterpiece.
Think of it like building a house. You need a solid foundation, right? The same goes for a stacked cake. This recipe acts as that foundation, providing a stable base without sacrificing taste. Many recipes focus solely on flavor, leaving you with a cake that crumbles under pressure. Others prioritize structure, resulting in a dry, unappetizing dessert. This recipe? It's the best of both worlds.
The Magic is in the Cocoa (and a Few Other Secrets)
Dutch-processed cocoa is the star of the show here. Unlike natural cocoa powder, Dutch-processed cocoa has a more mellow flavor and a darker color, which translates to a richer, more intense chocolate experience. But it's not just about the cocoa. The addition of buttermilk and oil contributes to the cake's moistness, while the precise ratio of flour to other ingredients ensures a tender crumb that's not too dense.
Ever wonder why some chocolate cakes are dry and crumbly? It often comes down to using the wrong type of cocoa or not having the right balance of wet and dry ingredients. This recipe has been meticulously tested and tweaked to guarantee a perfect result every time. We're talking a cake that's moist, flavorful, and sturdy enough to handle even the most elaborate decorations.
Versatility for Every Baker and Every Occasion
Whether you're a seasoned pro or a beginner baker, this recipe is designed to be accessible and adaptable. The instructions are clear and concise, with plenty of tips and tricks to help you along the way. Plus, the recipe can be easily scaled up or down to accommodate different cake sizes and tiers. Need a smaller cake for a birthday celebration? No problem. Want to create a towering masterpiece for a wedding? This recipe has you covered.
Beyond its structural integrity and delicious flavor, this recipe is also incredibly versatile. You can customize it with different frostings, fillings, and decorations to create a cake that's truly your own. Add a layer of raspberry jam for a fruity twist, or top it with a decadent chocolate ganache for an extra dose of indulgence. The possibilities are endless!
Cake Size | Baking Time (Approximate) |
|---|---|
6-inch rounds | 30-35 minutes |
8-inch rounds | 35-40 minutes |
9-inch rounds | 40-45 minutes |
The Secret to a Sturdy Chocolate Cake: Ingredients that Matter
The Secret to a Sturdy Chocolate Cake: Ingredients that Matter
Flour Power: Choosing the Right Type
let's talk flour. Not all flour is created equal, especially when you're aiming for a cake that can stand tall. For the best chocolate cake recipe for stacking, you'll want to reach for cake flour. Why? Because cake flour has a lower protein content than all-purpose flour. That lower protein translates to less gluten development, which means a more tender crumb. And a tender crumb is essential for a cake that's moist and delicious, not tough and chewy. Think of it as the difference between biting into a cloud and biting into a rubber band – we're definitely going for the cloud.
But what if you don't have cake flour on hand? Don't panic! You can make a substitute by measuring out 1 cup of all-purpose flour, removing 2 tablespoons, and then adding 2 tablespoons of cornstarch. The cornstarch helps to further inhibit gluten development, giving you a similar result to cake flour. It's a handy trick to have up your sleeve when you're in a pinch. However, for the ultimate in tenderness and stackability, cake flour is always the best choice.
Cocoa Considerations: Dutch-Processed vs. Natural
We touched on this earlier, but it's worth diving deeper: cocoa is not just cocoa. The type of cocoa you use can dramatically impact the flavor, color, and even the texture of your cake. As mentioned, Dutch-processed cocoa is the way to go for this recipe. Its mellow flavor allows the chocolate notes to shine through without any harshness, and its darker color creates a visually stunning cake. Plus, Dutch-processed cocoa has a neutral pH, which means it won't react with baking soda in the same way that natural cocoa powder does. This contributes to a more consistent rise and a more tender crumb.
If you only have natural cocoa powder, you can still use it, but you'll need to make some adjustments to the recipe. You'll likely need to add an acidic ingredient, such as buttermilk or sour cream, to balance the pH and ensure proper leavening. However, keep in mind that the flavor and color will be slightly different. For the most reliable and delicious results, stick with Dutch-processed cocoa for this recipe.
Fat Factors: Oil vs. Butter (and Why Oil Wins)
When it comes to fat, many cake recipes call for butter. And while butter definitely has its merits, oil is the secret weapon for a super moist and stackable chocolate cake. Oil, unlike butter, remains liquid at room temperature, which means it contributes to a more tender and moist crumb. It also helps to prevent the cake from drying out over time, which is crucial when you're stacking multiple layers.
Now, you might be thinking, "But doesn't butter add flavor?" And you're right, it does. However, in this recipe, the intense chocolate flavor from the Dutch-processed cocoa takes center stage. The oil simply provides the necessary moisture and tenderness without overpowering the chocolate. Plus, using oil makes this recipe incredibly easy to whip up – no need to wait for butter to soften!
Ingredient | Why It Matters |
|---|---|
Cake Flour | Low protein = tender crumb = stackable cake |
Dutch-Processed Cocoa | Mellow flavor, dark color, consistent rise |
Oil | Moisture, tenderness, prevents drying out |
StepbyStep: Baking Your Dream Stacking Chocolate Cake
StepbyStep: Baking Your Dream Stacking Chocolate Cake
Mise en Place: Setting Yourself Up for Success
Before you even think about turning on your mixer, let's talk mise en place. It's a fancy French term that basically means "everything in its place." And trust me, when you're baking a cake that needs to be structurally sound, organization is key. Start by gathering all of your ingredients and measuring them out accurately. This isn't the time for eyeballing! Use a kitchen scale for the most precise measurements, especially when it comes to flour and cocoa powder. It makes a huge difference in the final product. Next, prepare your cake pans by greasing them thoroughly with baking spray or butter and flour. This will prevent the cakes from sticking and ensure clean release. Finally, preheat your oven to the correct temperature. A consistent oven temperature is crucial for even baking.
I cannot stress enough how important it is to be organized. Imagine you're halfway through mixing the batter and realize you're out of eggs! Talk about a baking disaster. By having everything prepped and ready to go, you'll minimize stress and maximize your chances of success. It's like preparing for a marathon – you wouldn't start running without stretching and hydrating, would you? Baking is the same way. A little preparation goes a long way.
Mixing Magic: Creating the Perfect Batter
Alright, now for the fun part: mixing the batter! Start by whisking together the dry ingredients – cake flour, Dutch-processed cocoa, sugar, baking soda, baking powder, and salt – in a large bowl. This ensures that everything is evenly distributed and that there are no pockets of baking soda lurking to create a weird, salty bite. In a separate bowl, whisk together the wet ingredients – oil, buttermilk, eggs, and vanilla extract. Then, gradually add the wet ingredients to the dry ingredients, mixing on low speed until just combined. Be careful not to overmix! Overmixing develops gluten, which can lead to a tough cake. We want a tender crumb, remember?
Once the batter is combined, add the hot coffee. Yes, hot coffee! It might sound strange, but the hot coffee intensifies the chocolate flavor and adds moisture to the cake. Trust me on this one. Gently fold the coffee into the batter until it's evenly incorporated. Now, divide the batter evenly among your prepared cake pans. I like to use a kitchen scale to ensure that each pan has the same amount of batter. This helps the cakes bake evenly and creates a more uniform appearance for stacking.
Step | Description | Why It's Important |
|---|---|---|
Whisk Dry Ingredients | Ensures even distribution | Prevents pockets of baking soda |
Combine Wet Ingredients | Creates a smooth emulsion | Evenly distributes moisture |
Add Coffee | Intensifies chocolate flavor | Adds moisture |
Baking and Cooling: The Final Countdown
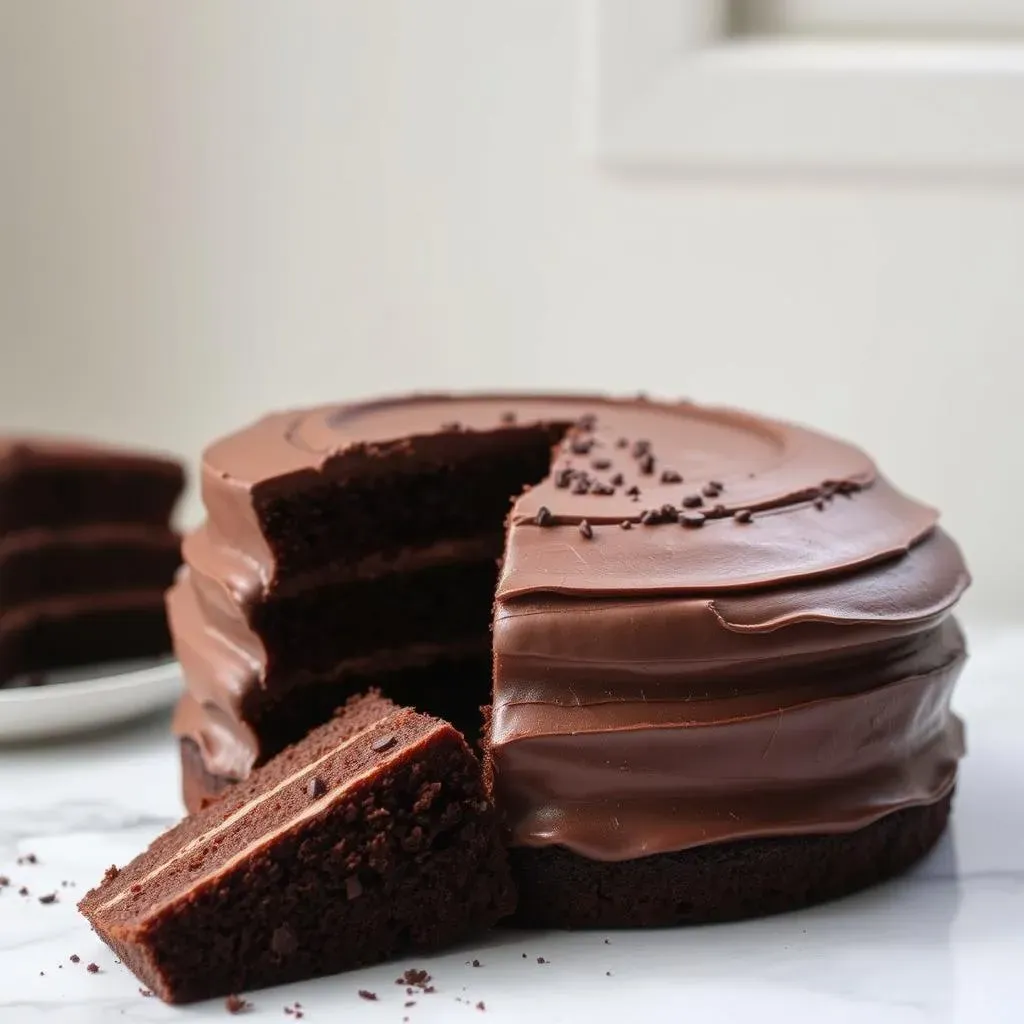
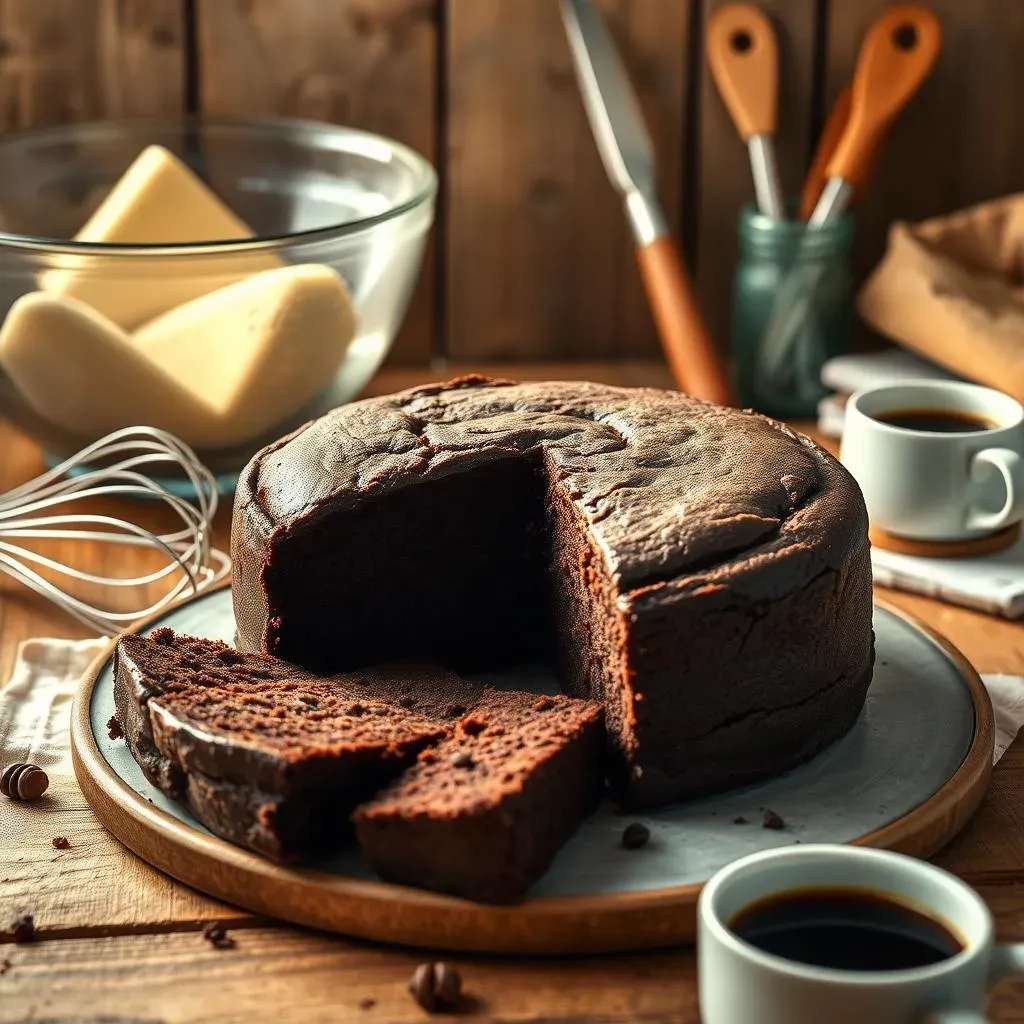
Carefully transfer the filled cake pans to your preheated oven and bake for the recommended time, or until a toothpick inserted into the center comes out clean. Keep in mind that baking times may vary depending on your oven, so it's always best to check for doneness a few minutes early. Once the cakes are baked, remove them from the oven and let them cool in the pans for about 10 minutes. This allows them to set slightly and prevents them from sticking to the pans.
After 10 minutes, invert the cakes onto a wire rack and let them cool completely. It's crucial that the cakes are completely cool before you start frosting and stacking them. Warm cakes are more likely to crumble and break, which is not what you want when you're building a multi-tiered masterpiece. While the cakes are cooling, you can start preparing your frosting. And speaking of frosting, we'll dive into the best frosting options for stacking in the next section. Get ready to create a cake that's not only delicious but also structurally sound and visually stunning!
Level Up: Frosting and Decorating Your Stacked Chocolate Cake
Level Up: Frosting and Decorating Your Stacked Chocolate Cake
Choosing the Right Frosting for Stability
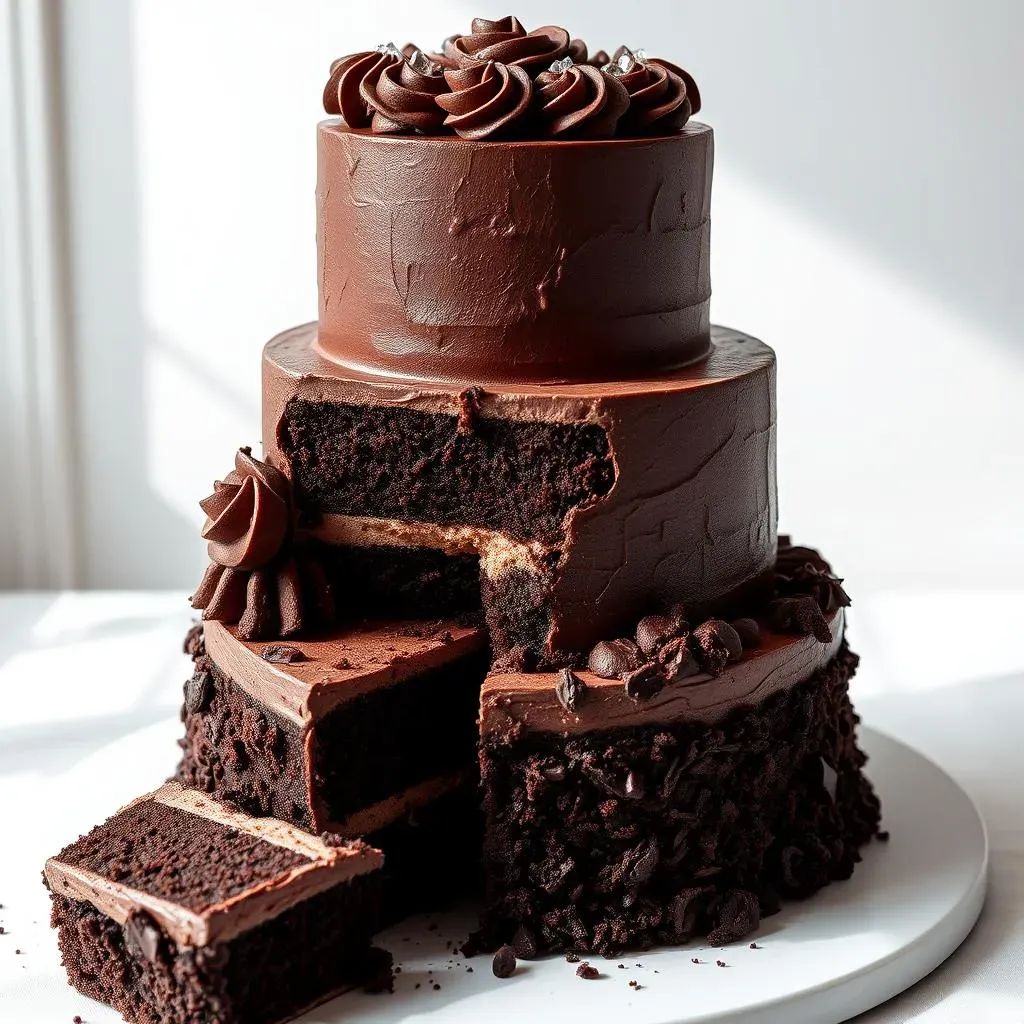
so you've baked these beautiful, sturdy chocolate cake layers. Now, how do you keep them from becoming a leaning tower of deliciousness? The frosting is key! Not all frostings are created equal when it comes to stacking. You need something that can provide structure and support without being overly sweet or heavy. My go-to? A classic American buttercream, but with a twist. I like to add a bit of melted (and cooled!) white chocolate to the buttercream. This not only enhances the flavor but also creates a firmer, more stable frosting that's perfect for stacking. Think of it as adding rebar to your concrete – it strengthens the whole structure.
Another great option is Swiss meringue buttercream. It's a bit more finicky to make, but it's incredibly smooth, light, and stable. Plus, it's not as sweet as American buttercream, which can be a bonus if you're not a huge fan of overly sugary frostings. Whatever frosting you choose, make sure it's thick enough to hold its shape. A runny frosting will spell disaster for your stacked cake. You want it to be able to create a nice, even layer between each cake, providing a solid foundation for the next tier.
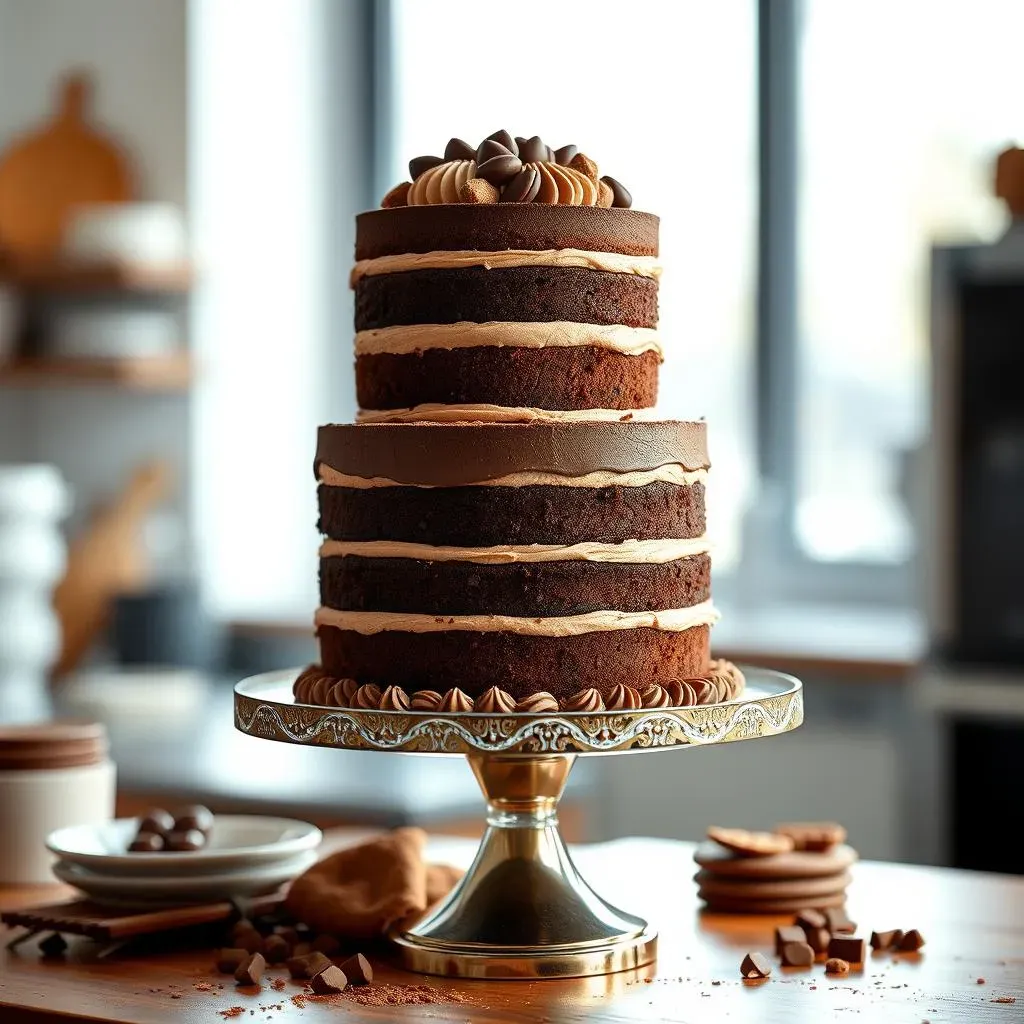
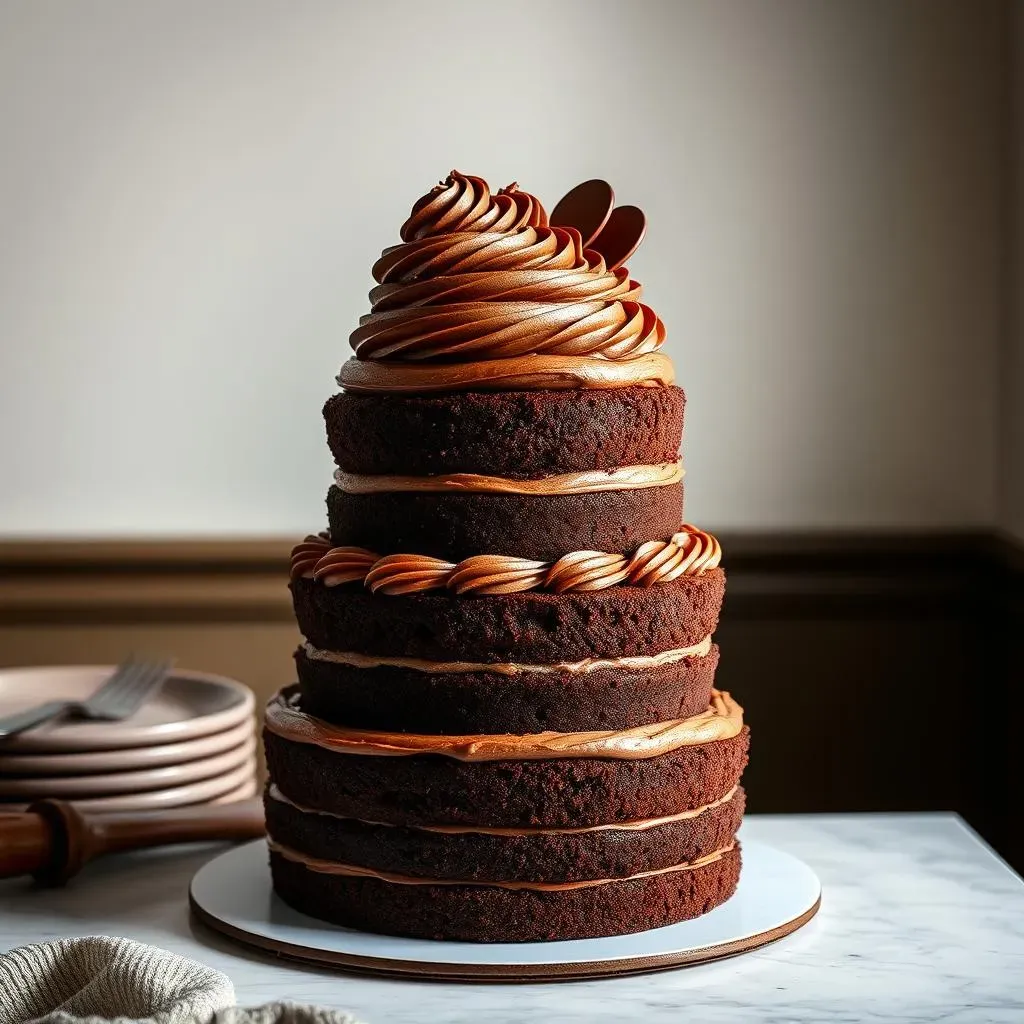
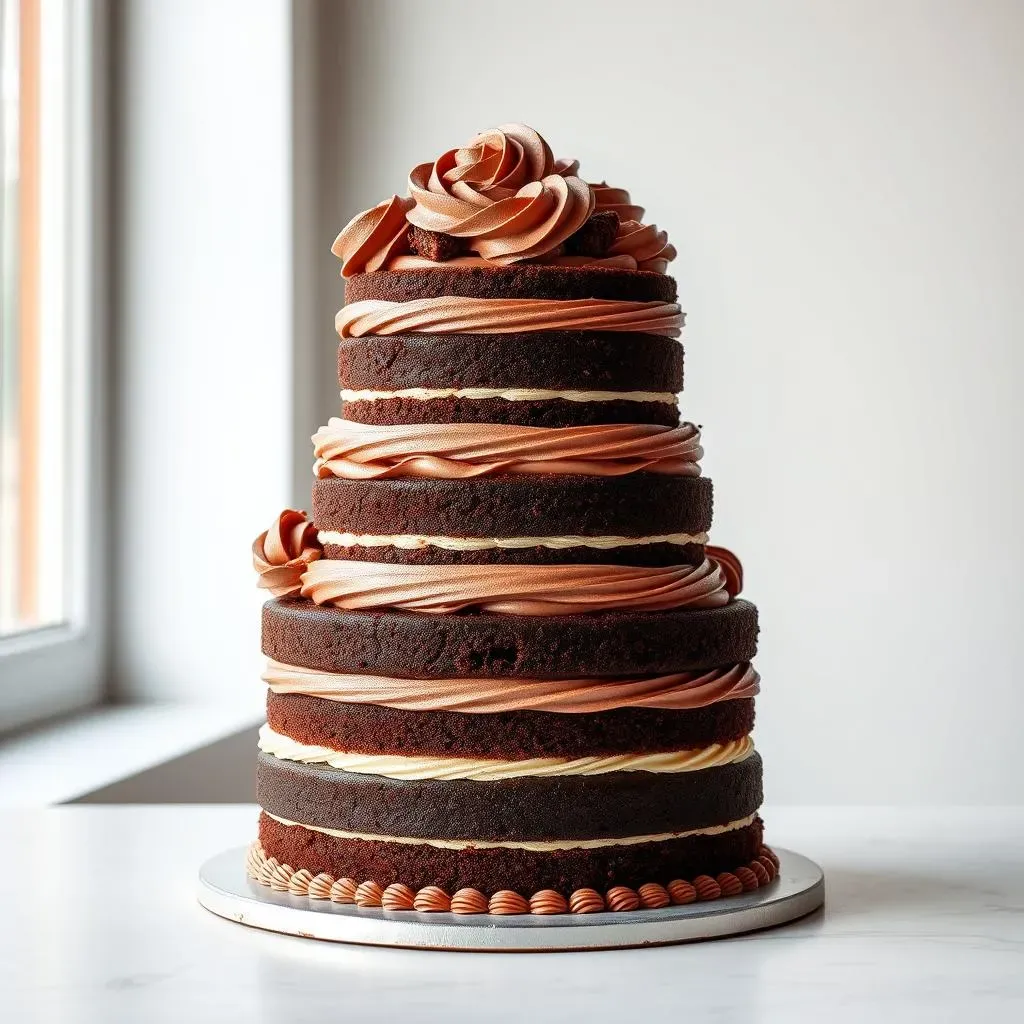
Stacking and Decorating: Tips for a Show-Stopping Cake
Now for the fun part: stacking and decorating! Before you start, make sure your cake layers are completely cool and level. If they're not, use a serrated knife to trim off any unevenness. This will ensure that your cake stacks evenly and doesn't wobble. Place a dollop of frosting on your cake board or serving plate to act as glue for the first layer. Then, carefully place the first cake layer on top and spread an even layer of frosting over the surface. Repeat with the remaining cake layers, making sure to keep everything aligned.
Once the cake is stacked, it's time to crumb coat! This is a thin layer of frosting that seals in any loose crumbs and creates a smooth surface for your final layer of frosting. Chill the cake in the refrigerator for about 30 minutes to allow the crumb coat to set. Then, apply your final layer of frosting and decorate as desired. Whether you're a fan of simple swirls, elegant rosettes, or intricate fondant designs, the possibilities are endless. Just remember to have fun and let your creativity shine! And don't be afraid to use dowels or cake supports for extra stability, especially for taller or heavier cakes.
Frosting Type | Pros | Cons |
|---|---|---|
American Buttercream (with white chocolate) | Easy to make, stable, delicious | Can be quite sweet |
Swiss Meringue Buttercream | Smooth, light, not too sweet | More finicky to make |
Troubleshooting and FAQs for the Best Chocolate Cake Recipe
Troubleshooting and FAQs for the Best Chocolate Cake Recipe
Why is my cake dry?
A dry cake is a baker's worst nightmare, right? Several factors can contribute to this unfortunate situation. First, check your oven temperature. An oven that's too hot can cause the cake to bake too quickly, resulting in a dry texture. Use an oven thermometer to ensure accuracy. Second, avoid overbaking the cake. Start checking for doneness a few minutes before the recommended baking time and remove the cake from the oven as soon as a toothpick inserted into the center comes out clean. Overbaking is a surefire way to dry out your cake.
Another common culprit is using too much flour. As we discussed earlier, accurate measurements are crucial. Use a kitchen scale for the most precise results. Finally, consider the ingredients themselves. Make sure your baking powder and baking soda are fresh, as they lose their potency over time. And don't skimp on the oil! Oil is essential for keeping the cake moist. If you've tried all of these tips and your cake is still dry, it might be time to tweak the recipe slightly. Try adding an extra tablespoon or two of oil or buttermilk to the batter.
Why did my cake sink in the middle?
A sunken cake can be just as frustrating as a dry cake. There are a few potential causes for this issue. One common reason is that the oven temperature was too low. A low oven temperature can cause the cake to rise too quickly and then collapse in the middle. Again, an oven thermometer is your best friend. Another possibility is that the batter was overmixed. Overmixing develops gluten, which can create a tough, dense cake that's prone to sinking. Mix the batter until just combined, and avoid overworking it.
Sometimes, a sunken cake can also be a sign that there was too much liquid in the batter. Double-check your measurements and make sure you're not adding extra liquid by accident. Finally, avoid opening the oven door frequently while the cake is baking. This can cause the oven temperature to fluctuate, which can lead to a sunken cake. Be patient and let the cake bake undisturbed until it's time to check for doneness.
Problem | Possible Cause | Solution |
|---|---|---|
Dry Cake | Oven too hot, overbaking, too much flour | Check oven temp, avoid overbaking, measure accurately |
Sunken Cake | Oven too low, overmixing, too much liquid | Check oven temp, avoid overmixing, measure accurately |
The Last Layer: Mastering the Best Chocolate Cake Recipe for Stacking
So, there you have it – your complete guide to conquering the best chocolate cake recipe for stacking. From understanding the science behind sturdy yet moist layers to perfecting your frosting techniques, you're now equipped to create stunning, multi-tiered cakes that will wow any crowd. Don't be afraid to experiment with flavors, decorations, and sizes to make this recipe your own. The most important ingredient, after all, is your passion for baking. Now, go forth and stack those cakes high!