Table of Contents
If you're on the hunt for the best chocolate cake recipe for fondant covering, you've landed in the right place. Forget about cakes that crumble under the weight of your beautiful fondant designs or lack that rich, chocolatey punch. This recipe isn't just about creating a cake; it's about building a foundation for your edible masterpieces. We're talking about a cake that's both sturdy enough to hold its shape and moist enough to melt in your mouth.
Why This is the Best Chocolate Cake Recipe for Fondant Covering
Why This is the Best Chocolate Cake Recipe for Fondant Covering
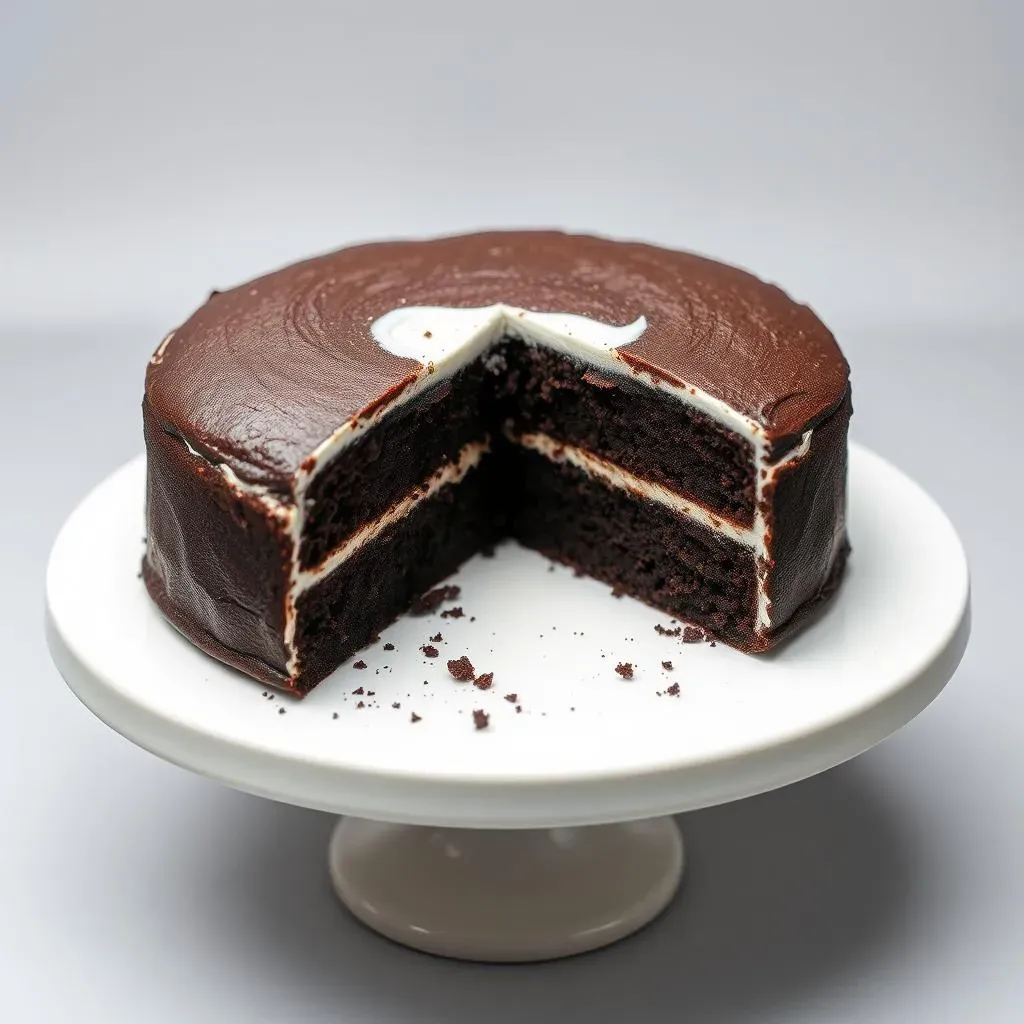
let's get real about why this chocolate cake recipe is a game-changer when you're planning to slather it in fondant. It all boils down to structure and taste. Nobody wants a cake that buckles under the weight of fondant or tastes like cardboard just to hold its shape. This recipe nails both. It's engineered to be sturdy, so you can stack tiers high and carve intricate designs without fear of collapse. But more importantly, it's incredibly delicious.
We're talking about a deep, rich chocolate flavor that complements the sweetness of the fondant, not overpowers it. It's moist, so it doesn't dry out under the fondant, and it has a tight crumb, which means fewer air pockets to cause unsightly bumps. I've seen so many recipes that focus only on structure and completely forget about the flavor. This one gives you the best of both worlds, ensuring your cake looks amazing and tastes even better. It's the reliable foundation every cake artist dreams of.
Achieving the Perfect Crumb: Key Ingredients for a Sturdy Chocolate Cake
Achieving the Perfect Crumb: Key Ingredients for a Sturdy Chocolate Cake
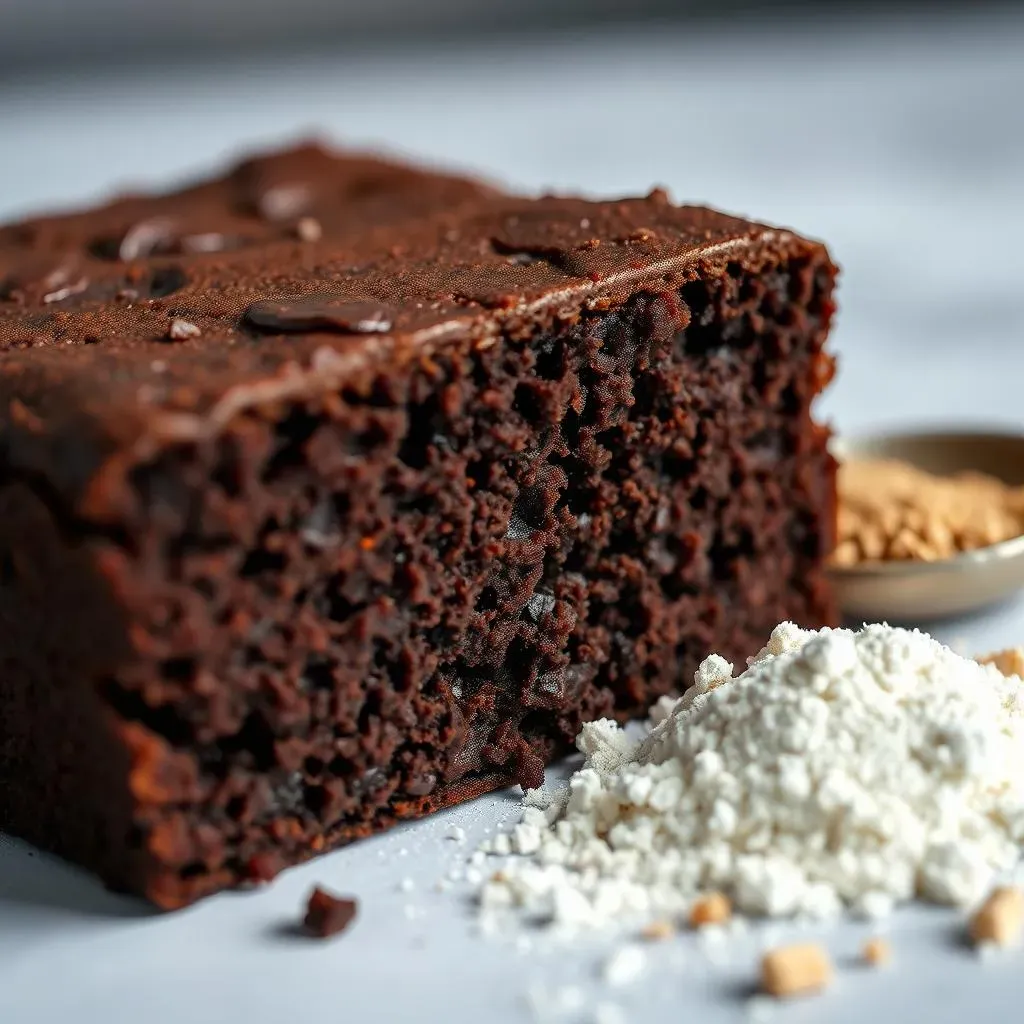
let's talk ingredients because this is where the magic really happens. Achieving the perfect crumb for a cake that's going to be covered in fondant isn't just about following a recipe; it's about understanding what each component brings to the party. We're aiming for a texture that's dense enough to support weight but still soft and moist. So, what are the key players?
First up, flour. All-purpose flour is fine, but if you want extra insurance against a fragile cake, consider using cake flour or a blend of the two. Cake flour has a lower protein content, which means less gluten development, resulting in a more tender crumb. Next, sugar isn't just for sweetness; it also contributes to moisture and tenderness. Granulated sugar is the standard, but brown sugar can add a deeper, more complex flavor and extra moisture. And don't even get me started on cocoa powder. Dutch-processed cocoa is my go-to because it has a richer, smoother flavor and a darker color. Plus, it reacts differently with baking soda, giving your cake a better rise and a more stable structure.
Ingredient | Why It Matters | Tips |
|---|---|---|
Cake Flour | Tender crumb, less gluten | Can be mixed with all-purpose for balance |
Dutch-Processed Cocoa | Rich flavor, dark color, stable structure | Look for a good quality brand |
Brown Sugar | Moisture, complex flavor | Use light or dark, depending on your preference |
StepbyStep: Baking Your Chocolate Cake for Fondant Success
StepbyStep: Baking Your Chocolate Cake for Fondant Success
Get Ready: Prep and Preheat
let's get down to business. First things first, preheat your oven. Temperature is key, and for this recipe, 325°F (160°C) is the sweet spot. It's lower than usual, which helps the cake bake evenly and prevents a dome from forming – crucial for a flat surface that's fondant-ready. Next, grease and flour your cake pans. I swear by parchment paper rounds at the bottom, too. They make releasing the cake a breeze and save you from any sticking disasters.
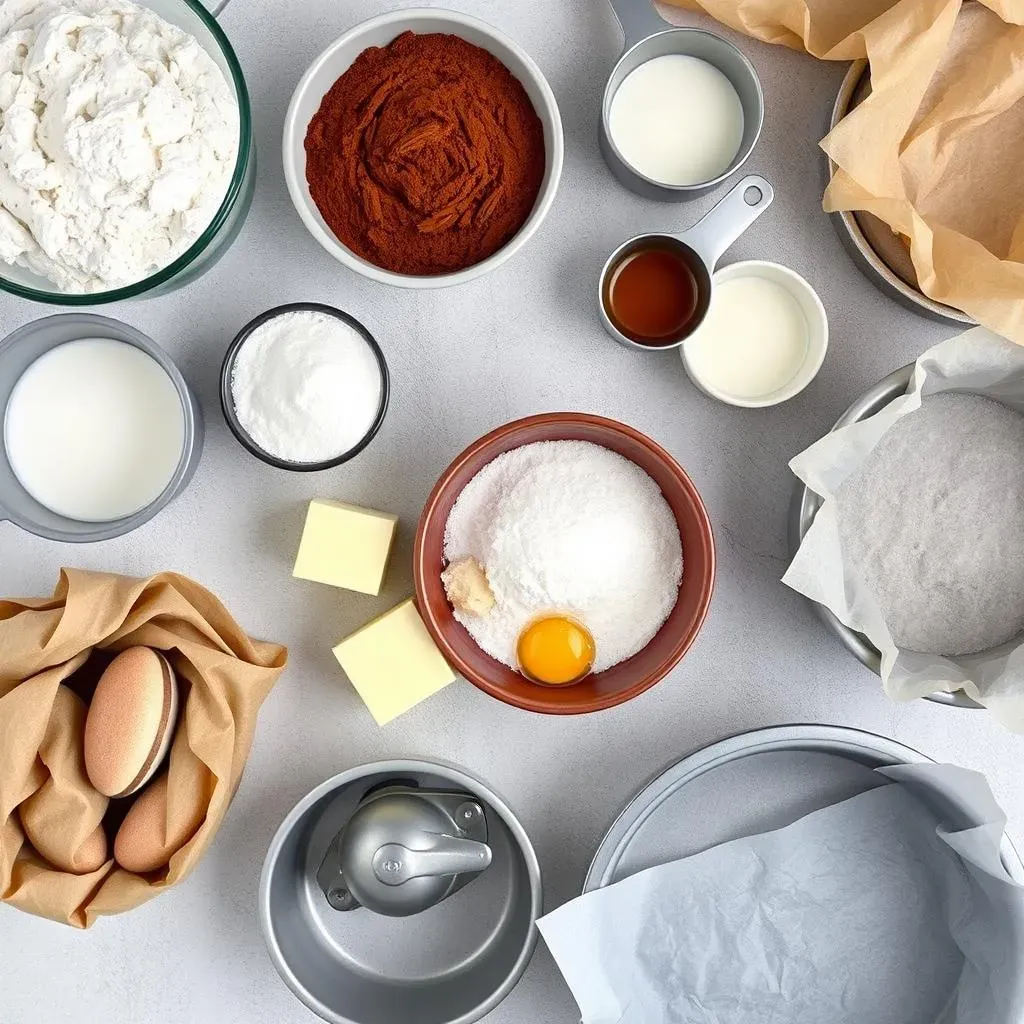
Now, gather all your ingredients. Make sure your butter and eggs are at room temperature. This helps them emulsify properly, creating a smooth batter and a tender cake. Measure everything out precisely. Baking is a science, people, and accuracy matters. Got everything? Good. Let's move on to the batter.
Mix It Up: Creating the Perfect Batter
Time to mix the batter! In a large bowl, cream together the butter and sugar until light and fluffy. This step is super important because it incorporates air into the batter, which contributes to the cake's light texture. Next, beat in the eggs one at a time, followed by the vanilla extract. Now, in a separate bowl, whisk together the flour, cocoa powder, baking powder, baking soda, and salt. This ensures that the dry ingredients are evenly distributed, preventing any pockets of baking soda or cocoa powder in your cake.
Gradually add the dry ingredients to the wet ingredients, alternating with the buttermilk or sour cream. Start and end with the dry ingredients. This helps prevent overmixing, which can lead to a tough cake. Mix until just combined. Be careful not to overmix! Finally, stir in the hot coffee or water. This will thin out the batter and intensify the chocolate flavor.
Don't have buttermilk?
Bake and Cool: The Final Stretch
Pour the batter into your prepared cake pans, dividing it evenly. Bake for 30-35 minutes, or until a toothpick inserted into the center comes out clean. Keep a close eye on them, as baking times can vary depending on your oven. Once the cakes are done, let them cool in the pans for 10 minutes before inverting them onto a wire rack to cool completely.
Resist the urge to frost or fondant them while they're still warm! This can cause the frosting to melt or the fondant to sweat. Once the cakes are completely cool, wrap them tightly in plastic wrap and chill them in the refrigerator for at least an hour. This will make them easier to handle and frost. Trust me, patience is key here.
Cooling Checklist:
- Cool in pans for 10 minutes
- Invert onto wire rack
- Cool completely
- Wrap tightly in plastic wrap
- Chill for at least 1 hour
Tips and Tricks for Flawless Fondant on Your Chocolate Cake
Tips and Tricks for Flawless Fondant on Your Chocolate Cake
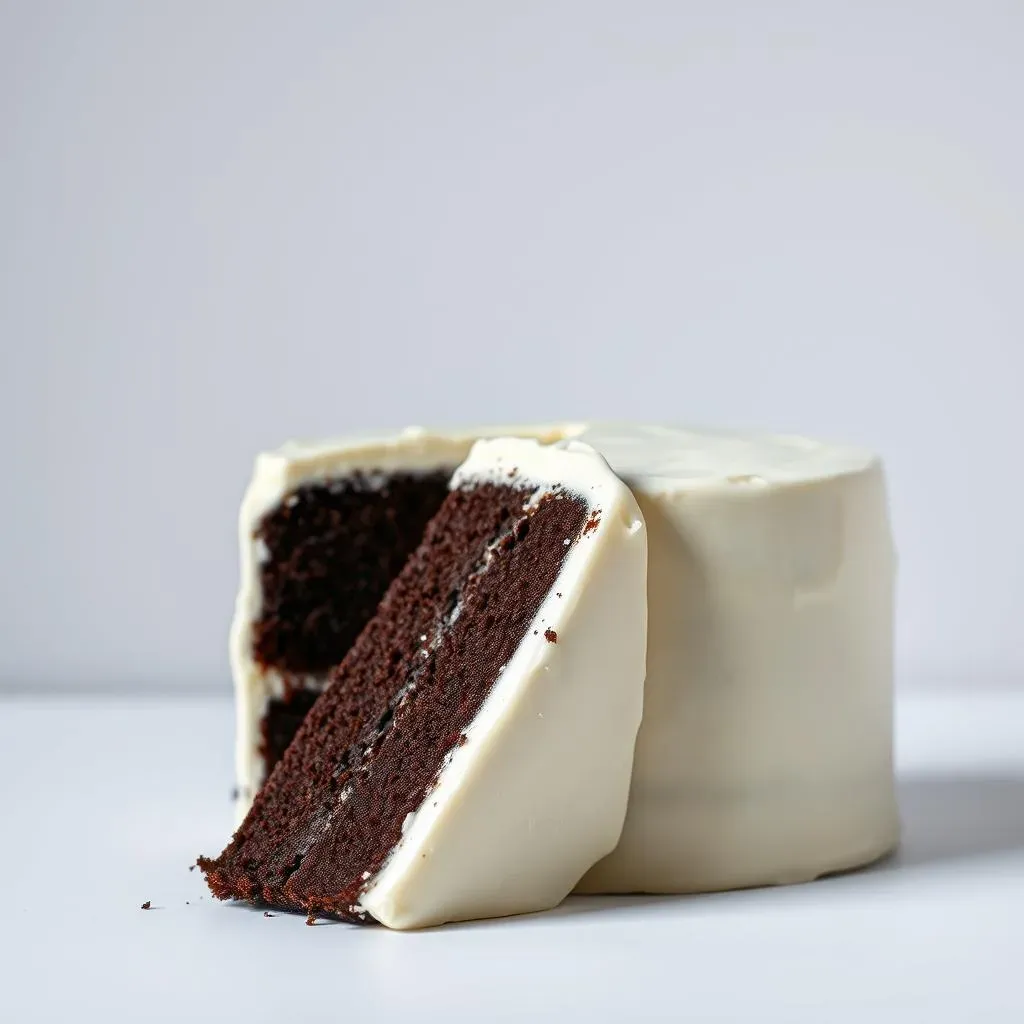
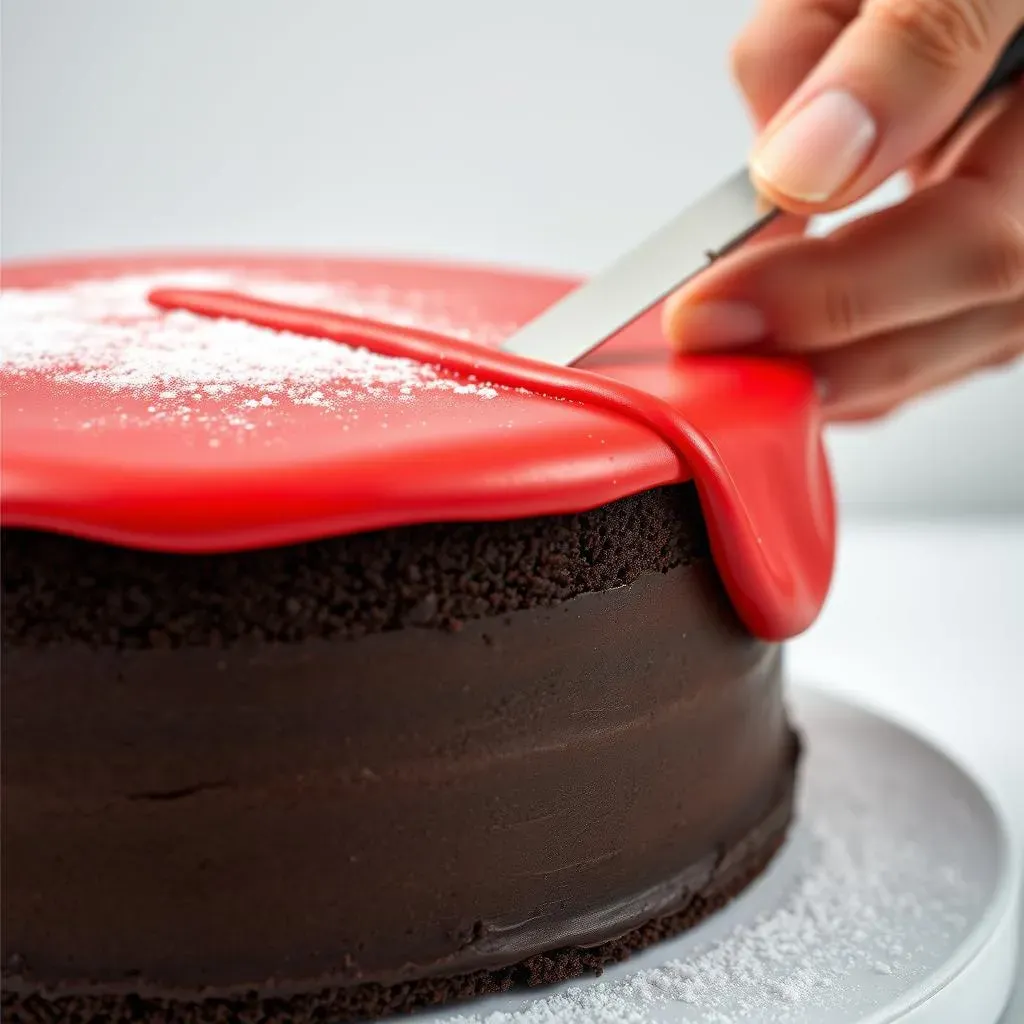
Alright, let's talk fondant! Getting that smooth, professional finish can feel like a Herculean task, but trust me, it's totally achievable with a few tips and tricks for flawless fondant on your chocolate cake. First off, the right tools make all the difference. A good rolling pin (preferably non-stick), a sharp knife or pizza cutter, and smoothing tools are essential. And don't skimp on the cornstarch or powdered sugar! These are your best friends when it comes to preventing the fondant from sticking to your work surface.
Before you even think about rolling out the fondant, make sure your cake is properly prepped. That means a smooth, even layer of buttercream or ganache. Any imperfections on the cake will show through the fondant, so take your time and get it as smooth as possible. Chill the cake for at least 30 minutes after frosting it to firm it up. This will give you a solid base to work with.
Rolling out fondant can be tricky, but here's a pro tip:
When you're ready to drape the fondant over the cake, gently lift it and center it as best you can. Use your hands or fondant smoothers to gently press the fondant onto the cake, starting from the top and working your way down the sides. Be careful to avoid air bubbles! If you do get air bubbles, use a pin to prick them and smooth the fondant over.
Once the fondant is smoothed, trim off the excess with a sharp knife or pizza cutter. Use a fondant smoother to blend the edges and create a clean, professional finish. And there you have it – a flawless fondant finish on your delicious chocolate cake! With a little practice and these handy tips, you'll be creating stunning cakes in no time.
Here's a quick recap:
- Use the right tools
- Prep your cake with a smooth base
- Roll fondant larger than needed
- Smooth carefully to avoid air bubbles
- Trim and blend edges for a clean finish
Your Fondant-Ready Chocolate Cake Awaits
With this best chocolate cake recipe for fondant covering, you’re now equipped to create stunning cakes that not only look spectacular but taste incredible too. Remember, the key is in the balance – a sturdy structure paired with a moist, flavorful crumb. Don't be afraid to experiment with variations and make this recipe your own. Happy baking, and may your cakes always rise to the occasion!