Table of Contents
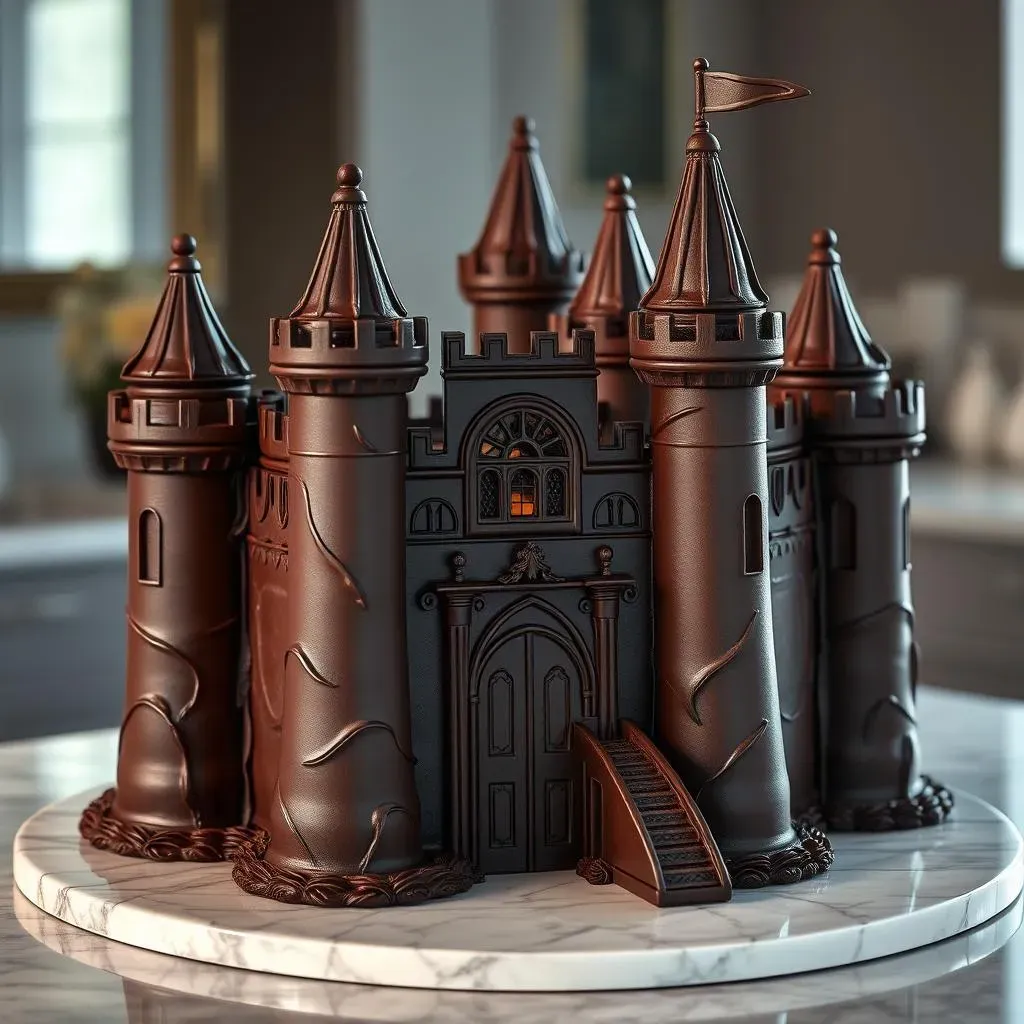
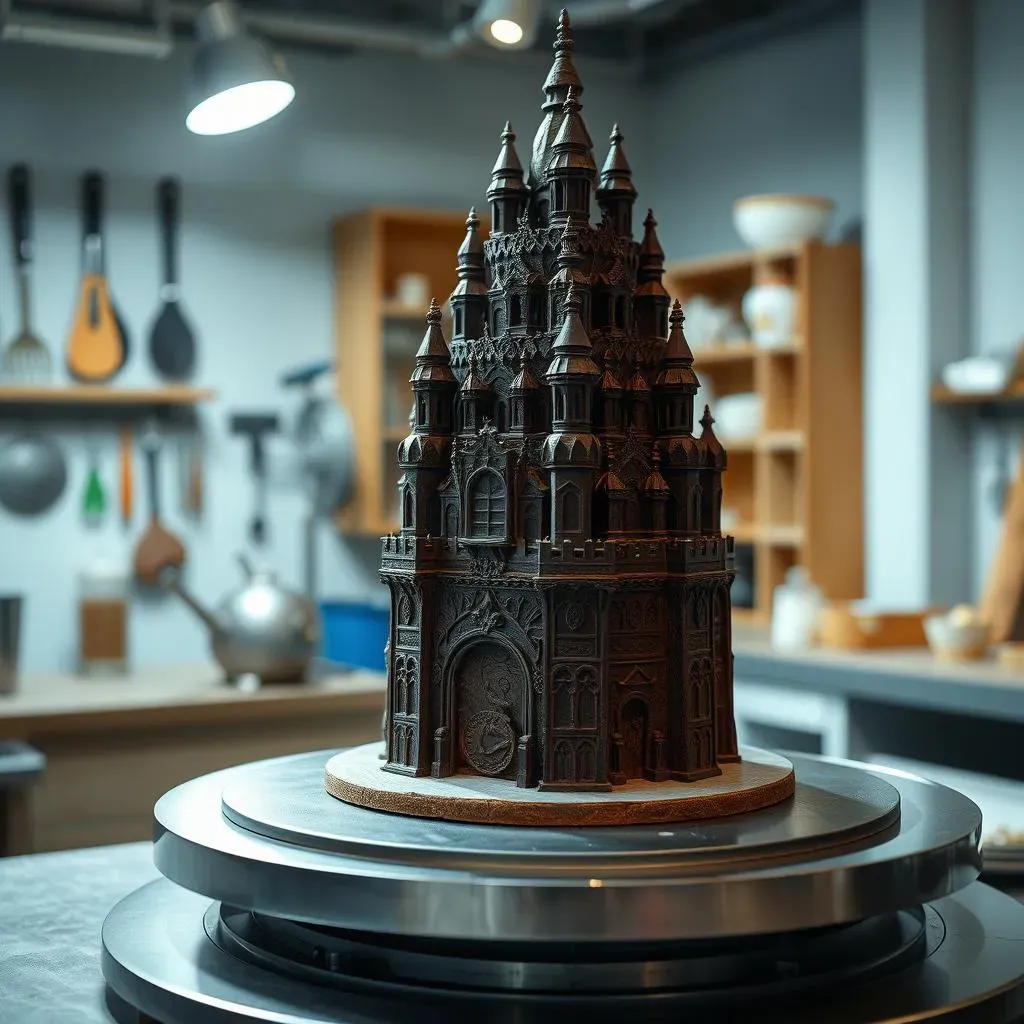
Ever dreamt of creating a gravity-defying cake, a sculpted masterpiece that tastes as amazing as it looks? It all starts with the right foundation. Forget those delicate, crumbly cakes that fall apart at the mere sight of a knife. You need a cake with backbone, a cake that's sturdy enough to handle your artistic ambitions, yet moist and delicious enough to impress every palate. That's where the best chocolate cake recipe for carving comes in. This isn't just another chocolate cake recipe; it's a baker's blueprint for edible architecture. We're diving deep into the secrets of creating a cake that's both a sculptor's dream and a chocolate lover's fantasy. From choosing the right ingredients to mastering the baking process, we'll equip you with everything you need to create a show-stopping cake. Get ready to unleash your inner artist and transform ordinary batter into extraordinary creations. Let's get baking!
Why This is the Best Chocolate Cake Recipe for Carving
Why This is the Best Chocolate Cake Recipe for Carving
so you're looking for a chocolate cake that can handle some serious sculpting, right? You need something that won't crumble under pressure, literally. This recipe isn't just about taste (though trust me, it's delicious). It's about structure. We're talking a cake that's dense enough to carve intricate details, stack layers high without collapsing, and still have that melt-in-your-mouth chocolate flavor. Forget those airy, delicate cakes – they're great for eating with a fork, but a nightmare for carving. This recipe is engineered for stability, using the right balance of ingredients to create a firm but moist texture. It's the difference between a wobbly tower of cake and a stunning, gravity-defying masterpiece.
Ingredients for a Sturdy Chocolate Cake
Ingredients for a Sturdy Chocolate Cake
The Foundation: Flour and Cocoa
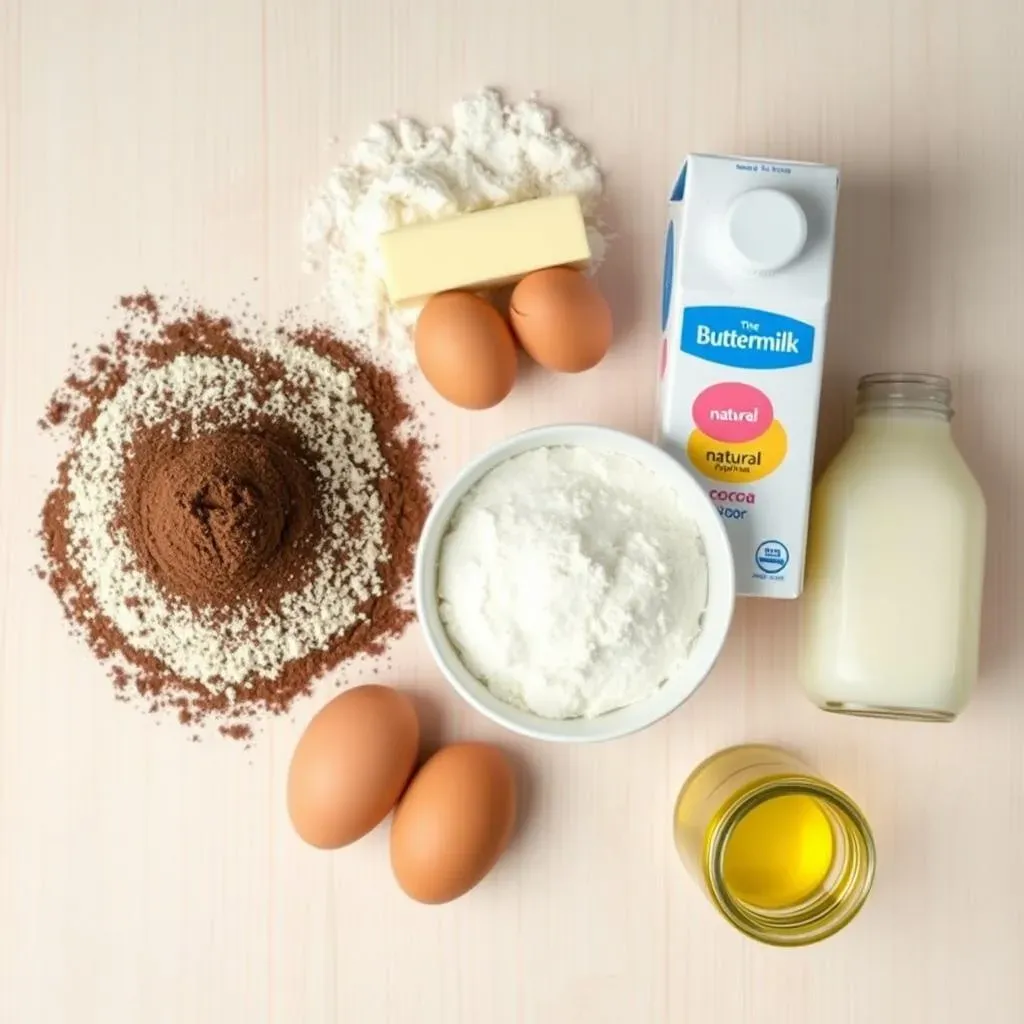
let's talk ingredients. Forget cake flour for this one. We need all-purpose flour – it provides the gluten structure necessary for a sturdy cake. And when it comes to cocoa powder, go for natural cocoa powder, not Dutch-processed. Natural cocoa is slightly acidic, which helps to tenderize the gluten and create a more moist cake, while still providing that intense chocolate flavor we all crave. The type of cocoa powder used significantly impacts the cake's structure and taste.
Also, don’t skimp on the flour. It's tempting to reduce it, thinking it'll make the cake more tender, but that's a recipe for disaster when you're carving. Think of flour as the scaffolding of your cake – it's what holds everything together. The cocoa powder adds flavor, but also contributes to the cake's overall dryness, so finding the right balance is crucial. Too much cocoa, and your cake will be dry and crumbly; too little, and it won't have that rich chocolate punch.
The Binders: Eggs and Fat
Next up: eggs and fat. Eggs are essential for binding the ingredients together and adding richness. Don't be tempted to use only egg whites – the yolks contribute to the cake's tenderness and moisture. As for fat, butter is my go-to choice. It adds flavor and creates a tender crumb. Shortening can also be used, but it doesn't provide the same depth of flavor. The key here is to use room-temperature butter – it creams more easily with the sugar, creating a light and airy batter that will translate into a tender cake.
Consider adding a touch of oil, too. While butter provides flavor, oil adds moisture. A combination of both butter and oil will give you the best of both worlds: a flavorful, moist, and sturdy cake. And don't forget the liquid! Buttermilk is my secret weapon. Its acidity helps to tenderize the gluten, creating a more tender cake. Plus, it adds a subtle tang that enhances the chocolate flavor. If you don't have buttermilk on hand, you can substitute it with regular milk mixed with a tablespoon of lemon juice or vinegar.
Ingredient | Why It's Important | Tips |
|---|---|---|
All-Purpose Flour | Provides structure and stability | Don't substitute with cake flour |
Natural Cocoa Powder | Adds chocolate flavor and tenderizes gluten | Avoid Dutch-processed for best results |
Room-Temperature Butter | Adds flavor and creates a tender crumb | Cream with sugar for a light batter |
Buttermilk | Tenderizes gluten and enhances flavor | Substitute with milk + lemon juice/vinegar if needed |
StepbyStep Guide to Baking the Perfect Carving Cake
StepbyStep Guide to Baking the Perfect Carving Cake
Alright, let's get down to the nitty-gritty: baking the cake! First things first, preheat your oven to 325°F (160°C). This lower temperature ensures that the cake bakes evenly and doesn't develop a dome, which is crucial for carving. Grease and flour your cake pans – I recommend using two 8-inch round pans. You can also use cake strips, which help to insulate the sides of the pan and prevent the cake from browning too quickly.
Now, cream together the room-temperature butter and sugar until light and fluffy. This step is essential for creating a tender cake. Don't rush it! Beat the mixture for at least 5 minutes, or until it's pale and creamy. Next, beat in the eggs one at a time, followed by the vanilla extract. Make sure each egg is fully incorporated before adding the next. In a separate bowl, whisk together the all-purpose flour, natural cocoa powder, baking soda, baking powder, and salt. Gradually add the dry ingredients to the wet ingredients, alternating with the buttermilk, beginning and ending with the dry ingredients. This ensures that the batter doesn't become overmixed.
Step | Description | Why It Matters |
|---|---|---|
Preheat Oven | 325°F (160°C) | Ensures even baking and prevents doming |
Grease & Flour Pans | Use 8-inch round pans | Prevents sticking and ensures easy removal |
Cream Butter & Sugar | Until light and fluffy | Creates a tender cake |
Alternate Dry & Wet | Begin and end with dry | Prevents overmixing |
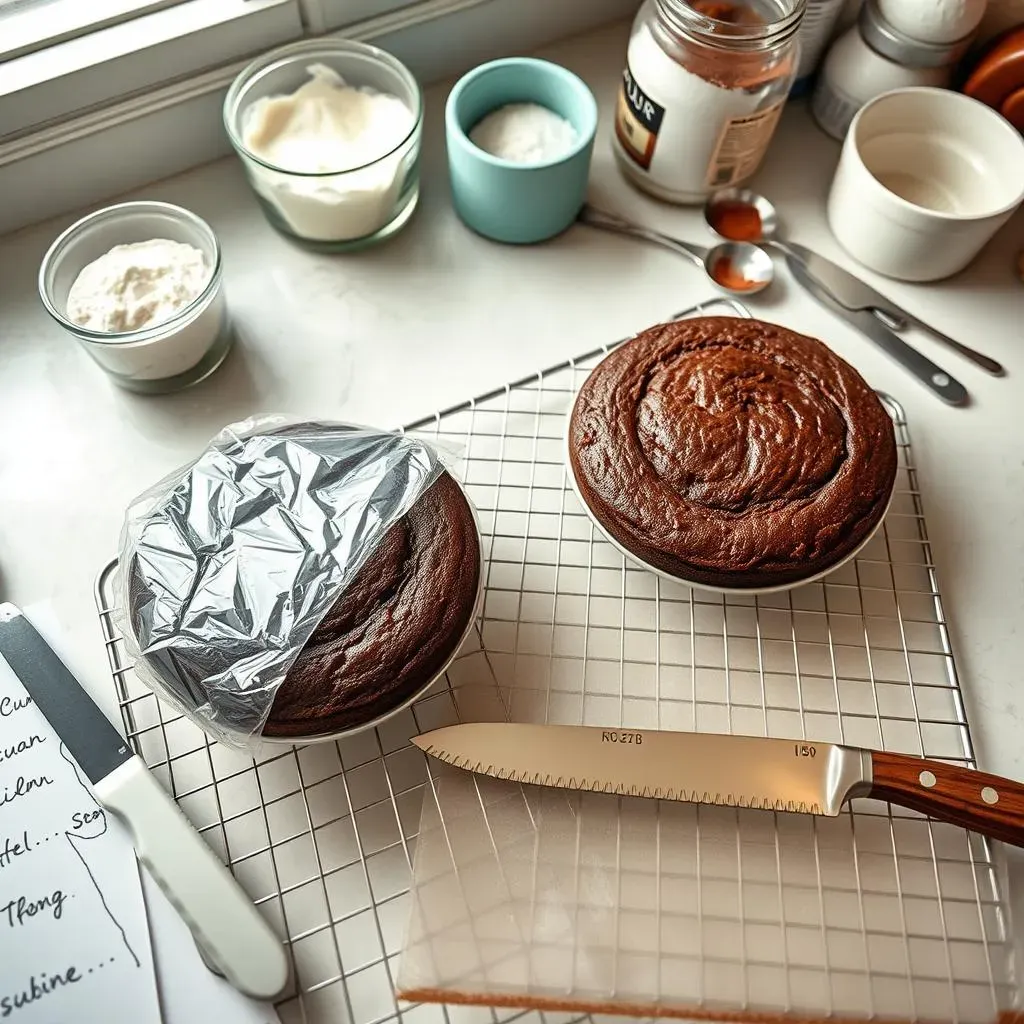
Divide the batter evenly between the prepared cake pans and bake for 30-35 minutes, or until a wooden skewer inserted into the center comes out clean. Let the cakes cool in the pans for 10 minutes before inverting them onto a wire rack to cool completely. Once the cakes are completely cool, wrap them tightly in plastic wrap and refrigerate them for at least 2 hours, or preferably overnight. This chilling step is crucial for making the cake easier to carve. Cold cake is firmer and less likely to crumble.
Before you start carving, level the cakes using a serrated knife. This ensures that your cake will sit flat and won't be lopsided. Now you're ready to carve! Use a sharp knife or a cake carving tool to shape the cake into your desired design. And remember, don't be afraid to make mistakes – it's just cake! If you mess up, you can always patch it up with frosting or cover it with fondant. The most important thing is to have fun and let your creativity shine!
“Baking is therapy.” – Paul Hollywood
Tips and Tricks for Carving Your Chocolate Cake Masterpiece

Tips and Tricks for Carving Your Chocolate Cake Masterpiece
Chill Out: Temperature is Key
listen up, because this is where the magic (or the madness) happens. First and foremost: chill your cake! I cannot stress this enough. A cold cake is a firm cake, and a firm cake is your best friend when it comes to carving. Think of it like trying to sculpt butter that's been sitting out in the sun versus butter straight from the fridge. The difference is night and day. Wrap your cooled cakes tightly in plastic wrap and let them chill in the refrigerator for at least two hours, but preferably overnight. Trust me, that little bit of patience will save you a whole lot of frustration.
When you're ready to carve, work quickly! The longer the cake sits out at room temperature, the softer it will become, and the harder it will be to achieve clean, crisp lines. Have your design in mind, your tools ready, and a clear workspace. This isn't the time for distractions! Think of yourself as a surgeon performing a delicate operation – precision and speed are essential.
Tools of the Trade: Sharpen Your Skills (and Your Knives)
Now, let's talk tools. You don't need to go out and buy a fancy cake-carving kit (although those can be fun!). A good serrated knife is your best friend for leveling the cake and making large cuts. For finer details, I recommend a small paring knife or even a clay sculpting tool. The key is to use sharp tools! A dull knife will tear the cake and create crumbs, which is the last thing you want. Keep a bowl of warm water nearby to dip your knife in occasionally – this helps to keep the blade clean and prevents it from sticking to the cake.
And don't forget about supports! If you're creating a multi-tiered cake or a design with gravity-defying elements, you'll need to use dowels or skewers to provide support. These will help to prevent the cake from collapsing under its own weight. Think of them as the hidden infrastructure that keeps your masterpiece standing tall. Nobody wants a leaning tower of cake! Also, consider using a turntable. It allows you to easily rotate the cake while carving, giving you access to all sides without having to constantly pick it up and move it.
Tip | Description | Why It Matters |
|---|---|---|
Chill Cake | Refrigerate for at least 2 hours | Firms the cake for easier carving |
Sharp Tools | Use serrated and paring knives | Ensures clean cuts and prevents tearing |
Warm Water | Dip knife in warm water | Prevents sticking and keeps blade clean |
Supports | Use dowels or skewers | Provides stability for multi-tiered cakes |
Conclusion: Your Carved Chocolate Cake Awaits
So, there you have it – the keys to unlocking the best chocolate cake recipe for carving success! With the right ingredients, careful technique, and a dash of creativity, you're well on your way to creating stunning, edible art. Don't be afraid to experiment with flavors, shapes, and decorating styles to truly make it your own. Remember, every masterpiece starts with a single slice. Now go forth, bake boldly, and carve your way to cake decorating glory!