
Table of Contents
Ever dream of a dessert that's both intensely chocolatey and bursting with fresh, fruity flavor? Then you've come to the right place! We're about to embark on a delicious journey to create the best chocolate and raspberry cake recipe you've ever tasted. Forget dry, boring cakes; this one is layers of moist, dark chocolate sponge, a tangy homemade raspberry filling, and a smooth, decadent chocolate buttercream. It's not just a cake; it's an experience. In this article, we'll start by making the perfect chocolate cake base, then move on to crafting a bright and flavorful raspberry filling. After that, we'll assemble the masterpiece, and finally, we'll top it all off with a luxurious ganache that'll make your taste buds sing. So, grab your apron, preheat your oven, and get ready to bake a cake that's sure to impress.
Making the Best Chocolate Cake Base
Making the Best Chocolate Cake Base
The Foundation of Flavor
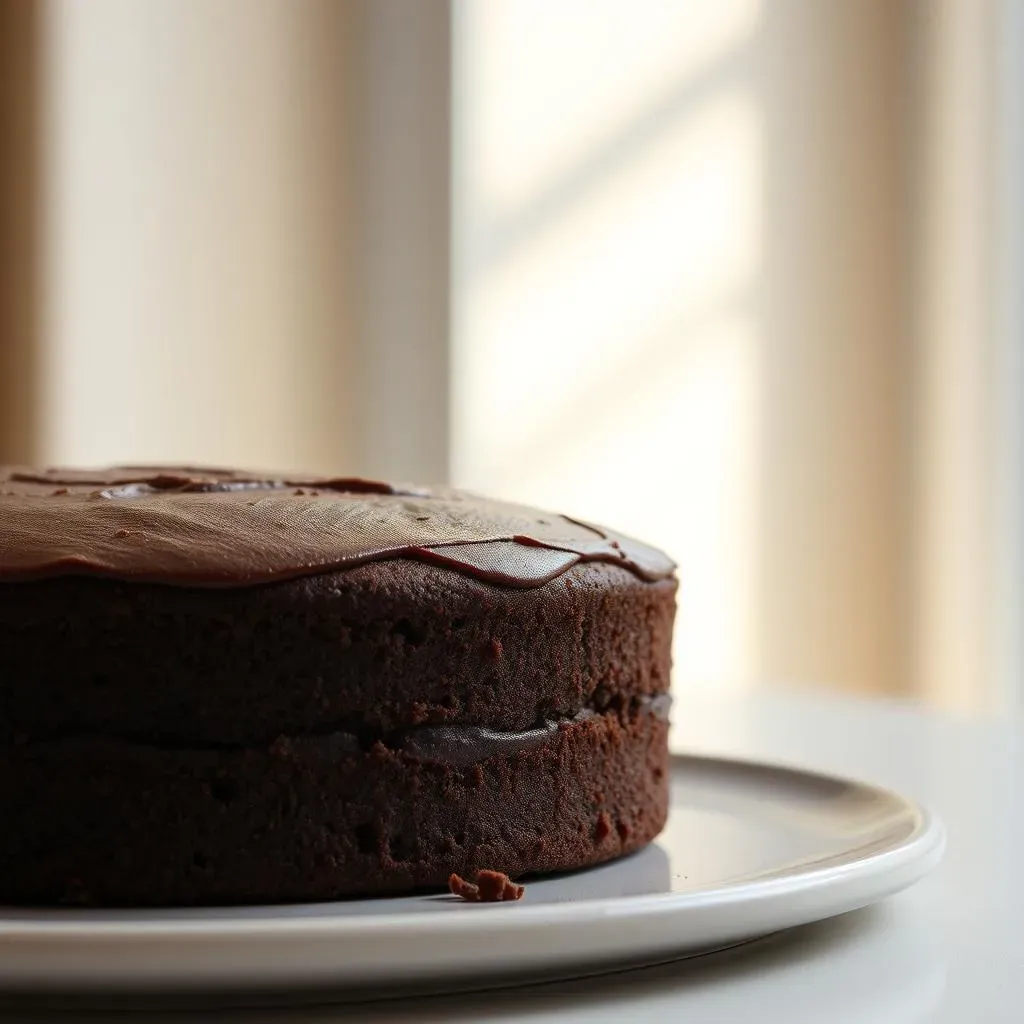
let's talk chocolate cake, the real star of this show. It's not just about throwing ingredients together, it's about creating a base that's moist, rich, and has that deep chocolate flavor we all crave. We're aiming for a cake that's tender, not dry, and sturdy enough to hold up to the raspberry filling and ganache we'll be adding later. Forget those store-bought mixes; we're making this from scratch, and trust me, it's worth every single minute. The secret is in the details, from the type of cocoa powder we use to the way we mix the batter. So, get ready to become a chocolate cake master.
First things first, let's gather our ingredients, and please, make sure they are at room temperature. This is not just a suggestion, it's a rule! Room temperature ingredients emulsify better, which means they combine more smoothly, resulting in a lighter, fluffier cake. We're talking about butter, eggs, and even the milk – everything needs to be cozy and at the same temperature. Then, pay attention to the order you add the ingredients; it's not random, there is a method to this madness. We'll start with the dry ingredients, then move onto the wet, and finally, we'll bring them together with a gentle hand. No overmixing allowed, that's a big no-no, or you will end up with a tough cake.
Key Ingredients and Their Roles
Let’s get into the nitty-gritty of ingredients. Think of your cocoa powder like you would a fine wine, you want the good stuff! Dutch-processed cocoa gives you a deep, dark color and a smoother chocolate flavor, while natural cocoa can sometimes be a bit more bitter, but that also depends on the brand. If you don't have buttermilk, don't panic! You can easily make a substitute by adding a tablespoon of lemon juice or white vinegar to regular milk, letting it sit for 5 minutes. The acid in the buttermilk helps tenderize the gluten in the flour, making your cake extra soft. And don’t forget to sift your dry ingredients – it’s not just for show, it aerates the flour and cocoa, making them easier to incorporate and preventing lumps in your batter.
Now, about the mixing. You’ve got to be gentle, like you’re handling a newborn baby. The goal is to combine everything until it's just mixed, no more. Overmixing develops the gluten in the flour, resulting in a dense, tough cake. So, mix until just combined, and then stop! Use a rubber spatula to scrape down the sides and bottom of the bowl to make sure everything is well incorporated. And when it comes to baking, make sure your oven is properly preheated. A cold oven will cause the cake to bake unevenly, and nobody wants that. Always bake your cake in the center rack, it's the goldilock zone for temperature.
Ingredient | Why It Matters |
|---|---|
Dutch-Processed Cocoa | Deep flavor, dark color |
Room Temperature Ingredients | Better emulsification, lighter cake |
Buttermilk | Tenderizes gluten, softer crumb |
Sifted Dry Ingredients | Prevents lumps, aerated batter |
Crafting the Perfect Raspberry Filling
Crafting the Perfect Raspberry Filling
The Tangy Heart of Our Cake
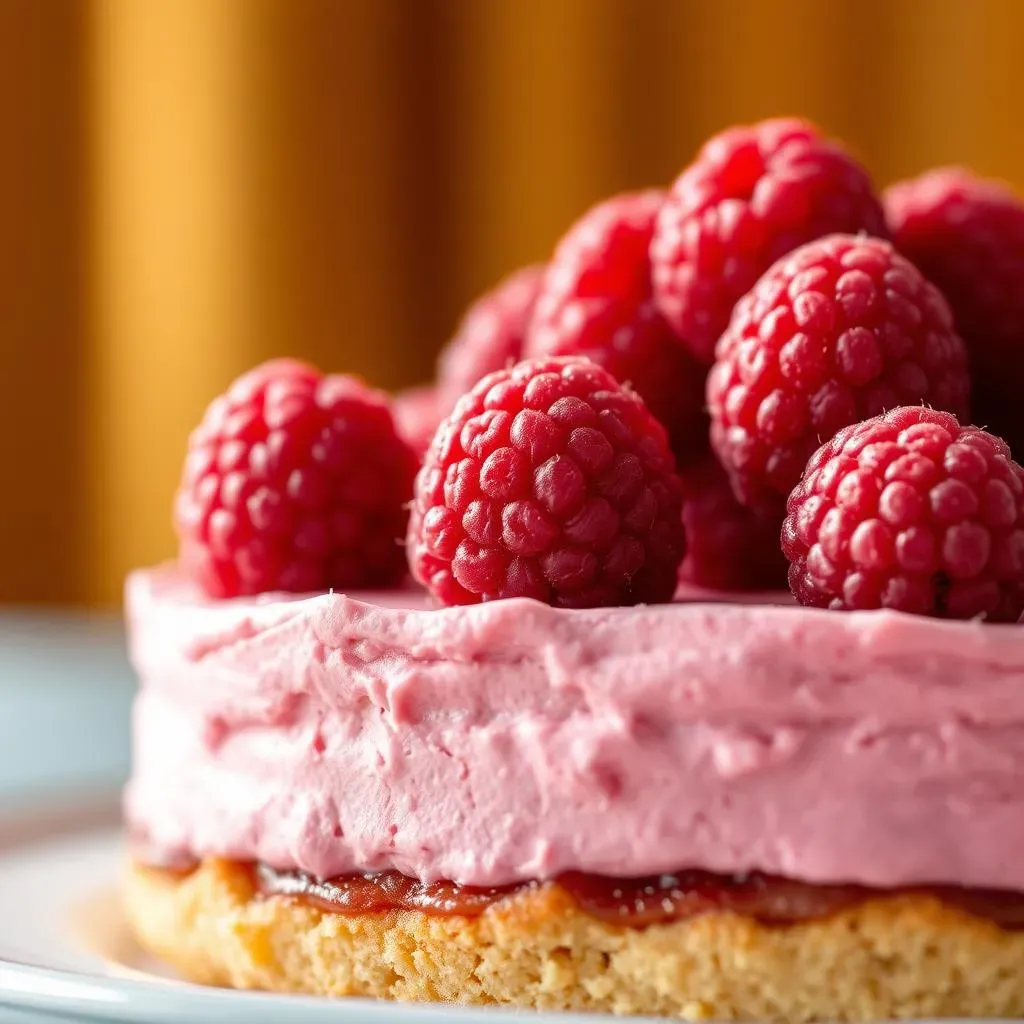
Alright, so we've got our chocolate cake sorted, and now it's time to focus on the raspberry filling, the real game changer. This isn't just some jam slapped between layers; it's a carefully crafted concoction that balances sweetness with a bright, tangy punch. Think of it as the counterpoint to the rich chocolate, a little "zing" that wakes up your taste buds. We're going for a filling that's not too runny, not too thick, just perfectly spoonable and bursting with fresh raspberry flavor. And the best part? It's ridiculously easy to make. We're not messing around with complicated techniques here, just a few simple steps that will transform frozen raspberries into a delicious, vibrant filling.
We're starting with frozen raspberries, because honestly, they're just as good as fresh and way more convenient. Plus, they release their juices as they thaw, which is exactly what we need for the filling. You'll want to cook them down with some sugar and a touch of cornstarch to thicken it up. The sugar helps draw out the natural sweetness of the raspberries, while the cornstarch acts as a binder, giving the filling that perfect consistency. The trick here is to not overcook it; we want to keep some of that natural raspberry texture and not turn it into a jam. Just cook until the raspberries are soft, the juices have thickened, and you've got a beautiful, glossy filling that's begging to be layered into our cake.
Ingredient | Purpose |
|---|---|
Frozen Raspberries | Convenient, great flavor |
Sugar | Sweetness, draws out juices |
Cornstarch | Thickens the filling |
Tips for the Best Raspberry Filling
Don't be tempted to add water to the raspberries; they'll release enough liquid on their own as they thaw. Keep the heat on medium, we don't want to burn the berries or boil them too aggressively, a gentle simmer is what we need. Taste as you go, and adjust the amount of sugar depending on the sweetness of your raspberries. If you're using super tart raspberries, you might want to add a little more sugar. And if you want to get fancy, you can add a squeeze of lemon juice or a dash of vanilla extract to the filling, this will brighten the raspberry flavor even more. But honestly, it's perfect just the way it is.
Once the filling is cooked, let it cool completely before you use it, if you use warm filling, it can melt the buttercream. I know it’s hard to resist, but trust me on this one. A cool filling will stay put when you layer it in the cake and won’t make a mess. While it's cooling, you can prep your buttercream for assembly. And if you’re making this ahead of time, the raspberry filling can be stored in an airtight container in the fridge for up to 3 days. So you can make it ahead of time and focus on the cake.
- Use frozen raspberries for convenience.
- Simmer gently, don't boil.
- Cool filling completely before assembling.
- Adjust sugar to taste.
Assembling Your Chocolate Raspberry Dream Cake
Assembling Your Chocolate Raspberry Dream Cake
Layering Like a Pro
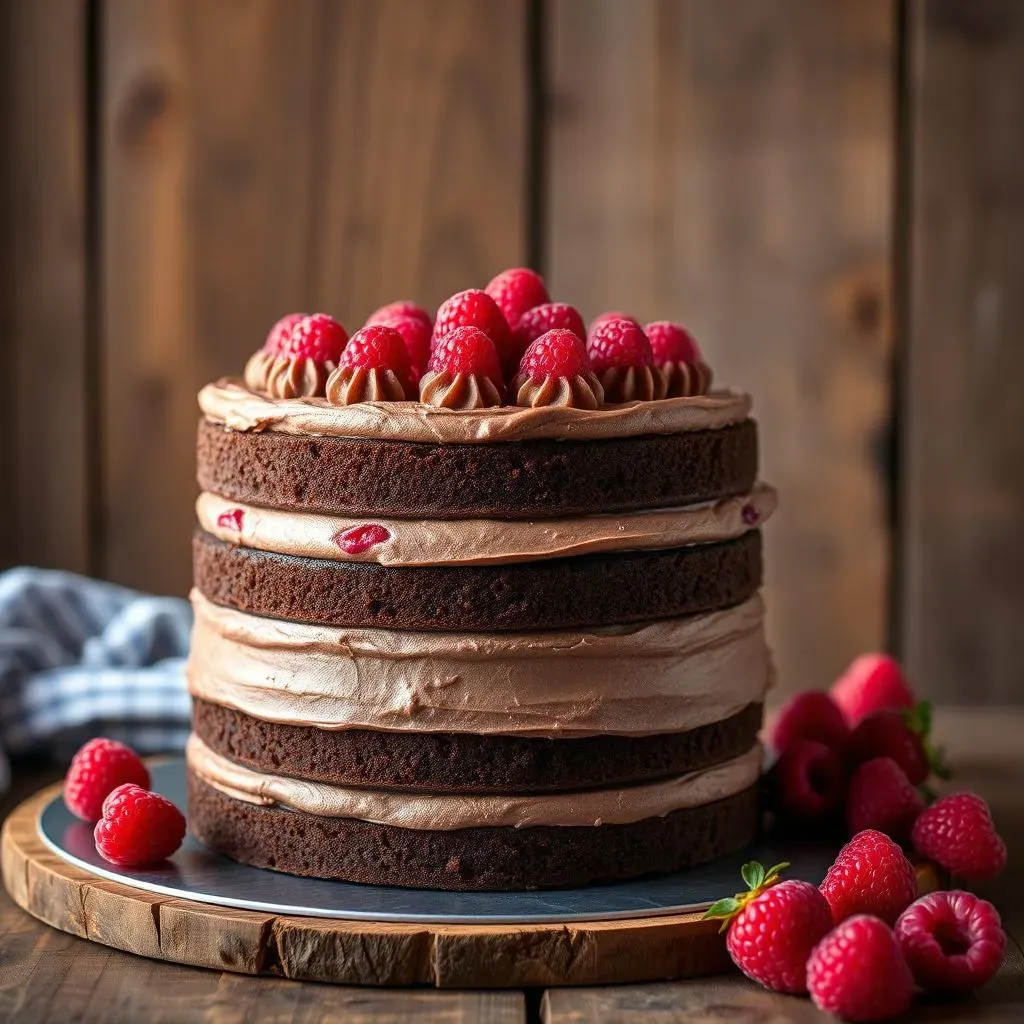
we've reached the most exciting part, assembling our masterpiece! This is where all our hard work comes together, transforming individual components into a magnificent chocolate raspberry cake. Think of it like building with LEGOs, but instead of plastic bricks, we're using layers of chocolate cake, raspberry filling, and buttercream frosting. The key here is to be patient and precise, ensuring each layer is even and well-distributed. We're not going for a leaning tower of cake; we want something that's structurally sound and visually appealing. So, let's get started and create a cake that's as beautiful as it is delicious.
First, make sure your chocolate cake layers have cooled completely, nobody likes a melty cake. If you try to assemble it while it's still warm, the frosting will melt, and you'll end up with a big mess. If the cake has a dome, use a long serrated knife to trim the tops off, creating a flat surface for stacking. This helps to ensure the layers are even and the cake doesn't wobble. Place your first cake layer on a serving plate or cake stand, and then, using a spatula or piping bag, spread a generous layer of chocolate buttercream frosting evenly over the top. This layer of buttercream will act like glue, holding everything together and adding another layer of flavor.
Layer | Purpose |
|---|---|
Chocolate Cake | The base, provides structure |
Buttercream Frosting | Holds layers together, adds flavor |
Raspberry Filling | Tangy, fruity counterpoint |
Adding the Raspberry Filling
Now, with your buttercream layer in place, it’s time for the raspberry filling. Spread it evenly over the buttercream, leaving a small border around the edge. This will prevent the filling from oozing out when you add the next cake layer. Don't be shy with the filling, we want a good layer of that tangy raspberry goodness in every bite. Then, gently place your second cake layer on top, and repeat the process. Add another layer of buttercream, and then another layer of raspberry filling, followed by your final cake layer. If you’re using a three-layer cake, just continue this pattern until you reach the top.
Once your cake is assembled, you’ll want to do a crumb coat; this is a thin layer of frosting that seals in all the crumbs and gives you a smooth surface for your final layer of frosting. Don't worry if it looks a little messy at this stage, we’re going to fix it later. Place the cake in the refrigerator for about 30 minutes to allow the crumb coat to set. This will make it much easier to frost the cake without picking up any crumbs. Remember, patience is key; don’t try to rush the process. Give each layer enough time to set, and you’ll end up with a beautifully assembled cake that’s ready for its final touches.
- Cool cake layers completely.
- Trim cake tops for even layers.
- Use buttercream as "glue."
- Apply a crumb coat and chill.
Finishing Touches and Serving Your Best Chocolate Raspberry Cake
Finishing Touches and Serving Your Best Chocolate Raspberry Cake
The Grand Finale: Frosting and Ganache
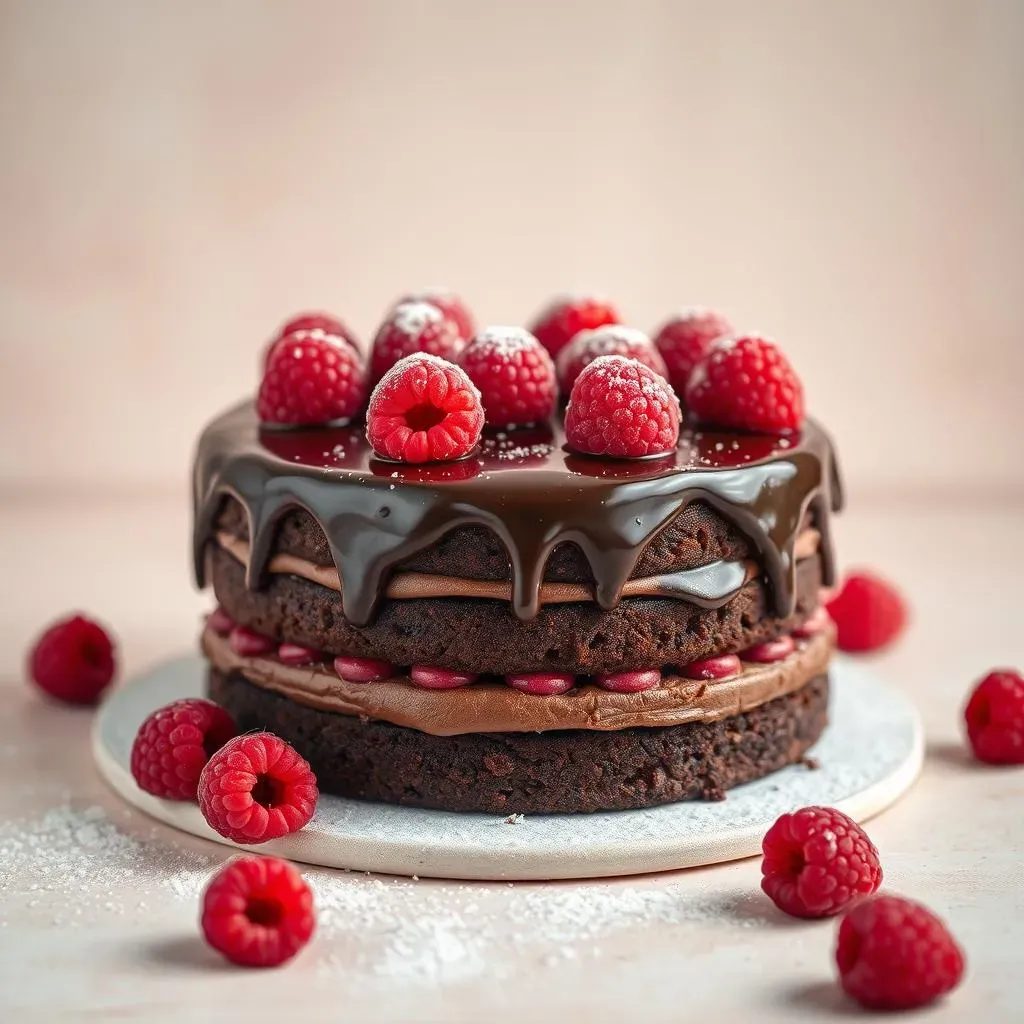
Alright, my friend, we're in the home stretch! We've assembled our cake, and now it's time for the final flourish: the frosting and ganache. This is where we transform our already delicious cake into a work of art. We're not just slapping on some frosting; we're creating a smooth, even canvas that's both visually appealing and adds another layer of flavor. Then comes the ganache, a rich, glossy glaze that cascades down the sides of the cake, adding a touch of elegance and sophistication. It's like the bow on a beautifully wrapped gift, the final touch that makes everything complete. So, let’s grab our spatulas and get ready to make this cake shine.
First, let's tackle the frosting. Take your remaining buttercream and apply it generously over the entire cake, making sure to cover all the sides and top. Use an offset spatula to smooth out the frosting, creating an even surface. Don't worry if it’s not perfect; we're going for a rustic look. If you want to get fancy, you can use a cake scraper to create smooth, sharp edges or add some swirls for a more textured look. But honestly, a simple, smooth layer of frosting is just as good. Once you’re happy with the frosting, it's time for the ganache. The ganache is a simple mixture of chocolate and cream, melted together until smooth and glossy. You can add a touch of raspberry liqueur for an extra layer of flavor, but it’s perfectly delicious without it.
Component | Purpose |
|---|---|
Buttercream Frosting | Smooth base, adds flavor |
Chocolate Raspberry Ganache | Rich glaze, adds elegance |
Once your ganache is ready, let it cool slightly, so it thickens a bit. Then, pour it over the center of the cake, allowing it to drip down the sides. Use a spatula to gently guide the ganache, ensuring it covers the entire cake. If you want to get creative, you can add some fresh raspberries on top or chocolate shavings. But honestly, the ganache is so beautiful on its own, that it needs very little to make it look stunning. Once you’ve added the final touches, let the cake set for a bit before serving.
Now, for the serving, this cake is best served at room temperature, so take it out of the fridge about an hour before you plan to cut into it. Use a long, serrated knife to cut clean slices, and serve with a scoop of vanilla ice cream or a dollop of whipped cream if you are feeling fancy. This cake is perfect for any occasion, from birthdays to holidays, or just a simple celebration of life. And the best part? You made it yourself, so enjoy the fruits (or raspberries) of your labor. This isn't just a cake; it’s a testament to your baking skills. So, go ahead, take a bite, and savor every single moment. You deserve it!
- Frost cake evenly with buttercream.
- Pour ganache over the cake, letting it drip.
- Add decorative touches if desired.
- Serve at room temperature.
The Sweet Finale: Enjoying Your Best Chocolate Raspberry Cake
And there you have it – your very own stunning, homemade chocolate raspberry cake! From the rich, moist layers to the burst of raspberry goodness and the final flourish of ganache, you've created something truly special. Baking this cake might seem like a bit of an adventure, but with each step, you've learned new skills and created a treat that's perfect for any celebration, or frankly, just because. So go ahead, slice a generous piece, share it with those you love, and savor the fruits (and chocolate) of your labor. Remember, the best chocolate and raspberry cake recipe is one that's made with love, a little bit of patience, and maybe a sneaky taste test or two along the way. Happy baking, and even happier eating!