
Table of Contents
Introduction
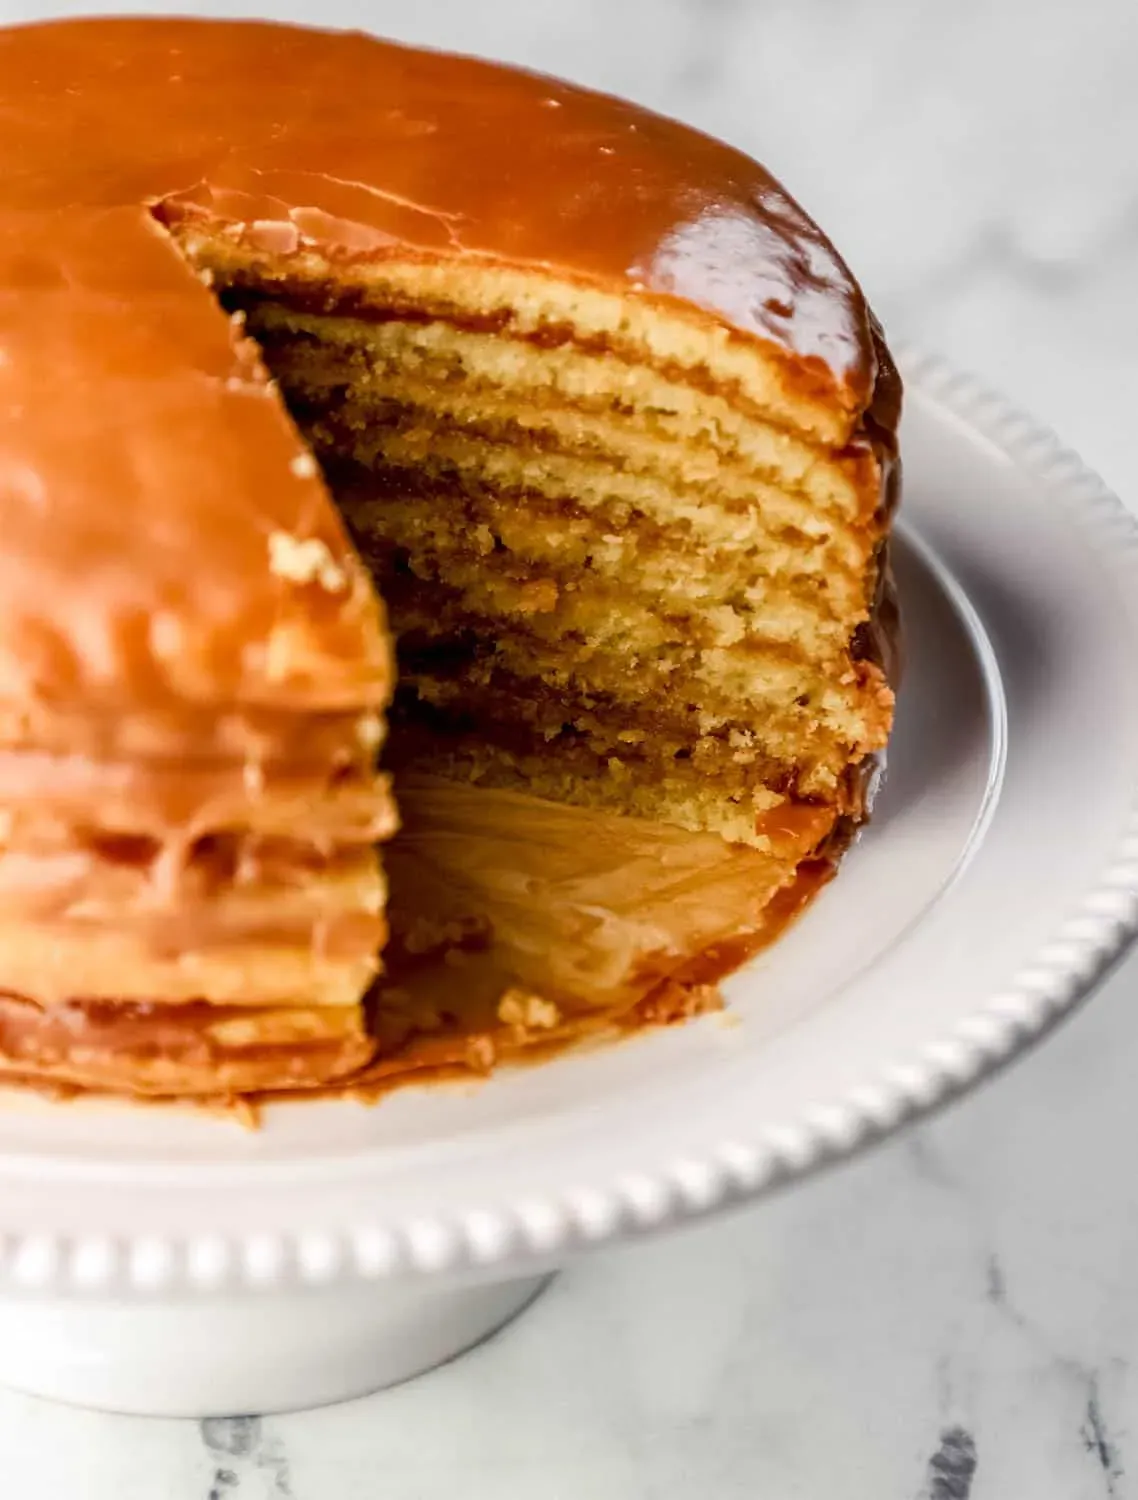
Alright, let's talk about a cake that’s less a dessert and more a culinary rite of passage: the 9 layer chocolate cake. This isn't your average sheet cake slapped together in ten minutes. This is a project. It's the kind of cake that shows up at family reunions and church picnics, instantly recognizable by its impressive height and that glossy, fudgy boiled icing. For generations, mastering the 9 layer chocolate cake recipe has been a marker of a serious baker, or at least someone with a lot of patience and a love for real chocolate flavor. Maybe you’ve seen one and thought, "How on earth do they do that?" Or perhaps you’ve attempted it before and ended up with fewer layers than intended or icing that didn't cooperate. Fear not. We're stripping away the mystery and walking you through the process, layer by thin layer. We'll tackle baking those impossibly thin rounds and demystifying that classic boiled icing. Get ready to bake a cake that’s not just delicious, but genuinely impressive. Stick with us, and you’ll conquer the classic 9 layer chocolate cake recipe.
Why the 9 Layer Chocolate Cake is a Southern Legend
Why the 9 Layer Chocolate Cake is a Southern Legend
More Than Just Cake: A Culinary Icon
Let's be honest, making a 9 layer chocolate cake recipe isn't for the faint of heart. It's a commitment. Nine thin layers, stacked high, bound together by a glossy, cooked fudge icing. This isn't something you whip up on a Tuesday after work. This is a cake reserved for Sundays, holidays, and showing off at the potluck. Its towering presence on a dessert table commands respect, a silent declaration that someone put in serious effort. It's a tangible piece of Southern culinary history, a recipe passed down through generations, often scribbled on worn index cards.
The magic isn't just in the height; it's in the ratio. You get this perfect bite of moist, tender cake followed immediately by that rich, slightly chewy, intensely chocolatey cooked icing. It's a texture and flavor combination that's distinct and deeply satisfying. Anyone who grew up below the Mason-Dixon line likely has a memory tied to this specific dessert, whether it was Grandma's special occasion cake or the star of the church social. It's less about complexity of ingredients and more about the technique and patience required.
A Symbol of Southern Hospitality (and Bragging Rights)
This cake is a flex, plain and simple. Bringing a perfectly executed 9 layer chocolate cake recipe to an event says, "Yes, I love you enough to spend half my Saturday in the kitchen." It embodies a certain kind of Southern hospitality – generous, slightly excessive, and deeply rooted in tradition. It’s a conversation starter. People will ask who made it, how they got the layers so thin, and marvel at the sheer verticality of the thing. It’s a performance piece as much as it is a dessert.
Historically, this type of cake showcased a baker's skill and dedication. Baking nine separate layers, managing a finicky boiled icing that can turn granular in a heartbeat – these were not trivial tasks. It required attention to detail and a practiced hand. While modern recipes might simplify steps or offer shortcuts, the core challenge and the visual impact remain. It stands as a testament to a time when baking was a more labor-intensive, revered craft, solidifying its place as a true Southern legend.
Occasions Where the 9 Layer Chocolate Cake Reigns Supreme:
- Christmas Dinner
- Easter Celebrations
- Family Reunions
- Major Birthdays (the big ones!)
- Church Picnics and Socials
- Weddings (sometimes!)
Baking the Thin Layers for Your 9 Layer Chocolate Cake Recipe
Baking the Thin Layers for Your 9 Layer Chocolate Cake Recipe
Getting the Batter Just Right for Thinness
so you've committed. You're making the 9 layer chocolate cake recipe. The first real hurdle? Those layers. They aren't supposed to be fluffy, inch-thick affairs. We're talking thin here, maybe a quarter to a half-inch at most once baked. This means your batter consistency is key. It needs to be pourable, easy to spread thinly in the pan, but not so watery it just runs everywhere and bakes up brittle. Most traditional recipes use oil instead of butter for moisture and a tender crumb, which helps achieve that desired thinness without drying out.
Don't overmix the batter once the dry ingredients hit the wet. You want just enough mixing to combine everything. Overmixing develops gluten, which makes for a tough cake, and tough thin layers are just sad. Think "just combined." Lumps are okay, even expected. The batter should be smooth enough to pour, but it won't be like pancake batter. It's a delicate balance, and nailing this step is crucial for getting those multiple, even layers that define a classic 9 layer chocolate cake recipe.
Tips for Perfect Thin Layers:
- Measure ingredients precisely, especially flour.
- Sift dry ingredients to avoid lumps.
- Mix wet and dry ingredients just until combined.
- Use room temperature ingredients where specified.
- Don't overmix; a few small lumps are fine.
The Art of Baking Multiple Layers Simultaneously
Now for the actual baking. You're not going to bake these one by one unless you want to be in the kitchen all day and night. You need multiple pans. Ideally, you have at least three 8-inch round cake pans. The standard recipe calls for baking at a slightly lower temperature, around 325°F (160°C), which helps the thin layers bake evenly without scorching. You'll pour a measured amount of batter into each prepared pan – usually around ¾ cup – and gently tilt or spread it to cover the bottom evenly. Some folks even tap the bottom of the pan to help it settle.
Bake time is short, maybe 8 to 10 minutes. You're looking for the edges to just pull away slightly from the pan and the center to spring back when lightly touched. A toothpick inserted should come out clean. Since ovens can be finicky, check the layers early. Overbaking these thin guys is a common mistake and leads to dry, crumbly layers that are a nightmare to stack. Once they're out, let them cool in the pans for just a few minutes before turning them out onto wire racks to cool completely. This is where your production line starts for that impressive 9 layer chocolate cake recipe.
Crafting That Famous Boiled Icing for Your 9 Layer Chocolate Cake Recipe
Crafting That Famous Boiled Icing for Your 9 Layer Chocolate Cake Recipe
Why Boiled Icing is Different (and Demanding)
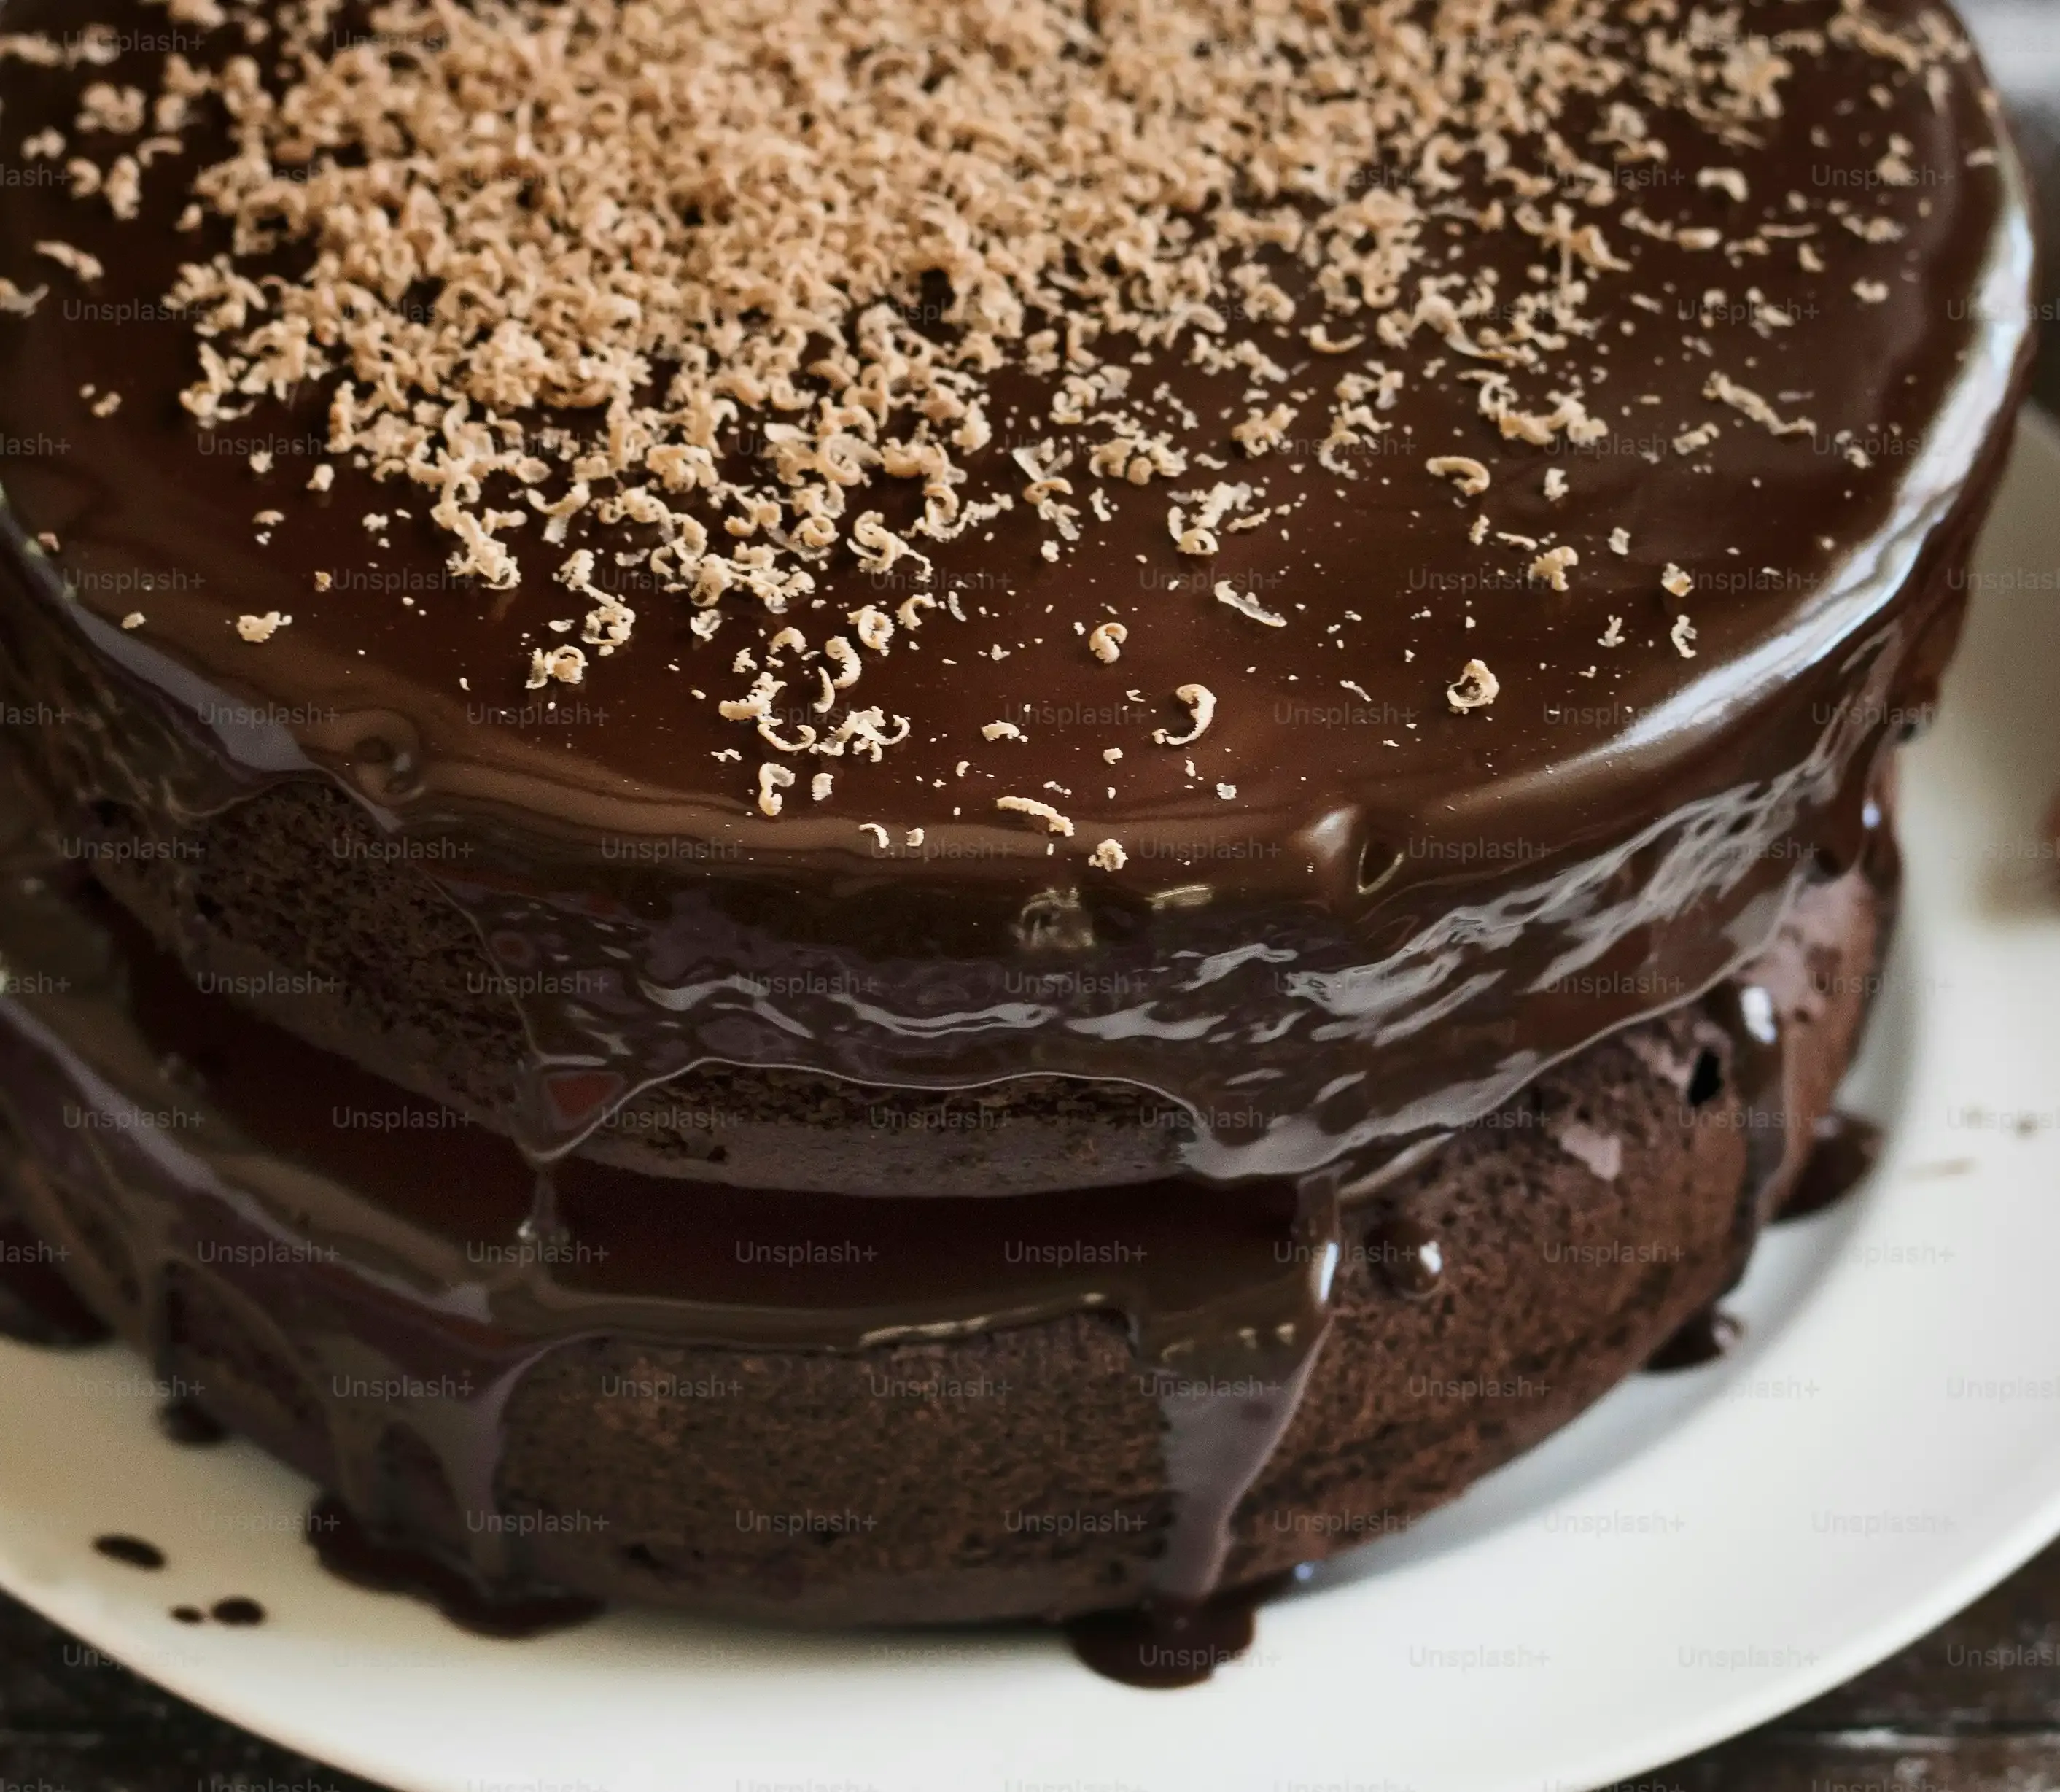
you've got your stack of thin cake layers cooling. Now for the part that makes some bakers sweat: the boiled icing. This isn't your standard buttercream or cream cheese frosting. This is a cooked icing, a candy-making process disguised as cake topping. It relies on cooking sugar, evaporated milk (usually), cocoa, and butter to a specific temperature, then beating it like crazy as it cools. Get it wrong, and you end up with grainy sugar sludge or a rock-hard mess. Get it right, and you have this incredible, slightly chewy, intensely chocolatey coating that sets up firm but stays moist. It's the signature element of a classic 9 layer chocolate cake recipe, and it demands your full attention.
Hitting the Sweet Spot: Cooking to Soft Ball Stage
The critical step in this icing is reaching the "soft ball" stage. This refers to the temperature the sugar syrup reaches, typically between 234°F and 236°F (112°C to 113°C). You absolutely need a candy thermometer for this. Eyeballing it is a recipe for frustration. You combine your ingredients in a heavy-bottomed saucepan, bring it to a boil, and then let it cook, stirring occasionally, until it hits that temperature range. Going even a few degrees too high results in a much firmer, potentially brittle icing. Too low, and it won't set up properly on your cake. It requires patience and monitoring. Once it hits the target temperature, you pull it off the heat immediately.
- Use a heavy-bottomed pot to prevent scorching.
- Stir constantly until the sugar dissolves, then stir only occasionally while boiling.
- Keep the heat medium-low once boiling to avoid cooking too fast.
- Have your candy thermometer ready and trust it.
- Clean sugar crystals from the sides of the pot with a wet pastry brush if they form.
The Arm Workout: Beating the Icing
After pulling the cooked mixture off the heat, you add vanilla and butter, stirring just to combine. Now comes the arm workout, or where your stand mixer earns its keep. You need to beat this mixture as it cools. As it cools, it will start to thicken and transform from a glossy syrup into a spreadable icing. This can take anywhere from 10 to 20 minutes of continuous beating. You're looking for it to lose its glossy sheen and become opaque, spreadable, and just starting to hold its shape. It sets up fast once it reaches the right consistency, so you need to work quickly to get it on the cake layers before it becomes too stiff to spread. This is the final push for your 9 layer chocolate cake recipe icing.
Assembling the Tower: Layering Your 9 Layer Chocolate Cake
Starting the Stack: The Foundation Layer
you've got your stack of perfectly cooled, impossibly thin chocolate layers. You've also got that boiled icing, hopefully just hitting that sweet spot of spreadable consistency before it decides to turn into fudge concrete. Now comes the part that separates the bakers from the hopefuls: the assembly of your 9 layer chocolate cake recipe. Start with your first layer on your serving plate or cake stand. A little dab of icing on the plate first helps anchor the bottom layer, preventing it from sliding around like a rogue hockey puck. Place the first layer down gently.
The key here is speed and evenness. Remember, that boiled icing sets up relatively fast as it cools. You don't have forever to fuss. Dollop a generous amount of icing onto the first layer and spread it quickly and evenly to the edges. Don't overthink it, but make sure you get full coverage. This first layer of icing is your base, and how smoothly you apply it sets the tone for the rest of the cake's appearance. Get a good, consistent layer down before grabbing your next cake round.
Building Up: Layering and Icing with Purpose
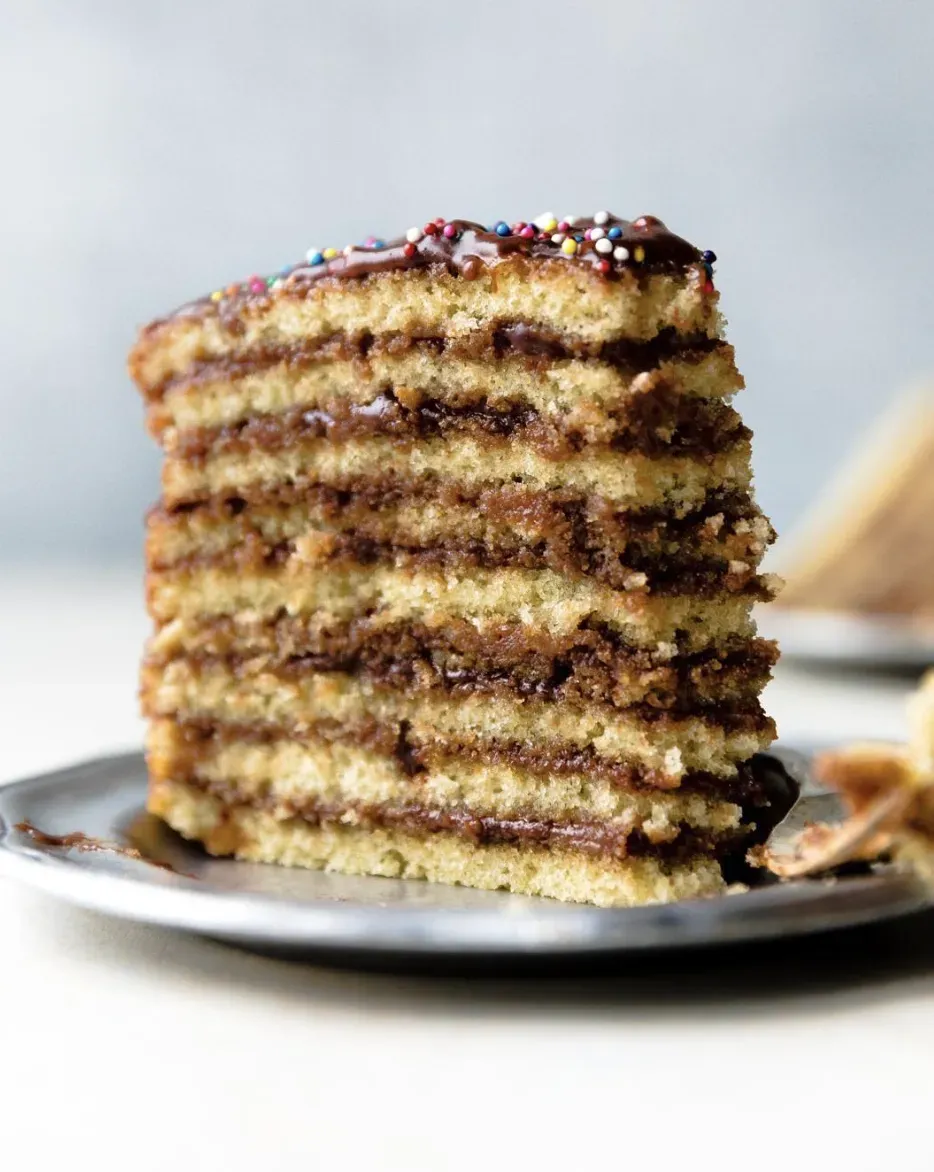
With the first layer iced, grab your second cake layer. Carefully place it directly on top of the iced first layer, trying your best to align the edges. Don't press down hard; you don't want to squeeze all the icing out or crack a delicate layer. Once the second layer is in place, immediately apply another generous dollop of that still-warm, spreadable icing. Work outward from the center, covering the entire layer right to the very edge. Repeat this process – cake layer, icing, cake layer, icing – eight more times until all nine layers are stacked.
As you stack higher, things can get a little wobbly. Keep your tower as straight as possible. Some folks use a ruler or eye it from the side periodically. Once the final, ninth layer is on top, you'll use the remaining icing to coat the sides and top of the cake. This is where any remaining warmth in the icing is your friend, allowing you to smooth it out reasonably well. Don't expect a perfectly smooth, fondant-like finish; this icing has a rustic charm. Just get it covered, ensuring there are no bare spots showing your hard-earned layers.
Assembly Step | Key Action | Why It Matters |
|---|---|---|
Anchor Base Layer | Small dab of icing on plate | Prevents sliding during stacking |
Apply Icing to Layers | Work quickly and evenly | Icing sets fast; ensures full coverage |
Add Next Layer | Align carefully, don't press hard | Keeps stack straight, avoids cracking layers |
Ice Sides & Top | Use remaining icing | Seals the cake, provides classic look |
Serving and Storing Your Masterpiece 9 Layer Chocolate Cake Recipe
Serving and Storing Your Masterpiece 9 Layer Chocolate Cake Recipe
Serving Your Towering Achievement
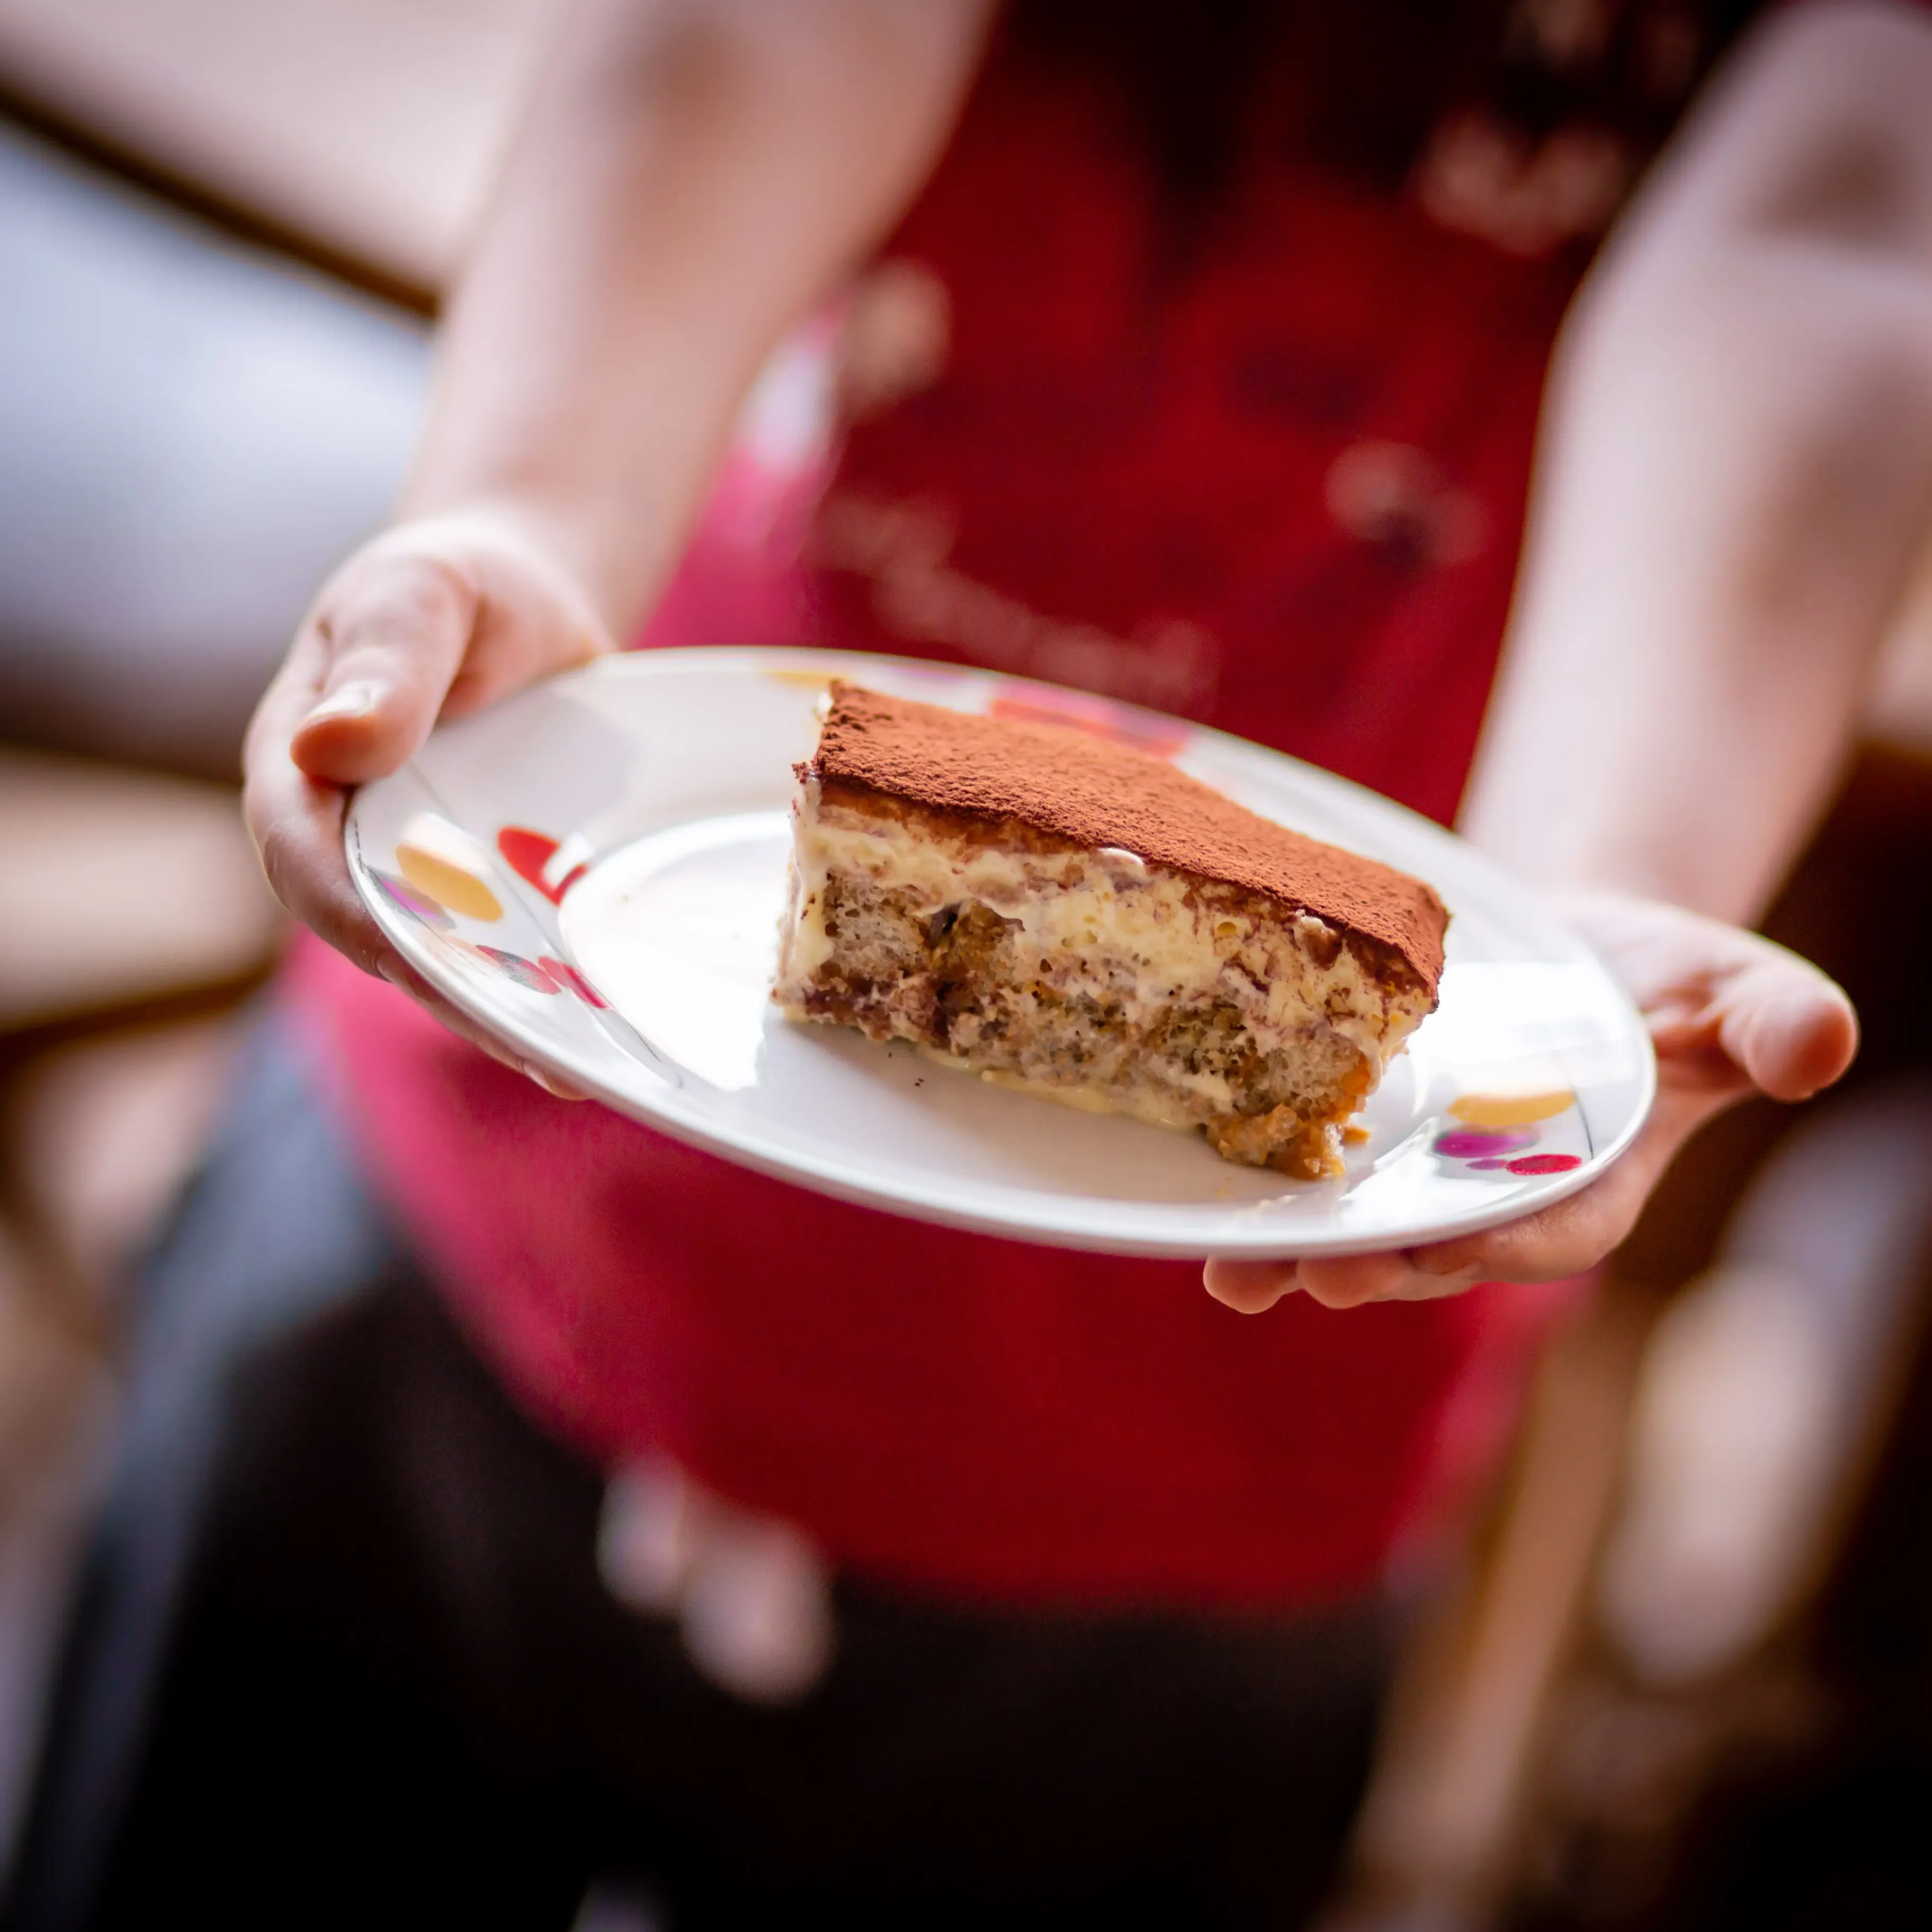
you did it. You wrestled with the layers, you tamed the boiled icing, and now you stand before your magnificent 9 layer chocolate cake recipe. It's tall, it's proud, and everyone is staring at it with a mixture of awe and hunger. The first thing to know is patience isn't quite over. This cake, with its boiled icing, really benefits from sitting for several hours, ideally overnight. This allows the icing to fully set and the flavors to meld. Trying to cut into it too soon is like trying to run a marathon without training – messy and disappointing.
When it's time to slice, use a sharp knife. A long, thin-bladed knife works best. Since it's so tall, cutting a clean slice can be tricky. Some people find it easiest to cut straight down, wiping the knife clean between slices to keep things tidy. Don't expect perfect geometry; the charm is in the height and the generous layers of icing. Serve it up, maybe with a cold glass of milk, and accept the well-deserved compliments. You just conquered a classic.
- Allow cake to set for several hours, preferably overnight.
- Use a sharp, thin-bladed knife for slicing.
- Cut straight down through all layers.
- Wipe the knife clean between each slice.
- Serve at room temperature for best texture.
Keeping Your Masterpiece Fresh
So, against all odds, you might have leftovers of your 9 layer chocolate cake recipe. Storing this cake properly is key to keeping that icing from drying out. Because of the cooked icing, it doesn't need refrigeration unless your kitchen is exceptionally warm or humid. In fact, chilling can sometimes make the cake layers a bit dry. The best way to store it is at room temperature, covered tightly. A cake dome is ideal, but plastic wrap pressed gently against the cut surfaces works too. Keep it away from direct sunlight or heat.
If you need to store it for more than a couple of days, or if it's a particularly humid environment, refrigeration is an option, but let it come back to room temperature for about an hour before serving. For longer storage, you can freeze slices or the entire cake (unfrosted layers freeze exceptionally well). Wrap pieces tightly in plastic wrap, then foil, and they'll keep for a couple of months. Thaw in the refrigerator and then bring to room temp before enjoying your preserved slice of Southern tradition.
The Final Slice: Was It Worth the Effort?
So, you've baked nine thin layers, navigated the sometimes-fickle world of boiled icing, and stacked your chocolate tower. Your kitchen probably looks like a flour bomb went off, and your arms might be tired from whisking. Was it easy? Nope. Was it quick? Definitely not. But take one bite of that moist cake paired with that rich, almost candy-like icing, and you'll get it. This 9 layer chocolate cake recipe isn't just about dessert; it's about a tangible accomplishment, a bit of edible history, and a really, really good piece of cake that store-bought just can't replicate. Enjoy the bragging rights. You earned them.